Use Custom Actions to trigger Power Automate Flows
Important
Data Activator is currently in preview.
Using Power Automate, you can generate actions in external systems when your Data Activator triggers activate. This can be useful for:
- Sending notifications using systems other than Teams and Email.
- Creating action items in ticketing systems.
- Calling line-of-business apps.
To trigger Power Automate flows from your triggers, you first create a custom action. Then, you call your custom action from your triggers.
Create a custom action
A custom action is a reusable action template that you can use in multiple triggers, in multiple Reflex items. Creating a custom action requires familiarity with Power Automate. However, once you have created a custom action, other Data Activator users can use the action in any trigger, without requiring any knowledge of Power Automate.
A custom action defines how to call a specific external system from a Data Activator trigger using a flow. It defines a set of input fields to pass from your triggers to the flow, so that the flow can call the external system. For example, suppose you wanted to define a custom action that sends an SMS message. The input fields for such an action might be Phone number and Message. This custom action would link to a flow that uses an SMS connector to send the message to the recipient.
Name your action and add input fields
To create a custom action, select new custom action from the ribbon in the design pane. Then, give your action a name such as Send SMS message and define the input fields (such as Phone number and Message).
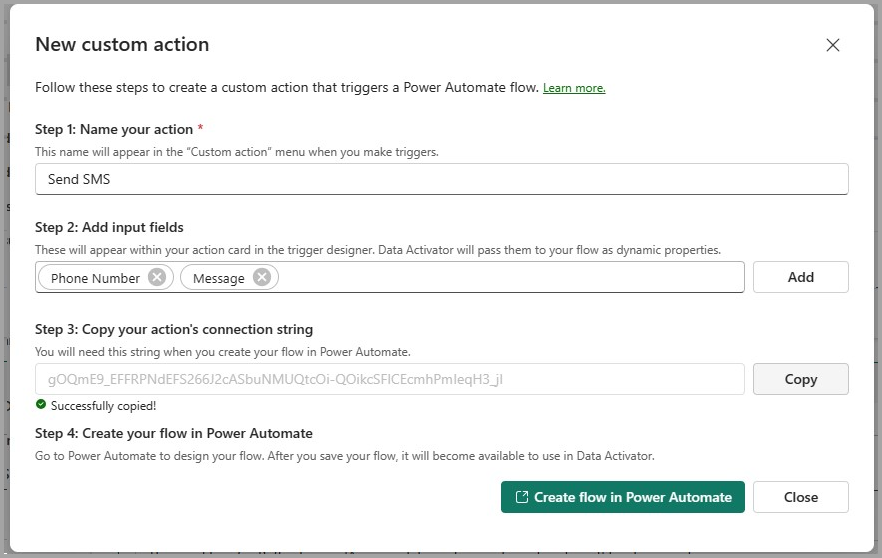
The next step is to define your flow in Power Automate. Select the copy connection string button, then select Create Flow in Power Automate. This creates a flow in Power Automate, and takes you to it so that you can define your flow.
Define your flow
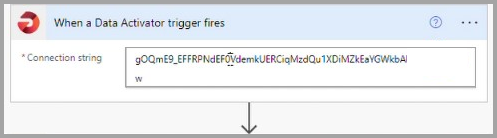
The flow is prepopulated with an action for data activator.
Important
You must paste the connection string from the previous step into this action, as shown in the following screenshot. Once you have done so, add further steps to your flow as needed, and save the flow.
To access your input fields in the flow, use a Power Automate expression of the form shown below. Use the Expression tab in the field editor to add your expression. Replace NAME_OF_INPUT_FIELD with the name of your input field.
triggerBody()?['customProperties/NAME_OF_INPUT_FIELD'].
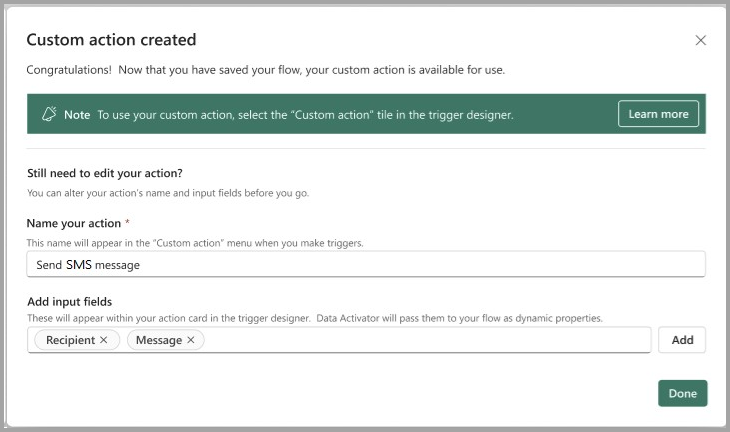
Complete your custom action
After you save your flow, return to Data Activator. Upon successful saving of the flow, you see a confirmation box in Data Activator as follows. At this point, your custom action is complete, and you may move on to the next step, calling your custom action from a trigger. If you need to rename your action, or edit the list of input fields, you can still do so at this point. Select Done when you're ready.
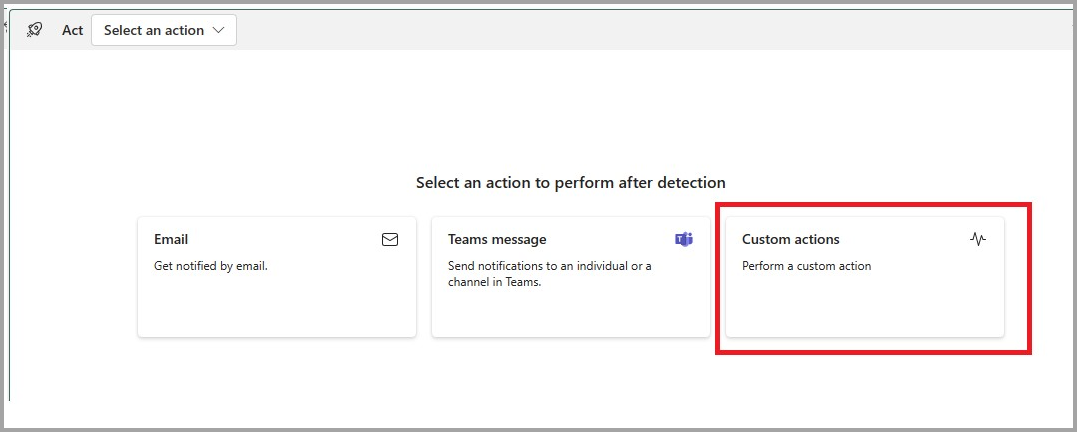
Call your custom action from a trigger
Once you have created a custom action, it's available for use by all Data Activator users, in all triggers and reflexes. To call your custom action, from a trigger, select the Custom Action tile in the trigger’s Act card, and select your custom action from the list:
You'll then get a card for your custom action, containing the input fields for your custom action. Fill them out as appropriate for your trigger definition:
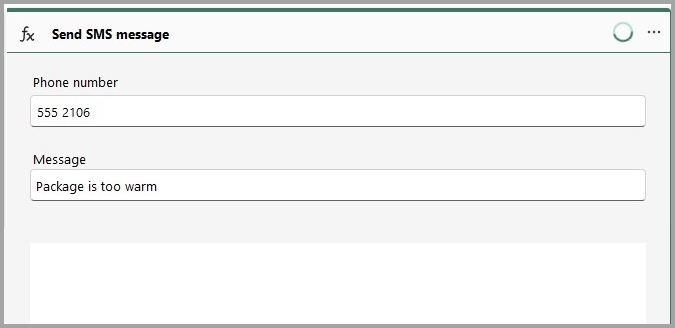
When your trigger activates, it calls your flow, sending it the values of the input fields that you defined.
Related content
- What is Data Activator?
- Get started with Data Activator
- Get data for Data Activator from Power BI
- Get data for Data Activator from Eventstreams
- Assign data to objects in Data Activator
- Create Data Activator triggers in design mode
- Data Activator tutorial using sample data
You can also learn more about Microsoft Fabric:
Feedback
Coming soon: Throughout 2024 we will be phasing out GitHub Issues as the feedback mechanism for content and replacing it with a new feedback system. For more information see: https://aka.ms/ContentUserFeedback.
Submit and view feedback for