Manage an Azure support request
After you create an Azure support request, you can manage it in the Azure portal.
Tip
You can create and manage requests programmatically by using the Azure support ticket REST API or Azure CLI. Additionally, you can view open requests, reply to your support engineer, or edit the severity of your ticket in the Azure mobile app.
To manage a support request, you must have the Owner, Contributor, or Support Request Contributor role at the subscription level. To manage a support request that was created without a subscription, you must be an Admin.
View support requests
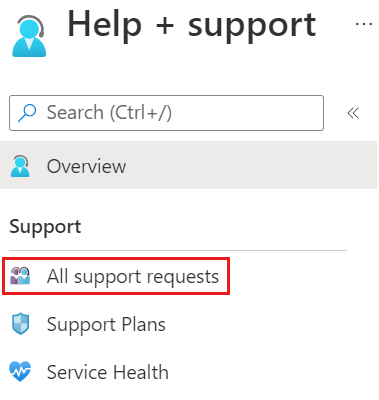
View the details and status of support requests by going to Help + support > All support requests in the Azure portal.

You can search, filter, and sort support requests. By default, you might only see recent open requests. Change the filter options to select a longer period of time or to include support requests that were closed.
To view details about a support request to view details, including its severity and any messages associated with the request, select it from the list.
Send a message
From All support requests, select the support request.
In the Support Request, select New message.
Enter your message and select Submit.
Change the severity level
Note
The maximum severity level depends on your support plan.
From All support requests, select the support request.
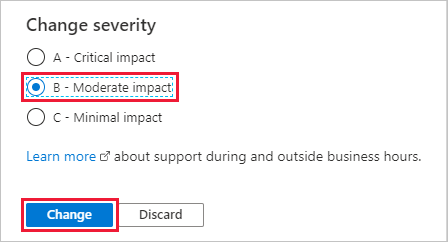
In the Support Request, select Change severity.
The Azure portal shows one of two screens, depending on whether your request is already assigned to a support engineer:
If your request isn't assigned, you see a screen like the following. Select a new severity level, then select Change.

If your request is assigned, you see a screen like the following. Select OK, then create a new message to request a change in severity level.

Allow collection of advanced diagnostic information
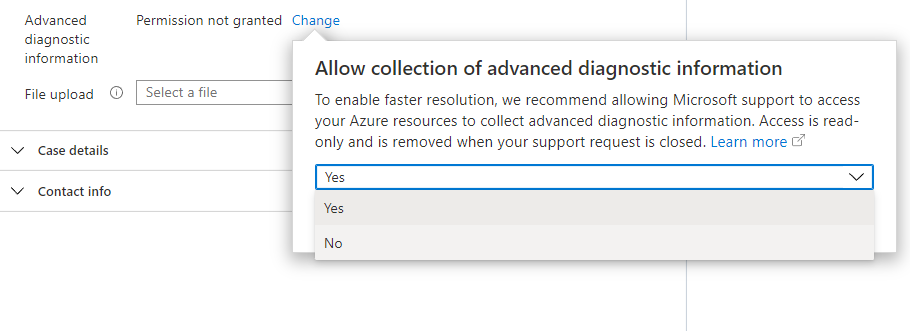
When you create a support request, you can select Yes or No in the Advanced diagnostic information section. This option determines whether Azure support can gather diagnostic information such as log files from your Azure resources that can potentially help resolve your issue. Azure support can only access advanced diagnostic information if your case was created through the Azure portal and you granted permission to allow it.
To change your Advanced diagnostic information selection after the request is created:
From All support requests, select the support request.
In the Support Request, select Advanced diagnostic information near the top of the screen.
Select Yes or No, then select Submit.

Upload files
You can use the file upload option to upload a diagnostic file, such as a browser trace or any other files that you think are relevant to a support request.
From All support requests, select the support request.
In the Support Request, select the Upload file box, then browse to find your file and select Upload.
File upload guidelines
Follow these guidelines when you use the file upload option:
- To protect your privacy, don't include personal information in your upload.
- The file name must be no longer than 110 characters.
- You can't upload more than one file. To include multiple different files, package them together in a compressed format such as .zip.
- Files can't be larger than 4 MB.
- All files must have a valid file name extension, such as
.docxor.xlsx. Most file name extensions are supported, but you can't upload files with these extensions:.bat, .cmd, .exe, .ps1, .js, .vbs, .com, .lnk, .reg, .bin,. cpl, .inf, .ins, .isu, .job, .jse, .msi, .msp, .paf, .pif, .rgs, .scr, .sct, .vbe, .vb, .ws, .wsf, .wsh
Close a support request
To close a support request, select the Close request option near the top of the screen. When prompted to confirm, select Close. You'll receive a confirmation email when your request is closed.
Reopen a closed request
To reopen a closed support request, select Reopen request near the top of the screen. When prompted to confirm, select Reopen request. Your support request will then be active again.
Note
Closed support requests can generally be viewed and reopened for a period of 13 months. After that time, they may be removed, making them unavailable to view or reopen.
Cancel a support plan
To cancel a support plan, see Cancel a support plan.
Get help with a support request
If you need assistance managing a support request, create another support request to get help. For the Issue type, select Technical, then select All Services. For Service type, select Portal and for Problem type select Issue with Support Ticket Experience.
Next steps
- Review the process to create an Azure support request.
- Learn about the Azure support ticket REST API.