Use Azure Storage Explorer to manage Azure managed disks
Applies to: ✔️ Linux VMs ✔️ Windows VMs ✔️ Flexible scale sets ✔️ Uniform scale sets
Azure Storage Explorer contains a rich set of features that allows you to:
- Upload, download, and copy managed disks.
- Create snapshots from operating system or data disk virtual hard disk.
- Migrate data from on-premises to Azure.
- Migrate data across Azure regions.
Prerequisites
To complete this article, you'll need:
- An Azure subscription.
- At least one Azure managed disk.
- The latest version of Azure Storage Explorer.
If you don't have an Azure subscription, create a free account before you begin.
Connect to an Azure subscription
If your Storage Explorer isn't connected to Azure, you can't use it to manage resources. Follow the steps in this section to connect Storage Explorer to your Azure account. Afterward, you can use it to manage your disks.
Open Azure Storage Explorer and select the Connect icon in the toolbar.
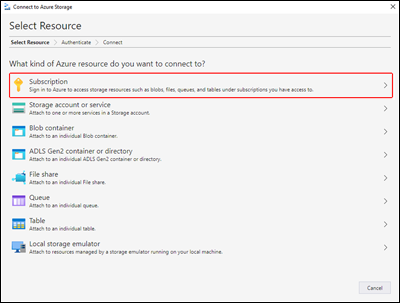
In the Connect to Azure Storage dialog box, select Subscription.
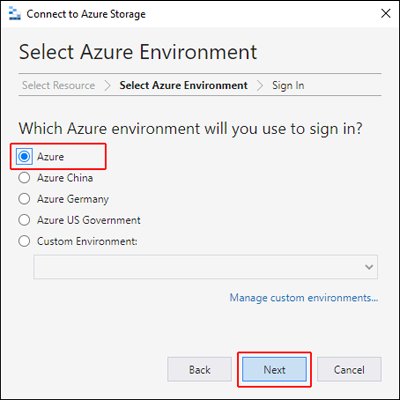
Select the appropriate environment and select Next. You can also select Manage custom environments to configure and add a custom environment.
In the Sign in dialog box, enter your Azure credentials.

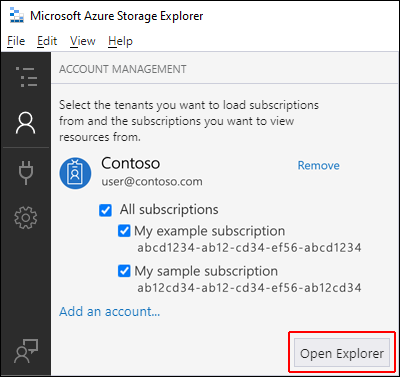
Select your subscription from the list and then select Open Explorer.
Upload an on-premises VHD
You can upload an on-premises virtual hard disk (VHD) file to Azure and use it to create an image. Follow the steps in this section to upload your source file.
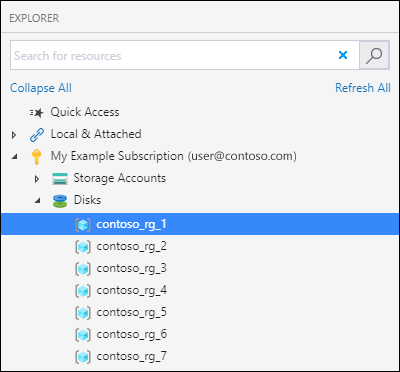
In the Explorer pane, expand Disks and select the resource group to which you'll upload your disk.
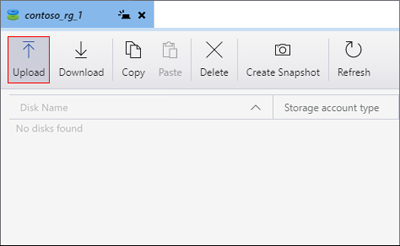
In the resource group details pane, select Upload.
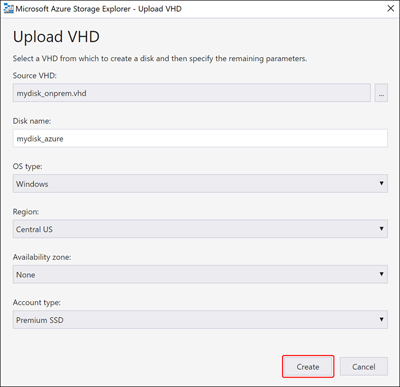
In the Upload VHD dialog box, specify your VHD source file, the name of the disk, the operating system type, the region to which you want to upload the disk, and the account type. If the region supports availability zones, you can select a zone of your choice. Select Create to begin uploading your disk.
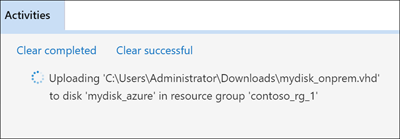
The status of the upload will now display in Activities.
If the upload has finished and you don't see the disk in the Activities pane, select Refresh.
Download a managed disk
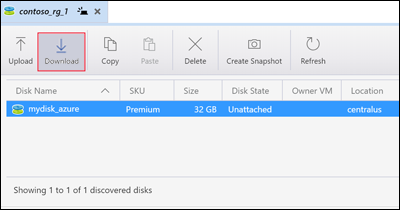
Follow the steps in this section to download a managed disk to an on-premises VHD. A disk's state must be Unattached before it can be downloaded.
In the Explorer pane, expand Disks and select the resource group from which you'll download your disk.
In the resource group details pane, select the disk you want to download.
Select Download and then choose where you would like to save the disk.
Select Save the begin the download. The download status will display in Activities.
Copy a managed disk
With Storage Explorer, you can copy a manged disk within or across regions. To copy a disk:
In the Explorer pane, expand the Disks dropdown and select the resource group that contains the disk you want to copy.
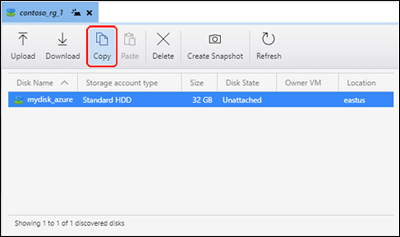
In the resource group details pane, select the disk you'd like to copy and select Copy.
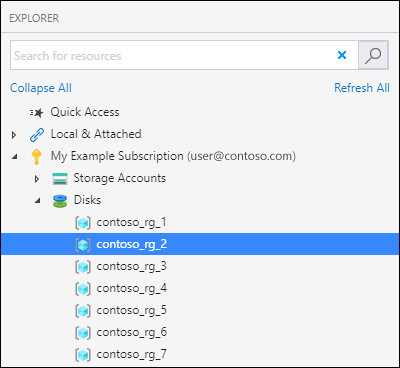
In the Explorer pane, expand Disks and select the resource group in which you'd like to paste the disk.
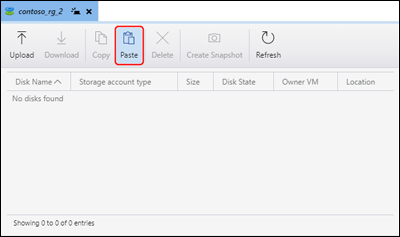
Select Paste in the resource group details pane.
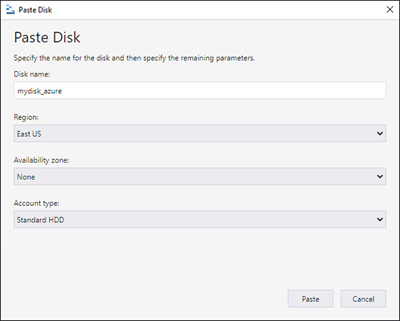
In the Paste Disk dialog box, fill in the values. You can also specify an availability zone in supported regions.
Select Paste to begin the disk copy. The status is displayed in Activities.
Create a snapshot
In the Explorer pane, expand Disks and select the resource group that contains the disk you want to snapshot.
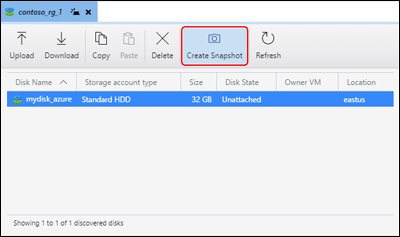
In the resource group details pane, select the disk you'd like to snapshot and select Create Snapshot.
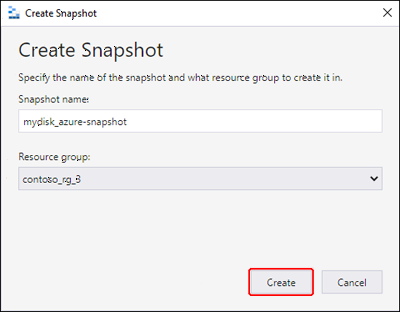
In Create Snapshot, specify the name of the snapshot and the resource group in which you'll create it. Select Create.
After the snapshot has been created, you can select Open in Portal in Activities to view the snapshot in the Azure portal.
