Muistiinpano
Tämän sivun käyttö edellyttää valtuutusta. Voit yrittää kirjautua sisään tai vaihtaa hakemistoa.
Tämän sivun käyttö edellyttää valtuutusta. Voit yrittää vaihtaa hakemistoa.
Note
Community interest groups have now moved from Yammer to Microsoft Viva Engage. To join a Viva Engage community and take part in the latest discussions, fill out the Request access to Finance and Operations Viva Engage Community form and choose the community you want to join.
This article explains how to copy an existing e-commerce site within or between e-commerce environments in Microsoft Dynamics 365 Commerce site builder.
Dynamics 365 Commerce supports copying or cloning sites as a self-serve operation in Commerce site builder. You can copy sites within a single e-commerce environment or between two e-commerce environments. The user who initiates the site copy operation must be a tenant administrator in both the source and destination e-commerce environments.
The site copy operation copies all e-commerce content of the source site. This content includes pages, fragments, templates, URLs, and assets. Before you can use a new site, you must initialize it through the first run experience (FRE) process. You can map and manage channels in site builder, at Site Settings > Channels.
The duration of the site copy operation depends primarily on the number of assets on the source site. For exceptionally large sites, consider using the environment copy operation instead. This operation is also known as the data portability operation.
Note
- The source site is read-only during the site copy operation.
- Only published versions of documents are copied. If no versions are published, only the latest versions are copied.
- Version history for content isn't available on the destination site.
Copy a site within an e-commerce environment
To copy a site within an e-commerce environment, follow these steps:
- Sign in to site builder for the environment where you want to perform the copy operation.
- Open the site list view by selecting Site switcher in the upper-right corner and then selecting Manage sites.
- Find the site that you want to copy or clone, and select it by selecting the checkbox next to the site name.
- On the command bar, select Copy site.
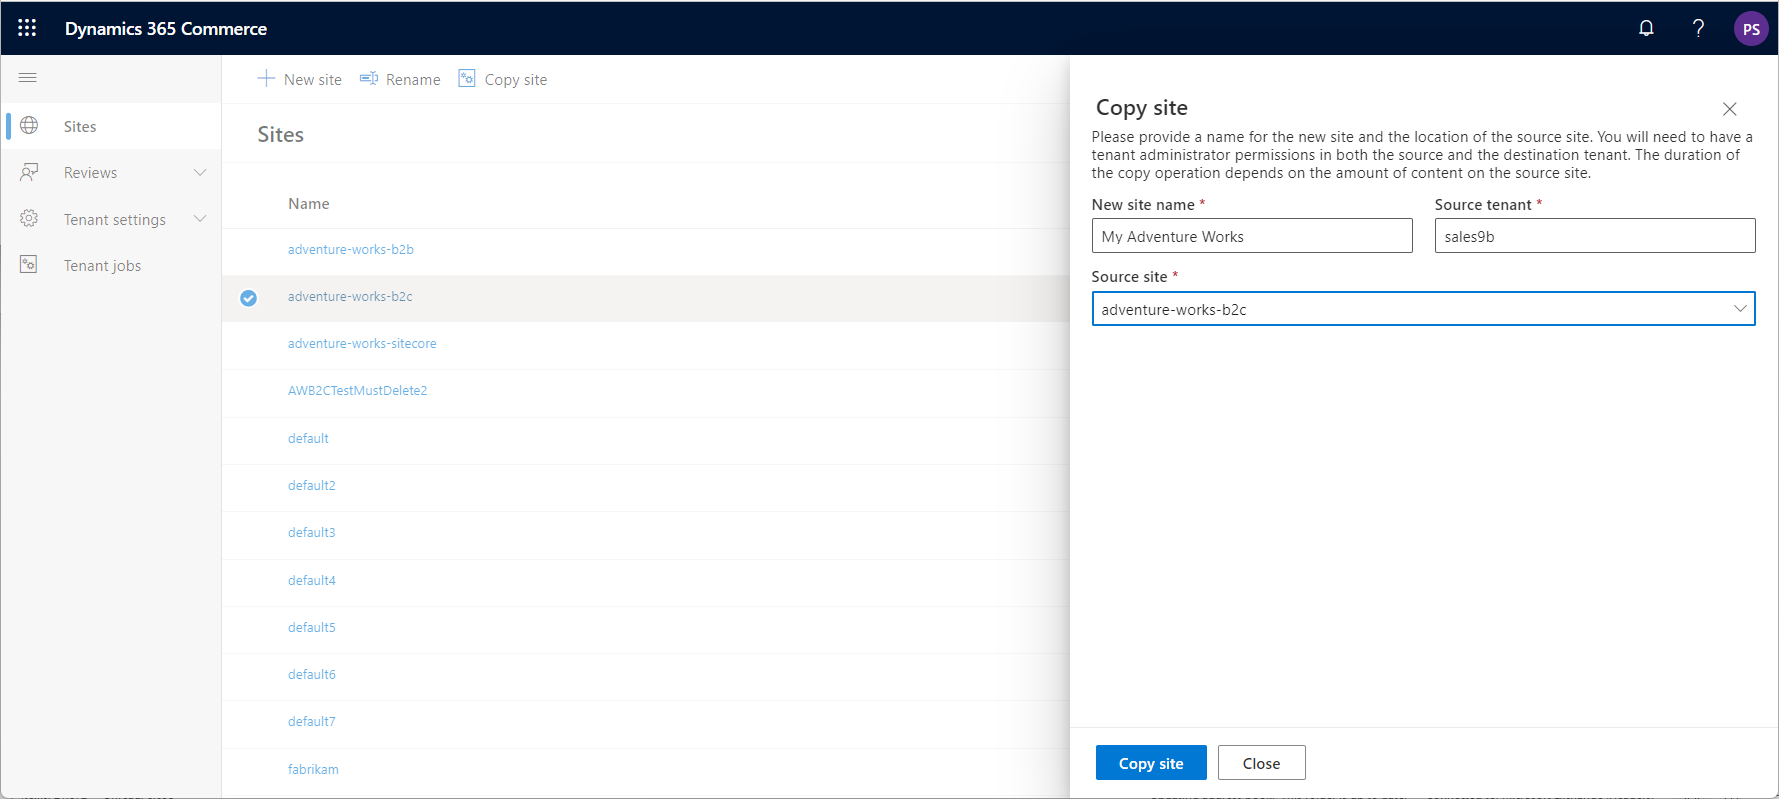
- In the Copy site flyout menu, in the New site name field, enter a name for the new site. The new site name must be unique in the e-commerce environment. The Source tenant and Source site fields automatically set to the information for the current tenant and the selected site.
- Select Create copy.
After the information is validated, a notification indicates that a new site copy job is created. You can monitor the progress of the job in the right pane of the Tenant jobs page. When the copy operation is successfully completed, the new site appears in the list of sites in site list view.
The following illustration shows an example of the Copy site flyout menu in site builder.
Copy a site between two e-commerce environments
To copy a site between two e-commerce environments, follow these steps:
- Sign in to site builder for the destination e-commerce environment.
- On the command bar, select Copy site.
- In the Copy site flyout menu, in the New site name field, enter a name for the new site. The new site name must be unique in the e-commerce environment.
- In the Source tenant field, select the name of the source tenant.
- In the Source site field, select the source site.
- Select Create copy.
Note
You need tenant administrator permissions for both the source and destination e-commerce environments.
After the information is validated, a notification indicates that a new site copy job is created. You can monitor the progress of the job in the right pane of the Tenant jobs page. When the copy operation is successfully completed, the new site appears in the list of sites in site list view.
Map channels during the site copy operation (optional)
You can map source channels and locales to destination channels and locales during the site copy operation. If you map channels during the site copy operation, you don't need to initialize the site by using the FRE process or configure the channels in site settings.
To map all the channels and locales as is (1-to-1) in site builder, follow these steps:
- Open the site list view by selecting Site switcher in the upper-right corner and then selecting Manage sites.
- Find the site that you want to copy or clone, and select it by selecting the checkbox next to the site name.
- On the command bar, select Copy site.
- In the Copy site flyout menu, enter values for New site name, Source tenant, and Source site (if not present already).
- Select Add channel mappings.
- In the Configure site channels and locales flyout menu, select Source channel, and then select the source channel.
- Select Destination channel and then select the same channel as the source channel.
- Select Add locale.
- Select Source locale, and then select the source locale.
- Select Destination locale, and then select the same locale as the source locale.
- For URL path, enter a unique URL path that isn't currently used in the destination environment.
- Repeat steps 8-11 for each locale to be mapped for the channel.
- Select Apply.
- Repeat steps 6-11 for each source channel.
- Select Close.
- Review the configuration for accuracy, and then select Copy site.
Note
You must map all source channels and locales, and you can only map each one once.
Monitor the site copy operation
To monitor the progress of the site copy operation, follow these steps:
- Sign in to site builder for the destination e-commerce environment.
- In the left pane, select Tenant jobs.
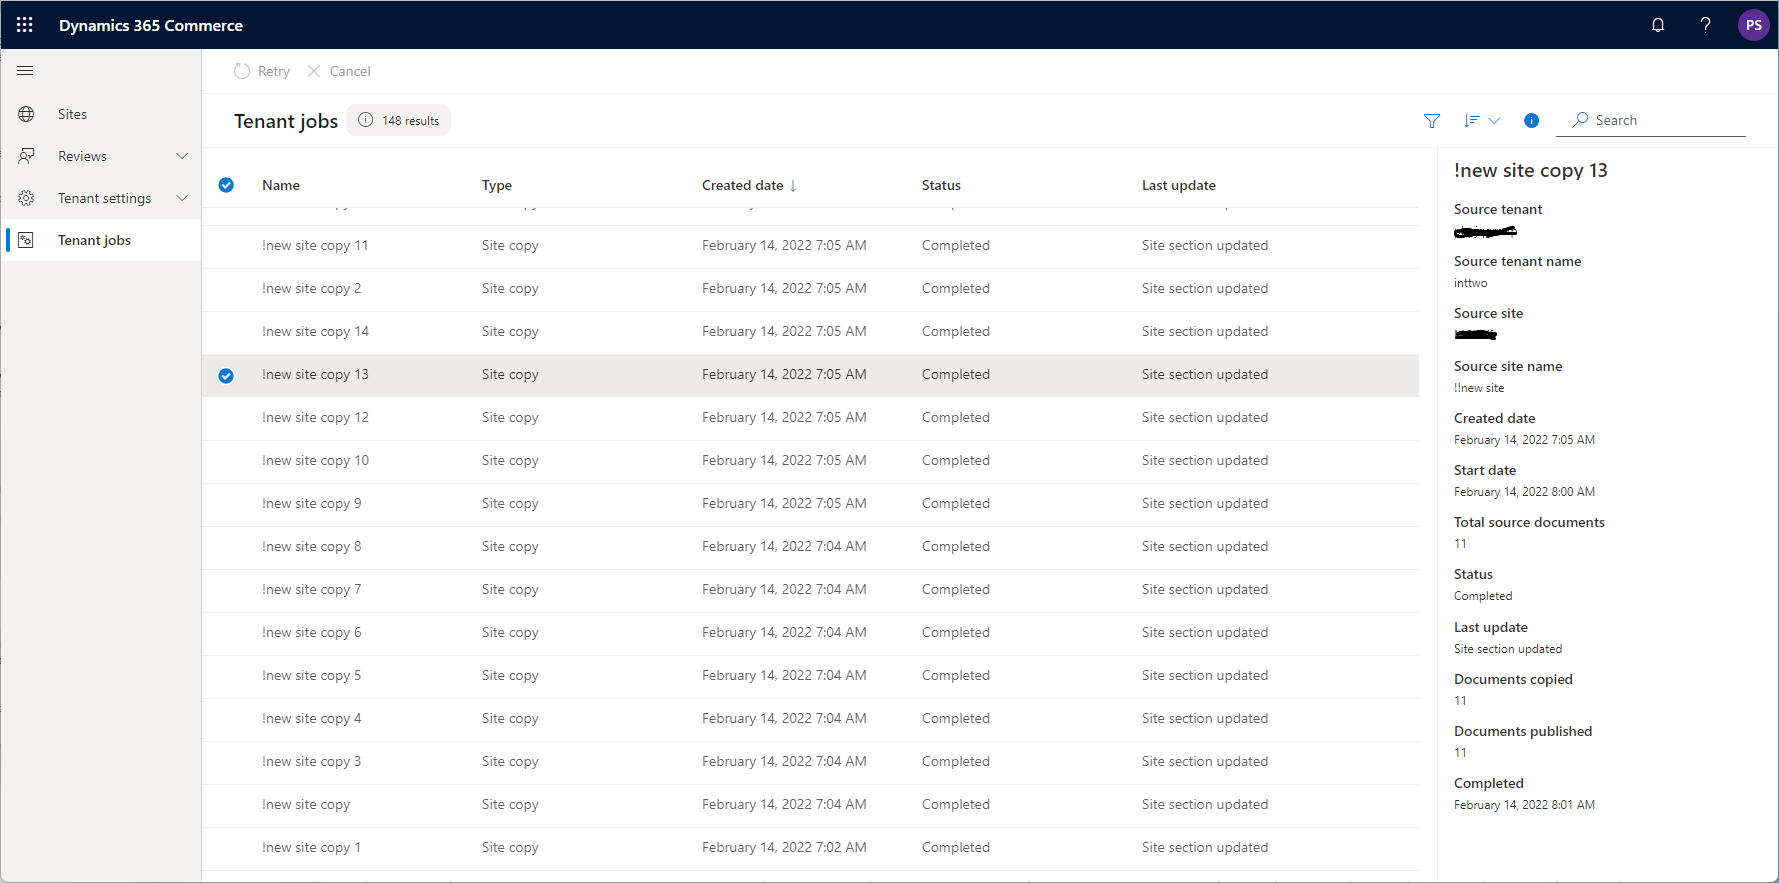
- On the Tenant jobs page, find and select the site copy job in the list. A pane appears that shows the status and details of the selected job.
You can cancel a job that has a status of In progress. Select the job in the list, and then select Cancel on the command bar.
You can retry a job that has a status of Failed or Completed with errors. Select the job in the list, and then select Retry on the command bar.
Note
Processing of video assets might continue after a site copy job is completed.
The following illustration shows an example of the right pane of the Tenant jobs page in site builder.
Initialize a new site by using the FRE process
Before you can use the new site, you must initialize it through the FRE process.
To initialize a new site by using the FRE process, follow these steps:
- Sign in to site builder for the new site.
- Open the site list view by selecting Site switcher in the upper-right corner and then selecting Manage sites.
- Find and select the new site that you want to initialize.
- In the Setup your site dialog box, in the Select a domain field, select a domain. All domains that are associated with the e-commerce environment during initialization are available for selection.
- In the Select a default channel field, select the associated online store channel. The selected channel provides assortments and other information that Commerce headquarters stores.
- In the Select a default language field, select the default authoring language. All languages that are configured for the selected online store channel are available for selection.
- In the Path field, the value consists of the base domain and an optional URL path that you can enter. You can leave the URL path blank if the channel is served from the domain root, or if you want to enter this information later in the channel configuration view in site builder. The site path must be unique in the e-commerce environment.
- Select OK. The site is initialized with the information that you provided, and you're sent to the site management view.
The following illustration shows an example of the Setup your site dialog box in site builder.

Additional resources
Deploy a new e-commerce tenant
Associate a Dynamics 365 Commerce site with an online channel
Set up a B2C tenant in Commerce
Set up custom pages for user logins
Configure multiple B2C tenants in a Commerce environment