Muistiinpano
Tämän sivun käyttö edellyttää valtuutusta. Voit yrittää kirjautua sisään tai vaihtaa hakemistoa.
Tämän sivun käyttö edellyttää valtuutusta. Voit yrittää vaihtaa hakemistoa.
Ready to write your first client script to see things in action? Let's get started. We'll keep it simple.
Objective
After completing this walkthrough, you know how to use JavaScript code in model-driven apps. This process involves the following high-level steps:
- Locate or create a solution to add your work to
- Write JavaScript code to address a business issue
- Upload your code as a web resource
- Associate your web resource to a form
- Configure form and field events
- Test your code
Step 1: Locate or create a solution
Use solutions to transport customizations from one environment to another. Write and test your JavaScript code in a development environment as part of an unmanaged solution. When you finish testing, export the solution as a managed solution and import or install it in your production environment.
An existing solution might already be available for you to use. The model-driven app you want to customize with your script should already be part of a solution. You can edit that solution or create a new solution that depends on another existing solution.
To create a new solution
Go to Power Apps.
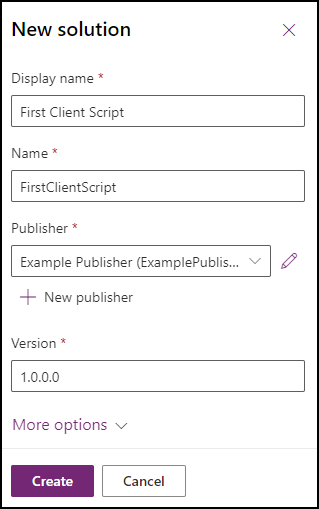
In the left navigation pane, select Solutions, and then select New solution.
In the fly-out dialog, enter a Display name, Name, and Publisher.
Most companies have an existing publisher that they always use. Use that publisher. If you're the first person, create your own publisher.
Select New Publisher to open the New Publisher dialog. In this walkthrough, use a publisher with this definition:
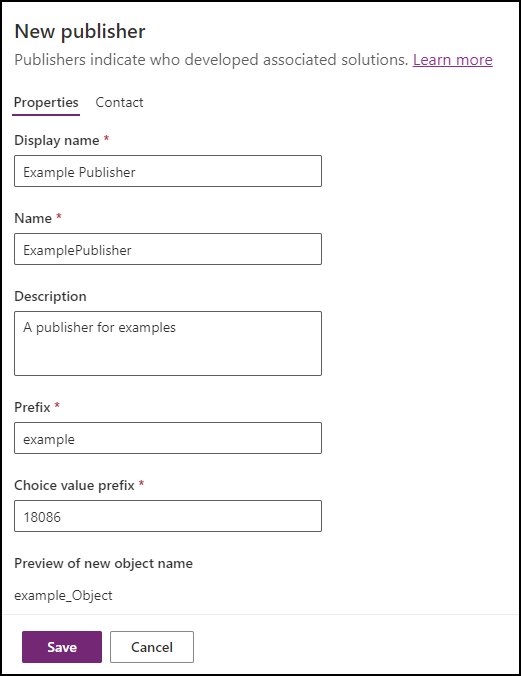
Notice the Prefix value. This value should identify your company. In this case, use
example.This solution is the one you use in this walkthrough.
Locate or add a model-driven app to your solution.
A new solution doesn't include any model-driven apps. You need to add an existing model-driven app or create a new one.
Note
For the purpose of this walkthrough, make sure the app includes the Account table. The scripts and instructions below expect fields found in a form for the Account table.
Option A: Add an existing model-driven app to your solution
- In your solution, select Add existing > App > Model-driven app.
- Select an existing app and select Add.
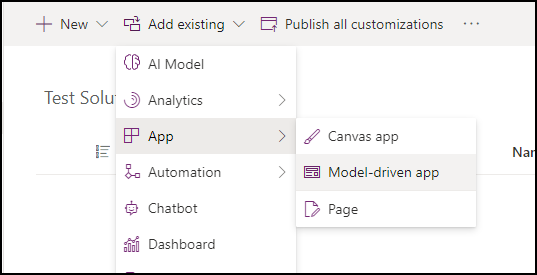
Option B: Create a new model-driven app in your solution
In your solution, select New > App > Model-driven app.
See the Build your first model-driven app tutorial. Create an app that includes the Account table.
Step 2: Write your JavaScript code
The first step is to identify the business problem you want to address by using client scripting. When you identify the problem, write your JavaScript code containing the custom business logic that addresses your business problem.
Model-driven apps don't provide a JavaScript editor. Use an external authoring tool that provides features to specifically support editing JavaScript files, such as Notepad++, Visual Studio Code, or Microsoft Visual Studio.
This walkthrough uses the following JavaScript code:
// A namespace defined for the sample code
// As a best practice, you should always define
// a unique namespace for your libraries
var Example = window.Example || {};
(function () {
    // Define some global variables
    var myUniqueId = "_myUniqueId"; // Define an ID for the notification
    var currentUserName = Xrm.Utility.getGlobalContext().userSettings.userName; // get current user name
    var message = currentUserName + ": Your JavaScript code in action!";

    // Code to run in the form OnLoad event
    this.formOnLoad = function (executionContext) {
        var formContext = executionContext.getFormContext();

        // Display the form level notification as an INFO
        formContext.ui.setFormNotification(message, "INFO", myUniqueId);

        // Wait for 5 seconds before clearing the notification
        window.setTimeout(function () { formContext.ui.clearFormNotification(myUniqueId); }, 5000);
    }

    // Code to run in the column OnChange event
    this.attributeOnChange = function (executionContext) {
        var formContext = executionContext.getFormContext();

        // Automatically set some column values if the account name contains "Contoso"
        var accountName = formContext.getAttribute("name").getValue();
        if (accountName.toLowerCase().search("contoso") != -1) {
            formContext.getAttribute("websiteurl").setValue("https://www.contoso.com");
            formContext.getAttribute("telephone1").setValue("425-555-0100");
            formContext.getAttribute("description").setValue("Website URL, Phone and Description set using custom script.");
        }
    }

    // Code to run in the form OnSave event
    this.formOnSave = function () {
        // Display an alert dialog
        Xrm.Navigation.openAlertDialog({ text: "Record saved." });
    }
}).call(Example);
Copy this code into a text file and save it as Example-form-script.js.
Detailed code explanation
Let's look at the code in detail:
Define namespace: The code starts by defining a namespace for your custom script. As a best practice, always create namespaced JavaScript libraries to avoid having your functions overridden by functions in another library.
var Example = window.Example || {};In this case, you can use all the functions defined in this library as
Example.[functionName]. Choose a namespace that matches your solution publisher name.Define global variables: The following section defines some global variables to use in the script. You can access context information globally by using the Xrm.Utility.getGlobalContext method.
// Define some global variables
var myUniqueId = "_myUniqueId"; // Define an ID for the notification
var currentUserName = Xrm.Utility.getGlobalContext().userSettings.userName; // get current user name
var message = currentUserName + ": Your JavaScript code in action!";
Function to execute on the OnLoad event: This section contains the function that executes when the account form loads. For example, when you create a new account record or when you open an existing account record.
The
Example.formOnLoadfunction uses theexecutionContextparameter to get theformContextobject. When you attach your code by using the form event later, select the option to pass the execution context to this function.This function displays a form level notification by using the formContext.ui.setFormNotification method.
Finally, this function uses the JavaScript setTimeOut method to delay the execution of the formContext.ui.clearFormNotification method to clear the notification after 5 seconds.
// Code to run in the form OnLoad event
this.formOnLoad = function (executionContext) {
    var formContext = executionContext.getFormContext();

    // Display the form level notification as an INFO
    formContext.ui.setFormNotification(message, "INFO", myUniqueId);

    // Wait for 5 seconds before clearing the notification
    window.setTimeout(function () { formContext.ui.clearFormNotification(myUniqueId); }, 5000);
}
Function to execute on the OnChange event: Associate the
Example.attributeOnChangefunction with the Account Name column in the account form so that it gets executed only when you change the account name value.This function performs a case-insensitive search for
Contosoin the accountname, and if present, sets values for thewebsiteurl,telephone1, anddescriptioncolumns in the account form.// Code to run in the column OnChange event this.attributeOnChange = function (executionContext) { var formContext = executionContext.getFormContext(); // Automatically set some column values if the account name contains "Contoso" var accountName = formContext.getAttribute("name").getValue(); if (accountName.toLowerCase().search("contoso") != -1) { formContext.getAttribute("websiteurl").setValue("https://www.contoso.com"); formContext.getAttribute("telephone1").setValue("425-555-0100"); formContext.getAttribute("description").setValue("Website URL, Phone and Description set using custom script."); } }Function to execute on the OnSave event: The
Example.formOnSavefunction displays an alert dialog box by using the Xrm.Navigation.openAlertDialog method. This dialog box displays a message with an OK button. The user can close the alert by selecting OK.Note
This function doesn't use the execution context because the Xrm.Navigation. methods don't require it.
// Code to run in the form OnSave event
this.formOnSave = function () {
    // Display an alert dialog
    Xrm.Navigation.openAlertDialog({ text: "Record saved." });
}
Step 3: Upload your code as a web resource
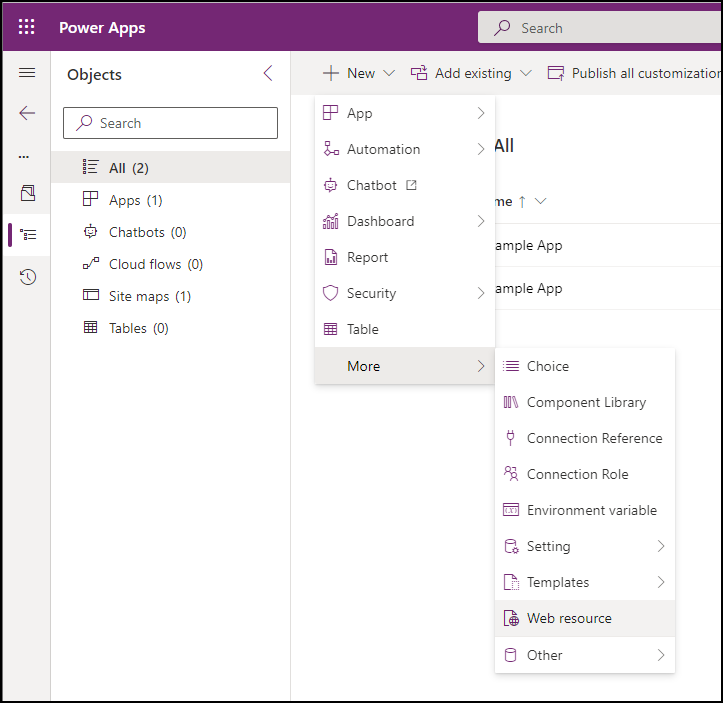
Now that your code is ready, upload it into your solution.
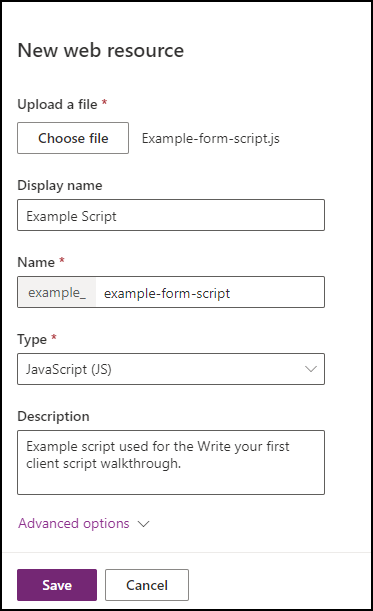
In your solution, select New > More > Web resource.
In the New web resource dialog, select Choose file and select the
Example-form-script.jsfile you saved earlier.Enter the Display name, Name, and optionally a Description. Make sure the Type is JavaScript (JS).
Note
- The Name has a prefix that matches the solution publisher customization prefix. There are other ways to create web resources, but creating a web resource this way ensures that the web resource is part of your solution.
- The name of the web resource is
example_example-form-script.
Step 4: Associate your web resource to a form
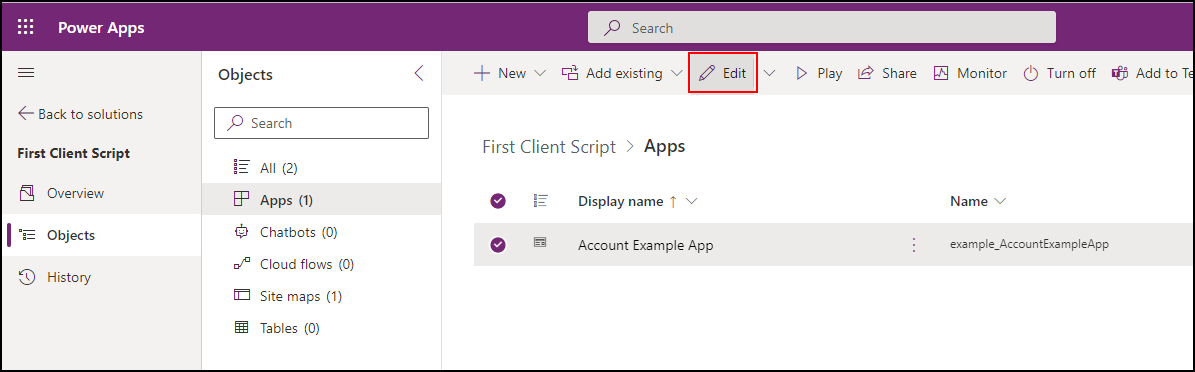
In your solution, select Objects > Apps > Your App and click Edit.
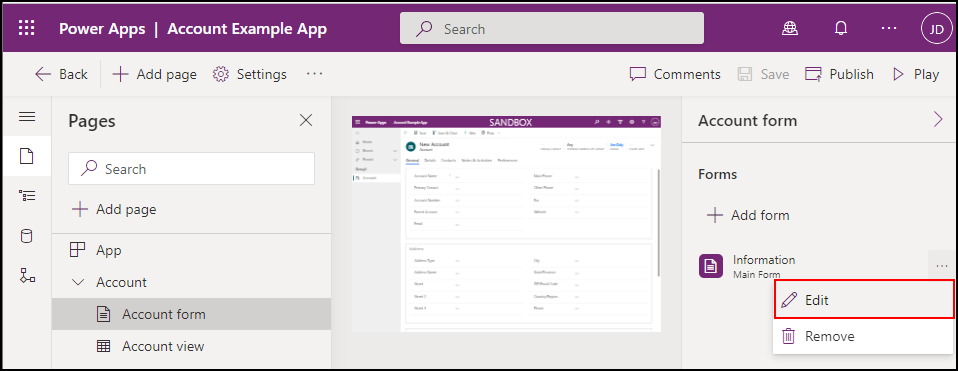
Expand Account and select the Account form. Click the ellipses (...) to the right of the Information form and select Edit.
In the left navigation, select Form Libraries and click Add library.
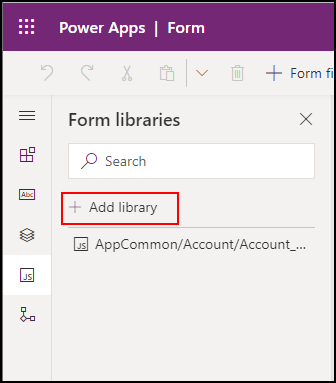
In the Add JavaScript Library dialog, search for the JavaScript web resource you created by name:
Example Script.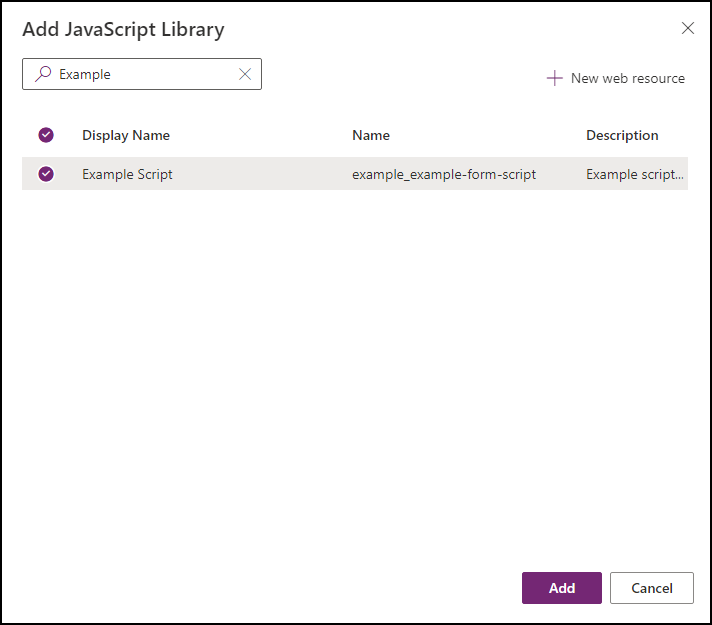
Select the Example Script web resource and click Add.
Step 5: Configure form and field events
Select the Events tab.
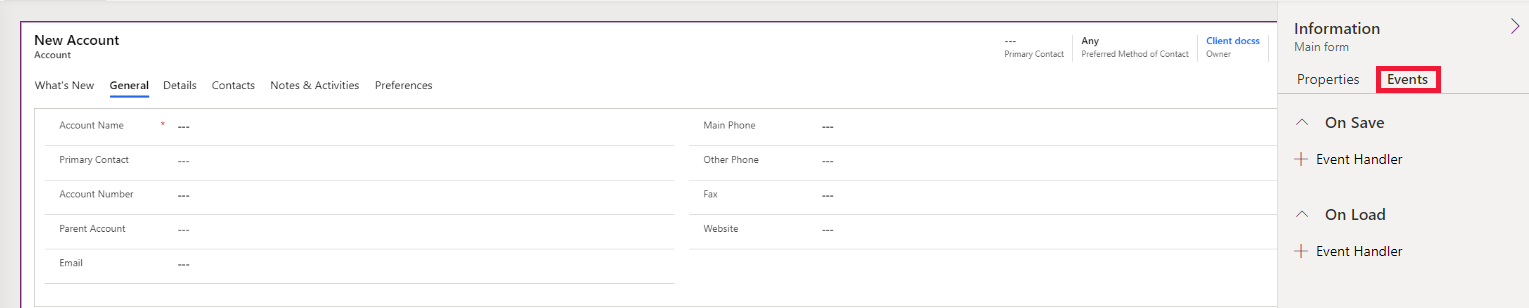
Configure form On Load event
Select On Load event handler and click + Event Handler.
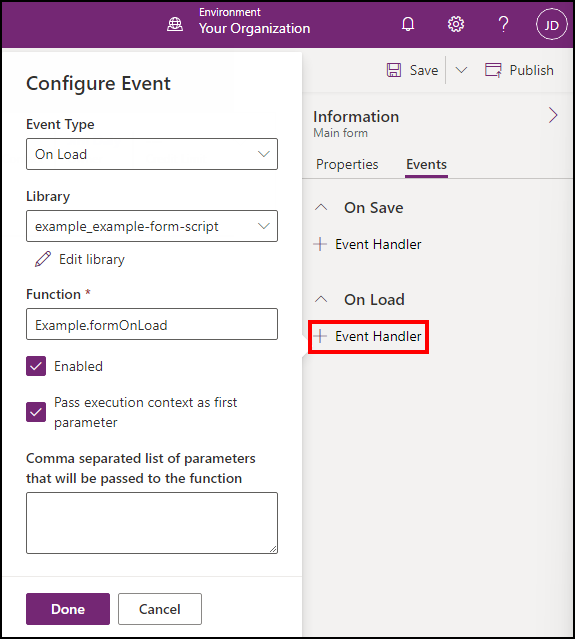
Make sure that the following settings are correct:
- The Event Type is On Load.
- The example_example-form-script library is selected.
- Type the name of the function in the Function field. In this case, enter
Example.formOnLoad. - Select Pass execution context as first parameter.
- Click Done.
Configure form On Save event
Select the On Save event handler, and then select + Event Handler.
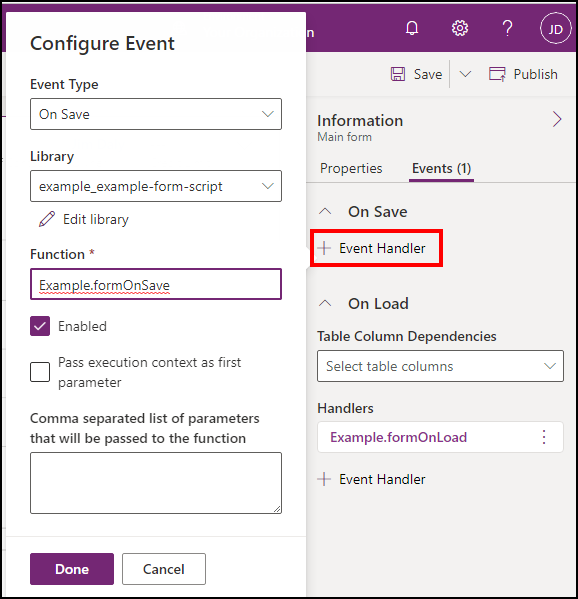
Make sure that the following settings are correct:
- The Event Type is On Save.
- The example_example-form-script library is selected.
- Type the name of the function in the Function field. In this case, enter
Example.formOnSave.Note
You don't need to select Pass execution context as first parameter for this function because it doesn't use it.
- Select Done.
Configure field On Change event
Select the Account Name field and the Events tab.

Select the On Change event handler and click + Event Handler.
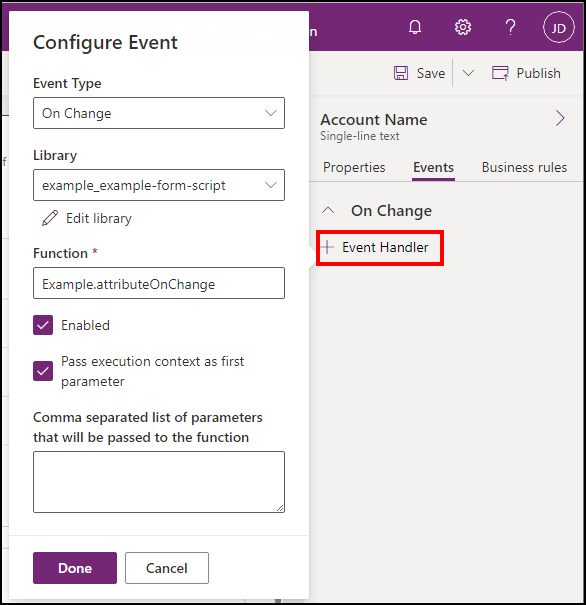
Make sure that the following settings are correct:
- The Event Type is On Change.
- The example_example-form-script library is selected.
- Type the name of the function in the Function field. In this case,
Example.attributeOnChange. - Select Pass execution context as first parameter.
- Select Done.
Save and publish your changes
Save the form and click Publish.
Step 6: Test your code
Refresh your browser to make sure your changes take effect in your model-driven apps instance.
To test your code:
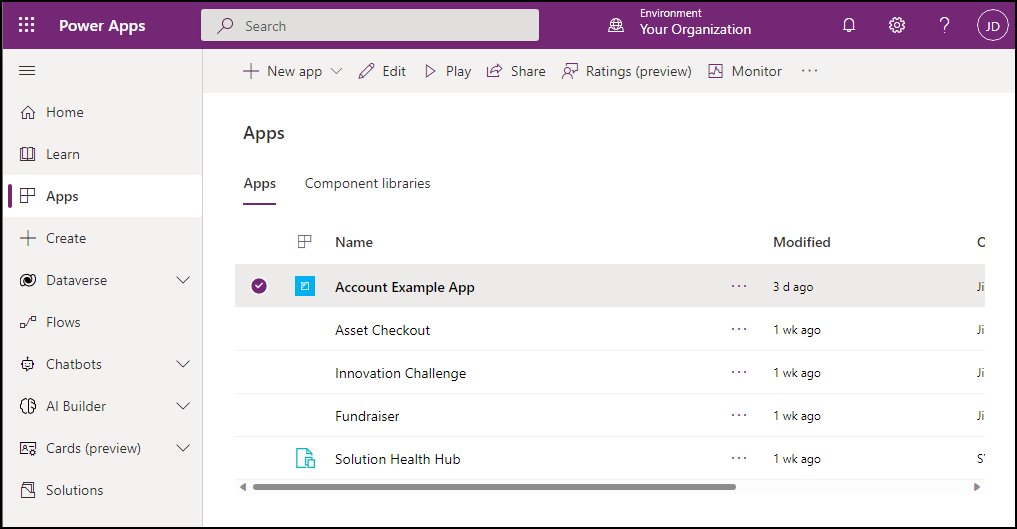
Go to Power Apps.
In the left navigation, select Apps.
Open the model-driven app you just edited, or select it and select Play.
Test form On Load function
Select any account record in the list to open it.
Verify that the notification appears.
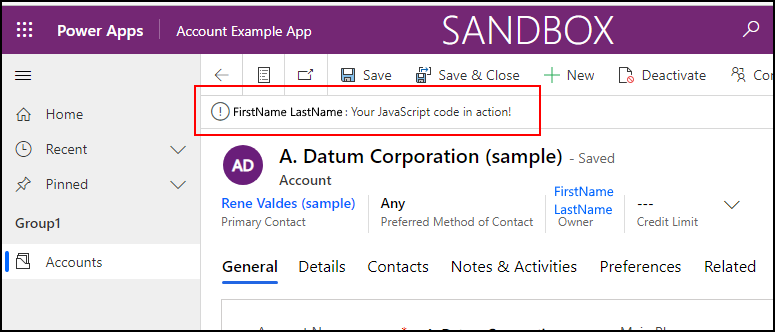
Verify the notification disappears in 5 seconds.
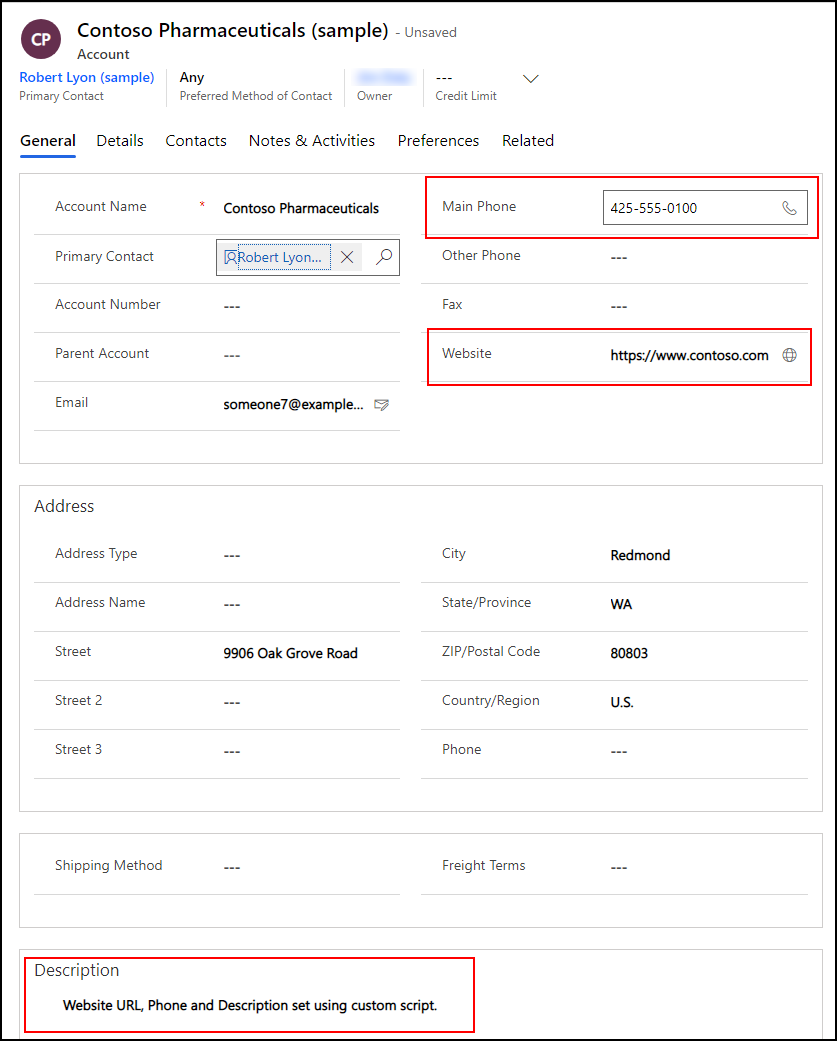
Test field On Change function
Edit the Account Name to include "Contoso" in the name and move to the next column by pressing TAB.
Verify the expected values set to the Main Phone, Website, and Description columns.
Test form On Save function
Select Save.
Verify that the alert dialog displays the message you configured in your code.
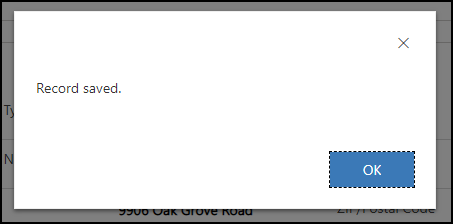
Select OK to close the alert.
Related articles
Debug JavaScript code for model-driven apps
Events in forms and grids in model-driven apps
Form OnLoad event
Form OnSave event (Client API reference) in model-driven apps
Column OnChange event (Client API reference)