Muistiinpano
Tämän sivun käyttö edellyttää valtuutusta. Voit yrittää kirjautua sisään tai vaihtaa hakemistoa.
Tämän sivun käyttö edellyttää valtuutusta. Voit yrittää vaihtaa hakemistoa.
In this article you'll learn how to create a plug-in package, upload and register it on the Dataverse server, and perform some other package management tasks. You'll be using PAC CLI to create the plug-in package and the Plug-in Registration tool to upload and register the package.
This article helps you:
- Create a Visual Studio plug-in project
- Add a dependent assembly to the project and build
- Use the Plug-in Registration tool to upload and register your package
- Use the Plug-in Registration tool to update and delete a package
More information: Build and package plug-in code.
Prerequisites
- Access to a Dataverse environment
- A system user account, with System Administrator or System Customizer role, in the target environment
- The tools described in the next table
| Tool/App | Instructions |
|---|---|
| Microsoft Power Platform CLI | Use version 1.17 or higher. The preferred installation method is using Visual Studio Code. See Power Platform Tools. You can also download and install the Windows version here: https://aka.ms/PowerAppsCLI. If you have already installed the Windows version, make sure you run More information: What is Microsoft Power Platform CLI? |
| Plug-in Registration tool (PRT) | Use version 9.1.0.184 or higher. Use these instructions to install the latest version: Dataverse development tools. |
| Visual Studio | Microsoft Visual Studio 2019 or newer. |
Create a Visual Studio project
Use the PAC CLI pac plugin init command to create a Visual Studio project that streamlines your development process with dependent assemblies.
Create a folder for your plug-in project. The name of this folder determines the name of the Visual Studio .NET Framework Class library project for your plug-in.
Open a PowerShell terminal window in Visual Studio Code to navigate to the folder and run the command pac plugin init. For plug-in packages, we recommend that you use the
--skip-signingparameter so that your plug-in assemblies aren't signed.Example:
PS E:\projects\mypluginproject> pac plugin init --skip-signing
Note
You are not required to sign the assemblies when using dependent assemblies. If you sign your assembly, all dependent assemblies must also be signed. More information: Signed assemblies are not required
The pac plugin init command has a number of optional parameters. You must use the --skip-signing parameter if you do not want to sign your plug-in assembly.
These commands create a Visual Studio .NET Framework class library project based on the name of the folder it was created in.
Depending on your Visual Studio solution configuration, when you open the Visual Studio project in Visual Studio and build it, a NuGet package is generated for the project in the bin\Debug or bin\Release folder. Each time you build your project, this NuGet package is updated. The NuGet package is the file you upload using the Plug-in Registration tool.
Add a dependent assembly to your project
You can add a NuGet package for satisfying required references to your Visual Studio plug-in project as you normally do. After you build the project, you should find your plug-in assembly in the generated NuGet package located in the bin\outputPackages folder.
You can use NuGet Package Explorer to examine the generated NuGet package.
Add a dependent assembly without using NuGet
If you have an assembly that isn't distributed as a NuGet package, you can add it to your project as you normally do. In Solution Explorer, right-click Dependencies and choose Add Assembly Reference.... Select the assembly you want to add.
Use the Plug-in Registration tool
You can use the Plug-in Registration tool (PRT) to perform the following tasks:
- View list of available plug-in packages
- Register a NuGet package as a plug-in package
View list of available plug-in packages
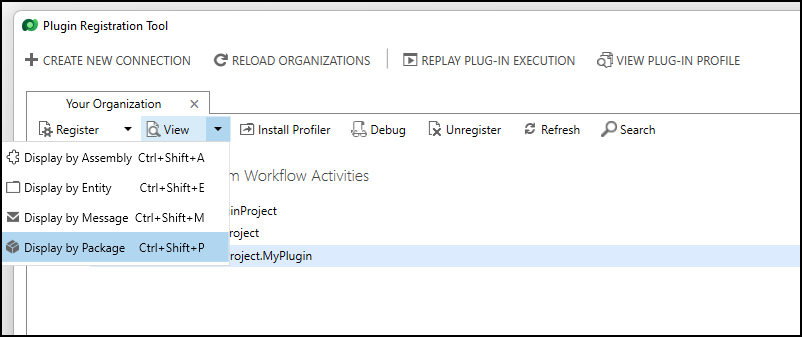
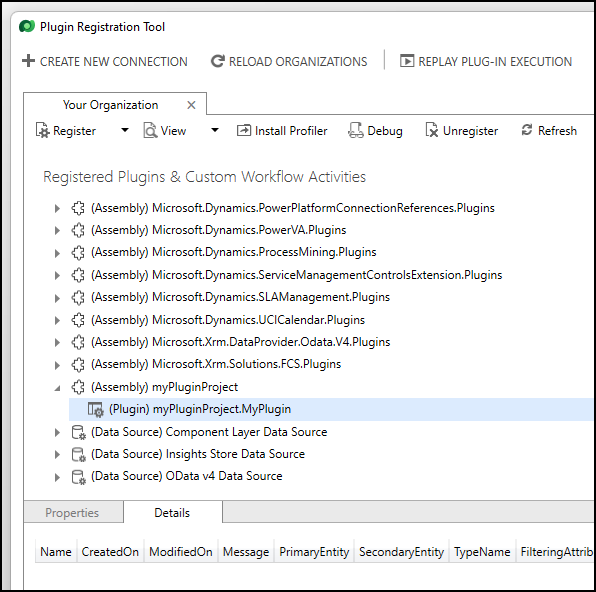
The PRT has a new Display by Package view to list any plug-in packages previously imported:
Register a NuGet package as a plug-in package
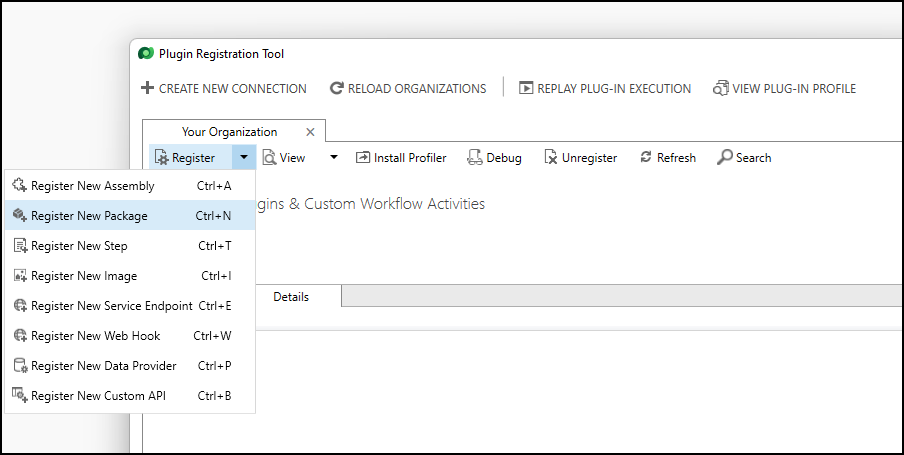
The PRT has a command to select a NuGet package to import/register as a plug-in package.
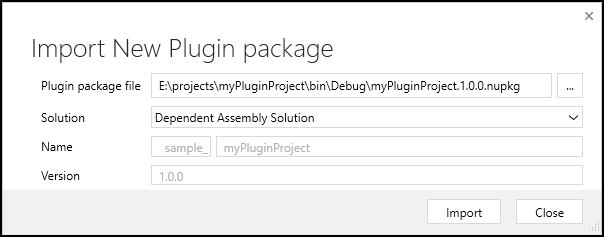
This command opens a dialog to select the plug-in package.
You can select an existing solution or create a new one.
From the Display by Package view, you can select the assembly and register steps.
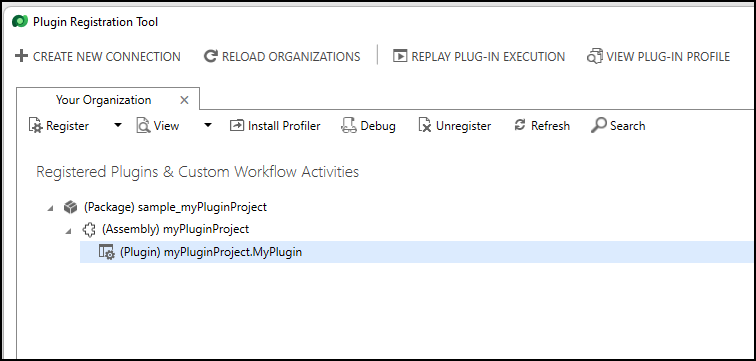
The assembly is also available within the Display by Assembly view.
Plug-in package management
Within the Plug-in Registration tool, you can perform additional operations on plug-in packages as described in the next sections.
Update a plug-in package
While viewing the list of plug-in packages using the Display by Package view, select the plug-in package and select the Update command.
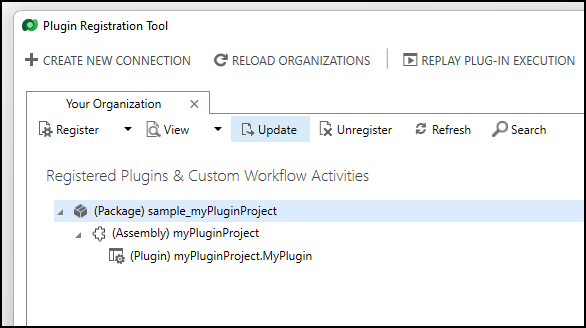
This command opens a dialog so you can select the NuGet Package with changes.
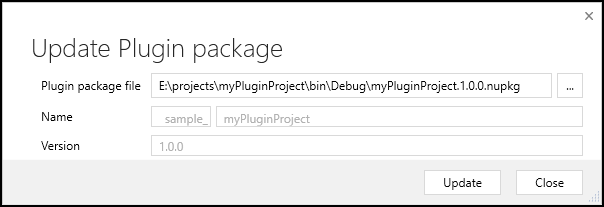
Important
If your update removes any plug-in assemblies, or types which are used in plug-in step registrations, the update will be rejected. You must manually remove any step registrations that use plug-in assemblies or plug-in types that you want to remove with your update.
The version of the plug-in package or plug-in assembly is not a factor in any upgrade behaviors. You can update the version of the plug-in assembly as you need.
The name and version of the plug-in package cannot be changed once created. Attempting to do so, for example in an API call, results in an error.
Delete plug-in packages
While viewing the list of plug-in packages using the Display by Package view, select the plug-in package and select the Unregister command.
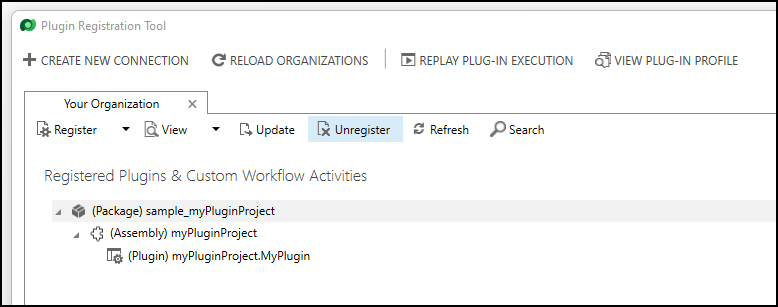
Important
You cannot unregister a package that has any plug-in step registrations for any plug-in assemblies in the package. You must first unregister all step registrations for the assemblies in the package before you can delete the package.