Use Npm scopes in Azure Artifacts
TFS 2018
Npm scopes serve as a means to categorize related packages into groups. These scopes enable you to create packages with identical names to those created by different users without encountering conflicts. By using scopes, you have the ability to segregate public and private packages by adding the scope prefix @scopeName and configuring the .npmrc file to exclusively use a feed with that particular scope.
Azure Artifacts provides the capability to publish and download both scoped and nonscoped packages from feeds or public registries. Npm scopes are particularly valuable when working with self-hosted on-premises servers lacking internet access, as configuring upstream sources in such scenarios isn't feasible. In summary, when using scopes:
- We don't have to worry about name collisions.
- No need to change the npm registry in order to install or publish our packages.
- Each npm organization/user has their own scope, and only the owner or the scope members can publish packages to their scope.
Project setup
Navigate to your project
http://ServerName:8080/tfs/DefaultCollection/<ProjectName>.Select Build and Release.
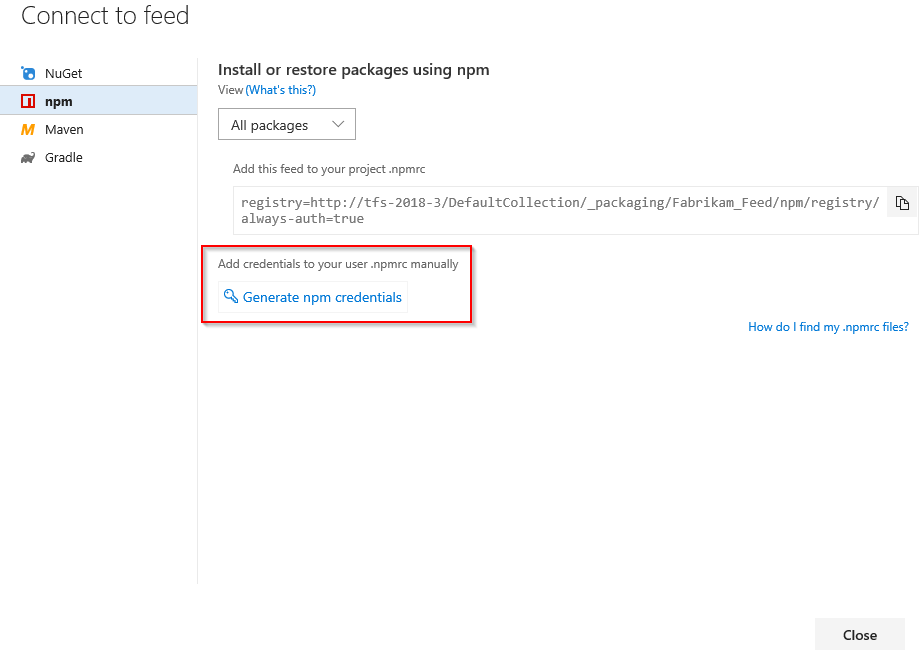
Select Packages, and then select Connect to feed.
Select npm and then select Generate npm credentials, and then copy the credentials and add them to your .npmrc file.

Scope setup
In your .npmrc file, replace registry=<YOUR_SOURCE_URL> with @ScopeName:registry=<YOUR_SOURCE_URL>.
Make sure to include both the scope and package names in your package.json file as follows: { "name": "@ScopeName/PackageName" }. See the examples below:
Organization-scoped feed:
@ScopeName:registry=https://pkgs.dev.azure.com/<ORGANIZATION_NAME>/_packaging/<FEED_NAME>/npm/registry/

always-auth=true
{ "name": "@ScopeName/PackageName" }Project-scoped feed:
@ScopeName:registry=https://pkgs.dev.azure.com/<ORGANIZATION_NAME>/<PROJECT_NAME>/_packaging/<FEED_NAME>/npm/registry/

always-auth=true
{ "name": "@ScopeName/PackageName" }Example:
@local:registry=https://pkgs.dev.azure.com/FabrikamOrg/NpmDemo/_packaging/FabrikamFeed/npm/registry/

always-auth=true
{ "name": "@demo/js-e2e-express-server", "version": "2.0.0", "description": "JavaScript server written with Express.js", "main": "index.js", "directories": { "doc": "docs", "test": "test" }
Publish scoped packages
Open a command prompt window, navigate to your project directory, and run the following command to publish your scoped package. In our example, our package is listed under the @local view.
npm publish

Upstream sources vs scopes
Upstream sources give you the most flexibility to use a combination of scoped and nonscoped packages in your feed, as well as both scoped and nonscoped packages from public registries like npmjs.com.
Scopes, however, impose a naming restriction on your packages: each package name must start with @<scope>. If you want to publish your private packages to public registries, you must do so with the scopes intact. If you remove package scopes when deploying your packages, you'll need to update all the references in your package.json file. With that in mind, scopes can serve as a viable alternative to upstream sources.