Build and publish artifacts with Gradle and Azure Pipelines
TFS 2018
Gradle is a popular build tool for Java applications and the primary build tool for Android. Using Azure Pipelines, we can add the gradle task to our build definition and build and publish our build artifacts.
Prerequisites
To make sure you have all the prerequisites set up, run the following command in an elevated command prompt to check which Java version is installed on your machine.
java -version
If the above command doesn't return a java version, make sure you go back and install the Java JDK or JRE first.
To confirm the installation of Gradle, run the following command in an elevated command prompt:
gradle -v
Set up authentication
Select your profile icon, and then select Security.
Select New Token, and then name your token and set its expiration date.
Select the Packaging (Read & write) scope.
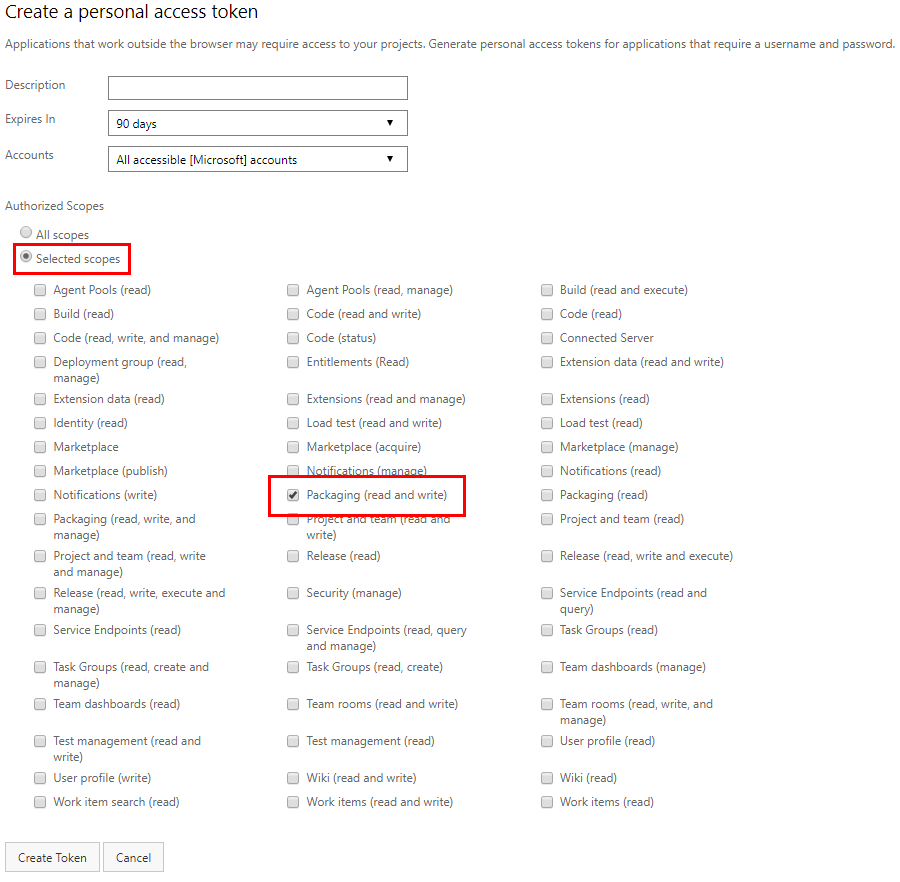
Copy your token and save it in a secure location.
Create a new file in your
.gradlefolder and name it gradle.properties. The path to your gradle folder is usually in%INSTALLPATH%/gradle/user/home/.gradle/.Open the gradle.properties file with a text editor and add the following snippet:
vstsMavenAccessToken=<PASTE_YOUR_PERSONAL_ACCESS_TOKEN_HERE>Save your file when you're done.
Build projects with Gradle CLI
Open your build.gradle file and make sure it starts with the following:
apply plugin: 'java'Add the following snippet to your build.gradle file to download your artifact during the build. Replace the placeholders with your groupID, artifactID, and versionNumber. For example: `compile(group: 'siteOps', name: 'odata-wrappers', version: '1.0.0.0')
dependencies {
    compile(group: '<YOUR_GROUP_ID>', name: '<ARTIFACT_ID>', version: '<VERSION_NUMBER>')
}
To test this, we can create a sample Java console app and build it with Gradle.
public class HelloWorld {
    public static void main(String[] args) {
        System.out.println("Hello, world!");
    }
}
Run the following command to build your project. Your build output should return: BUILD SUCCESSFUL
gradle build
Use Gradle in Azure Pipelines
Run the following command to create the Gradle wrapper gradlew.
gradle wrapperPush your changes to your remote branch. We will need this file later when we add the Gradle task.
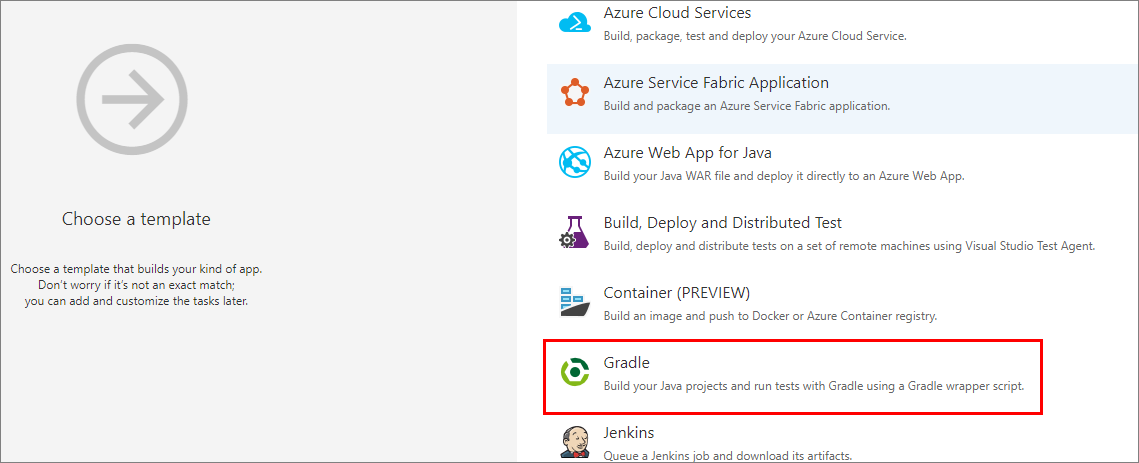
Navigate to your pipeline definition. If you don't have one, create a new pipeline, select Use the classic editor and then select the Gradle template.
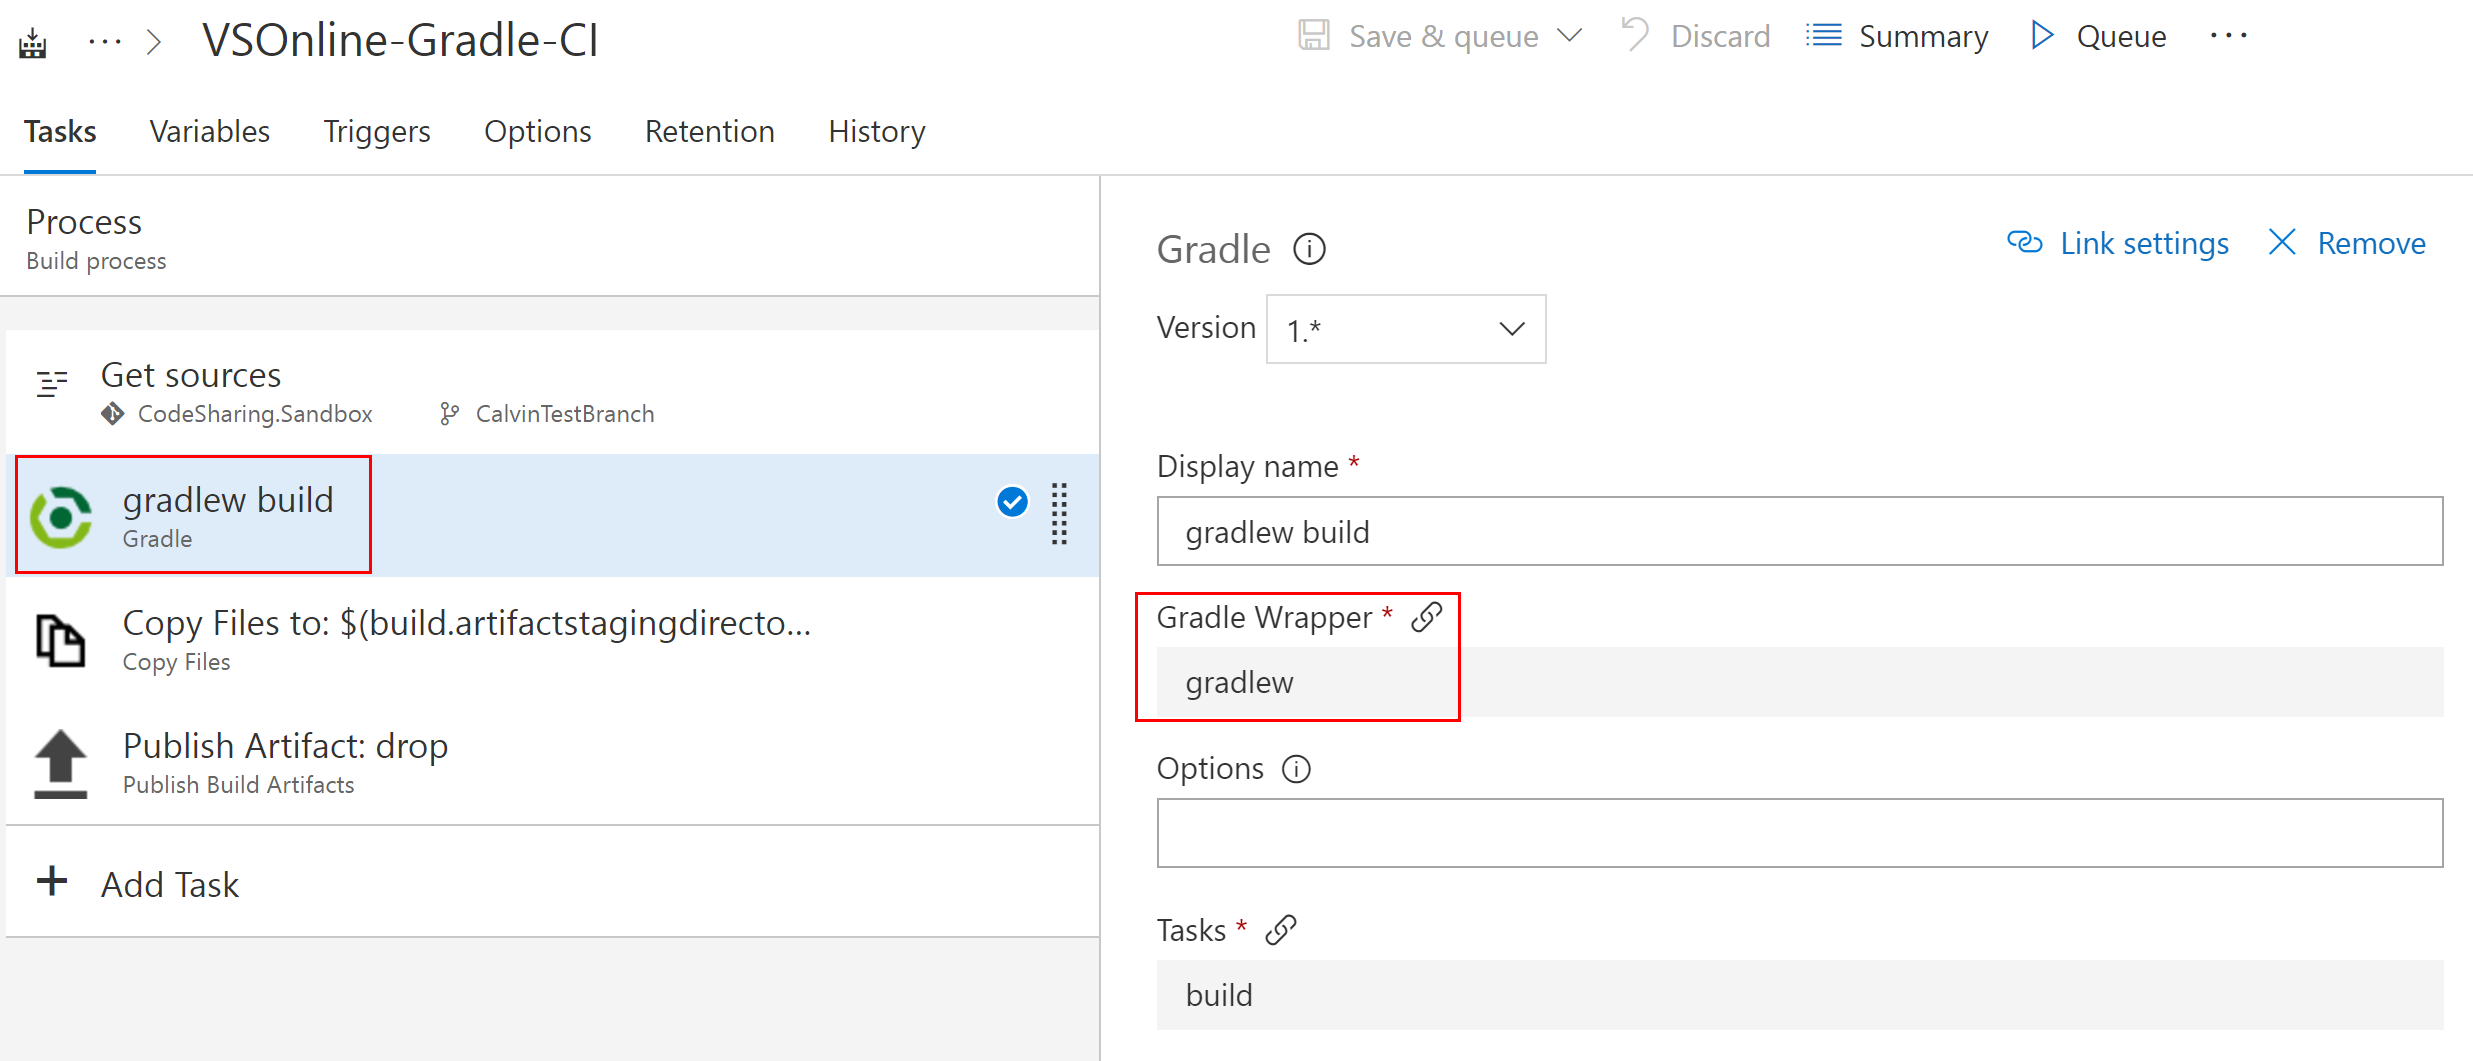
You can use the default settings with the gradlew build task.
The Publish build artifacts task will publish our artifact to Azure Pipelines.
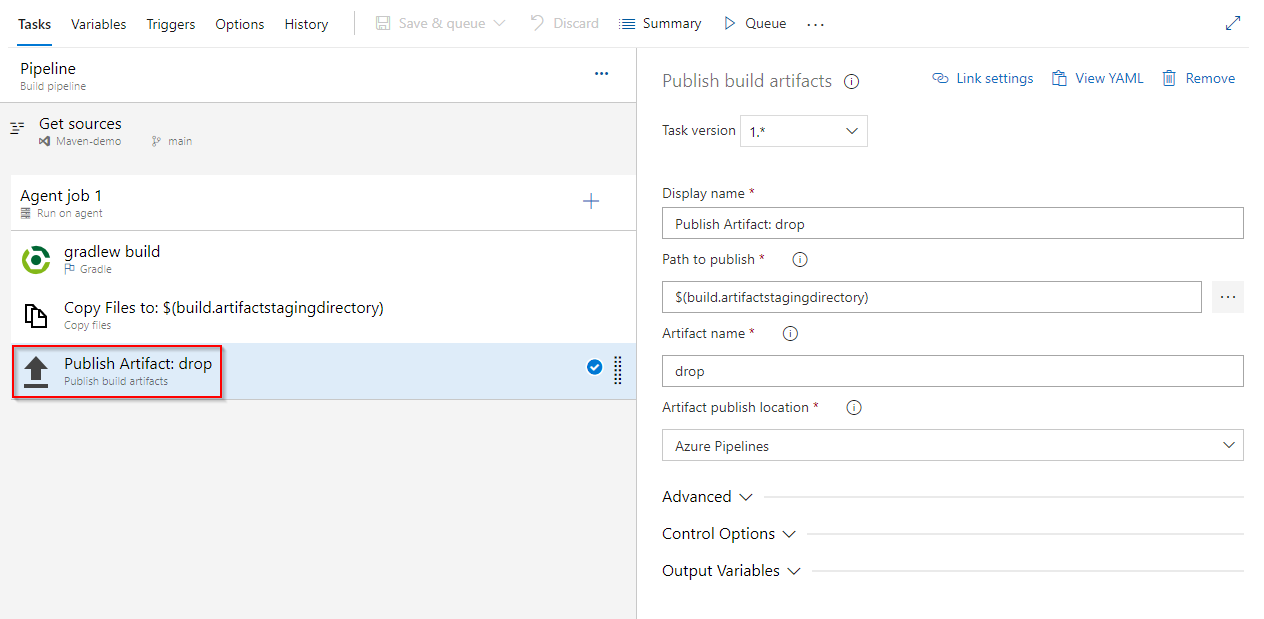
Select Save & queue when you're done.
You can view your published artifact in your pipeline Summary once the run is complete.
