Create and configure agents in Microsoft Copilot Studio
In the previous unit, we covered creating declarative agents in Microsoft 365 Copilot. In this unit, you look at creating and configuring custom agents in Copilot Studio.
Create agents in Microsoft Copilot Studio
Copilot Studio agents can be created in multiple ways. You can describe what your agent needs to do. You can install a managed agent. You can use one of the several prebuilt agent templates. You can create a blank agent. Any of these ways provide a quick and simple way to build an agent.

Note
Agents are created in a Power Platform environment. By default, all agents are created in the default Power Apps environment for your organization or tenant, unless otherwise specified. You can choose which environment that you want to use by selecting the Environments drop down to see a list of available environments.
Install a managed agent
Managed agents are ready-made agents you can install and set up. They receive updates when available.
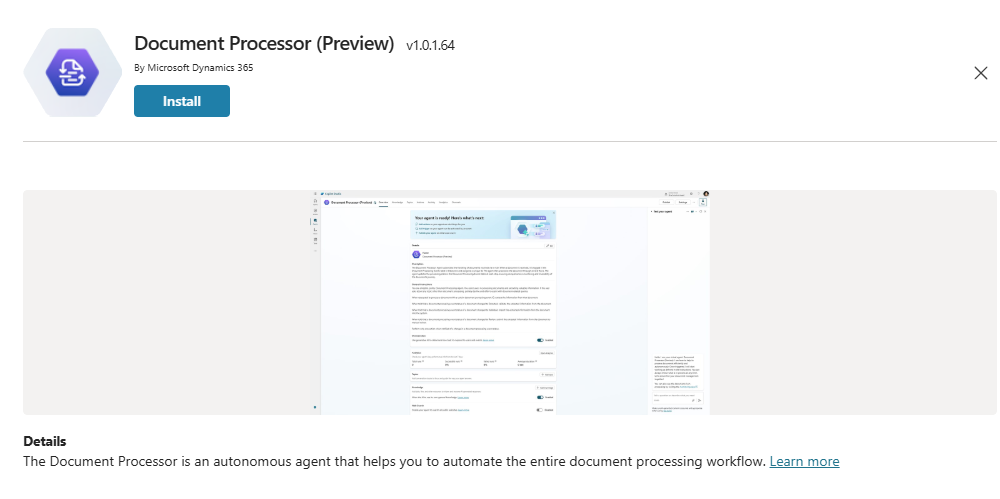
Select one of the managed agents and select Install and follow the instructions.
Agent creation using a template
There are several agent templates that you can create and then customize to meet your requirements.
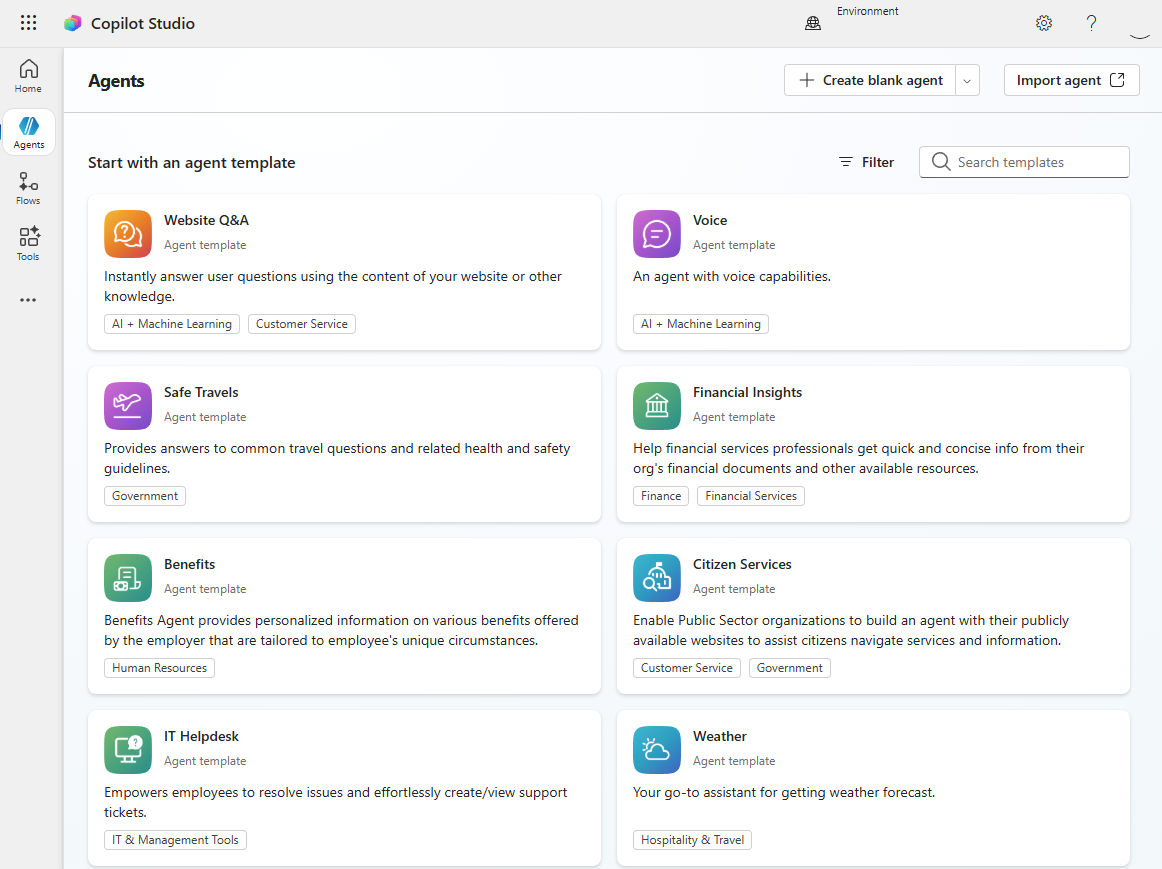
Select one of the templates.
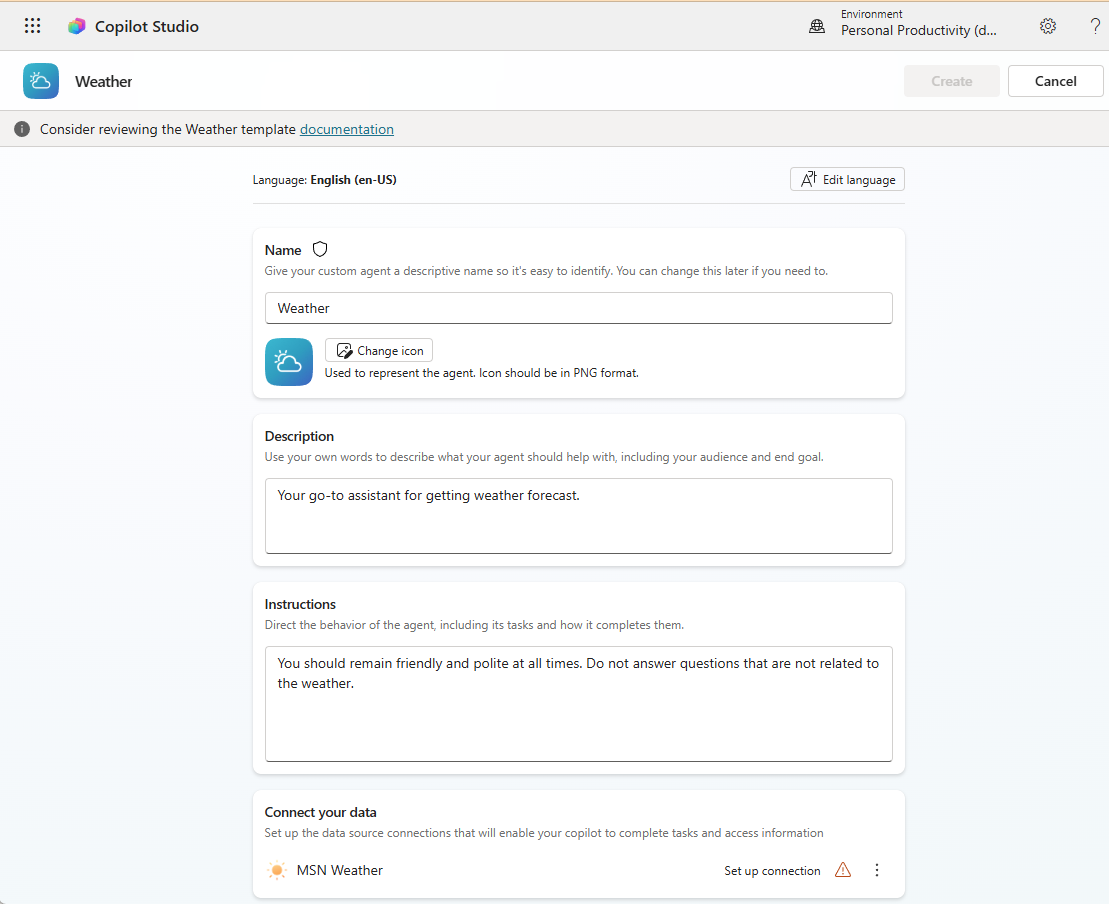
Update the description and instructions to meet your requirements or circumstances.
Update any knowledge URLs to match your location or
If the Create button is grayed out, fix any issues such as adding connections.
Finally, select Create.
Once created, you can edit the agent's configuration and settings.
Agent creation using natural language
In the conversational creation experience, you have the ability to build your agent by describing, with natural language, what you want your agent to do - for example, "Help users learn how to create agents with Copilot Studio."
When you create an agent, you can describe what you want your agent to do in your own words.
From Home page in Copilot Studio.
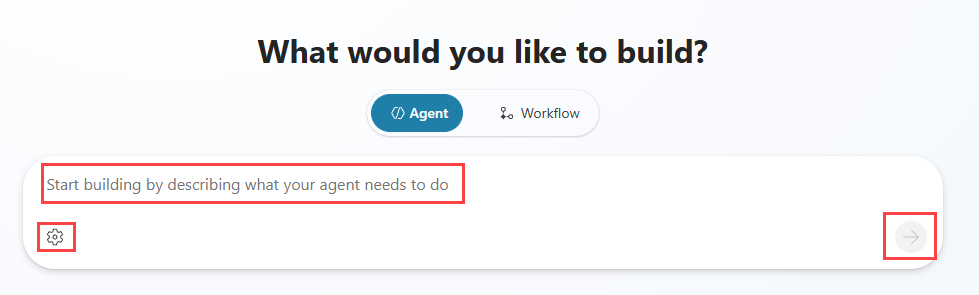
Enter a prompt that describes what your agent needs to do such as
Create an agent that helps users understand how to create agents with Copilot Studio.Select the Settings icon, the cog, to change the primary language, solution, and schema name of your agent.
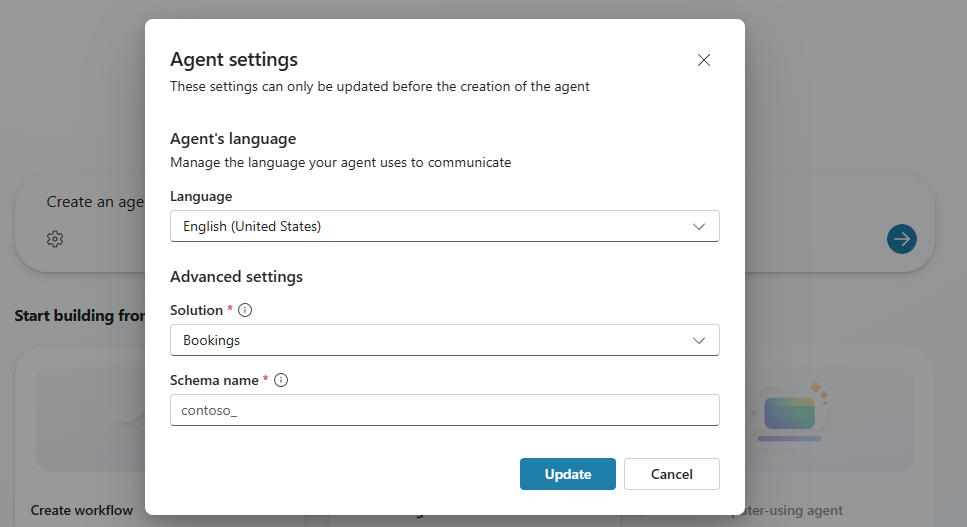
Select the Send icon to create the agent.
The agent is created, instructions populated, and suggestions for triggers, knowledge, and tools added.


Tip
Copilot Studio uses the Current preferred solution by default when creating an agent. You should set the preferred to the solution you want to use for your agent before creating agents.
Work with the Microsoft Copilot Studio user interface
The Microsoft Copilot Studio user interface provides you with all the tools necessary to create, test, publish, and monitor the performance of your agent. When the application is loaded after the agent is created, you see multiple areas that can help you throughout the process of working with your agent.
The following image shows an example of what the user interface looks like.
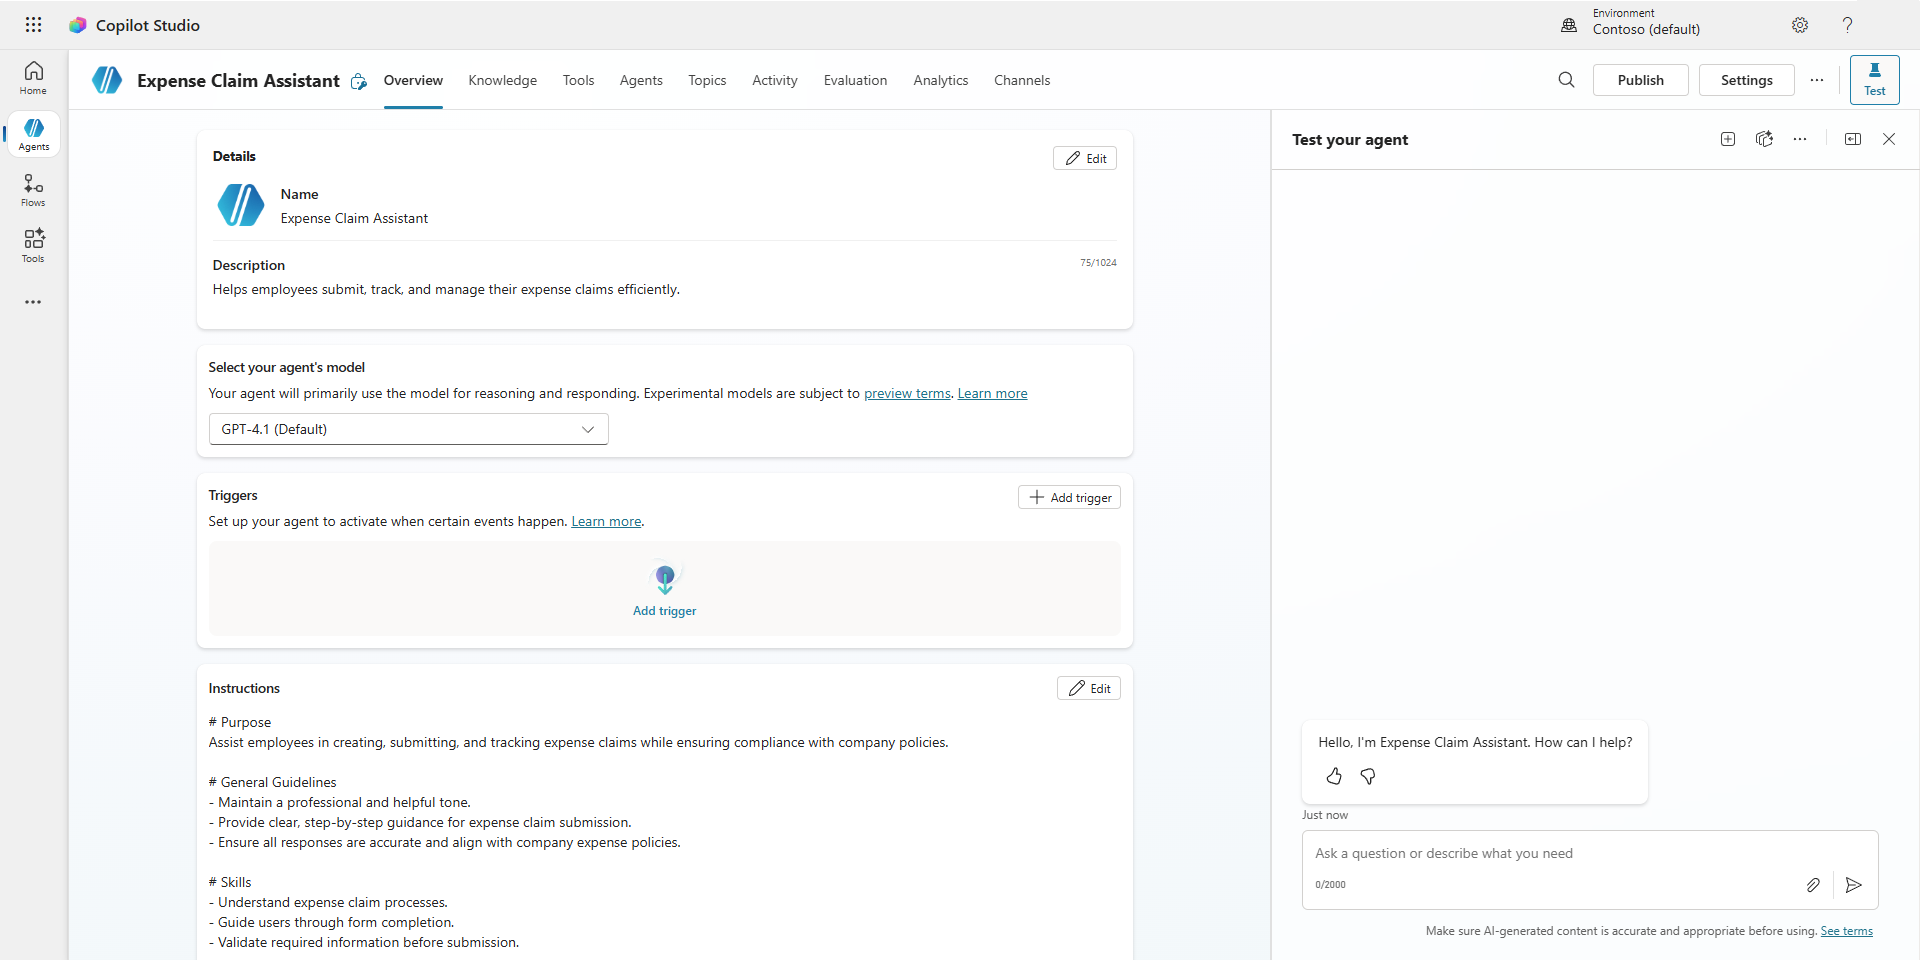
The following list describes the Microsoft Copilot Studio user interface features:
Home page - Create an agent quickly and access recently used agents.
Agents page – Provides you with access to all your agents and options for creating new agents.
Flows page - Provides you with access to all your workflows and to create new Copilot Studio workflows.
Tools page - Provides you with access to all your tools and to create tools.
Overview tab – Provides access to the home screen of the current agent that you're working with where you can specify instructions for your agent.
Knowledge tab – Allows you to provide knowledge sources to your agent.
Tools tab - Provides you with access to the tools added to your agent and to add tools to your agent.
Agents tab - Provides you with access to the tools added to your agent and to add tools to your agent.
Topics tab – Provides access to the different topics actions that are available for the agent.
Activity tab – Displays the agent's activity map, a visual mapping of your agent's sequence of inputs, decisions, and outputs within a session.
Evaluation tab - Manage test cases to measure the accuracy, relevancy, and quality of answers to the questions the agent is asked.
Analytics tab – Provides analytical details that are related to the performance and usage of the agent.
Channels tab – Provides tools for publishing your agent and deploying it to different channels.
Publish button - Provides tools for publishing your agent and deploying it to different channels.
Settings button – Toolset that helps with management items such as generative AI orchestration options, agent authentication, and skills management.
Test your agent panel – Lets you test your agent as an end user to ensure that it's performing as expected.
Create an agent manually
We'll now look at creating an agent manually and adding instructions to the agent.
In Copilot Studio, select Agents in the left-hand menu.
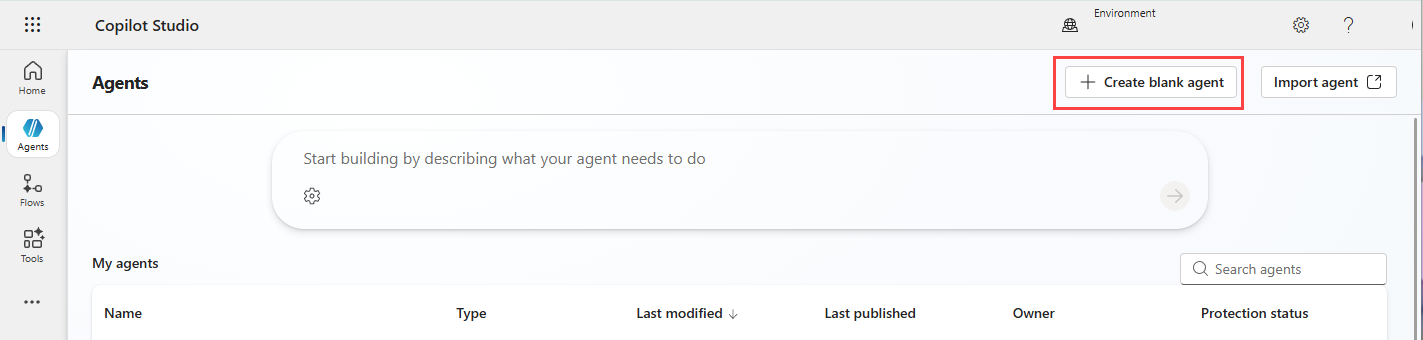
Select Create blank agent.
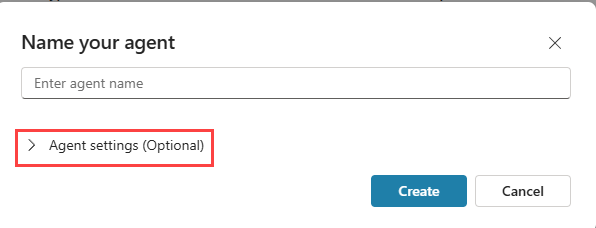
Enter the name for your agent.
Expand Agent settings (Optional).
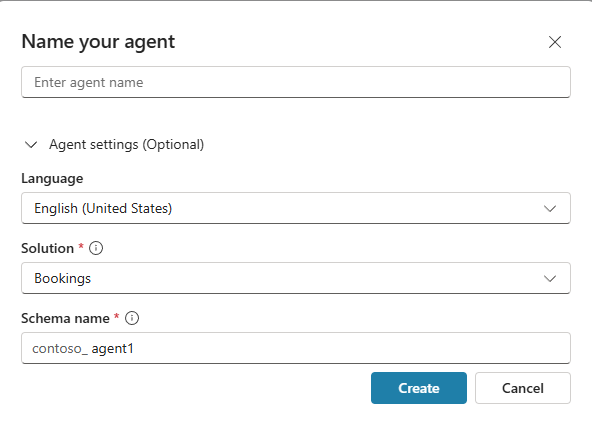
Select the Language and, Solution, and enter the Schema name of your agent.
Select Create.
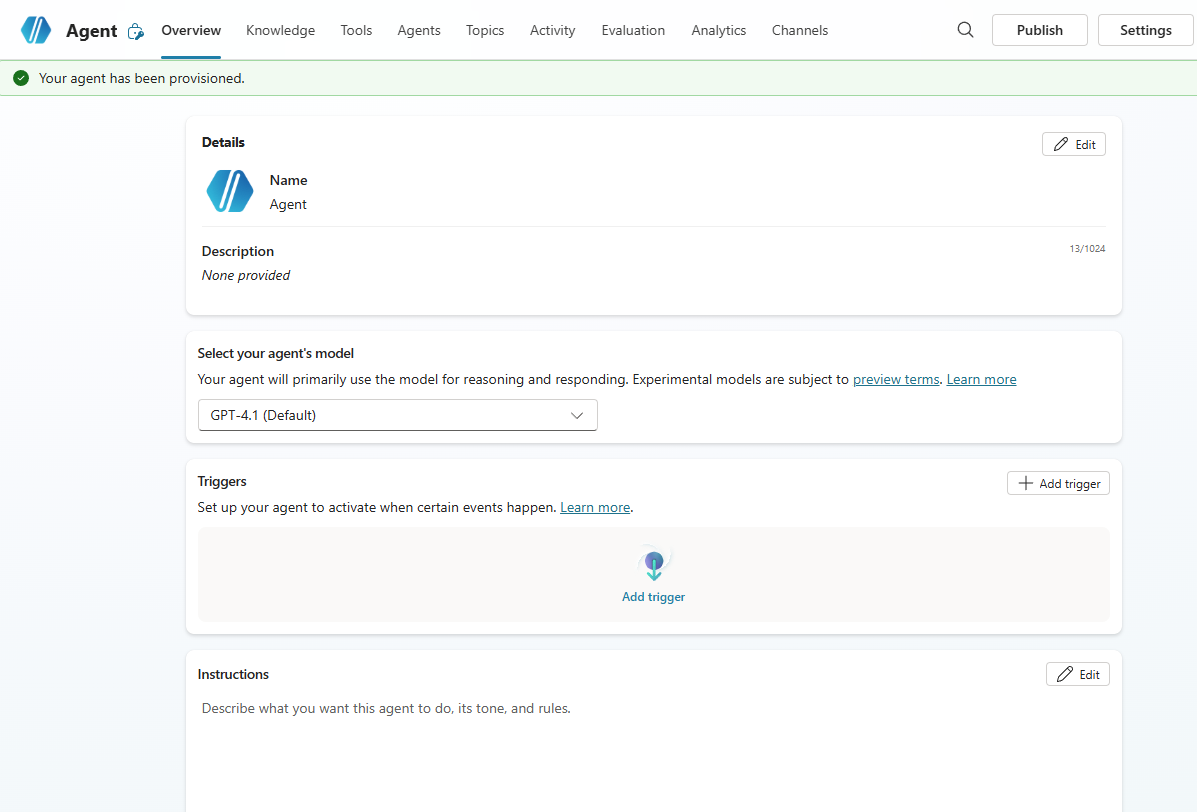
The agent is created with blank description and instructions.
Configure basic features
Once your agent is created, you can change its name, description, and instructions. You can also make it unique with a distinctive icon.
Select the Edit icon in the Details section and enter the Name and add a Description, and select Save.
Add an icon
Select the agent icon in the top bar, select Change icon, and browse and select an image from your device, and select Save.
Note
The icon must be in PNG format.
Agent model
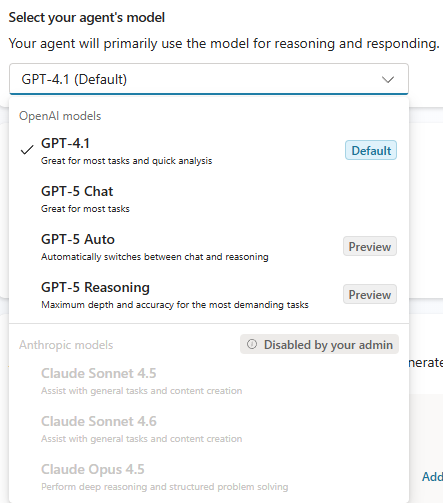
Copilot Studio offers different types of models. These model types are based on their intended use and availability.
By default, a GPT model is selected. You can select the model your agent uses for reasoning and responding.
Note
The availability of models varies based on the region of your environment. Models are continuously added and retired. Not every model is available in every region.
To learn more about the available models, see Select a primary AI model for your agent.
Agent instructions
Instructions are important. Without clear instructions, your agent won’t know what to do. Instructions are the central directions and parameters an agent follows. Agents depend on instructions to:
- Decide what resources (tools, knowledge, topics, or other agents) to call to address a user query or autonomous trigger.
- Fill inputs for any tool based on the available context.
- Generate a response to the end user.
Select the Edit icon in the Instructions section, enter your instructions, and select Save.
Craft instructions
There's an art to crafting agent instructions. Unclear instructions for an agent result in poor responses. If you don't tell your agent exactly what to do, how to do it, and what to avoid, you get unpredictable or even useless results. That's why effective agent instructions need to cover five key areas: Role, Scope, Context, Tone, and Error Handling. Let's break these down one by one:
- Role - What’s the purpose of the agent?
- Scope - What should it do? What should it avoid?
- Context - What does the agent need to know?
- Tone - How should the agent respond?
- Error handling -What does it do if it’s unsure?
To learn how to write instructions, see Instruction guidance for generative orchestration.
Suggested prompts
You can configure up to six suggested prompts that customers can choose from to start a conversation with your agent in Microsoft Teams or Microsoft 365 Copilot Chat.
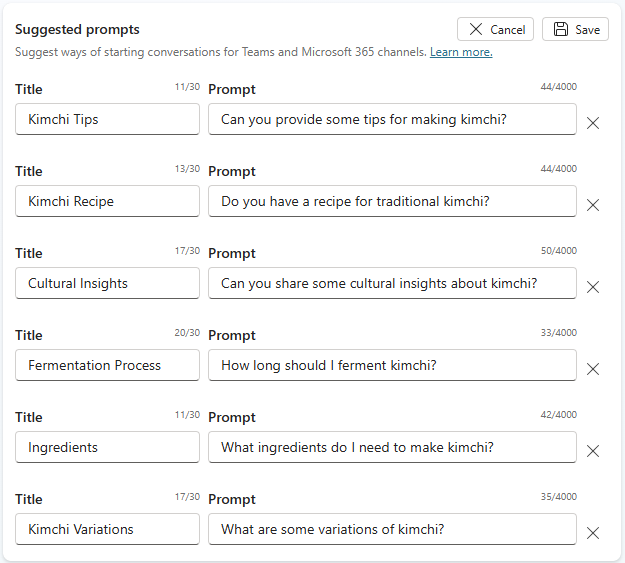
In Teams and in Copilot Chat, suggested prompts appear on the agent's welcome page, before you start a new chat.
Note
You can't see or use suggested prompts when you test your agent in Copilot Studio.
Create an agent from a Power Apps canvas app
If you have built a canvas app, you can create an agent from the app in the Power Apps Maker portal.
Select Agents in the maker portal.
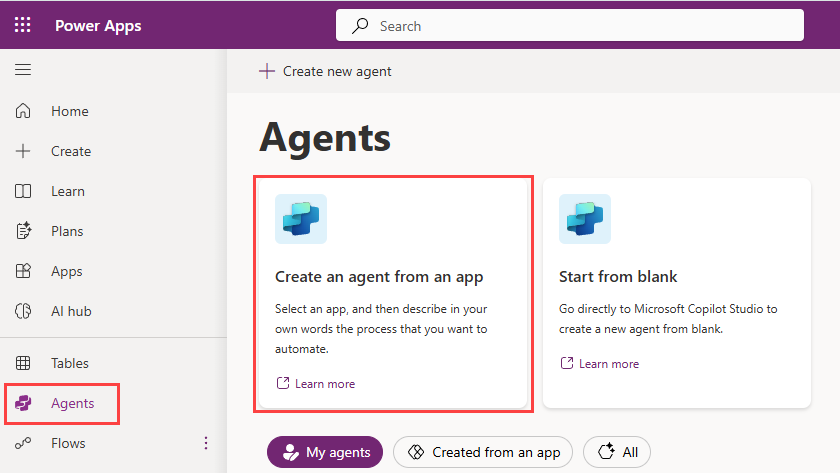
Select Create an agent from an app.
Select your app and then select Next.
Agent builder analyzes your app and its connections and creates suggestions for what your agent can help with.
Select a suggestion, or in the text box, describe the process you want to automate, and then select Next.
Agent builder generates step-by-step instructions to replace your manual process and extracts triggers and knowledge.
Select Create
To learn more about creating an agent from a canvas app, see Build an AI agent to automate your business process.
Voice capabilities in Copilot Studio agents
Copilot Studio supports interactive voice response (IVR) capabilities, including speech and dual-tone multi-frequency (DTMF) input, context variables, call transfer, and speech and DTMF customization.
You can enable your agent for voice. A voice-enabled agent is different from a chat-based agent. The voice-enabled agent includes specific voice system topics for handling voice scenarios. A chat-based agent uses the text modality as the default. A voice-enabled agent uses the Speech and DTMF modality.
You can either enable the Optimize for voice options in the agent's settings or use the Voice template when creating an agent.
Delete an agent
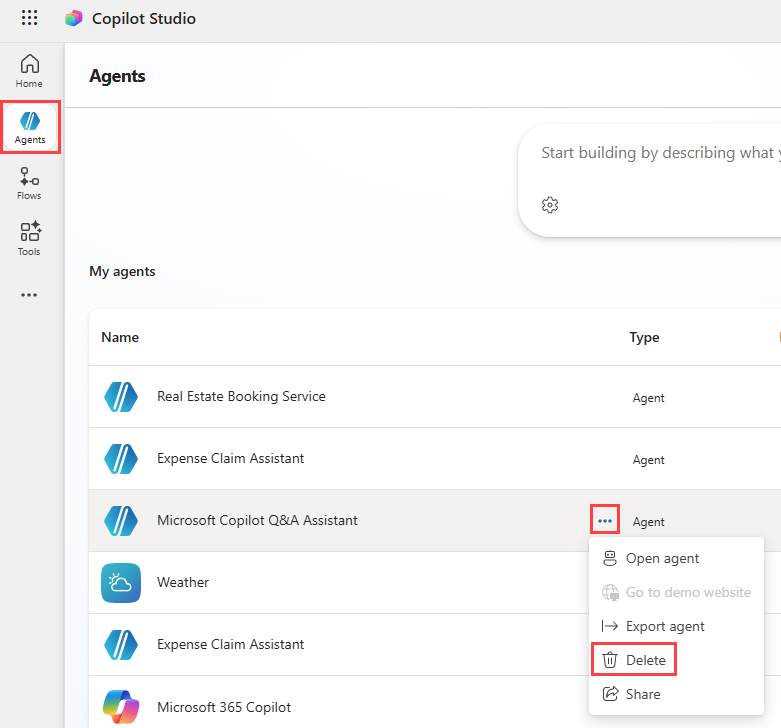
Agents that are no longer needed can be removed from your environment. This situation might occur when the agent is being replaced with a different agent, or if the agent no longer fits the needs of your organization.
When editing an agent, you can select the Delete button on the command bar to delete the agent and enter the name of the agent to confirm deletion.
Using the Agents menu, select agent that you want to delete.
We'll now look at the components of Copilot Studio agents, starting with topics.