Remarque
L’accès à cette page requiert une autorisation. Vous pouvez essayer de vous connecter ou de modifier des répertoires.
L’accès à cette page requiert une autorisation. Vous pouvez essayer de modifier des répertoires.
Cet article explique comment joindre un appel de salle à l’aide de kits SDK d’appel web ou mobiles natifs.
Prérequis
- Compte Azure avec un abonnement actif. Créez un compte gratuitement.
- Une ressource Communication Services active et la chaîne de connexion. Créez une ressource Communication Services.
- Deux identités d’utilisateur de communication ou plus. Créez et gérez des jetons d’accès ou créez rapidement des identités à des fins de test.
- Une salle créée et un participant ajouté à celle-ci. Créer et gérer des salles
Obtenir un jeton d’accès utilisateur
Si vous avez déjà créé des utilisateurs et les avez ajoutés en tant que participants dans la salle en suivant la section « Configurer les participants de la salle » de cette page, vous pouvez utiliser directement ces utilisateurs pour rejoindre la salle.
Sinon, vous allez devoir créer un jeton d’accès utilisateur pour chaque participant à l’appel. Découvrez comment créer et gérer des jetons d’accès utilisateur. Vous pouvez également utiliser Azure CLI et exécuter la commande ci-dessous avec votre chaîne de connexion pour créer un utilisateur et un jeton d’accès. Une fois les utilisateurs créés, vous devez les ajouter à la salle en tant que participants avant qu’ils puissent rejoindre la salle.
az communication identity token issue --scope voip --connection-string "yourConnectionString"
Pour plus d’informations, consultez Utiliser Azure CLI pour créer et gérer des jetons d’accès.
Remarque
Vous pouvez accéder aux salles à l’aide de la bibliothèque d’interface utilisateur Azure Communication Services. La bibliothèque d’interface utilisateur permet aux développeurs d’ajouter un client d’appel activé pour Rooms dans leur application avec seulement quelques lignes de code.
Implémenter l’exemple d’application
Pour implémenter le code nécessaire pour joindre des participants à un appel de salle, téléchargez à partir de GitHub l’exemple d’application Appel de salle.
Prérequis web
- Vous avez besoin de Node.js 18. Vous pouvez utiliser microsoft Installer (MSI) pour l’installer.
Configuration du projet
Création d’une application Node.js
Ouvrez votre fenêtre de terminal ou de commande, créez un répertoire pour votre application, puis accédez-y.
mkdir calling-rooms-quickstart && cd calling-rooms-quickstart
Exécutez npm init -y pour créer un fichier package.json avec les paramètres par défaut.
npm init -y
Installer le package
Utilisez la commande npm install pour installer le SDK Azure Communication Services Calling pour JavaScript.
Important
Ce guide de démarrage rapide utilise la version 1.14.1 du SDK Azure Communication Services Calling. La possibilité de rejoindre un appel de salle et d’afficher les rôles des participants aux appels est disponible dans le SDK JavaScript Appels pour les navigateurs web version 1.13.1 et versions ultérieures.
npm install @azure/communication-common --save
npm install @azure/communication-calling@1.14.1 --save
Configurer le framework d’application
Cet article utilise webpack pour regrouper les ressources d’application. Exécutez la commande suivante pour installer les webpackpackages , webpack-cliet webpack-dev-server npm et les répertorier en tant que dépendances de développement dans votre package.json:
npm install copy-webpack-plugin@^11.0.0 webpack@^5.88.2 webpack-cli@^5.1.4 webpack-dev-server@^4.15.1 --save-dev
Voici le code :
Créez un fichier index.html dans le répertoire racine de votre projet. Utilisez ce fichier pour configurer une disposition de base qui permet à l’utilisateur de rejoindre un appel de salle.
<!-- index.html-->
<!DOCTYPE html>
<html>
    <head>
        <title>Azure Communication Services - Rooms Call Sample</title>
        <link rel="stylesheet" type="text/css" href="styles.css"/>
    </head>
    <body>
        <h4>Azure Communication Services - Rooms Call Sample</h4>
        <input id="user-access-token"
            type="text"
            placeholder="User access token"
            style="margin-bottom:1em; width: 500px;"/>
        <button id="initialize-call-agent" type="button">Initialize Call Agent</button>
        <br>
        <br>
        <input id="acs-room-id"
            type="text"
            placeholder="Enter Room Id"
            style="margin-bottom:1em; width: 500px; display: block;"/>
        <button id="join-room-call-button" type="button" disabled="true">Join Room Call</button>
        <button id="hangup-call-button" type="button" disabled="true">Hang up Call</button>
        <button id="start-video-button" type="button" disabled="true">Start Video</button>
        <button id="stop-video-button" type="button" disabled="true">Stop Video</button>
        <br>
        <br>
        <div id="connectedLabel" style="color: #13bb13;" hidden>Room Call is connected!</div>
        <br>
        <div id="remoteVideosGallery" style="width: 40%;" hidden>Remote participants' video streams:</div>
        <br>
        <div id="localVideoContainer" style="width: 30%;" hidden>Local video stream:</div>
        <!-- points to the bundle generated from client.js -->
        <script src="./main.js"></script>
    </body>
</html>
Créez un fichier dans le répertoire racine de votre projet appelé index.js pour la logique d’application. Ajoutez le code suivant à index.js :
// Make sure to install the necessary dependencies
const { CallClient, VideoStreamRenderer, LocalVideoStream } = require('@azure/communication-calling');
const { AzureCommunicationTokenCredential } = require('@azure/communication-common');
const { AzureLogger, setLogLevel } = require("@azure/logger");
// Set the log level and output
setLogLevel('verbose');
AzureLogger.log = (...args) => {
    console.log(...args);
};

// Calling web sdk objects
let callAgent;
let deviceManager;
let call;
let localVideoStream;
let localVideoStreamRenderer;

// UI widgets
let userAccessToken = document.getElementById('user-access-token');
let acsRoomId = document.getElementById('acs-room-id');
let initializeCallAgentButton = document.getElementById('initialize-call-agent');
let startCallButton = document.getElementById('join-room-call-button');
let hangUpCallButton = document.getElementById('hangup-call-button');
let startVideoButton = document.getElementById('start-video-button');
let stopVideoButton = document.getElementById('stop-video-button');
let connectedLabel = document.getElementById('connectedLabel');
let remoteVideosGallery = document.getElementById('remoteVideosGallery');
let localVideoContainer = document.getElementById('localVideoContainer');

/**
 * Using the CallClient, initialize a CallAgent instance with a CommunicationUserCredential which enable us to join a rooms call.
 */
initializeCallAgentButton.onclick = async () => {
    try {
        const callClient = new CallClient();
        tokenCredential = new AzureCommunicationTokenCredential(userAccessToken.value.trim());
        callAgent = await callClient.createCallAgent(tokenCredential)
        // Set up a camera device to use.
        deviceManager = await callClient.getDeviceManager();
        await deviceManager.askDevicePermission({ video: true });
        await deviceManager.askDevicePermission({ audio: true });

        startCallButton.disabled = false;
        initializeCallAgentButton.disabled = true;
    } catch(error) {
        console.error(error);
    }
}

startCallButton.onclick = async () => {
    try {
        const localVideoStream = await createLocalVideoStream();
        const videoOptions = localVideoStream ? { localVideoStreams: [localVideoStream] } : undefined;

        const roomCallLocator = { roomId: acsRoomId.value.trim() };
        call = callAgent.join(roomCallLocator, { videoOptions });

        // Subscribe to the call's properties and events.
        subscribeToCall(call);
    } catch (error) {
        console.error(error);
    }
}

/**
 * Subscribe to a call obj.
 * Listen for property changes and collection updates.
 */
subscribeToCall = (call) => {
    try {
        // Inspect the initial call.id value.
        console.log(`Call Id: ${call.id}`);
        //Subscribe to call's 'idChanged' event for value changes.
        call.on('idChanged', () => {
            console.log(`Call Id changed: ${call.id}`);
        });

        // Inspect the initial call.state value.
        console.log(`Call state: ${call.state}`);
        // Subscribe to call's 'stateChanged' event for value changes.
        call.on('stateChanged', async () => {
            console.log(`Call state changed: ${call.state}`);
            if(call.state === 'Connected') {
                connectedLabel.hidden = false;
                startCallButton.disabled = true;
                hangUpCallButton.disabled = false;
                startVideoButton.disabled = false;
                stopVideoButton.disabled = false;
                remoteVideosGallery.hidden = false;
            } else if (call.state === 'Disconnected') {
                connectedLabel.hidden = true;
                startCallButton.disabled = false;
                hangUpCallButton.disabled = true;
                startVideoButton.disabled = true;
                stopVideoButton.disabled = true;
                remoteVideosGallery.hidden = true;
                console.log(`Call ended, call end reason={code=${call.callEndReason.code}, subCode=${call.callEndReason.subCode}}`);
            }
        });
        call.on('isLocalVideoStartedChanged', () => {
            console.log(`isLocalVideoStarted changed: ${call.isLocalVideoStarted}`);
        });
        console.log(`isLocalVideoStarted: ${call.isLocalVideoStarted}`);
        call.localVideoStreams.forEach(async (lvs) => {
            localVideoStream = lvs;
            await displayLocalVideoStream();
        });
        call.on('localVideoStreamsUpdated', e => {
            e.added.forEach(async (lvs) => {
                localVideoStream = lvs;
                await displayLocalVideoStream();
            });
            e.removed.forEach(lvs => {
               removeLocalVideoStream();
            });
        });

        // Inspect the call's current remote participants and subscribe to them.
        call.remoteParticipants.forEach(remoteParticipant => {
            subscribeToRemoteParticipant(remoteParticipant);
        });
        // Subscribe to the call's 'remoteParticipantsUpdated' event to be
        // notified when new participants are added to the call or removed from the call.
        call.on('remoteParticipantsUpdated', e => {
            // Subscribe to new remote participants that are added to the call.
            e.added.forEach(remoteParticipant => {
                subscribeToRemoteParticipant(remoteParticipant)
            });
            // Unsubscribe from participants that are removed from the call
            e.removed.forEach(remoteParticipant => {
                console.log('Remote participant removed from the call.');
            });
        });
    } catch (error) {
        console.error(error);
    }
}

/**
 * Subscribe to a remote participant obj.
 * Listen for property changes and collection updates.
 */
subscribeToRemoteParticipant = (remoteParticipant) => {
    try {
        // Inspect the initial remoteParticipant.state value.
        console.log(`Remote participant state: ${remoteParticipant.state}`);
        // Subscribe to remoteParticipant's 'stateChanged' event for value changes.
        remoteParticipant.on('stateChanged', () => {
            console.log(`Remote participant state changed: ${remoteParticipant.state}`);
        });

        // Inspect the remoteParticipants's current videoStreams and subscribe to them.
        remoteParticipant.videoStreams.forEach(remoteVideoStream => {
            subscribeToRemoteVideoStream(remoteVideoStream)
        });
        // Subscribe to the remoteParticipant's 'videoStreamsUpdated' event to be
        // notified when the remoteParticipant adds new videoStreams and removes video streams.
        remoteParticipant.on('videoStreamsUpdated', e => {
            // Subscribe to new remote participant's video streams that were added.
            e.added.forEach(remoteVideoStream => {
                subscribeToRemoteVideoStream(remoteVideoStream)
            });
            // Unsubscribe from remote participant's video streams that were removed.
            e.removed.forEach(remoteVideoStream => {
                console.log('Remote participant video stream was removed.');
            })
        });
    } catch (error) {
        console.error(error);
    }
}

/**
 * Subscribe to a remote participant's remote video stream obj.
 * You have to subscribe to the 'isAvailableChanged' event to render the remoteVideoStream. If the 'isAvailable' property
 * changes to 'true', a remote participant is sending a stream. Whenever availability of a remote stream changes
 * you can choose to destroy the whole 'Renderer', a specific 'RendererView' or keep them, but this will result in displaying blank video frame.
 */
subscribeToRemoteVideoStream = async (remoteVideoStream) => {
    let renderer = new VideoStreamRenderer(remoteVideoStream);
    let view;
    let remoteVideoContainer = document.createElement('div');
    remoteVideoContainer.className = 'remote-video-container';

    const createView = async () => {
        // Create a renderer view for the remote video stream.
        view = await renderer.createView();
        // Attach the renderer view to the UI.
        remoteVideoContainer.appendChild(view.target);
        remoteVideosGallery.appendChild(remoteVideoContainer);
    }

    // Remote participant has switched video on/off
    remoteVideoStream.on('isAvailableChanged', async () => {
        try {
            if (remoteVideoStream.isAvailable) {
                await createView();
            } else {
                view.dispose();
                remoteVideosGallery.removeChild(remoteVideoContainer);
            }
        } catch (e) {
            console.error(e);
        }
    });

    // Remote participant has video on initially.
    if (remoteVideoStream.isAvailable) {
        try {
            await createView();
        } catch (e) {
            console.error(e);
        }
    }
}

/**
 * Start your local video stream.
 * This will send your local video stream to remote participants so they can view it.
 */
startVideoButton.onclick = async () => {
    try {
        const localVideoStream = await createLocalVideoStream();
        await call.startVideo(localVideoStream);
    } catch (error) {
        console.error(error);
    }
}

/**
 * Stop your local video stream.
 * This will stop your local video stream from being sent to remote participants.
 */
stopVideoButton.onclick = async () => {
    try {
        await call.stopVideo(localVideoStream);
    } catch (error) {
        console.error(error);
    }
}

/**
 * To render a LocalVideoStream, you need to create a new instance of VideoStreamRenderer, and then
 * create a new VideoStreamRendererView instance using the asynchronous createView() method.
 * You may then attach view.target to any UI element.
 */
createLocalVideoStream = async () => {
    const camera = (await deviceManager.getCameras())[0];
    if (camera) {
        return new LocalVideoStream(camera);
    } else {
        console.error(`No camera device found on the system`);
    }
}

/**
 * Display your local video stream preview in your UI
 */
displayLocalVideoStream = async () => {
    try {
        localVideoStreamRenderer = new VideoStreamRenderer(localVideoStream);
        const view = await localVideoStreamRenderer.createView();
        localVideoContainer.hidden = false;
        localVideoContainer.appendChild(view.target);
    } catch (error) {
        console.error(error);
    }
}

/**
 * Remove your local video stream preview from your UI
 */
removeLocalVideoStream = async() => {
    try {
        localVideoStreamRenderer.dispose();
        localVideoContainer.hidden = true;
    } catch (error) {
        console.error(error);
    }
}

/**
 * End current room call
 */
hangUpCallButton.addEventListener("click", async () => {
    await call.hangUp();
});
Ajouter le code du serveur local webpack
Créez un fichier dans le répertoire racine de votre projet sous le nom webpack.config.js qui contiendra la logique de serveur local pour ce guide de démarrage rapide. Ajoutez le code suivant à webpack.config.js :
const path = require('path');
const CopyPlugin = require("copy-webpack-plugin");

module.exports = {
    mode: 'development',
    entry: './index.js',
    output: {
        filename: 'main.js',
        path: path.resolve(__dirname, 'dist'),
    },
    devServer: {
        static: {
            directory: path.join(__dirname, './')
        },
    },
    plugins: [
        new CopyPlugin({
            patterns: [
                './index.html'
            ]
        }),
    ]
};
Exécuter le code
Utilisez webpack-dev-server pour créer et exécuter votre application. Exécutez la commande suivante pour créer un bundle de l’application hôte sur un serveur web local :
`npx webpack serve --config webpack.config.js`
- Ouvrir votre navigateur et accéder à http://localhost:8080/.
- Dans le premier champ de saisie, entrez un jeton d’accès utilisateur valide.
- Cliquez sur « Initialiser l’agent d’appel » et entrez votre ID de salle.
- Cliquez sur Rejoindre l'appel de groupe.
Vous avez réussi à rejoindre un appel Rooms !
Comprendre la jonction d’un appel de salle
Tout le code que vous avez ajouté à l'application d'exemple vous a permis de démarrer et de rejoindre un appel en salle. Voici plus d'informations sur les méthodes/gestionnaires pour les salles que vous pouvez utiliser pour étendre les fonctionnalités de votre application.
Pour afficher le rôle des participants d’appel local ou distant, abonnez-vous au gestionnaire comme suit.
// Subscribe to changes for your role in a call
 const callRoleChangedHandler = () => {
 	console.log(call.role);
 };

 call.on('roleChanged', callRoleChangedHandler);

// Subscribe to role changes for remote participants
 const subscribeToRemoteParticipant = (remoteParticipant) => {
 	remoteParticipant.on('roleChanged', () => {
 	    console.log(remoteParticipant.role);
 	});
 }
Pour plus d’informations sur les rôles des participants à l’appel de salle, consultez l’API Salles pour les réunions structurées.
Implémenter l’exemple d’application
Pour implémenter le code nécessaire pour joindre des participants à un appel de salle, téléchargez à partir de GitHub l’exemple d’application Appel de salle.
Configuration du projet
Création du projet Xcode
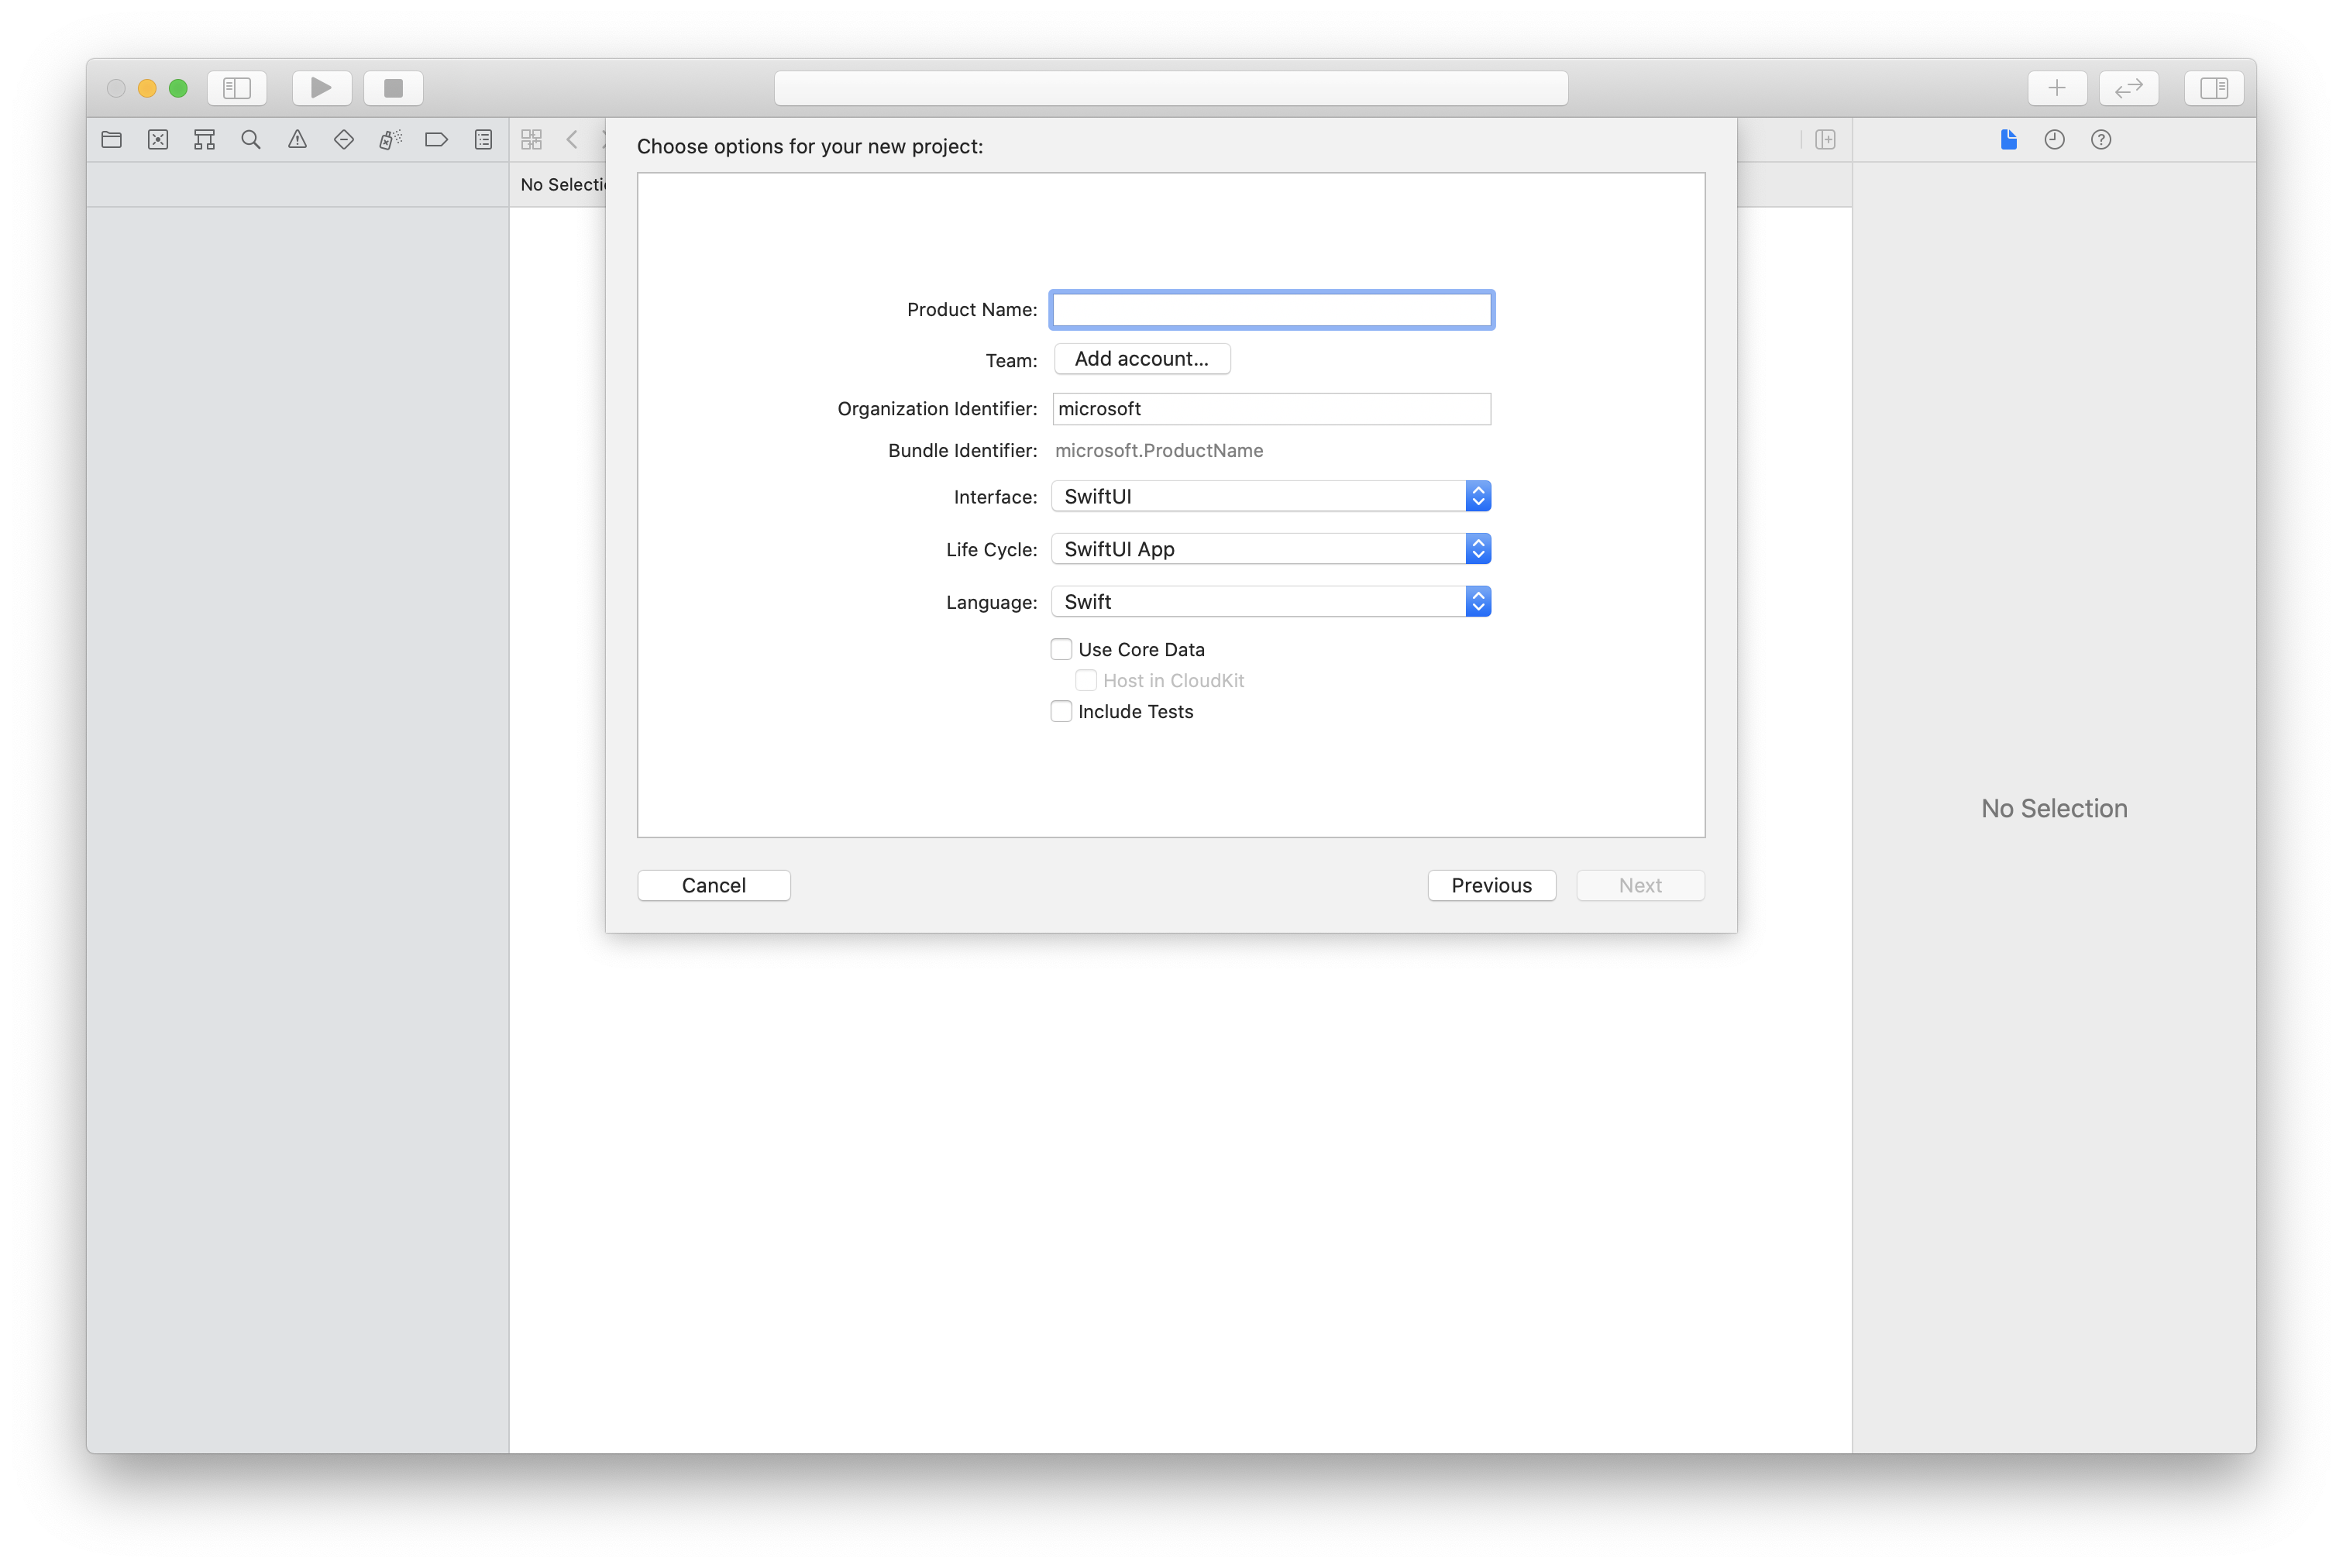
Dans Xcode, créez un projet iOS et sélectionnez le modèle Single View App. Ce tutoriel utilise le framework SwiftUI. Vous devez donc définir Swift comme langage et SwiftUI comme interface utilisateur.
Installation de CocoaPods
Utilisez ce guide pour installer CocoaPods sur votre Mac.
Installer le package et les dépendances avec CocoaPods
Pour créer un Podfile pour votre application, ouvrez le terminal et accédez au dossier du projet, puis exécutez pod init.
Ajoutez le code suivant au Podfile et enregistrez-le :
platform :ios, '13.0'
use_frameworks!

target 'roomsquickstart' do
 pod 'AzureCommunicationCalling', '~> 2.5.0'
end
Exécutez pod install.
Ouvrez le fichier
.xcworkspaceavec Xcode.
Demandez l’accès au microphone et à la caméra.
Pour accéder au microphone et à la caméra de l’appareil, vous devez mettre à jour la liste des propriétés d’informations de votre application avec NSMicrophoneUsageDescription et NSCameraUsageDescription. Définissez la valeur associée sur une chaîne à inclure dans la boîte de dialogue utilisée par le système pour demander l’accès de l’utilisateur.
Cliquez avec le bouton droit sur l’entrée Info.plist de l’arborescence du projet, puis sélectionnez Ouvrir comme > Code source. Ajoutez les lignes suivantes dans la section <dict> tout en haut, puis enregistrez le fichier.
<key>NSMicrophoneUsageDescription</key>
<string>Need microphone access for VOIP calling.</string>
<key>NSCameraUsageDescription</key>
<string>Need camera access for video calling</string>
Configurer le framework d’application
Ouvrez le fichier ContentView.swift de votre projet. Dans le fichier supérieur, ajoutez une déclaration d’importation pour importer la AzureCommunicationCalling bibliothèque et AVFoundation. Utilisez AVFoundation pour obtenir l'autorisation audio à partir du code.
import AzureCommunicationCalling
import AVFoundation
Modèle objet
Les classes et les interfaces suivantes gèrent certaines des principales fonctionnalités du kit de développement logiciel (SDK) Azure Communication Services Calling pour iOS.
| Nom | Descriptif |
|---|---|
| CallClient | CallClient est le point d’entrée principal du kit de développement logiciel (SDK) Calling. |
| CallAgent | CallAgent sert à démarrer et à gérer les appels. |
| CommunicationTokenCredential | CommunicationTokenCredential est utilisé comme informations d’identification du jeton pour instancier CallAgent. |
| CommunicationIdentifier | CommunicationIdentifier sert à représenter l’identité de l’utilisateur, qui peut avoir l’une des valeurs suivantes : CommunicationUserIdentifier/PhoneNumberIdentifier/CallingApplication. |
| RoomCallLocator | Le RoomCallLocator est utilisé par CallAgent pour joindre un appel de salle |
Créer l’agent d’appel
Remplacez l’implémentation du struct ContentView par des contrôles d’interface utilisateur simples qui permettent à un utilisateur de lancer un appel et d’y mettre fin. Nous attachons la logique métier à ces contrôles dans cet exemple.
struct ContentView: View {
 @State var roomId: String = ""
 @State var callObserver:CallObserver?
 @State var previewRenderer: VideoStreamRenderer? = nil
 @State var previewView: RendererView? = nil
 @State var sendingLocalVideo: Bool = false
 @State var speakerEnabled: Bool = false
 @State var muted: Bool = false
 @State var callClient: CallClient?
 @State var call: Call?
 @State var callHandler: CallHandler?
 @State var callAgent: CallAgent?
 @State var deviceManager: DeviceManager?
 @State var localVideoStreams: [LocalVideoStream]?
 @State var callState: String = "Unknown"
 @State var showAlert: Bool = false
 @State var alertMessage: String = ""
 @State var participants: [[Participant]] = [[]]

 var body: some View {
 NavigationView {
 ZStack {
 if (call == nil) {
 Form {
 Section {
 TextField("Room ID", text: $roomId)
 Button(action: joinRoomCall) {
 Text("Join Room Call")
 }
 }
 }
 .navigationBarTitle("Rooms Quickstart")
 } else {
 ZStack {
 VStack {
 ForEach(participants, id:\.self) { array in
 HStack {
 ForEach(array, id:\.self) { participant in
 ParticipantView(self, participant)
 }
 }
 .frame(maxWidth: .infinity, maxHeight: 200, alignment: .topLeading)
 }
 }
 .background(Color.black)
 .frame(maxWidth: .infinity, maxHeight: .infinity, alignment: .topLeading)
 VStack {
 if (sendingLocalVideo) {
 HStack {
 RenderInboundVideoView(view: $previewView)
 .frame(width:90, height:160)
 .padding(10)
 .background(Color.green)
 }
 .frame(maxWidth: .infinity, alignment: .trailing)
 }
 HStack {
 Button(action: toggleMute) {
 HStack {
 Text(muted ? "Unmute" : "Mute")
 }
 .frame(width:80)
 .padding(.vertical, 10)
 .background(Color(.lightGray))
 }
 Button(action: toggleLocalVideo) {
 HStack {
 Text(sendingLocalVideo ? "Video-Off" : "Video-On")
 }
 .frame(width:80)
 .padding(.vertical, 10)
 .background(Color(.lightGray))
 }
 }
 .frame(maxWidth: .infinity, alignment: .leading)
 .padding(.horizontal, 10)
 .padding(.vertical, 5)
 HStack {
 Button(action: leaveRoomCall) {
 HStack {
 Text("Leave Room Call")
 }
 .frame(width:80)
 .padding(.vertical, 10)
 .background(Color(.red))
 }
 }
 .frame(maxWidth: .infinity, alignment: .leading)
 .padding(.horizontal, 10)
 .padding(.vertical, 5)
 HStack {
 Text("Status:")
 Text(callState)
 }
 .padding(.vertical, 10)
 }
 .frame(maxWidth: .infinity, maxHeight: .infinity, alignment: .bottomLeading)
 }
 }
 }
 }
 .onAppear{
 // Authenticate the client
 // Initialize the CallAgent and access Device Manager
 // Ask for permissions
 }
 }
}

//Functions and Observers

struct HomePageView_Previews: PreviewProvider {
 static var previews: some View {
 HomePageView()
 }
}
Authentifier le client
Pour initialiser une instance CallAgent, nous avons besoin d’un jeton d’accès utilisateur qui permet aux participants de rejoindre des appels de salle.
Une fois que vous avez le jeton, ajoutez le code suivant au rappel onAppear dans ContentView.swift. Vous devez remplacer <USER ACCESS TOKEN> par un jeton d’accès utilisateur valide pour votre ressource :
var userCredential: CommunicationTokenCredential?
do {
 userCredential = try CommunicationTokenCredential(token: "<USER ACCESS TOKEN>")
} catch {
 print("ERROR: It was not possible to create user credential.")
 return
}
Initialiser l’instance CallAgent et accéder au Gestionnaire de périphériques
Pour créer une instance CallAgent à partir d’un CallClient, utilisez la méthode callClient.createCallAgent qui retourne un objet CallAgent de manière asynchrone une fois qu’elle est lancée. DeviceManager vous permet d’énumérer les appareils locaux qui peuvent être utilisés dans un appel pour transmettre des flux audio/vidéo. Il vous permet également de demander l’autorisation d’un utilisateur pour accéder au microphone/caméra.
self.callClient = CallClient()
self.callClient?.createCallAgent(userCredential: userCredential!) { (agent, error) in
 if error != nil {
 print("ERROR: It was not possible to create a call agent.")
 return
 } else {
 self.callAgent = agent
 print("Call agent successfully created.")
 self.callAgent!.delegate = callHandler
 self.callClient?.getDeviceManager { (deviceManager, error) in
 if (error == nil) {
 print("Got device manager instance")
 self.deviceManager = deviceManager
 } else {
 print("Failed to get device manager instance")
 }
 }
 }
}
Demander des autorisations
Nous avons besoin d’ajouter le code suivant au rappel onAppear pour demander des autorisations pour l’audio et la vidéo.
AVAudioSession.sharedInstance().requestRecordPermission { (granted) in
 if granted {
 AVCaptureDevice.requestAccess(for: .video) { (videoGranted) in
 /* NO OPERATION */
 }
 }
}
Joindre un appel de salle
Configurez la joinRoomCall méthode comme action à effectuer lorsqu’un participant sélectionne le bouton Rejoindre l’appel de salle . Dans cet exemple, les appels sont audio uniquement par défaut, mais peuvent avoir la vidéo activée une fois qu’un participant rejoint une salle.
func joinRoomCall() {
 if self.callAgent == nil {
 print("CallAgent not initialized")
 return
 }

 if (self.roomId.isEmpty) {
 print("Room ID not set")
 return
 }

 // Join a call with a Room ID
 let options = JoinCallOptions()
 let audioOptions = AudioOptions()
 audioOptions.muted = self.muted

 options.audioOptions = audioOptions

 let roomCallLocator = RoomCallLocator(roomId: roomId)
 self.callAgent!.join(with: roomCallLocator, joinCallOptions: options) { (call, error) in
 self.setCallAndObserver(call: call, error: error)
 }
}
CallObserver est utilisé pour gérer les événements durant l’appel et les participants distants. Nous définissons les observateurs dans la fonction setCallAndObserver.
func setCallAndObserver(call:Call!, error:Error?) {
 if (error == nil) {
 self.call = call
 self.callObserver = CallObserver(view:self)

 self.call!.delegate = self.callObserver

 if (self.call!.state == CallState.connected) {
 self.callObserver!.handleInitialCallState(call: call)
 }
 } else {
 print("Failed to get call object")
 }
}
Quitter un appel de salle
La leaveRoomCall méthode est définie comme action à effectuer lorsqu’un participant sélectionne le bouton Quitter l’appel de salle . La méthode gère la sortie d’un appel et nettoie toutes les ressources qui ont été créées.
private func leaveRoomCall() {
 if (self.sendingLocalVideo) {
 self.call!.stopVideo(stream: self.localVideoStreams!.first!) { (error) in
 if (error != nil) {
 print("Failed to stop video")
 } else {
 self.sendingLocalVideo = false
 self.previewView = nil
 self.previewRenderer?.dispose()
 self.previewRenderer = nil
 }
 }
 }
 self.call?.hangUp(options: nil) { (error) in }
 self.participants.removeAll()
 self.call?.delegate = nil
 self.call = nil
}
Diffusion vidéo
Lors d’un appel en salle, utilisez startVideo ou stopVideo pour commencer ou arrêter l’envoi de LocalVideoStream à des participants distants.
func toggleLocalVideo() {
 if (self.sendingLocalVideo) {
 self.call!.stopVideo(stream: self.localVideoStreams!.first!) { (error) in
 if (error != nil) {
 print("Cannot stop video")
 } else {
 self.sendingLocalVideo = false
 self.previewView = nil
 self.previewRenderer!.dispose()
 self.previewRenderer = nil
 }
 }
 } else {
 let availableCameras = self.deviceManager!.cameras
 let scalingMode:ScalingMode = .crop
 if (self.localVideoStreams == nil) {
 self.localVideoStreams = [LocalVideoStream]()
 }
 self.localVideoStreams!.append(LocalVideoStream(camera: availableCameras.first!))
 self.previewRenderer = try! VideoStreamRenderer(localVideoStream: self.localVideoStreams!.first!)
 self.previewView = try! previewRenderer!.createView(withOptions: CreateViewOptions(scalingMode:scalingMode))
 self.call!.startVideo(stream: self.localVideoStreams!.first!) { (error) in
 if (error != nil) {
 print("Cannot start video")
 }
 else {
 self.sendingLocalVideo = true
 }
 }
 }
}
Mise en sourdine de l’audio local
Pendant un appel de salle, nous pouvons utiliser mute ou unMute pour activer ou désactiver le son de notre microphone.
func toggleMute() {
 if (self.muted) {
 call!.unmuteOutgoingAudio(completionHandler: { (error) in
 if error == nil {
 self.muted = false
 }
 })
 } else {
 call!.muteOutgoingAudio(completionHandler: { (error) in
 if error == nil {
 self.muted = true
 }
 })
 }
}
Gestion des mises à jour des appels
Pour traiter les mises à jour des appels, implémentez un CallHandler pour gérer les événements de mise à jour. Placez l’implémentation suivante dans CallHandler.swift.
final class CallHandler: NSObject, CallAgentDelegate {
 public var owner: ContentView?

 private static var instance: CallHandler?
 static func getOrCreateInstance() -> CallHandler {
 if let c = instance {
 return c
 }
 instance = CallHandler()
 return instance!
 }

 private override init() {}

 public func callAgent(_ callAgent: CallAgent, didUpdateCalls args: CallsUpdatedEventArgs) {
 if let removedCall = args.removedCalls.first {
 owner?.call = nil
 }
 }
}
Nous avons besoin de créer une instance de CallHandler en ajoutant le code suivant au rappel onAppear dans ContentView.swift :
self.callHandler = CallHandler.getOrCreateInstance()
self.callHandler.owner = self
Définissez un délégué sur le CallAgent une fois que ce dernier est correctement créé :
self.callAgent!.delegate = callHandler
Gestion des participants distants
Tous les participants distants ont le RemoteParticipant type et sont disponibles via la remoteParticipants collection sur une instance d’appel. Nous pouvons implémenter une classe Participant pour gérer les mises à jour effectuées sur les flux vidéo à distance des participants distants, entre autres choses.
class Participant: NSObject, RemoteParticipantDelegate, ObservableObject {
 private var videoStreamCount = 0
 private let innerParticipant:RemoteParticipant
 private let call:Call
 private var renderedRemoteVideoStream:RemoteVideoStream?

 @Published var state:ParticipantState = ParticipantState.disconnected
 @Published var isMuted:Bool = false
 @Published var isSpeaking:Bool = false
 @Published var hasVideo:Bool = false
 @Published var displayName:String = ""
 @Published var videoOn:Bool = true
 @Published var renderer:VideoStreamRenderer? = nil
 @Published var rendererView:RendererView? = nil
 @Published var scalingMode: ScalingMode = .fit

 init(_ call: Call, _ innerParticipant: RemoteParticipant) {
 self.call = call
 self.innerParticipant = innerParticipant
 self.displayName = innerParticipant.displayName

 super.init()

 self.innerParticipant.delegate = self

 self.state = innerParticipant.state
 self.isMuted = innerParticipant.isMuted
 self.isSpeaking = innerParticipant.isSpeaking
 self.hasVideo = innerParticipant.videoStreams.count > 0
 if(self.hasVideo) {
 handleInitialRemoteVideo()
 }
 }

 deinit {
 self.innerParticipant.delegate = nil
 }

 func getMri() -> String {
 Utilities.toMri(innerParticipant.identifier)
 }

 func set(scalingMode: ScalingMode) {
 if self.rendererView != nil {
 self.rendererView!.update(scalingMode: scalingMode)
 }
 self.scalingMode = scalingMode
 }

 func handleInitialRemoteVideo() {
 renderedRemoteVideoStream = innerParticipant.videoStreams[0]
 renderer = try! VideoStreamRenderer(remoteVideoStream: renderedRemoteVideoStream!)
 rendererView = try! renderer!.createView()
 }

 func toggleVideo() {
 if videoOn {
 rendererView = nil
 renderer?.dispose()
 videoOn = false
 }
 else {
 renderer = try! VideoStreamRenderer(remoteVideoStream: innerParticipant.videoStreams[0])
 rendererView = try! renderer!.createView()
 videoOn = true
 }
 }

 func remoteParticipant(_ remoteParticipant: RemoteParticipant, didUpdateVideoStreams args: RemoteVideoStreamsEventArgs) {
 let hadVideo = hasVideo
 hasVideo = innerParticipant.videoStreams.count > 0
 if videoOn {
 if hadVideo && !hasVideo {
 // Remote user stopped sharing
 rendererView = nil
 renderer?.dispose()
 } else if hasVideo && !hadVideo {
 // remote user started sharing
 renderedRemoteVideoStream = innerParticipant.videoStreams[0]
 renderer = try! VideoStreamRenderer(remoteVideoStream: renderedRemoteVideoStream!)
 rendererView = try! renderer!.createView()
 } else if hadVideo && hasVideo {
 if args.addedRemoteVideoStreams.count > 0 {
 if renderedRemoteVideoStream?.id == args.addedRemoteVideoStreams[0].id {
 return
 }

 // remote user added a second video, so switch to the latest one
 guard let rendererTemp = renderer else {
 return
 }
 rendererTemp.dispose()
 renderedRemoteVideoStream = args.addedRemoteVideoStreams[0]
 renderer = try! VideoStreamRenderer(remoteVideoStream: renderedRemoteVideoStream!)
 rendererView = try! renderer!.createView()
 } else if args.removedRemoteVideoStreams.count > 0 {
 if args.removedRemoteVideoStreams[0].id == renderedRemoteVideoStream!.id {
 // remote user stopped sharing video that we were rendering but is sharing
 // another video that we can render
 renderer!.dispose()

 renderedRemoteVideoStream = innerParticipant.videoStreams[0]
 renderer = try! VideoStreamRenderer(remoteVideoStream: renderedRemoteVideoStream!)
 rendererView = try! renderer!.createView()
 }
 }
 }
 }
 }

 func remoteParticipant(_ remoteParticipant: RemoteParticipant, didChangeDisplayName args: PropertyChangedEventArgs) {
 self.displayName = innerParticipant.displayName
 }
}

class Utilities {
 @available(*, unavailable) private init() {}

 public static func toMri(_ id: CommunicationIdentifier?) -> String {

 if id is CommunicationUserIdentifier {
 let communicationUserIdentifier = id as! CommunicationUserIdentifier
 return communicationUserIdentifier.identifier
 } else {
 return "<nil>"
 }
 }
}
Flux vidéo des participants distants
Nous pouvons créer un ParticipantView pour gérer le rendu des diffusions de vidéo d’un participant distant. Mettre l’implémentation dans ParticipantView.swift
struct ParticipantView : View, Hashable {
 static func == (lhs: ParticipantView, rhs: ParticipantView) -> Bool {
 return lhs.participant.getMri() == rhs.participant.getMri()
 }

 private let owner: HomePageView

 @State var showPopUp: Bool = false
 @State var videoHeight = CGFloat(200)
 @ObservedObject private var participant:Participant

 var body: some View {
 ZStack {
 if (participant.rendererView != nil) {
 HStack {
 RenderInboundVideoView(view: $participant.rendererView)
 }
 .background(Color(.black))
 .frame(height: videoHeight)
 .animation(Animation.default)
 } else {
 HStack {
 Text("No incoming video")
 }
 .background(Color(.red))
 .frame(height: videoHeight)
 }
 }
 }

 func hash(into hasher: inout Hasher) {
 hasher.combine(participant.getMri())
 }

 init(_ owner: HomePageView, _ participant: Participant) {
 self.owner = owner
 self.participant = participant
 }

 func resizeVideo() {
 videoHeight = videoHeight == 200 ? 150 : 200
 }

 func showAlert(_ title: String, _ message: String) {
 DispatchQueue.main.asyncAfter(deadline: .now() + 0.1) {
 self.owner.alertMessage = message
 self.owner.showAlert = true
 }
 }
}

struct RenderInboundVideoView: UIViewRepresentable {
 @Binding var view:RendererView!

 func makeUIView(context: Context) -> UIView {
 return UIView()
 }

 func updateUIView(_ uiView: UIView, context: Context) {
 for view in uiView.subviews {
 view.removeFromSuperview()
 }
 if (view != nil) {
 uiView.addSubview(view)
 }
 }
}
S’abonner à des événements
Nous pouvons implémenter une classe CallObserver pour nous abonner à une collection d’événements afin d’être avertis quand des valeurs, telles que remoteParticipants, changent pendant l’appel.
public class CallObserver : NSObject, CallDelegate
{
 private var owner: ContentView
 private var firstTimeCallConnected: Bool = true

 init(view: ContentView) {
 owner = view
 super.init()
 }

 public func call(_ call: Call, didChangeState args: PropertyChangedEventArgs) {
 let state = CallObserver.callStateToString(state:call.state)
 owner.callState = state
 if (call.state == CallState.disconnected) {
 owner.leaveRoomCall()
 }
 else if (call.state == CallState.connected) {
 if(self.firstTimeCallConnected) {
 self.handleInitialCallState(call: call);
 }
 self.firstTimeCallConnected = false;
 }
 }

 public func handleInitialCallState(call: Call) {
 // We want to build a matrix with max 2 columns

 owner.callState = CallObserver.callStateToString(state:call.state)
 var participants = [Participant]()

 // Add older/existing participants
 owner.participants.forEach { (existingParticipants: [Participant]) in
 participants.append(contentsOf: existingParticipants)
 }
 owner.participants.removeAll()

 // Add new participants to the collection
 for remoteParticipant in call.remoteParticipants {
 let mri = Utilities.toMri(remoteParticipant.identifier)
 let found = participants.contains { (participant) -> Bool in
 participant.getMri() == mri
 }

 if !found {
 let participant = Participant(call, remoteParticipant)
 participants.append(participant)
 }
 }

 // Convert 1-D array into a 2-D array with 2 columns
 var indexOfParticipant = 0
 while indexOfParticipant < participants.count {
 var newParticipants = [Participant]()
 newParticipants.append(participants[indexOfParticipant])
 indexOfParticipant += 1
 if (indexOfParticipant < participants.count) {
 newParticipants.append(participants[indexOfParticipant])
 indexOfParticipant += 1
 }
 owner.participants.append(newParticipants)
 }
 }

 public func call(_ call: Call, didUpdateRemoteParticipant args: ParticipantsUpdatedEventArgs) {
 var participants = [Participant]()
 // Add older/existing participants
 owner.participants.forEach { (existingParticipants: [Participant]) in
 participants.append(contentsOf: existingParticipants)
 }
 owner.participants.removeAll()

 // Remove deleted participants from the collection
 args.removedParticipants.forEach { p in
 let mri = Utilities.toMri(p.identifier)
 participants.removeAll { (participant) -> Bool in
 participant.getMri() == mri
 }
 }

 // Add new participants to the collection
 for remoteParticipant in args.addedParticipants {
 let mri = Utilities.toMri(remoteParticipant.identifier)
 let found = participants.contains { (view) -> Bool in
 view.getMri() == mri
 }

 if !found {
 let participant = Participant(call, remoteParticipant)
 participants.append(participant)
 }
 }

 // Convert 1-D array into a 2-D array with 2 columns
 var indexOfParticipant = 0
 while indexOfParticipant < participants.count {
 var array = [Participant]()
 array.append(participants[indexOfParticipant])
 indexOfParticipant += 1
 if (indexOfParticipant < participants.count) {
 array.append(participants[indexOfParticipant])
 indexOfParticipant += 1
 }
 owner.participants.append(array)
 }
 }

 private static func callStateToString(state:CallState) -> String {
 switch state {
 case .connected: return "Connected"
 case .connecting: return "Connecting"
 case .disconnected: return "Disconnected"
 case .disconnecting: return "Disconnecting"
 case .none: return "None"
 default: return "Unknown"
 }
 }
}
Exécuter le code
Vous pouvez générer et exécuter votre application sur le simulateur iOS en sélectionnantExécution du > ou en utilisant le raccourci clavier ⌘-R.
La possibilité de rejoindre un appel de salle et d’afficher les rôles des participants aux appels est disponible dans le SDK Appels mobiles iOS version 2.5.0 et versions ultérieures.
Pour plus d’informations sur les rôles des participants à l’appel de salle, consultez l’API Salles pour les réunions structurées.
Implémenter l’exemple d’application
Pour implémenter le code nécessaire pour joindre des participants à un appel de salle, téléchargez à partir de GitHub l’exemple d’application Appel de salle.
Configuration du projet
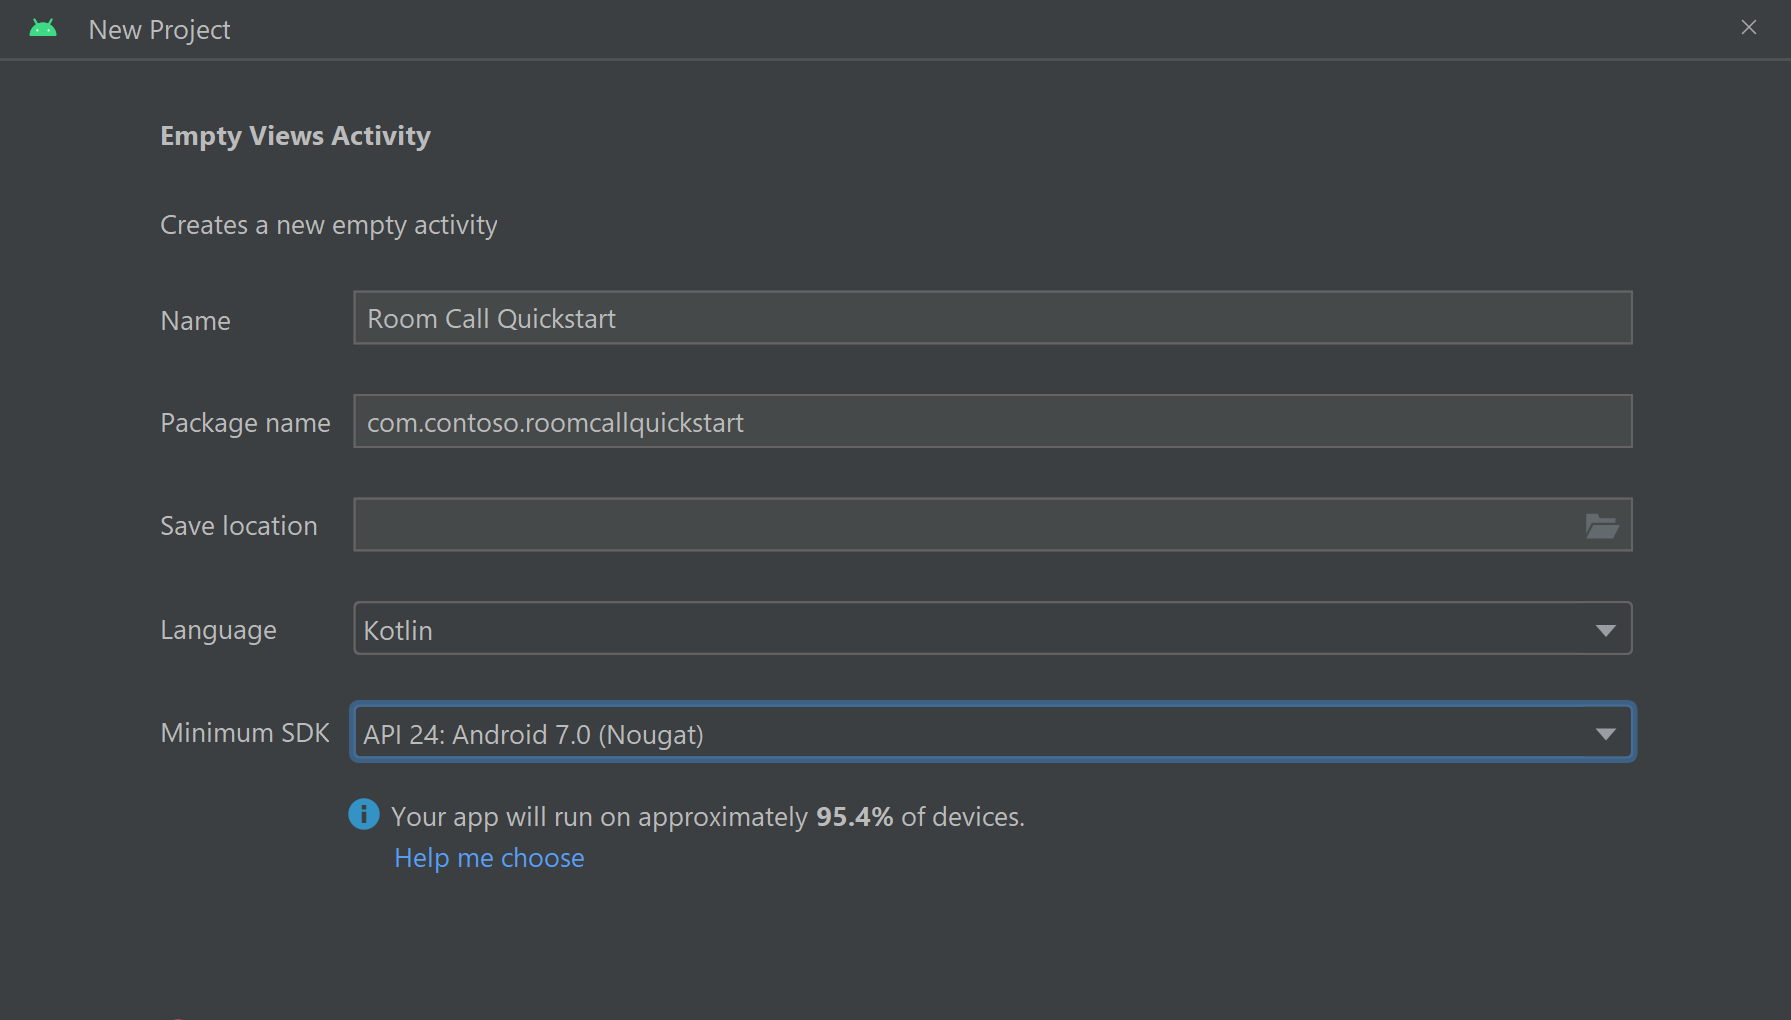
Créer une application Android avec une activité vide
Dans Android Studio, créez un projet :
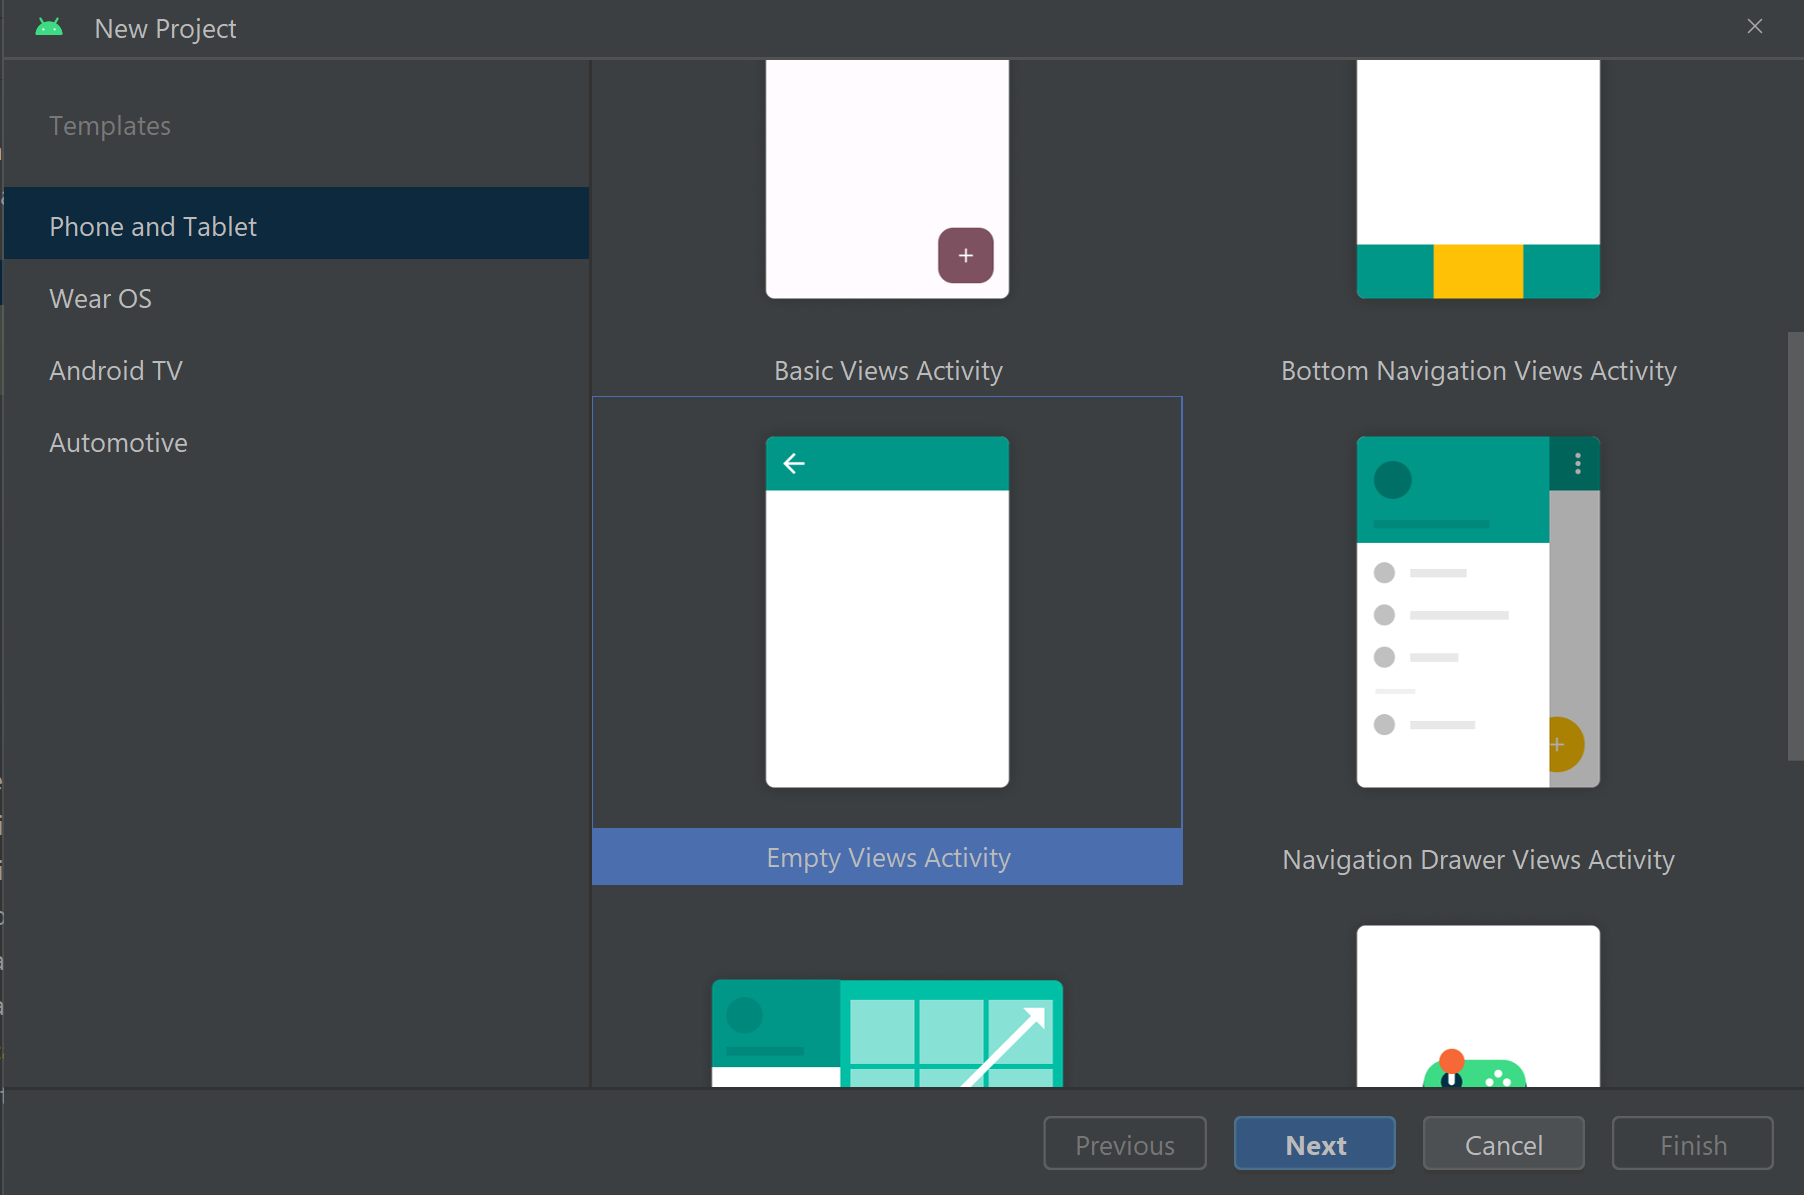
Nommez votre projet Room Call QuickStart et sélectionnez Kotlin.
Installer le package
Dans votre niveau de module build.gradle, ajoutez la ligne suivante à la section dependencies.
dependencies {
    ...
    //Ability to join a Rooms calls is available in 2.4.0 or above.
    implementation 'com.azure.android:azure-communication-calling:2.4.0'
    ...
}
Ajouter des autorisations au manifeste de l’application
Pour demander des autorisations requises pour effectuer un appel, déclarez d’abord les autorisations dans le manifeste de l’application (app/src/main/AndroidManifest.xml). Copiez ce qui suit dans votre fichier manifeste :
<?xml version="1.0" encoding="utf-8"?>
<manifest xmlns:android="http://schemas.android.com/apk/res/android">

    <uses-feature
        android:name="android.hardware.camera"
        android:required="false" />

    <uses-permission android:name="android.permission.INTERNET" />
    <uses-permission android:name="android.permission.ACCESS_NETWORK_STATE" />
    <uses-permission android:name="android.permission.ACCESS_WIFI_STATE" />
    <uses-permission android:name="android.permission.RECORD_AUDIO" />
    <uses-permission android:name="android.permission.CAMERA" />

    <application
        android:allowBackup="true"
        android:icon="@mipmap/ic_launcher"
        android:label="@string/app_name"
        android:roundIcon="@mipmap/ic_launcher_round"
        android:supportsRtl="true"
        android:theme="@style/Theme.AppTheme">

        <!--Our Calling SDK depends on the Apache HTTP SDK.
    When targeting Android SDK 28+, this library needs to be explicitly referenced.
    See https://developer.android.com/about/versions/pie/android-9.0-changes-28#apache-p-->
        <uses-library android:name="org.apache.http.legacy" android:required="false"/>
        <activity
            android:name=".MainActivity"
            android:exported="true">
            <intent-filter>
                <action android:name="android.intent.action.MAIN" />

                <category android:name="android.intent.category.LAUNCHER" />
            </intent-filter>
        </activity>
    </application>

</manifest>
Configurer la disposition de l’application
Vous avez besoin d’une entrée de texte pour l’ID de salle, d’un bouton pour passer l’appel, et d’un bouton supplémentaire pour raccrocher.
Ouvrez le app/src/main/res/layout/activity_main.xml fichier et remplacez le contenu du fichier par le code suivant :
<?xml version="1.0" encoding="utf-8"?>
<androidx.constraintlayout.widget.ConstraintLayout
    xmlns:android="http://schemas.android.com/apk/res/android"
    xmlns:app="http://schemas.android.com/apk/res-auto"
    xmlns:tools="http://schemas.android.com/tools"
    android:layout_width="match_parent"
    android:layout_height="match_parent"
    tools:context=".MainActivity">

    <TextView
        android:id="@+id/text_role"
        android:layout_width="wrap_content"
        android:layout_height="wrap_content"
        android:text="Role:"
        android:textSize="16sp"
        android:textStyle="bold"
        app:layout_constraintTop_toTopOf="parent"
        app:layout_constraintStart_toStartOf="parent"
        app:layout_constraintEnd_toEndOf="parent"
        android:layout_marginTop="16dp" />

    <TextView
        android:id="@+id/text_call_status"
        android:layout_width="wrap_content"
        android:layout_height="wrap_content"
        android:text="Call Status"
        android:textSize="16sp"
        android:textStyle="bold"
        app:layout_constraintTop_toTopOf="parent"
        app:layout_constraintStart_toStartOf="parent"
        app:layout_constraintEnd_toEndOf="parent"
        android:layout_marginTop="48dp" />

    <EditText
        android:id="@+id/room_id"
        android:layout_width="match_parent"
        android:layout_height="wrap_content"
        android:ems="10"
        android:hint="Room ID"
        android:inputType="textPersonName"
        android:layout_marginTop="100dp"
        android:layout_marginHorizontal="20dp"
        app:layout_constraintTop_toTopOf="parent"
        app:layout_constraintStart_toStartOf="parent"
        app:layout_constraintEnd_toEndOf="parent" />

    <LinearLayout
        android:layout_width="match_parent"
        android:layout_height="wrap_content"
        android:layout_marginBottom="260dp"
        android:gravity="center"
        app:layout_constraintBottom_toBottomOf="parent"
        app:layout_constraintEnd_toEndOf="parent"
        app:layout_constraintStart_toStartOf="parent">

        <Button
            android:id="@+id/call_button"
            android:layout_width="wrap_content"
            android:layout_marginEnd="32dp"
            android:layout_height="wrap_content"
            android:text="Start Call" />

        <Button
            android:id="@+id/hangup_button"
            android:layout_width="wrap_content"
            android:layout_height="wrap_content"
            android:text="Hangup" />

    </LinearLayout>

</androidx.constraintlayout.widget.ConstraintLayout>
Créer l’activité principale
Une fois la disposition créée, vous pouvez ajouter la logique pour démarrer un appel de salle. L’activité gère la demande d’autorisations d’exécution, la création de l’agent d’appel et le placement de l’appel lorsqu’un participant appuie sur le bouton.
La méthode onCreate appelle getAllPermissions et createAgent, et ajoute les liaisons pour le bouton d’appel.
Cet événement ne se produit qu’une seule fois lors de la création de l’activité. Pour plus d’informations sur onCreate, consultez Comprendre le cycle de vie de l’activité.
Ouvrez le MainActivity.kt fichier et remplacez le contenu par le code suivant :
package com.contoso.roomscallquickstart

import android.Manifest
import android.annotation.SuppressLint
import android.content.pm.PackageManager
import android.media.AudioManager
import android.os.Bundle
import android.widget.Button
import android.widget.EditText
import android.widget.TextView
import android.widget.Toast
import androidx.appcompat.app.AppCompatActivity
import androidx.core.app.ActivityCompat
import com.azure.android.communication.calling.Call
import com.azure.android.communication.calling.CallAgent
import com.azure.android.communication.calling.CallClient
import com.azure.android.communication.calling.HangUpOptions
import com.azure.android.communication.calling.JoinCallOptions
import com.azure.android.communication.calling.RoomCallLocator
import com.azure.android.communication.common.CommunicationTokenCredential
import java.util.concurrent.ExecutionException

class MainActivity : AppCompatActivity() {
    private val allPermissions = arrayOf(
        Manifest.permission.RECORD_AUDIO,
        Manifest.permission.CAMERA,
        Manifest.permission.READ_PHONE_STATE
    )

    private val userToken = "<ACS_USER_TOKEN>"
    private lateinit var callAgent: CallAgent
    private var call: Call? = null

    private lateinit var roleTextView: TextView
    private lateinit var statusView: TextView

    override fun onCreate(savedInstanceState: Bundle?) {
        super.onCreate(savedInstanceState)
        setContentView(R.layout.activity_main)

        getAllPermissions()
        createCallAgent()

        val callButton: Button = findViewById(R.id.call_button)
        callButton.setOnClickListener { startCall() }

        val hangupButton: Button = findViewById(R.id.hangup_button)
        hangupButton.setOnClickListener { endCall() }

        roleTextView = findViewById(R.id.text_role)
        statusView = findViewById(R.id.text_call_status)

        volumeControlStream = AudioManager.STREAM_VOICE_CALL
    }

    /**
     * Start a call
     */
    private fun startCall() {
        if (userToken.startsWith("<")) {
            Toast.makeText(this, "Please enter token in source code", Toast.LENGTH_SHORT).show()
            return
        }

        val roomIdView: EditText = findViewById(R.id.room_id)
        val roomId = roomIdView.text.toString()
        if (roomId.isEmpty()) {
            Toast.makeText(this, "Please enter room ID", Toast.LENGTH_SHORT).show()
            return
        }

        val joinCallOptions = JoinCallOptions()

        val roomCallLocator = RoomCallLocator(roomId)
        call = callAgent.join(applicationContext, roomCallLocator, joinCallOptions)

        call?.addOnStateChangedListener { setCallStatus(call?.state.toString()) }

        call?.addOnRoleChangedListener { setRoleText(call?.callParticipantRole.toString()) }
    }

    /**
     * Ends the call previously started
     */
    private fun endCall() {
        try {
            call?.hangUp(HangUpOptions())?.get()
        } catch (e: ExecutionException) {
            Toast.makeText(this, "Unable to hang up call", Toast.LENGTH_SHORT).show()
        }
    }

    /**
     * Create the call callAgent
     */
    private fun createCallAgent() {
            try {
                val credential = CommunicationTokenCredential(userToken)
                callAgent = CallClient().createCallAgent(applicationContext, credential).get()
            } catch (ex: Exception) {
                Toast.makeText(
                    applicationContext,
                    "Failed to create call callAgent.",
                    Toast.LENGTH_SHORT
                ).show()
            }
    }

    /**
     * Request each required permission if the app doesn't already have it.
     */
    private fun getAllPermissions() {
        val permissionsToAskFor = mutableListOf<String>()
        for (permission in allPermissions) {
            if (ActivityCompat.checkSelfPermission(this, permission) != PackageManager.PERMISSION_GRANTED) {
                permissionsToAskFor.add(permission)
            }
        }
        if (permissionsToAskFor.isNotEmpty()) {
            ActivityCompat.requestPermissions(this, permissionsToAskFor.toTypedArray(), 1)
        }
    }

    /**
     * Ensure all permissions were granted, otherwise inform the user permissions are missing.
     */
    override fun onRequestPermissionsResult(
        requestCode: Int,
        permissions: Array<out String>,
        grantResults: IntArray
    ) {
        super.onRequestPermissionsResult(requestCode, permissions, grantResults)
        var allPermissionsGranted = true
        for (result in grantResults) {
            allPermissionsGranted = allPermissionsGranted && (result == PackageManager.PERMISSION_GRANTED)
        }
        if (!allPermissionsGranted) {
            Toast.makeText(this, "All permissions are needed to make the call.", Toast.LENGTH_LONG).show()
            finish()
        }
    }

    @SuppressLint("SetTextI18n")
    private fun setCallStatus(status: String?) {
        runOnUiThread {
            statusView.text = "Call Status: $status"
        }
    }
    @SuppressLint("SetTextI18n")
    private fun setRoleText(role: String?) {
        runOnUiThread {
            roleTextView.text = "Role: $role"
        }
    }
}
Remarque
Lors de la conception de votre application, tenez compte du moment où vous devez demander ces autorisations. Nous vous recommandons de demander des autorisations uniquement si nécessaire. Pour plus d’informations, consultez le Guide des autorisations Android.
Exécuter votre projet
Avant d’exécuter votre projet, remplacez <ACS_USER_TOKEN> dans MainActivity.kt par votre jeton d’accès utilisateur Azure Communication Services.
private val userToken = "<ACS_USER_TOKEN>"
Exécutez le projet sur un émulateur ou un appareil physique.
Recherchez le champ pour entrer votre identifiant de salle et un bouton pour démarrer l'appel en salle. Entrez votre ID de salle et vérifiez que l'état de l'appel a changé ainsi que votre rôle.
Comprendre la jonction d’un appel de salle
Tout le code que vous avez ajouté dans l’application vous permet de démarrer et de rejoindre un appel de salle. Nous devons explorer en profondeur le fonctionnement général et les autres méthodes et gestionnaires auxquels vous pouvez accéder pour les Salles.
Les appels de salle sont joints par le biais de CallAgent, qui est créé avec un jeton d’utilisateur valide :
private fun createCallAgent() {
    try {
        val credential = CommunicationTokenCredential(userToken)
        callAgent = CallClient().createCallAgent(applicationContext, credential).get()
    } catch (ex: Exception) {
        Toast.makeText(
            applicationContext,
            "Failed to create call callAgent.",
            Toast.LENGTH_SHORT
        ).show()
    }
}
Les participants peuvent utiliser CallAgent et RoomCallLocator pour joindre un appel de salon en utilisant la méthode CallAgent.join qui retourne un objet Call :
 val joinCallOptions = JoinCallOptions()
 val roomCallLocator = RoomCallLocator(roomId)
 call = callAgent.join(applicationContext, roomCallLocator, joinCallOptions)
Vous pouvez personnaliser davantage le fichier MainActivity.kt en vous abonnant aux événements Call pour recevoir des mises à jour.
call.addOnRemoteParticipantsUpdatedListener { args: ParticipantsUpdatedEvent? ->
    handleRemoteParticipantsUpdate(
        args!!
    )
}

call.addOnStateChangedListener { args: PropertyChangedEvent? ->
    this.handleCallOnStateChanged(
        args!!
    )
}
Vous pouvez étendre MainActivity.kt pour afficher le rôle des participants d’appel local ou distant à l’aide de ces méthodes et gestionnaires :
// Get your role in the call
call.getCallParticipantRole();

// Subscribe to changes for your role in a call
private void isCallRoleChanged(PropertyChangedEvent propertyChangedEvent) {
    // handle self-role change
}

call.addOnRoleChangedListener(isCallRoleChanged);

// Subscribe to role changes for remote participants
private void isRoleChanged(PropertyChangedEvent propertyChangedEvent) {
    // handle remote participant role change
}

remoteParticipant.addOnRoleChangedListener(isRoleChanged);

// Get role of the remote participant
remoteParticipant.getCallParticipantRole();
La possibilité de rejoindre un appel de salle et d’afficher les rôles des participants aux appels est disponible dans le SDK Android Appels mobiles version 2.4.0 et versions ultérieures.
Pour plus d’informations sur les rôles des participants à l’appel de salle, consultez l’API Salles pour les réunions structurées.
Implémenter l’exemple d’application
Pour rejoindre un appel de salle, configurez votre application Windows en suivant le guide Ajouter un appel vidéo à votre application cliente.
Alternativement, pour implémenter le code nécessaire afin de joindre les participants à un appel de réunion, téléchargez l'exemple d'application Appel de réunion à partir de GitHub.
Créez un callAgent avec un jeton d’utilisateur valide :
var creds = new CallTokenCredential("<user-token>");

CallAgentOptions callAgentOptions = new CallAgentOptions();
callAgentOptions.DisplayName = "<display-name>";
callAgent = await callClient.CreateCallAgentAsync(creds, callAgentOptions);
Utilisez les éléments callAgent et RoomCallLocator pour rejoindre un appel de salle. La méthode CallAgent.JoinAsync retourne un objet CommunicationCall.
RoomCallLocator roomCallLocator = new RoomCallLocator('<RoomId>');

CommunicationCall communicationCall = await callAgent.JoinAsync(roomCallLocator, joinCallOptions);
Abonnez-vous aux événements CommunicationCall pour obtenir les mises à jour :
private async void CommunicationCall_OnStateChanged(object sender, PropertyChangedEventArgs args) {
	var call = sender as CommunicationCall;
	if (sender != null)
	{
		switch (call.State){
			// Handle changes in call state
		}
	}
}
Pour afficher le rôle des participants aux appels, abonnez-vous aux modifications de rôles :
private void RemoteParticipant_OnRoleChanged(object sender, Azure.Communication.Calling.WindowsClient.PropertyChangedEventArgs args)
{
    _ = Windows.ApplicationModel.Core.CoreApplication.MainView.CoreWindow.Dispatcher.RunAsync(CoreDispatcherPriority.Normal, () =>
    {
        System.Diagnostics.Trace.WriteLine("Raising Role change, new Role: " + remoteParticipant_.Role);
        PropertyChanged(this, new System.ComponentModel.PropertyChangedEventArgs("RemoteParticipantRole"));
    });
}
La possibilité de rejoindre un appel de salle et d’afficher les rôles des participants aux appels est disponible dans la version Windows NuGet 1.1.0 et versions ultérieures.
Pour plus d’informations sur les rôles des participants à l’appel de salle, consultez l’API Salles pour les réunions structurées.
Étapes suivantes
Dans cette section, vous avez appris à :
- Ajouter un appel vidéo à votre application
- Passez l’identificateur de salle au Kit de développement logiciel (SDK) appelant
- Rejoindre un appel de salle à partir de votre application
Vous souhaiterez peut-être également :
- En savoir plus sur le concept de salles
- En savoir plus sur les concepts d’appel vocal et vidéo
- Découvrir les concepts d’authentification