Set up a PlayFab subscription that can be purchased from the Apple App Store
Note
IOS Subscription Redemption is currently in Private Preview. For access to this feature, send an email to PFEconomyPreviews@microsoft.com with the subject PlayFab Mobile Subscriptions along with your PlayFab Title ID and we will enable the feature in your environment.
This tutorial shows you how to successfully create a PlayFab subscription, add it to your game in the Apple App Store for players to purchase, and how to redeem the items contained in it.
Prerequisites
- A Title in PlayFab Game Manager.
- An existing integration between the selected Title in PlayFab and the Apple App Store.
- Access to App Store Connect.
- An app already created in the App Store Connect.
- An In-App Purchase created within your App in the App Store Connect. Your In-App Purchase should include Pricing and Localization.
- A Payment Queue with its corresponding Transaction Observer already part of your app.
Step 1: Create test users
In order for you to properly test a purchase without incurring in real-money payments, start by creating a test user for your app.
Navigate to the App Store Connect > Users and Access.
Select Sandbox.

Select the plus sign (+) button next to Test Accounts.
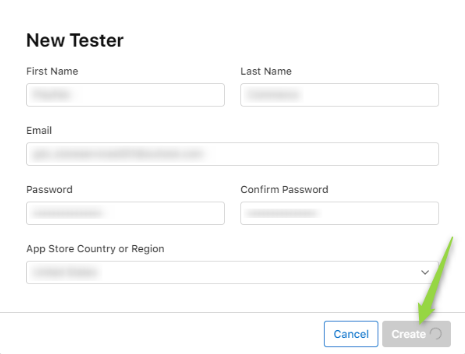
Fill the form and select Create.
Step 2: Create a Subscription in Game Manager
Note
Before creating a subscription in Game Manager, ensure that you have already created and published the items you want to add to the bundle in your Catalog. In this tutorial, we assume that you have already created a PlayFab catalog item called the Super Awesome Sword. If you need guidance on how to create an item, please refer to this step.
Go to Game Manager and navigate to your Title.
From the left navigation menu, choose Engage > Economy.
Select the Subscriptions .

Select New Subscription.
Add any information you want to the Subscription, such as items and prices. In this tutorial, use The Super Awesome Sword Subscription as the name.
Scroll down to the end of the page and select Save and publish if you want it to be redeemable by players right away. Select "Save as draft" if you want to publish it at a later date.

Add an item to your Subscription
A subscription by itself doesn't grant access of any items to a player. We need to link items to it so that the player inventory is aware of what items that player has access.
To add items to your subscription, follow these steps:
- Go to the Items section in edit mode.
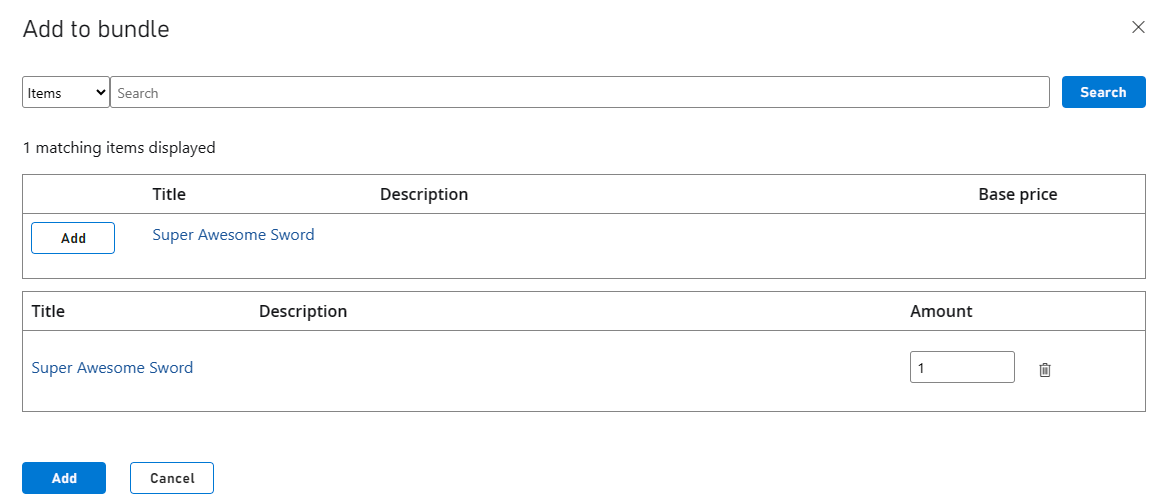
- Select Add. A window appears showing all your catalog items.
- You can filter by type or search for a specific item.
- Find our Super Awesome Sword and select Add next to it.
- Finally, select the Add button at the bottom.
This adds the item to your subscription.
Step 3: Enable marketplace mapping
To ensure that, when a player purchases a subscription from your app, it gets properly purchased and assigned in Game Manager, you must configure the Marketplace Mapping. This can be done while creating your subscription in Game Manager or by going back to the subsription in Edit mode after it has been created.
- Navigate to your subsription in edit mode.
- Scroll down to the Marketplace Mapping section.
- From the Marketplace dropdown, select your desired marketplace. (For this tutorial, it's AppleAppStore).
- For your Marketplace ID, make sure to use the same as your Product ID in the App Store Connect. In this tutorial, we used pf.commerce.ios.sas1.
- To finish, select the + at the right side of that row and Save your changes.

Step 4: Make a purchase
Tip
To find out more about this topic, see In-App Purchases.
For an overview on how to configure In-App Purchases, see Apple's Developer Documentation.
Now you have your IAP created in the App Store Connect, your Subscription configured with Item(s) in Game Manager, and the Marketplace Mapping of your Subscription set up. Let's move on to purchasing the subscription from your App.
After you have your IAP item exposed and purchasable from your app, you can use the Test User we created in Step 1 to purchase your IAP on your app. Once this is complete, Apple's API should return a receipt which you have to then use with PlayFab's redemption API to validate the purchase and ensure access to the subscription to the player.
Step 5: Redeem your In-App Purchase
Once your get your receipt from Apple's API, you must use PlayFab's RedeemAppleAppStoreInventoryItems API call to successfully redeem your IAP. In this case, it should grant the The Super Awesome Sword Subscription to the authenticated player, which then grants access to the Super Awesome Sword catalog item.
Check both IDs are matching
Before making your redemption call, you must ensure that both the Alternate ID you used in Game Manager for your marketplace mapping, matches the Product ID in the App Store Connect.
The following screenshot is from within your bundle in Game Manager, the Marketplace ID is what we call the AlternateId, basically it's another way of identifying your bundle.
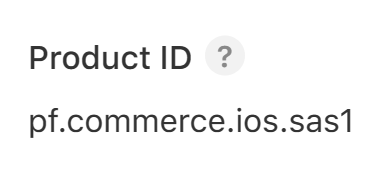
From the App Store Connect, go to My Apps, select your desired app, then navigate to Features > In-App Purchases from the left navigation menu, finally, select your IAP, and from the IAP metadata you see the Product ID.
Get the player authenticated
To redeem an item, use RedeemAppleAppStoreInventoryItems. But before that, we must ensure that the player looking to redeem the item(s) gets properly authenticated in your app, for which you use the LoginWithApple.
After a successful LoginWithApple call, PlayFab's API returns an EntityToken that you have to use as part of your RedeemAppleAppStoreInventoryItems headers with a X-EntityToken key. Which would look like this if you're using an API platform to test.

Make the redemption call
With your player authenticated, both your IDs checked and matching, and your receipt from the app purchase made by your player. You're ready to make the redemption call. For this, use the RedeemAppleAppStoreInventoryItems API call.
{
    "Receipt": "{Your receipt}"
}
The redemption call has only a single value and that's the receipt returned by Apple after a successful purchase of your IAP.
A successful response would include a 200 status code alongside data such as a timestamp and a MarketplaceTransactionId.
After a successful redemption call is executed, you should be able to see a Super Awesome Sword in your authenticated player's inventory.
See also
Commentaires
Bientôt disponible : Tout au long de l’année 2024, nous abandonnerons progressivement le mécanisme de retour d’information GitHub Issues pour le remplacer par un nouveau système de commentaires. Pour plus d’informations, consultez : https://aka.ms/ContentUserFeedback.
Soumettre et afficher des commentaires pour