Set up Omnichannel for Customer Service live chat
In this exercise, you set up live chat for Omnichannel for Dynamics 365 Customer Service. Omnichannel for Customer Service offers a suite of capabilities that extend the power of Dynamics 365 Customer Service Enterprise. With these capabilities, organizations can instantly connect and engage with customers across digital messaging channels.
In this exercise, you complete the following tasks:
Assign the Omnichannel agent security role to your user and the bot user.
Create an application user with the MCH Application ID and your bot ID.
Set up queues for bot and agent users.
Set up a workstream to define a chat channel with a context variable and routing rule to route the message to a bot or an agent.
Task: Assign the Omnichannel agent security role
To assign the Omnichannel agent security role, follow these steps:
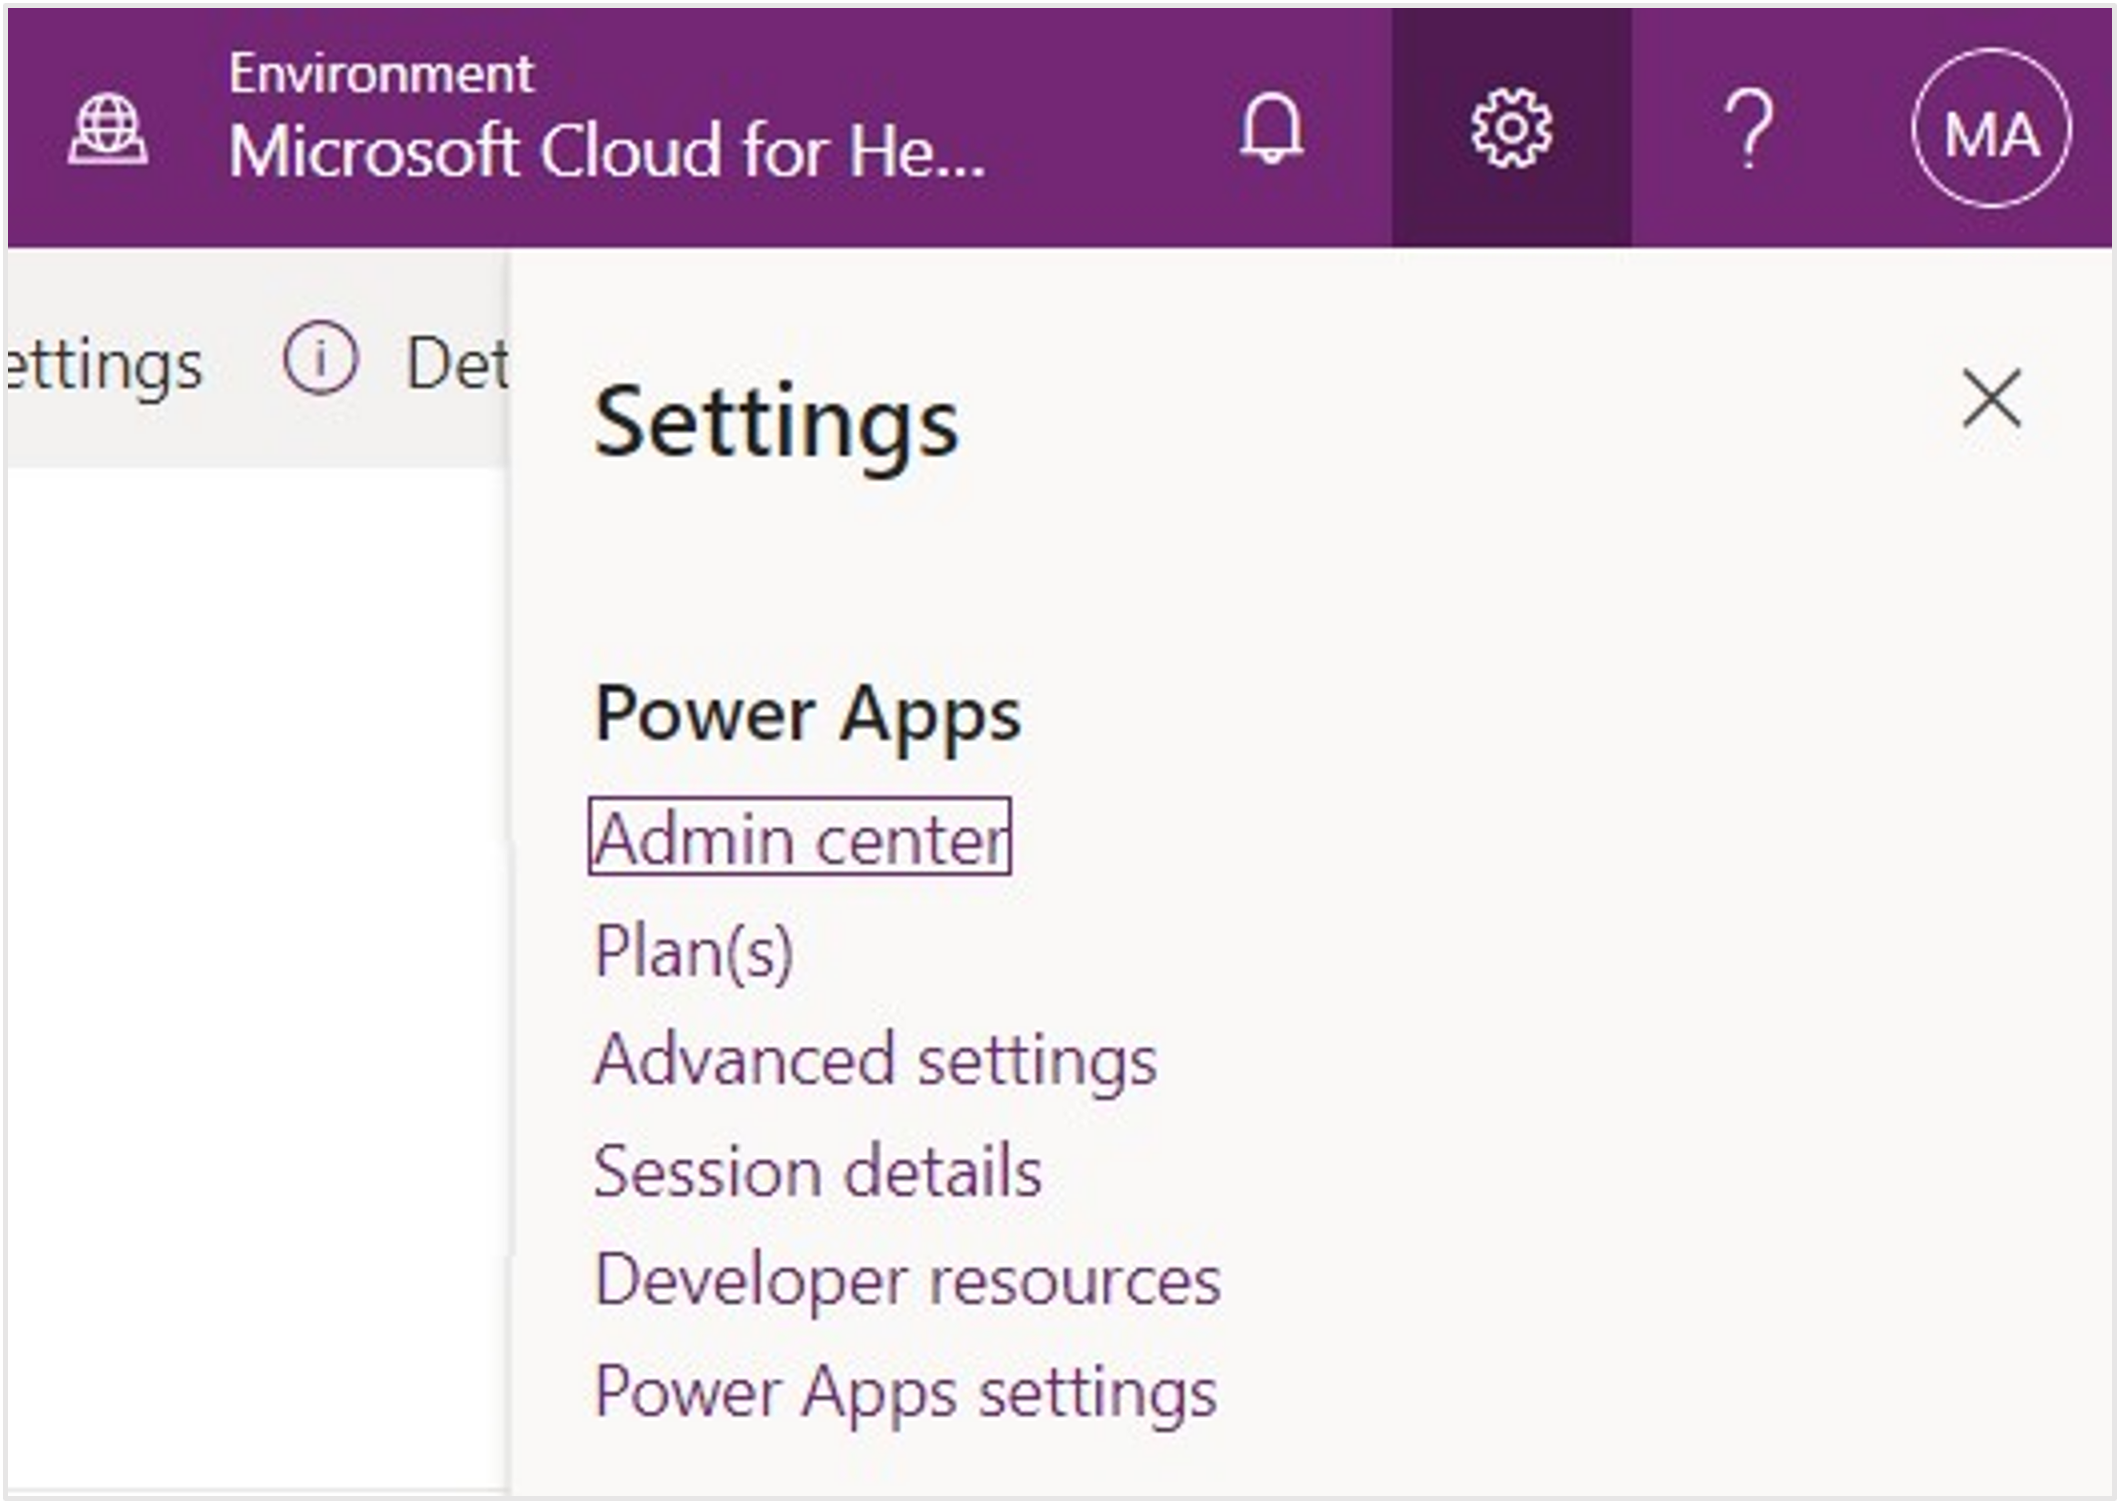
While in an InPrivate or Incognito browser, go to Microsoft Power Apps.
Select your environment from the Environment dropdown menu in the upper right.
Select the gear icon in the upper-right corner and then select Advanced settings.
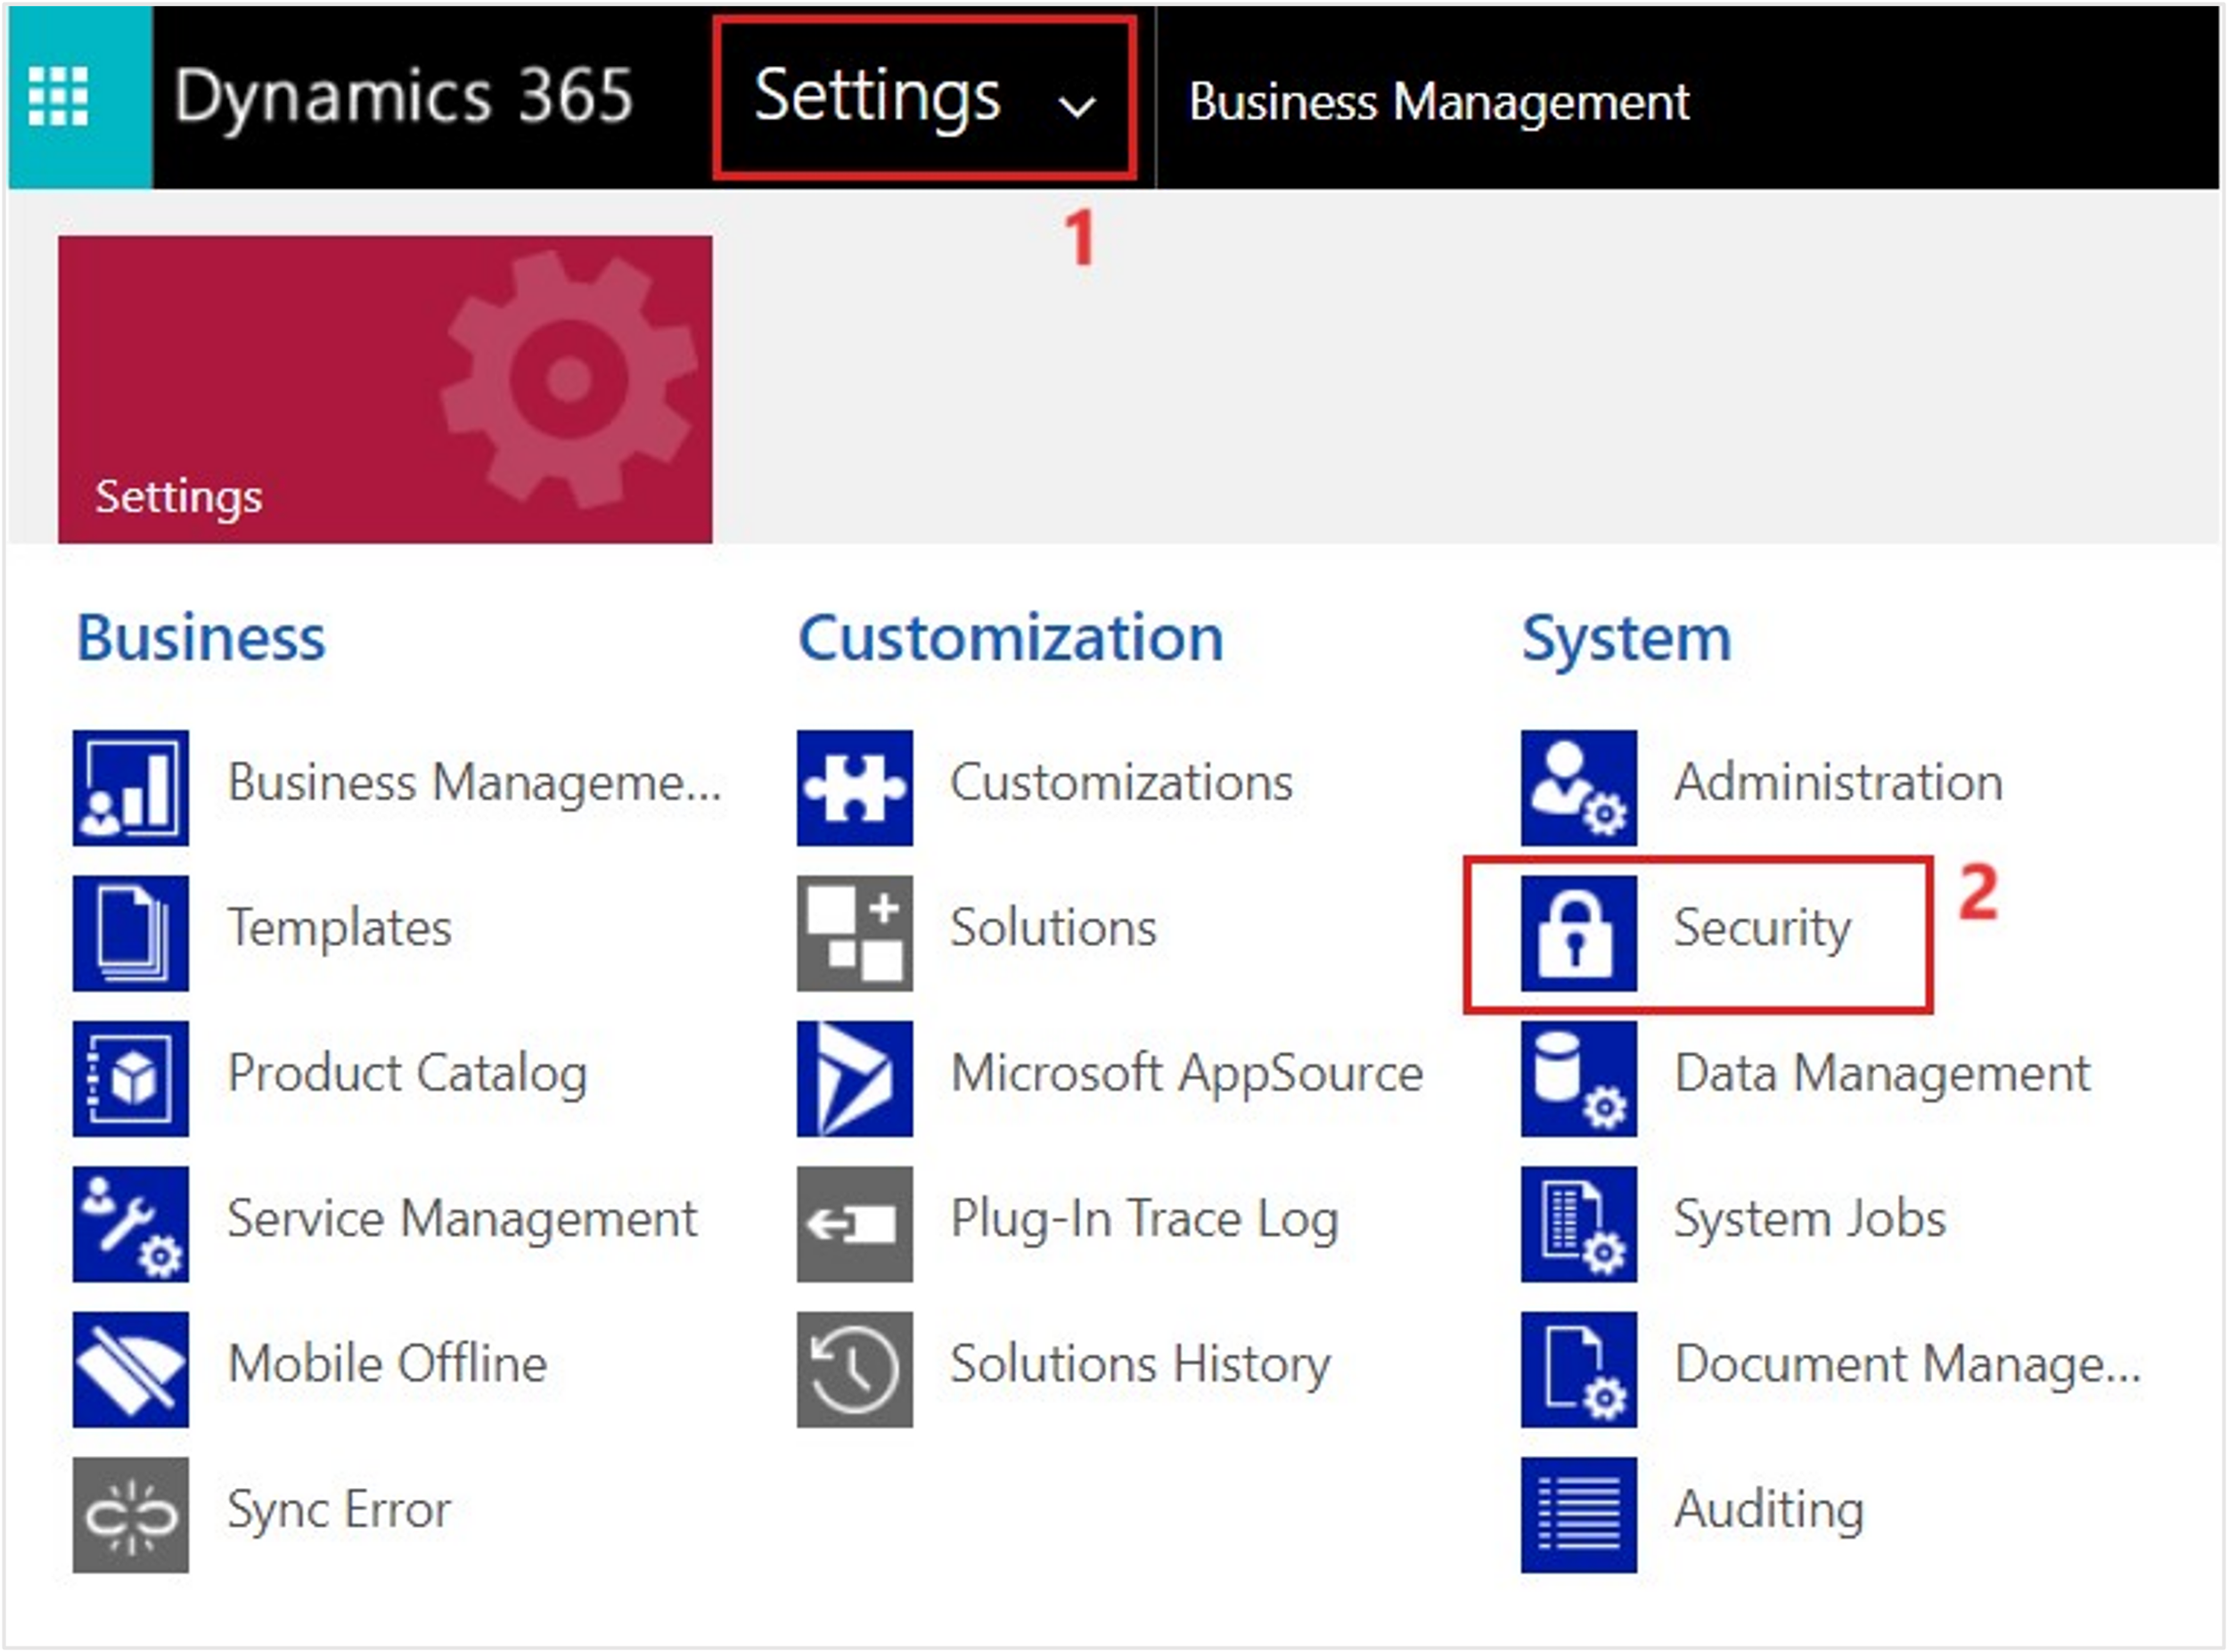
A new window should open showing the Business Management section of Dynamics 365. If loading takes a while, reload the page.
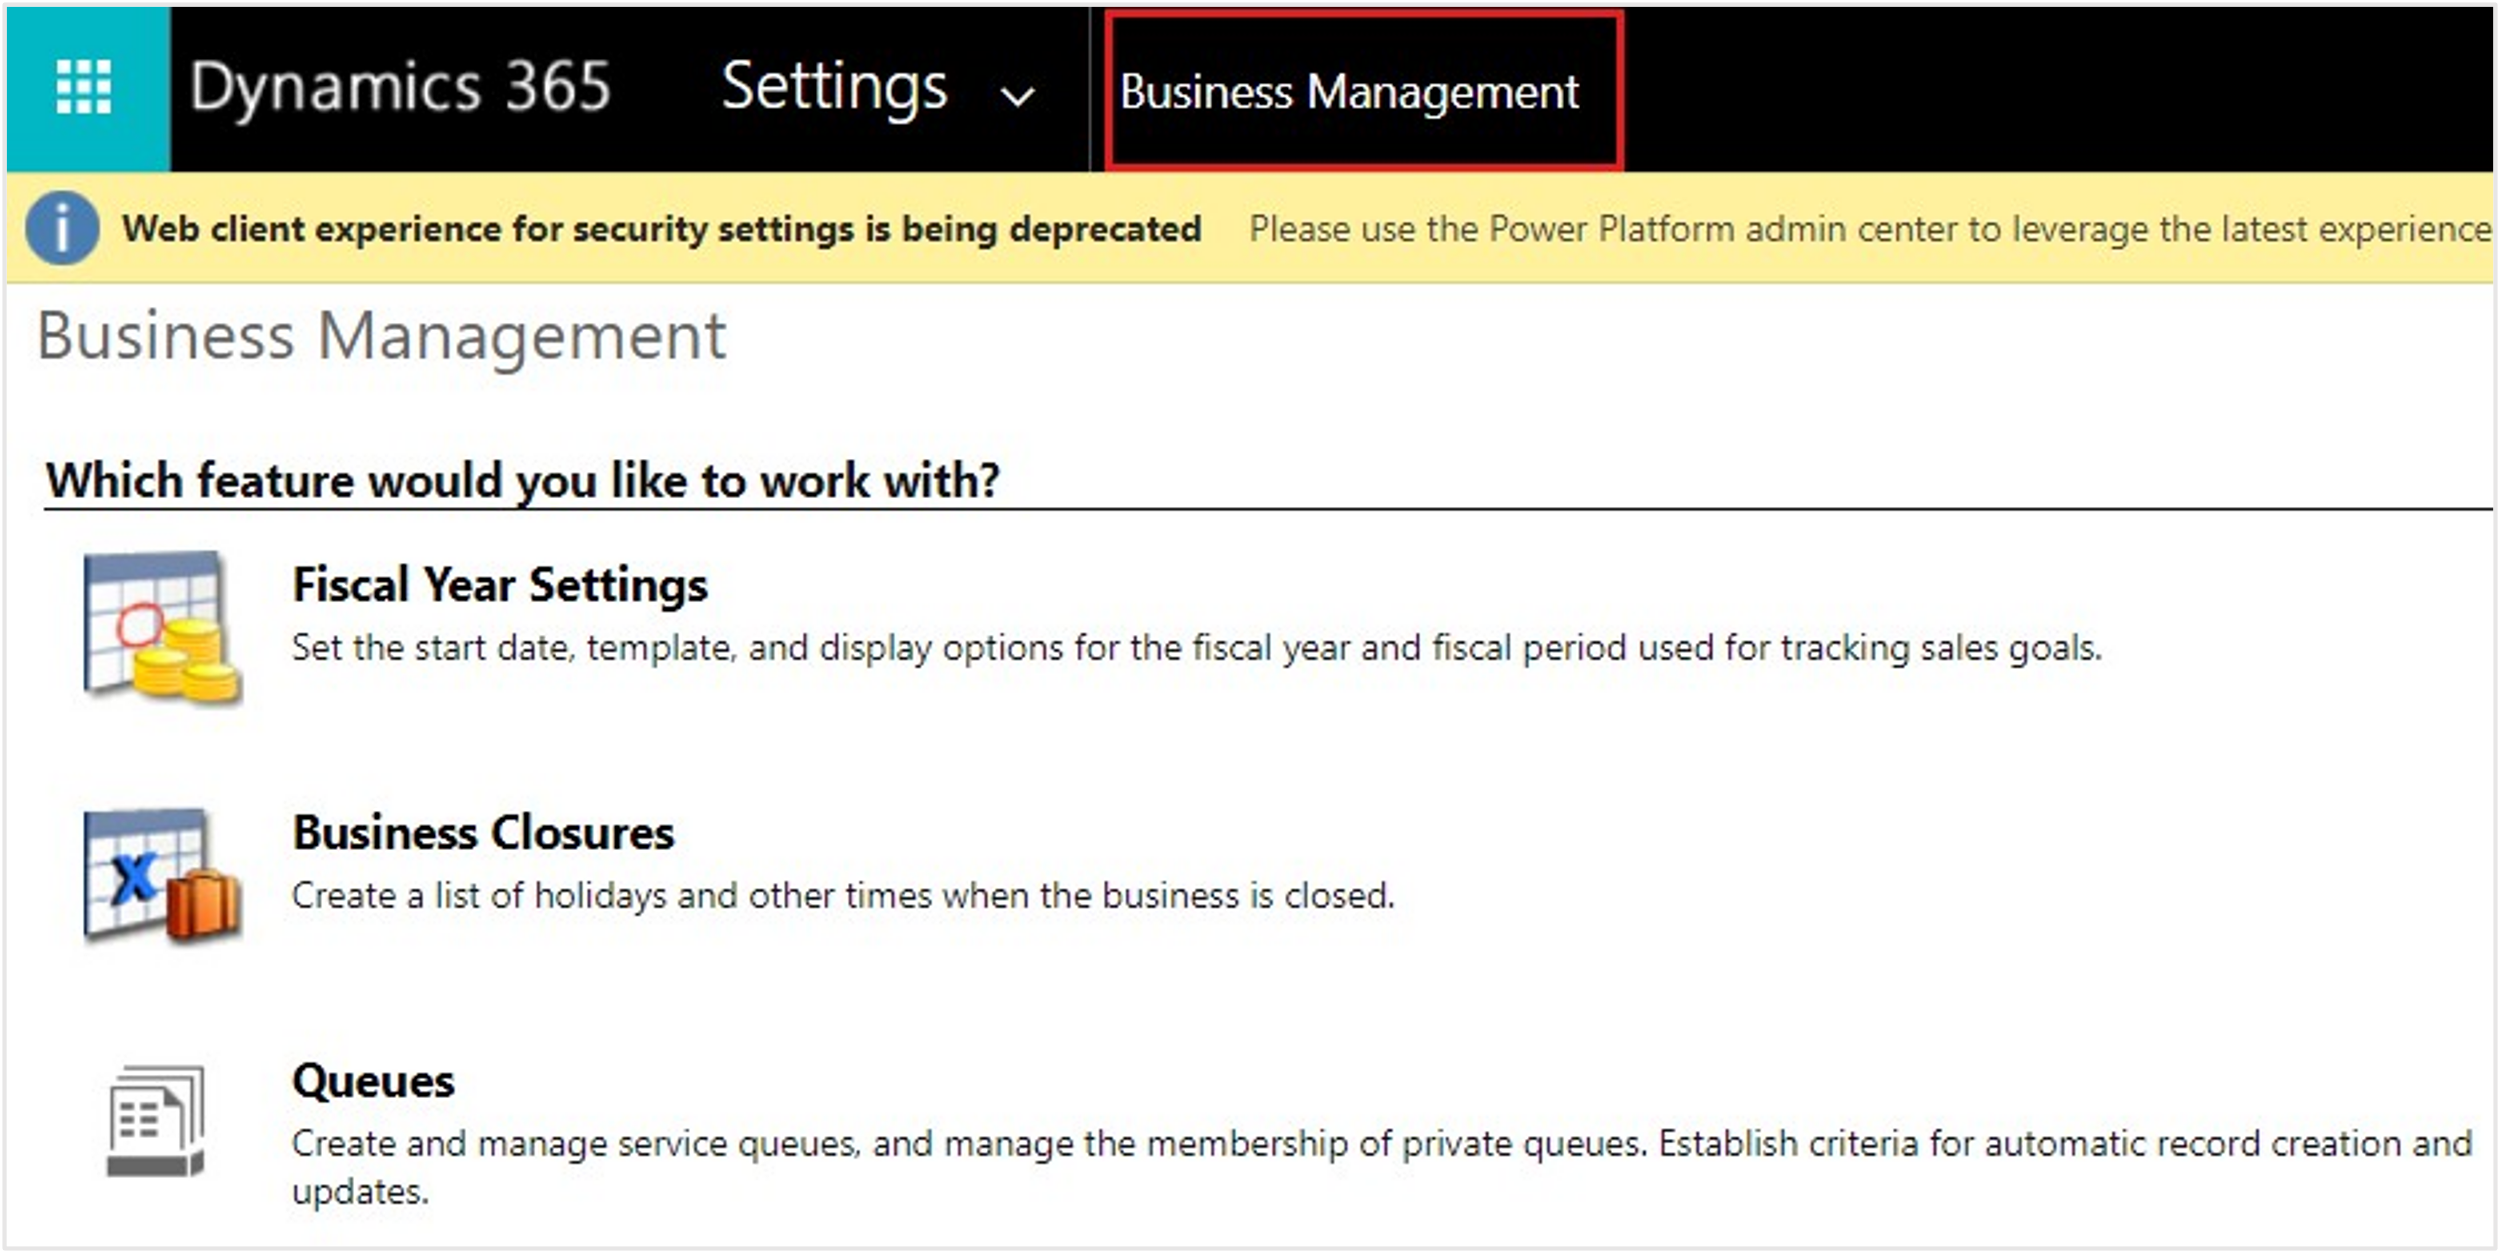
On the upper command bar next to Dynamics 365, select Settings to open the dropdown menu. Select Security in the third column under System.
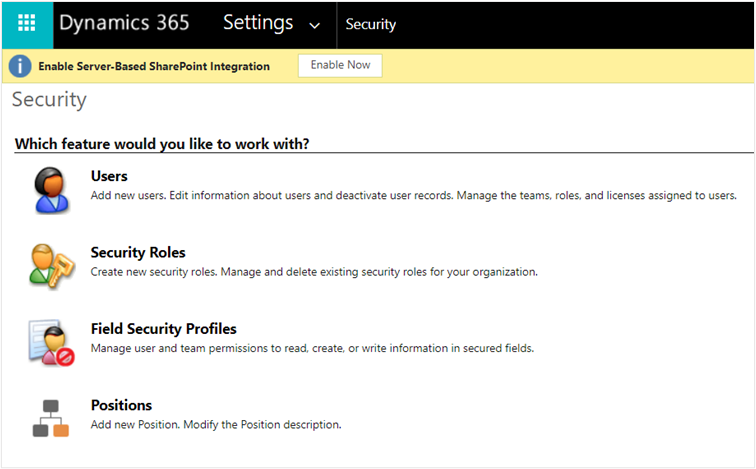
Under Security, select Users.
Switch the grid view dropdown menu from Omnichannel Users to Enabled Users so that you can view the user in the list.
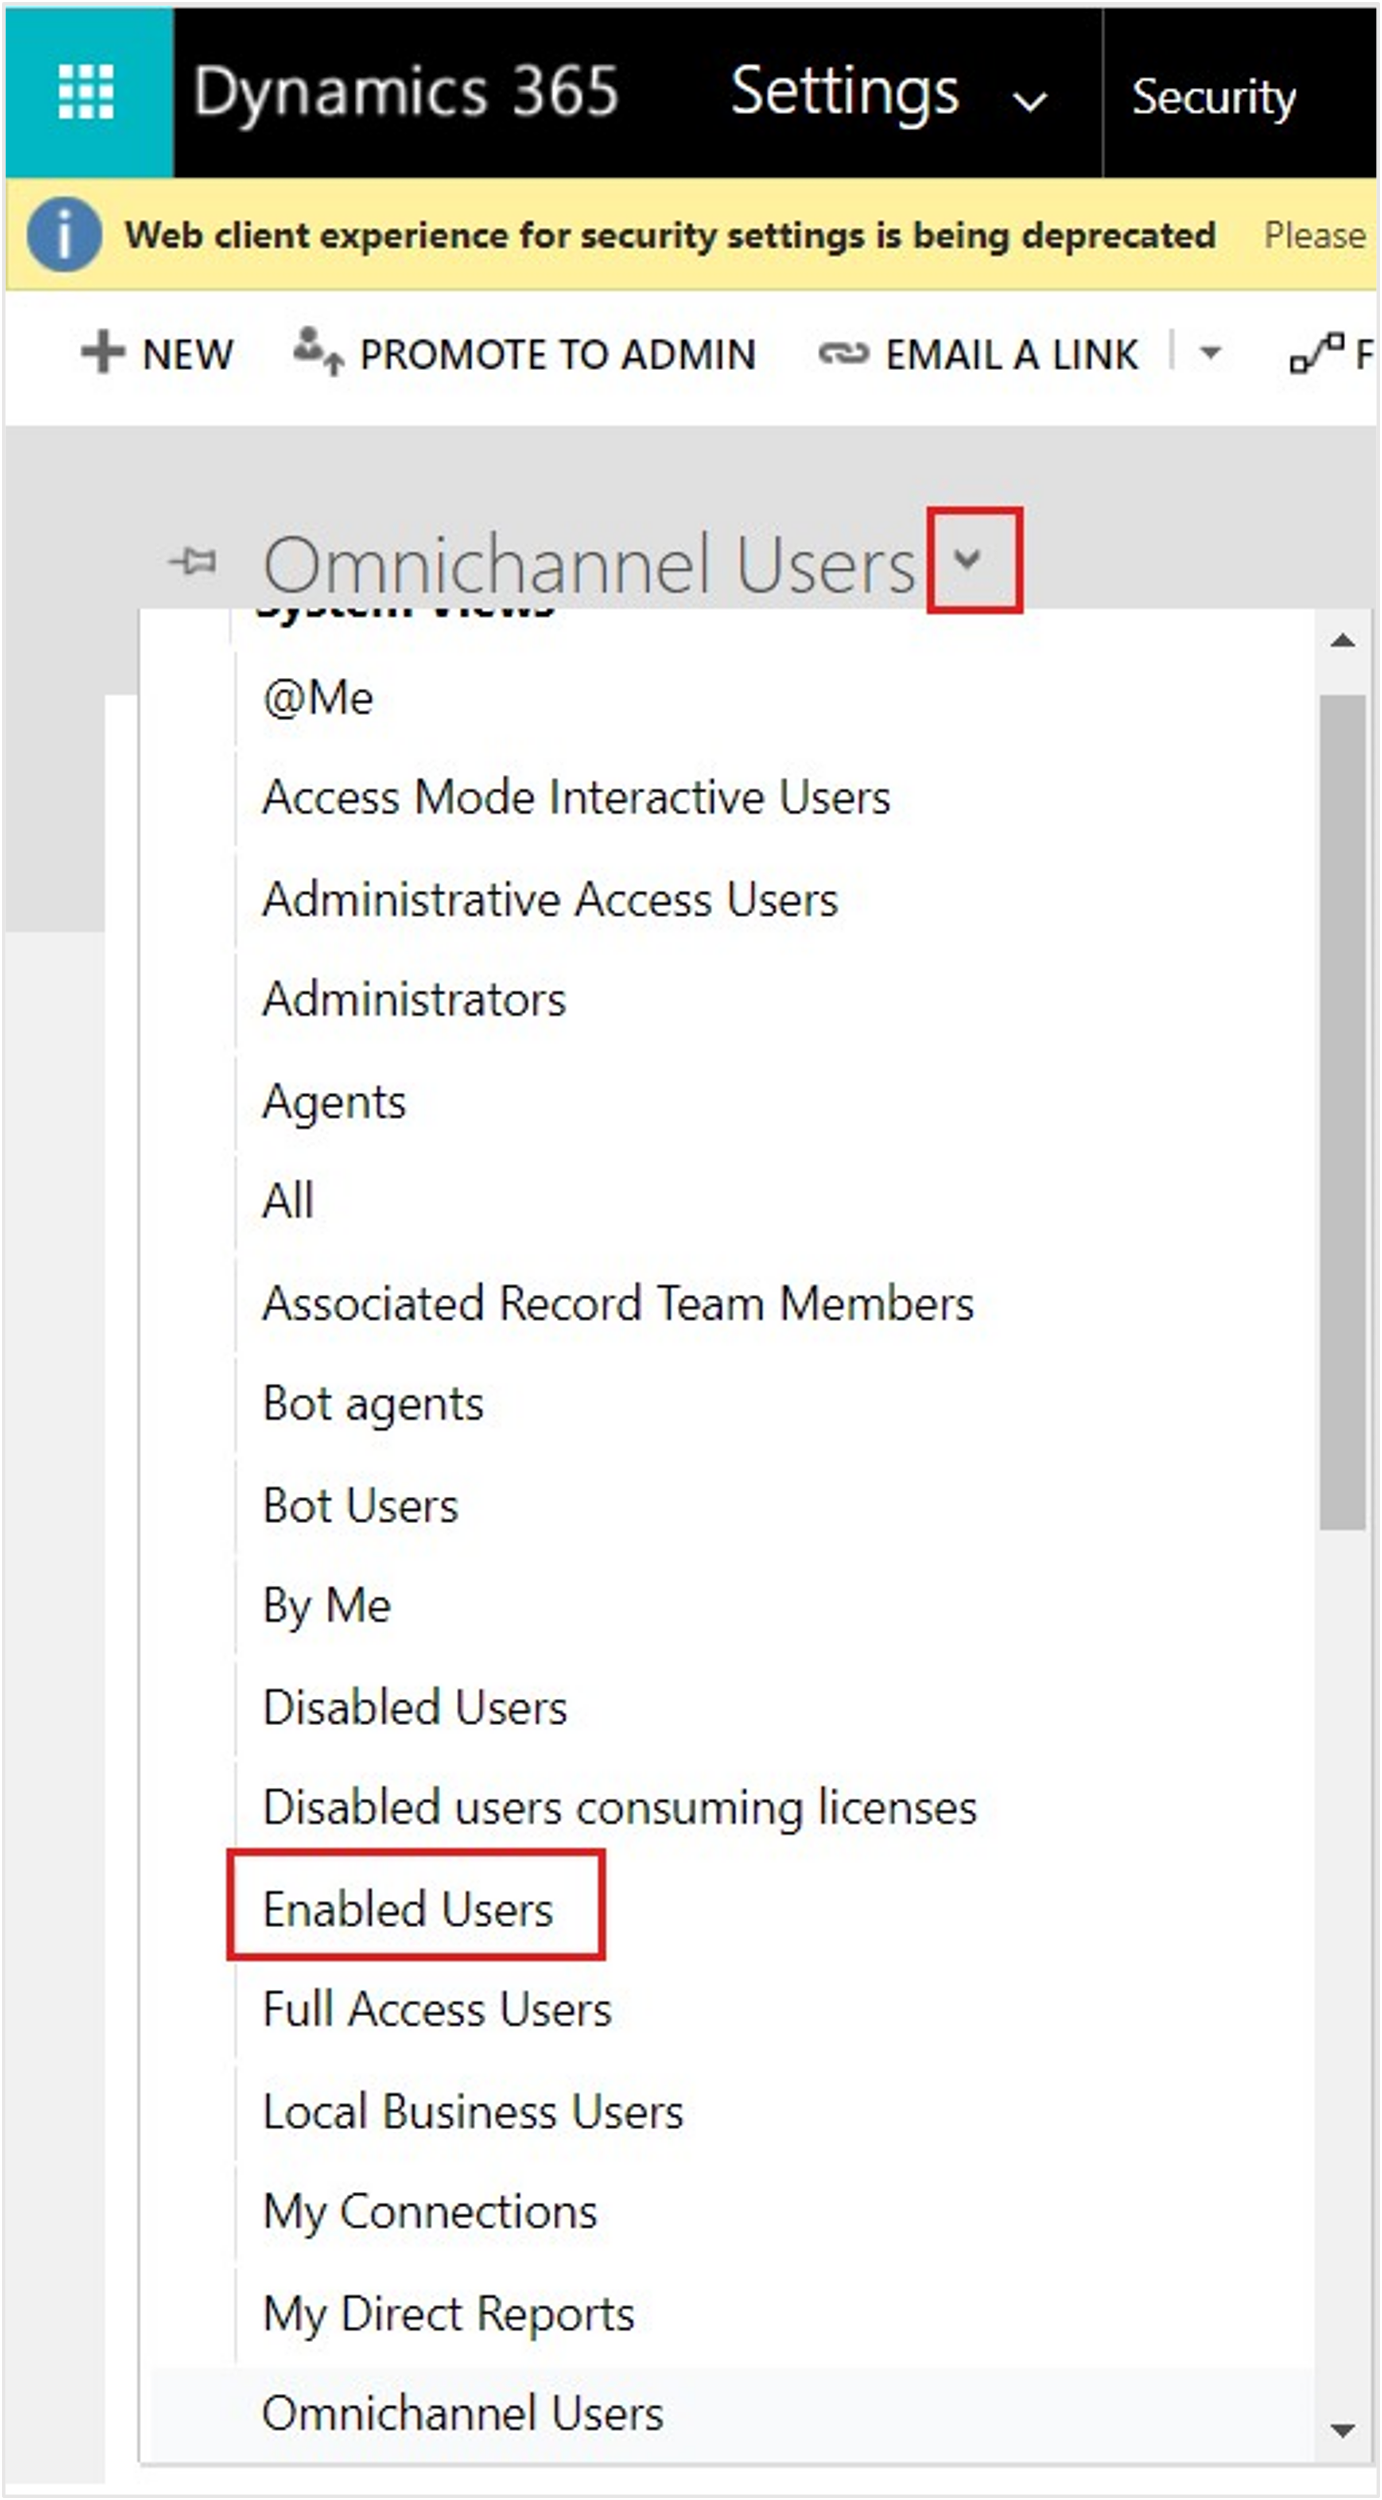
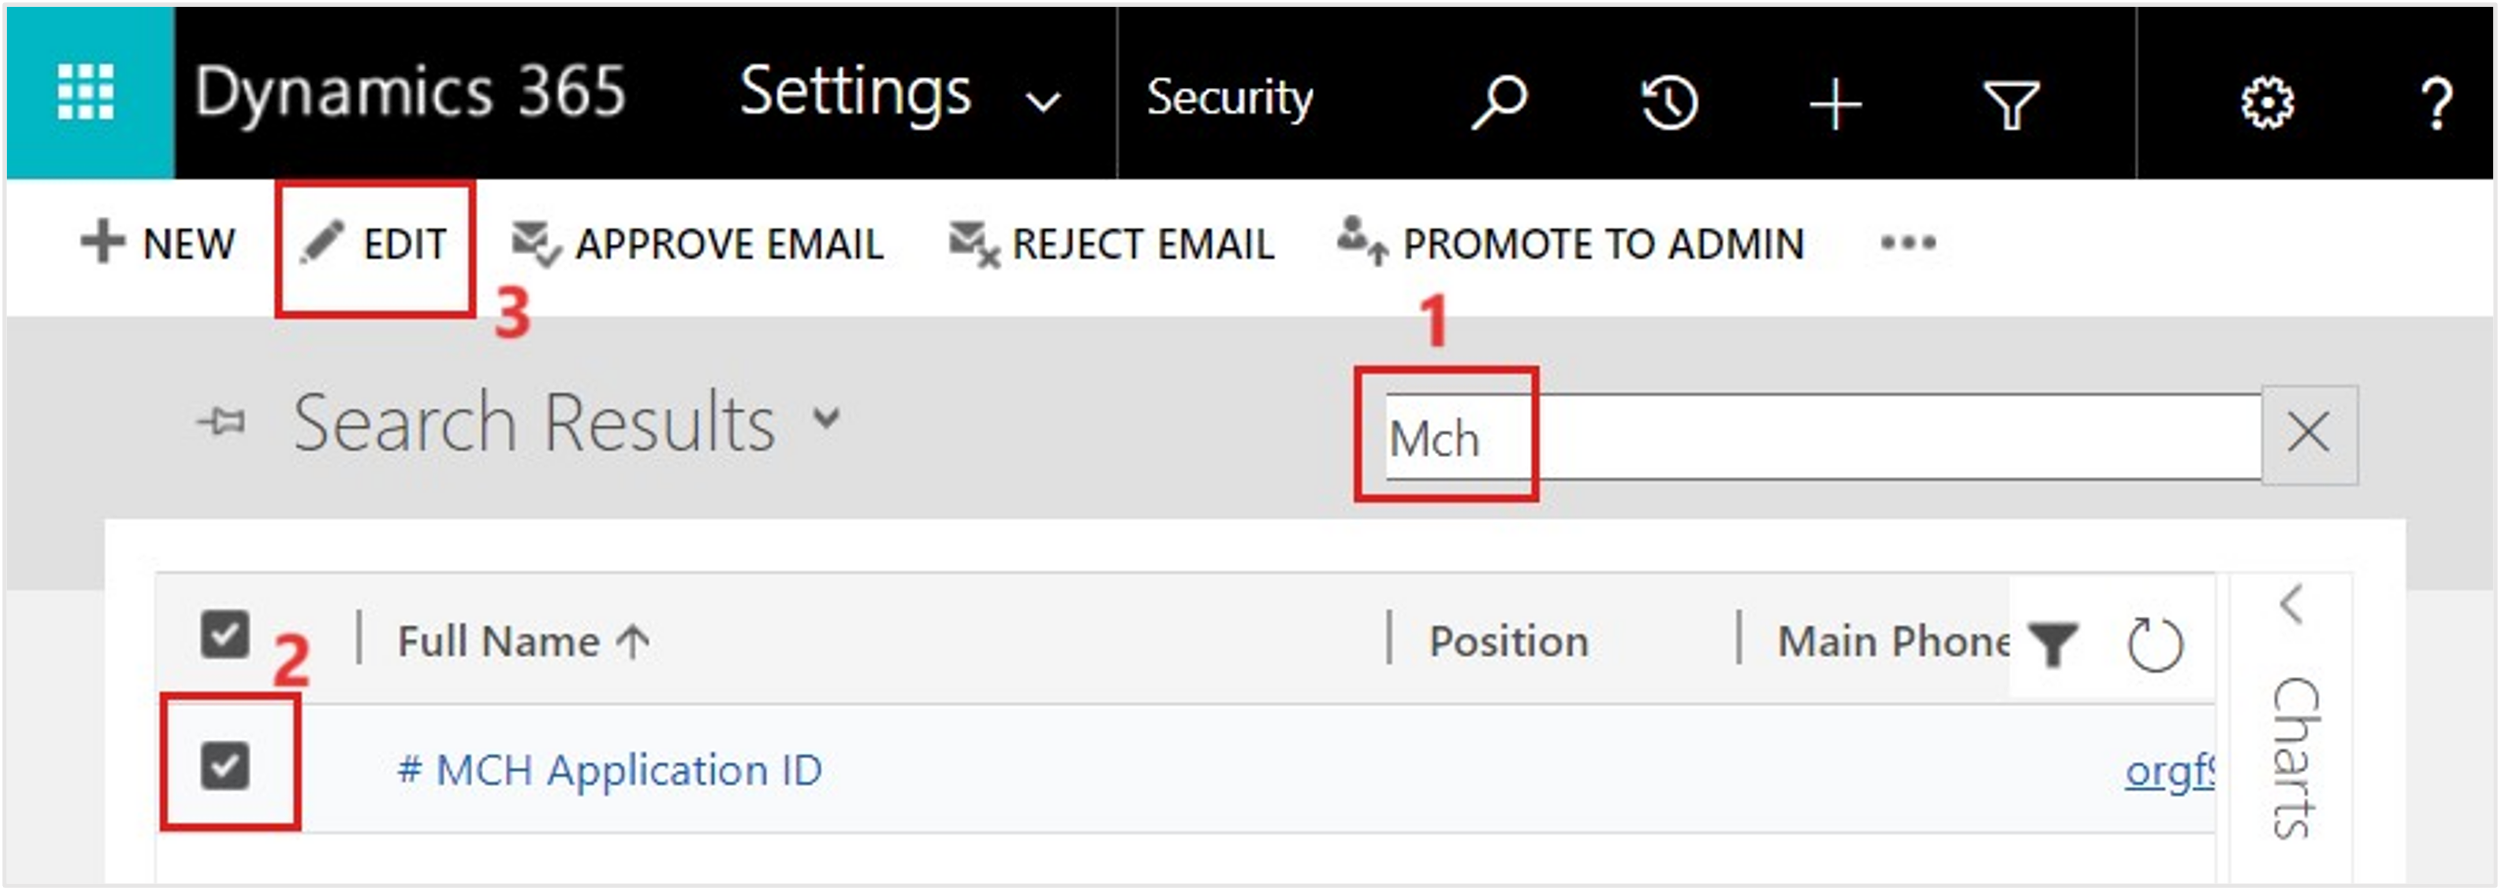
In the Enabled Users list, scroll or use the search bar to find your user.
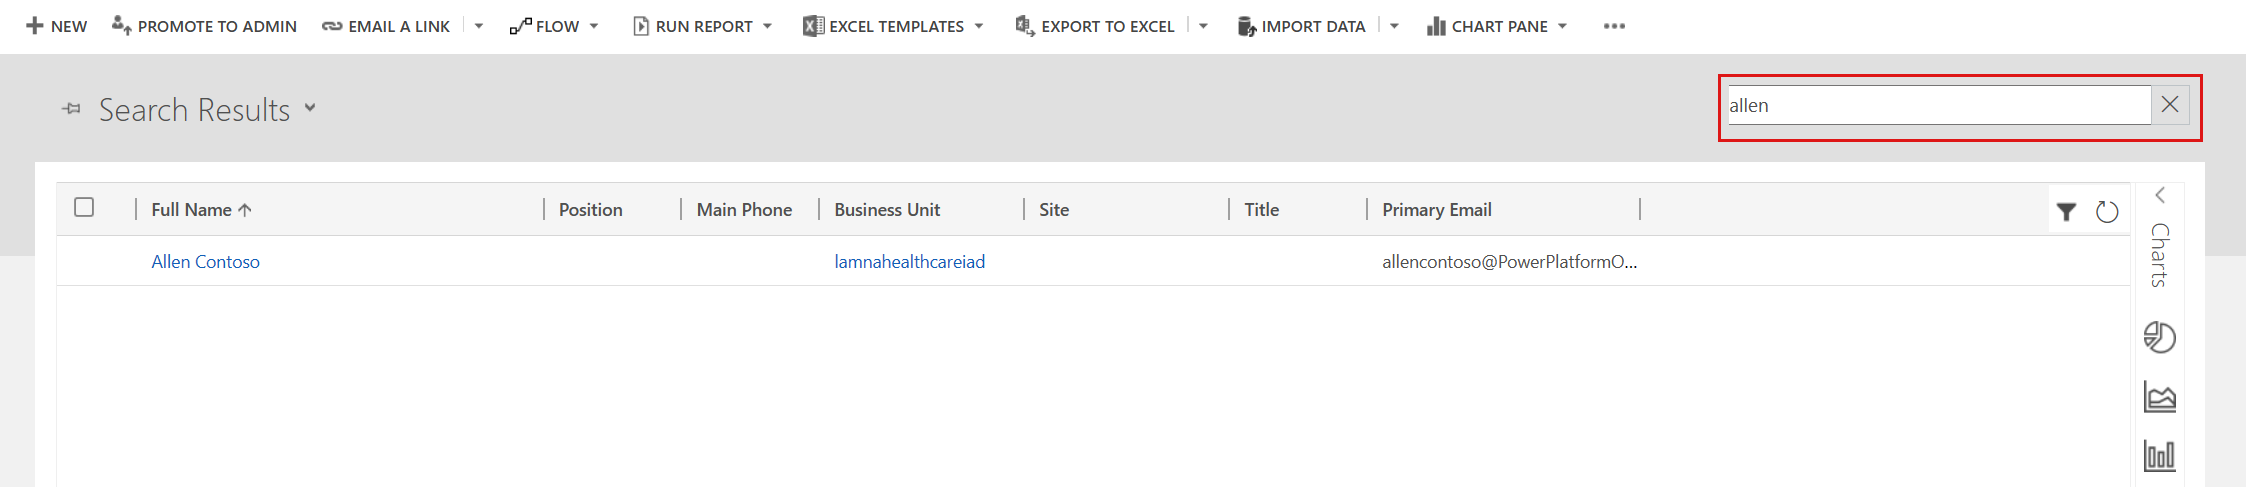
Select your user for the training and then select Manage Roles on the upper command bar.
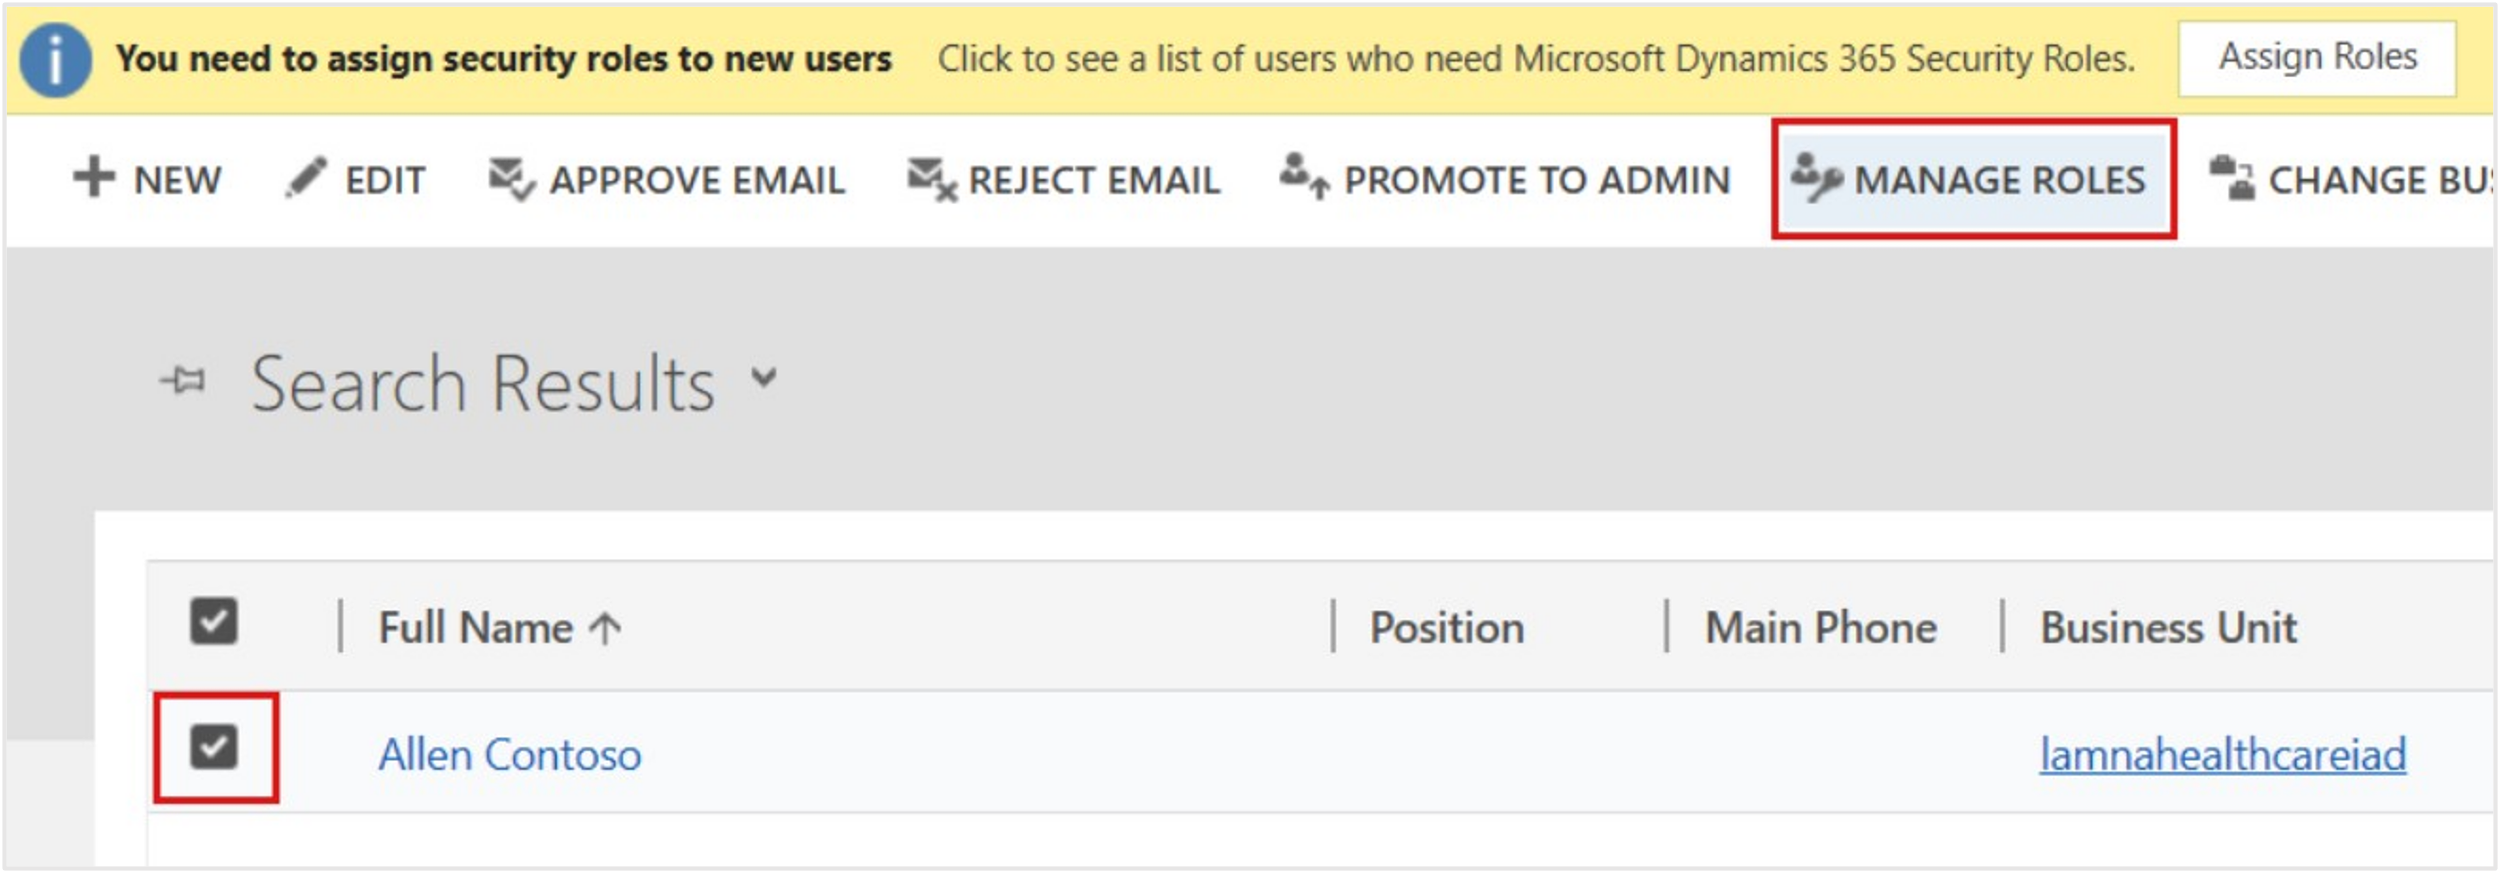
Select the Omnichannel agent role to assign to your user and then select OK.


You now assigned the correct Omnichannel agent role to the user, which allows you to be a live agent in Omnichannel.
Task: Create a Health Bot user in Dynamics 365 Customer Service
You need to set up two users in Omnichannel for Customer Service:
Health Bot User - The Azure AI Health Bot user that you created in the previous exercise. This configuration allows you to assign the bot as a user and take initial messages through live chat.
Omnichannel Agent User - The current user account that you used to sign in to Dynamics 365. This configuration allows you to be a live agent in Customer Service who receives messages from portal users through Azure bot escalations.
In this task, you create a bot user, which helps you connect Azure AI Health Bot with Omnichannel live chat.
Open a new tab and go to Microsoft Power Platform admin center.
Search for and select your Lamna Healthcare Company environment from the list.
Select the Settings button on the upper command bar.

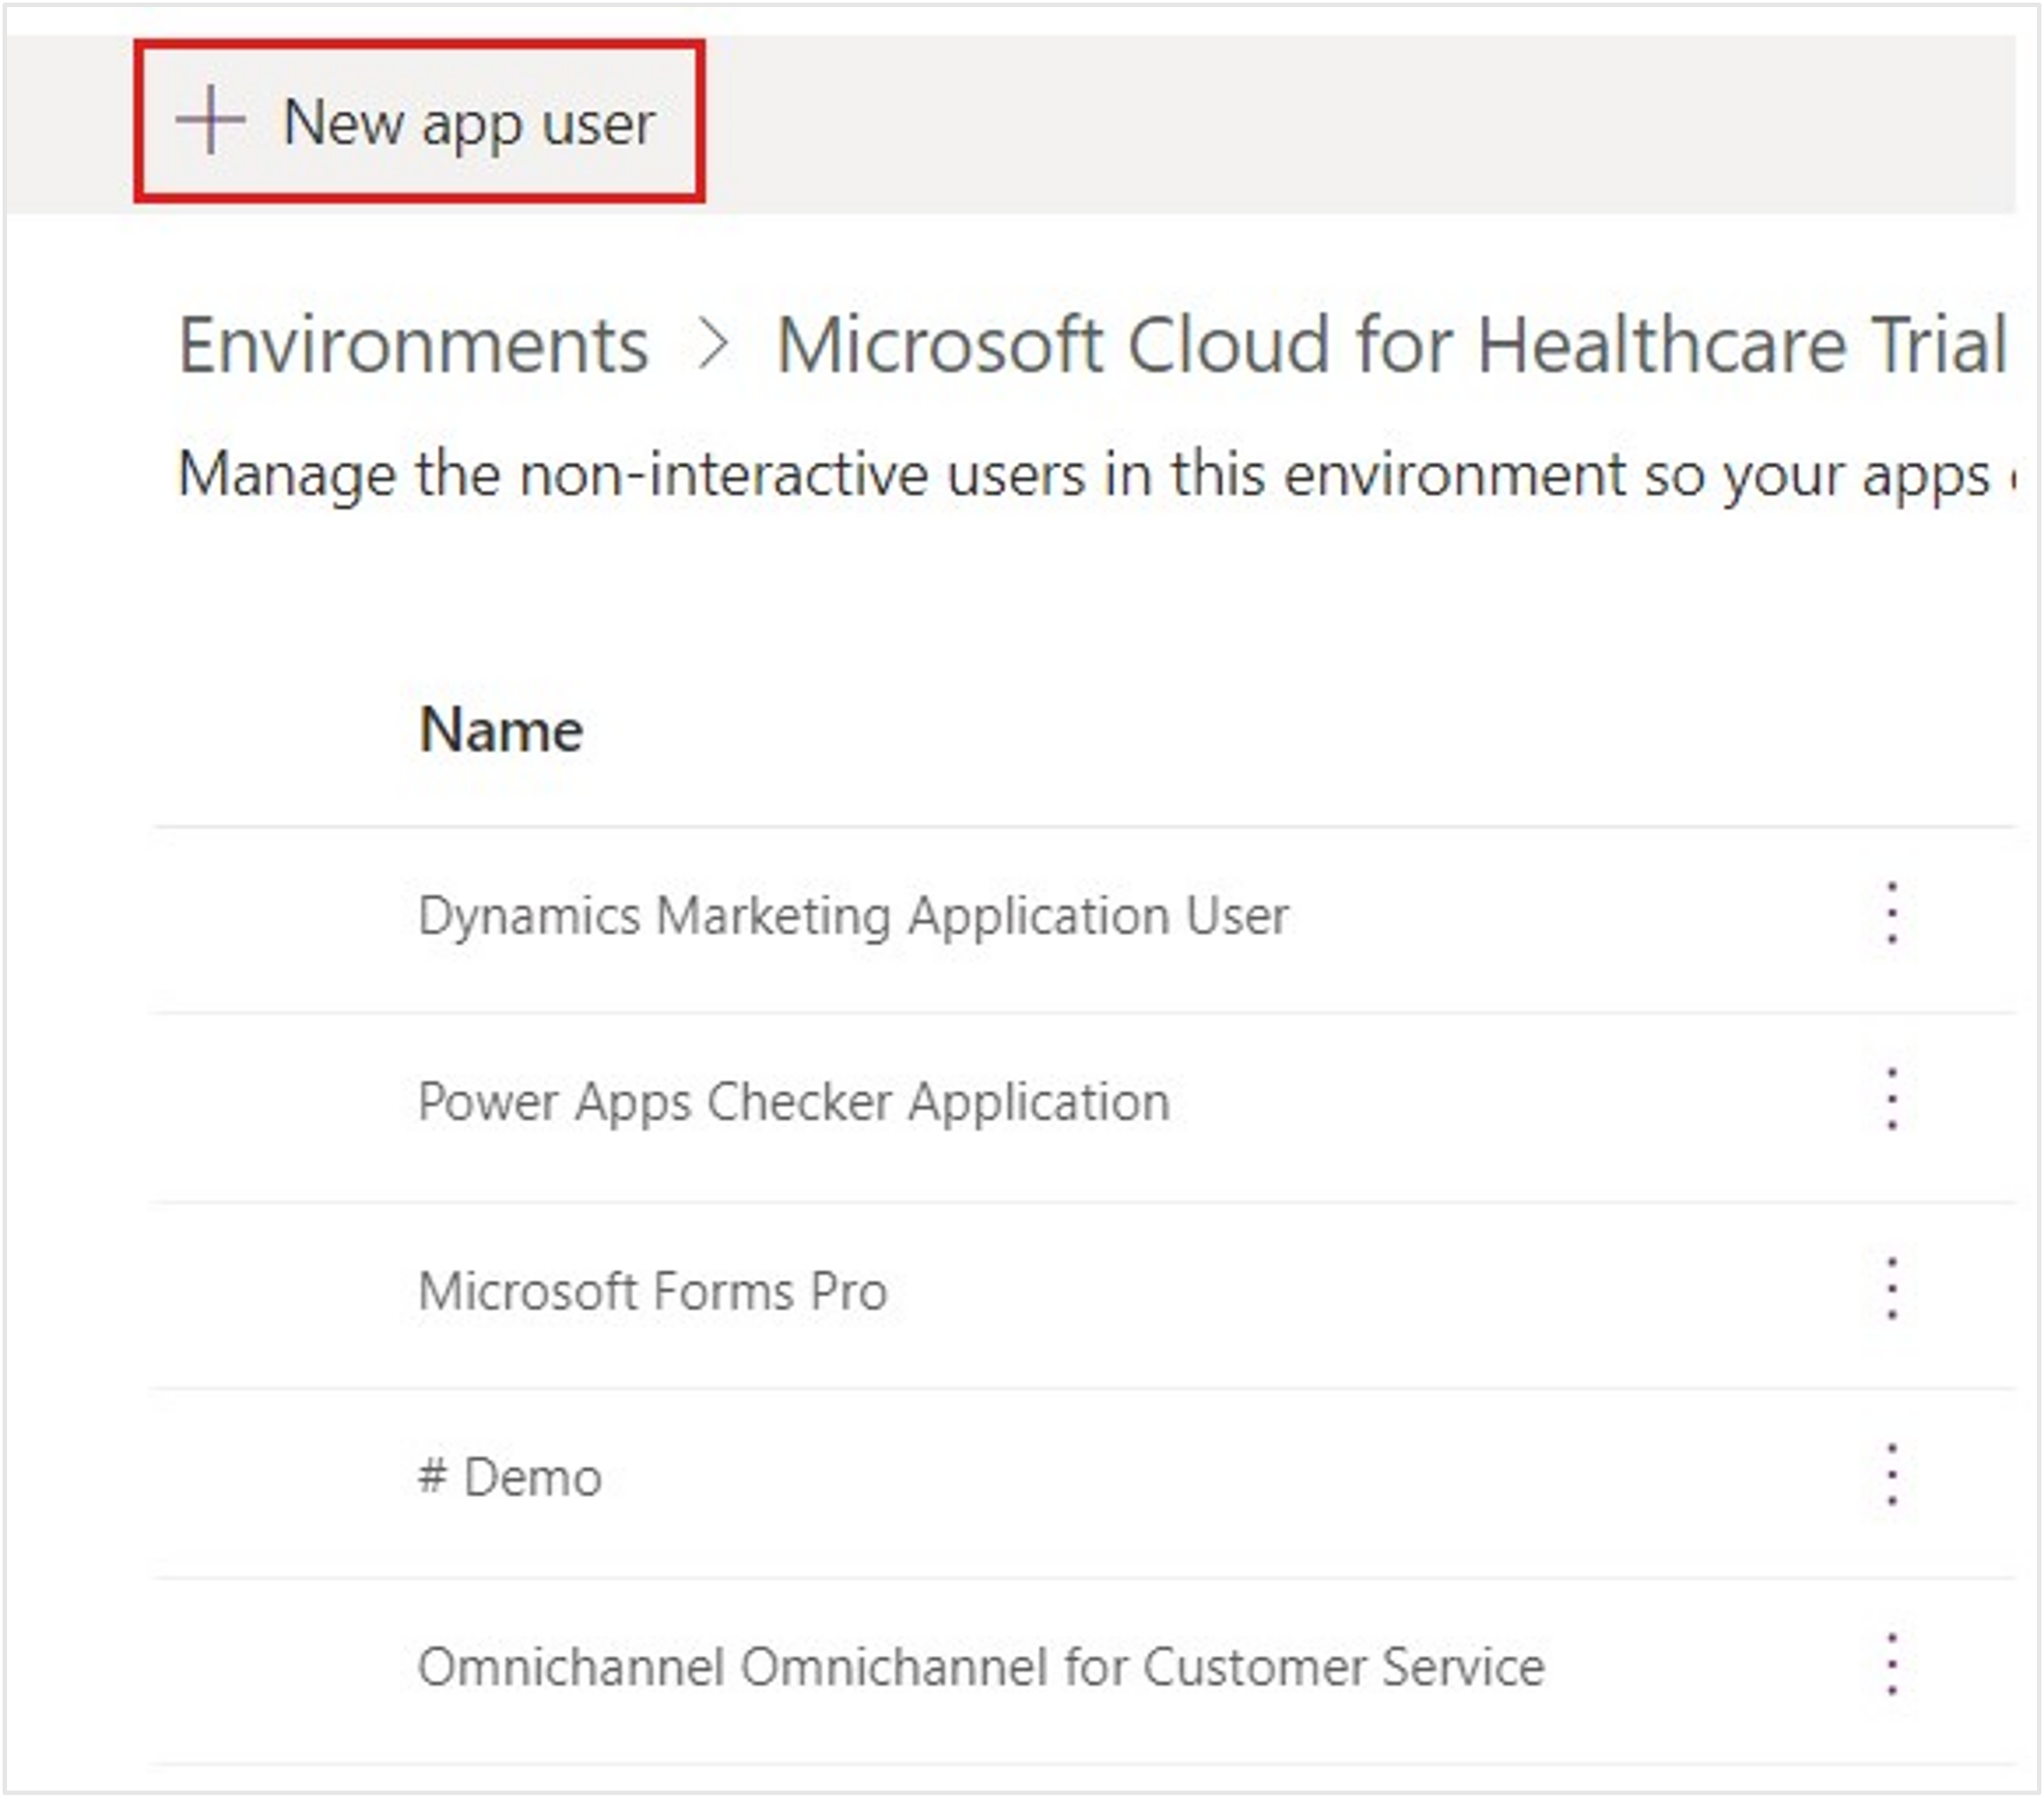
Expand Users + permissions and then select Application users.
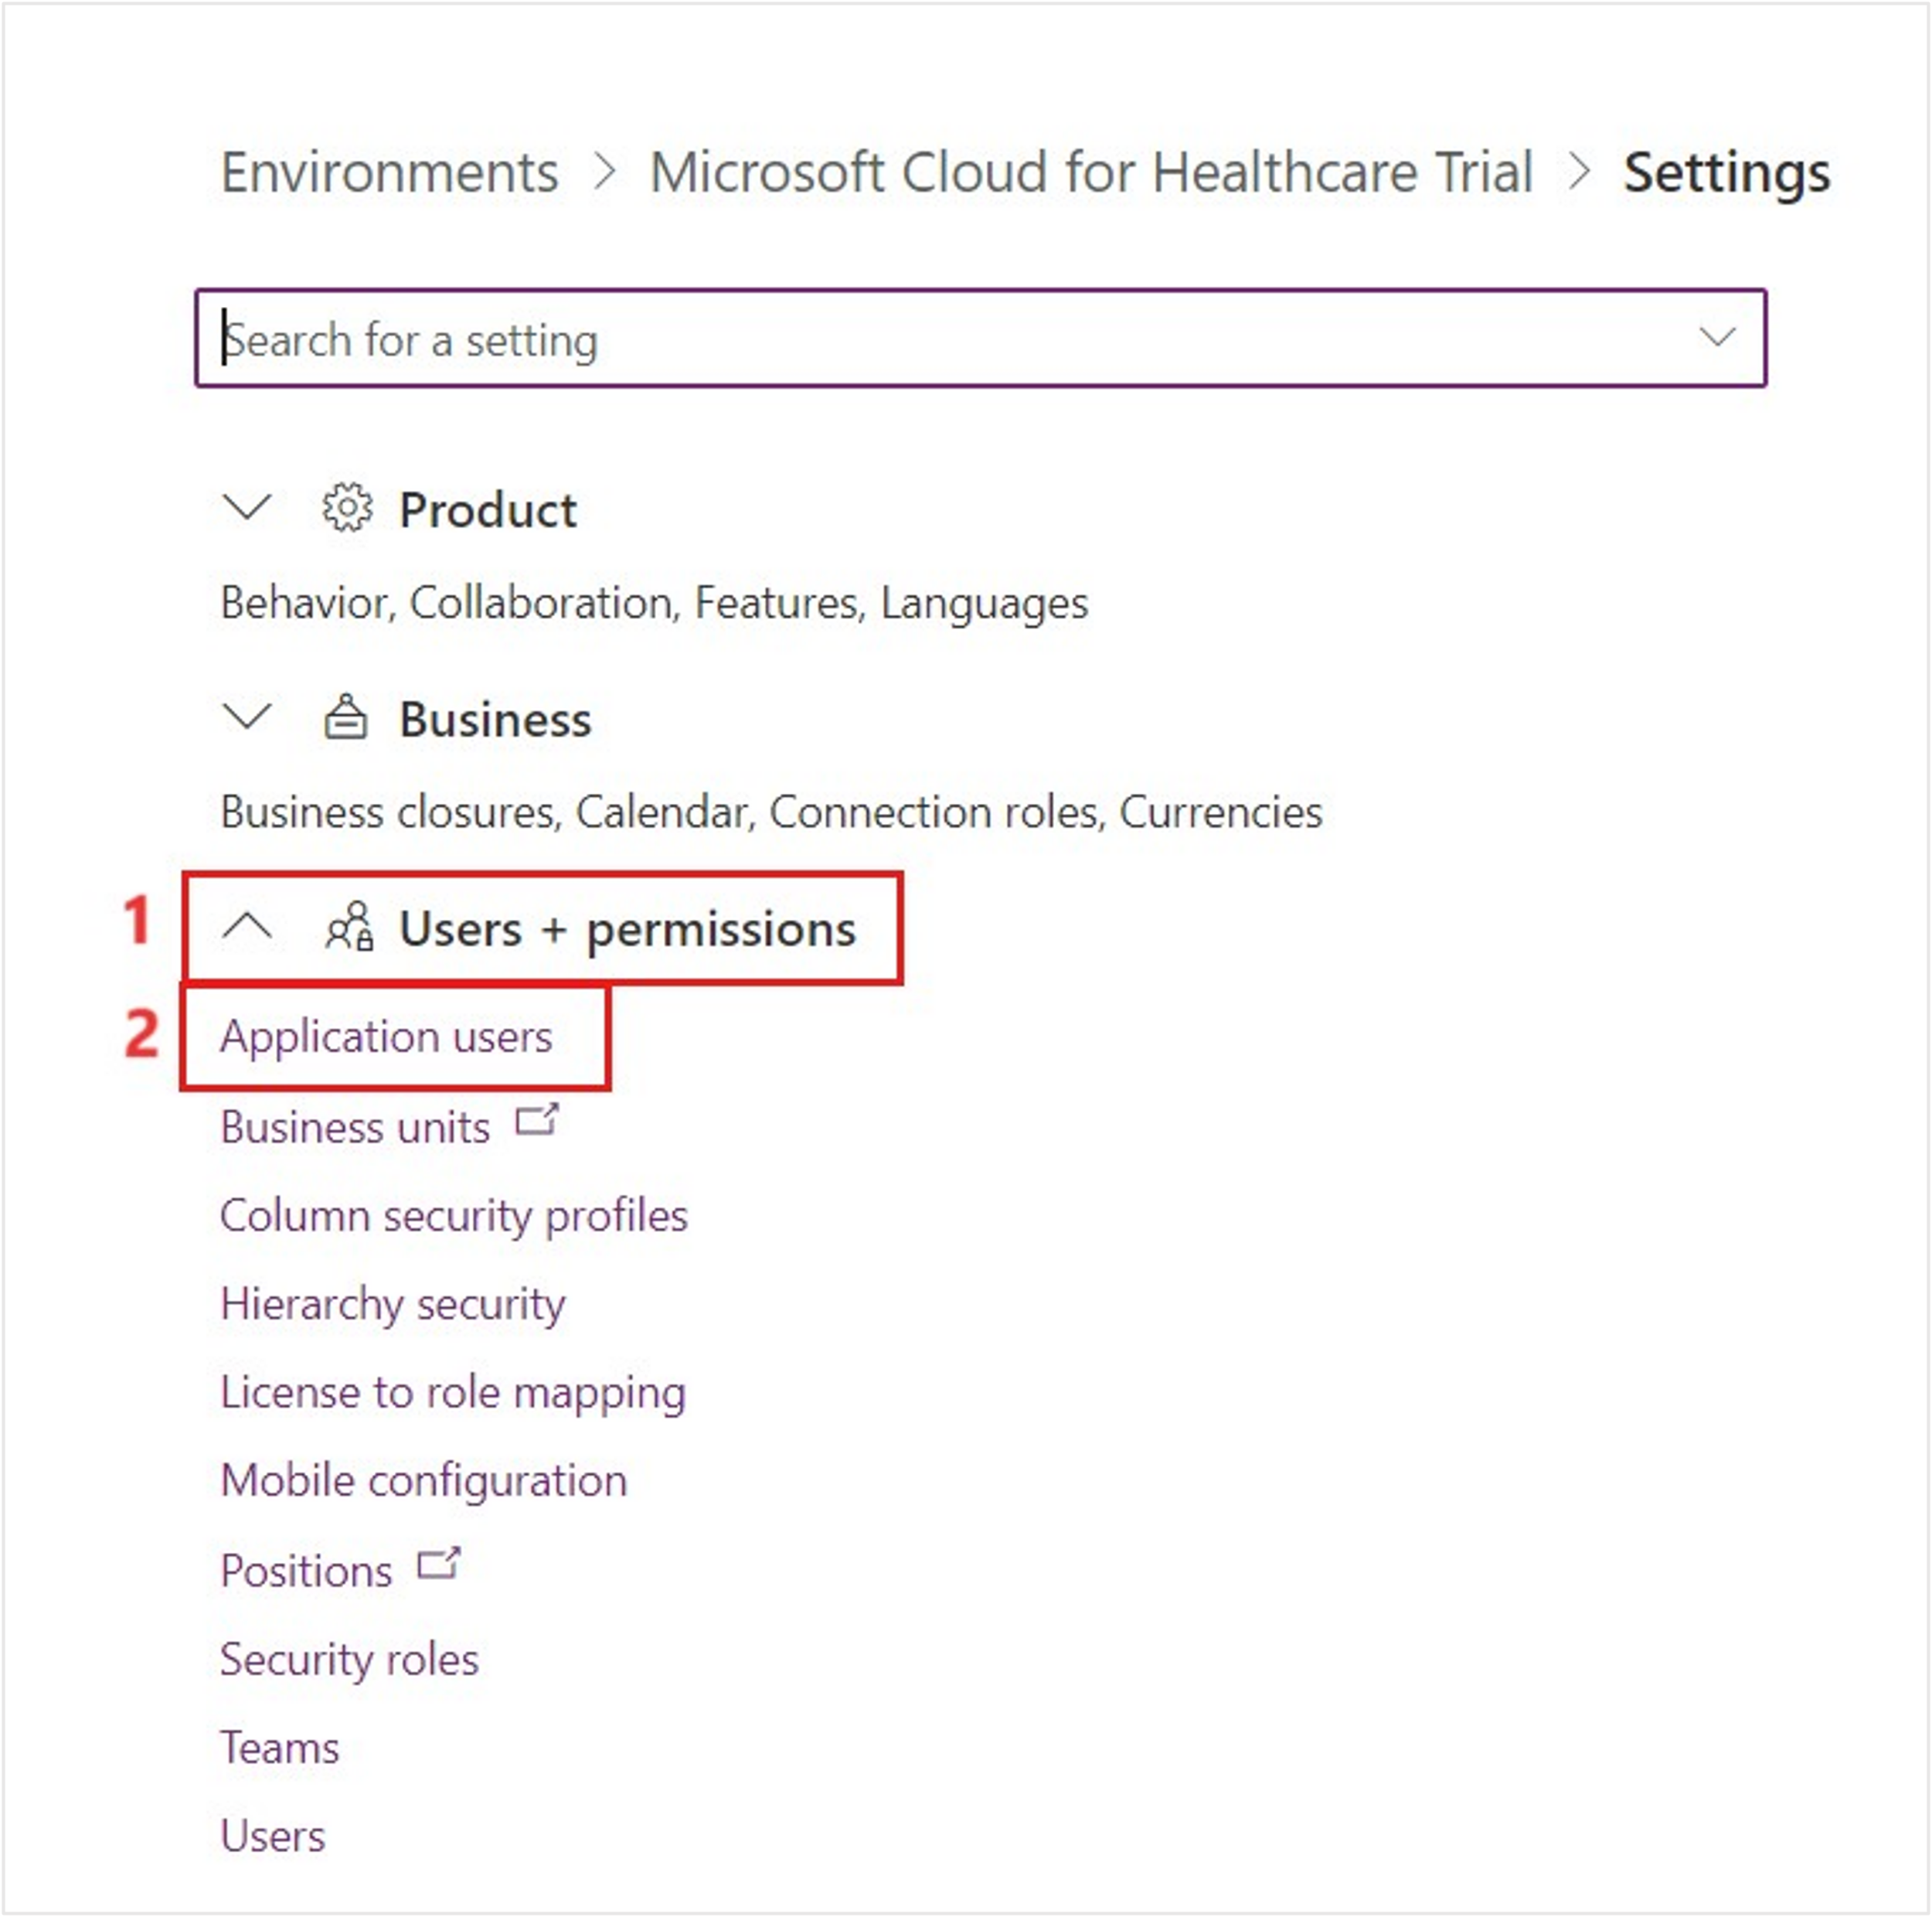
Select the + New app user button to create a new application user.
Select + Add an app on the Create a new app user page.
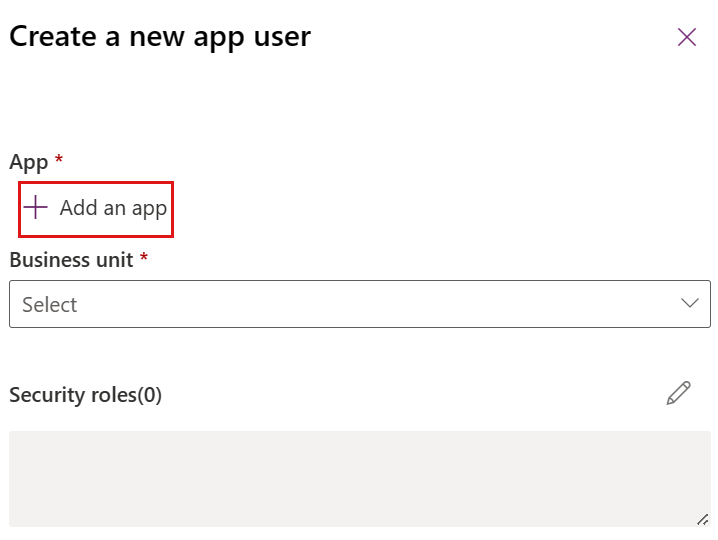
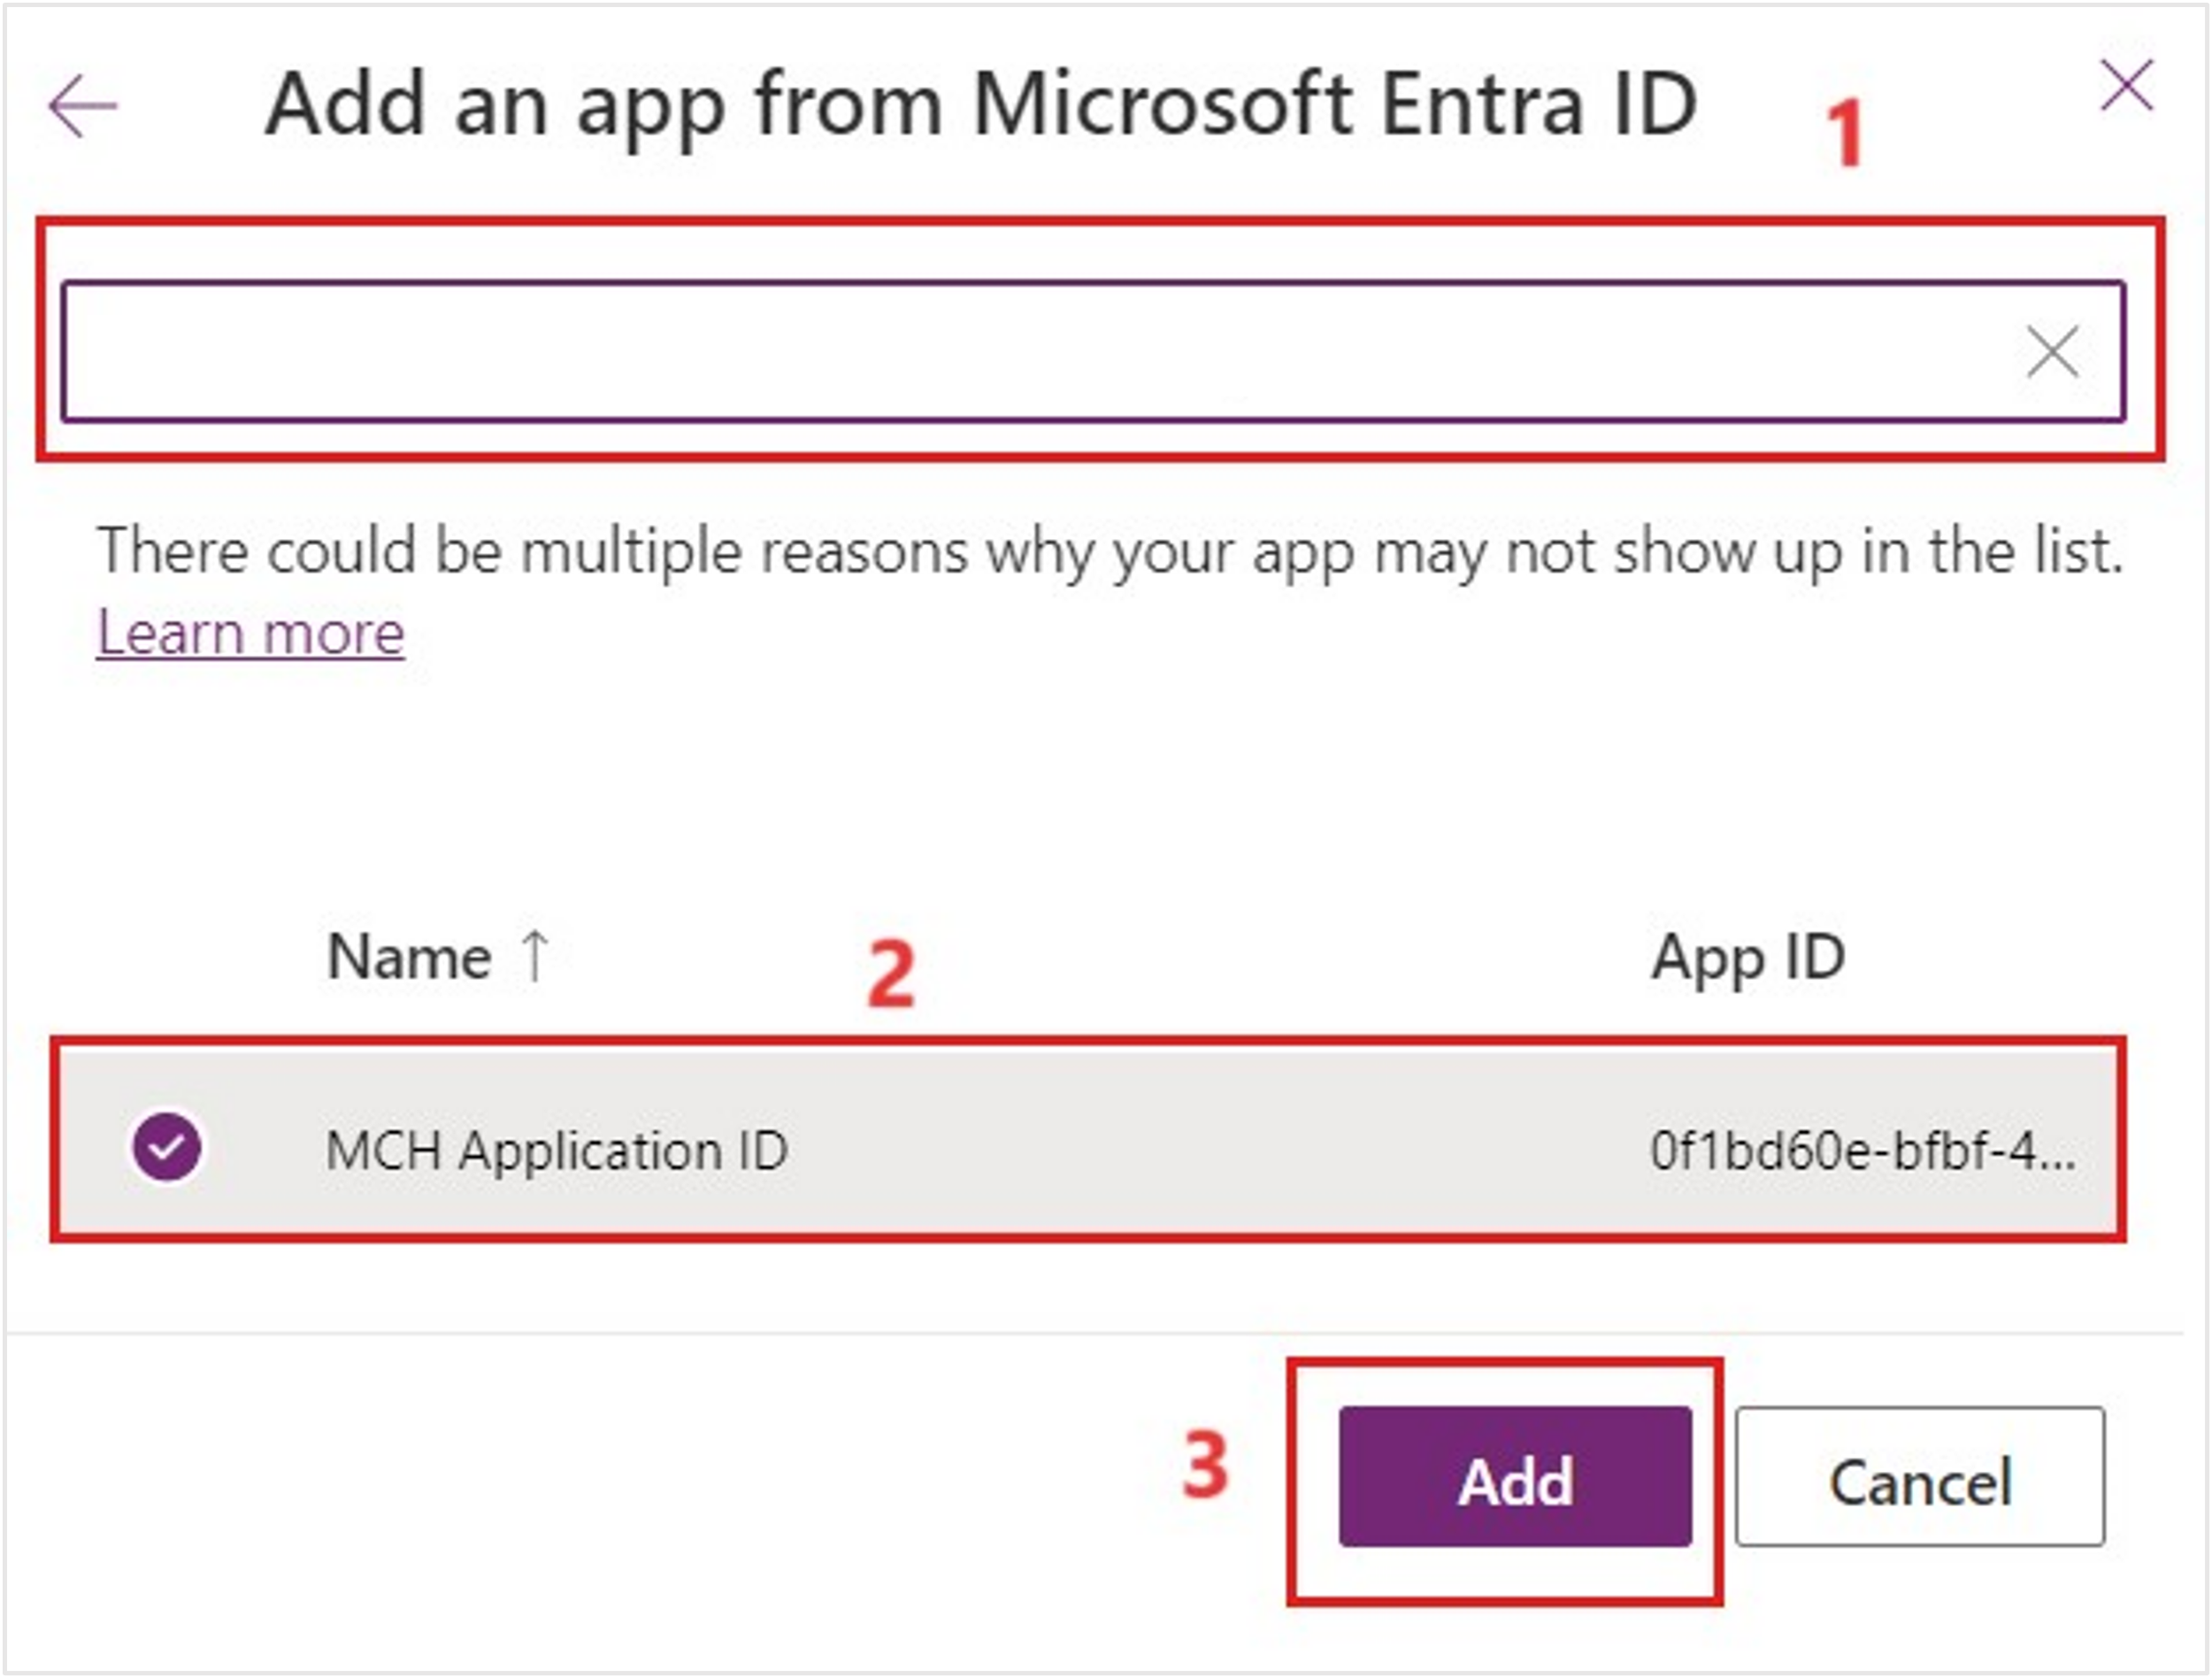
Paste the Application ID (the Application (client) ID that you obtained in the Azure portal for the supplied MCH Application ID) into the search box and then select the app from the list. You can also search for mch. Select Add.
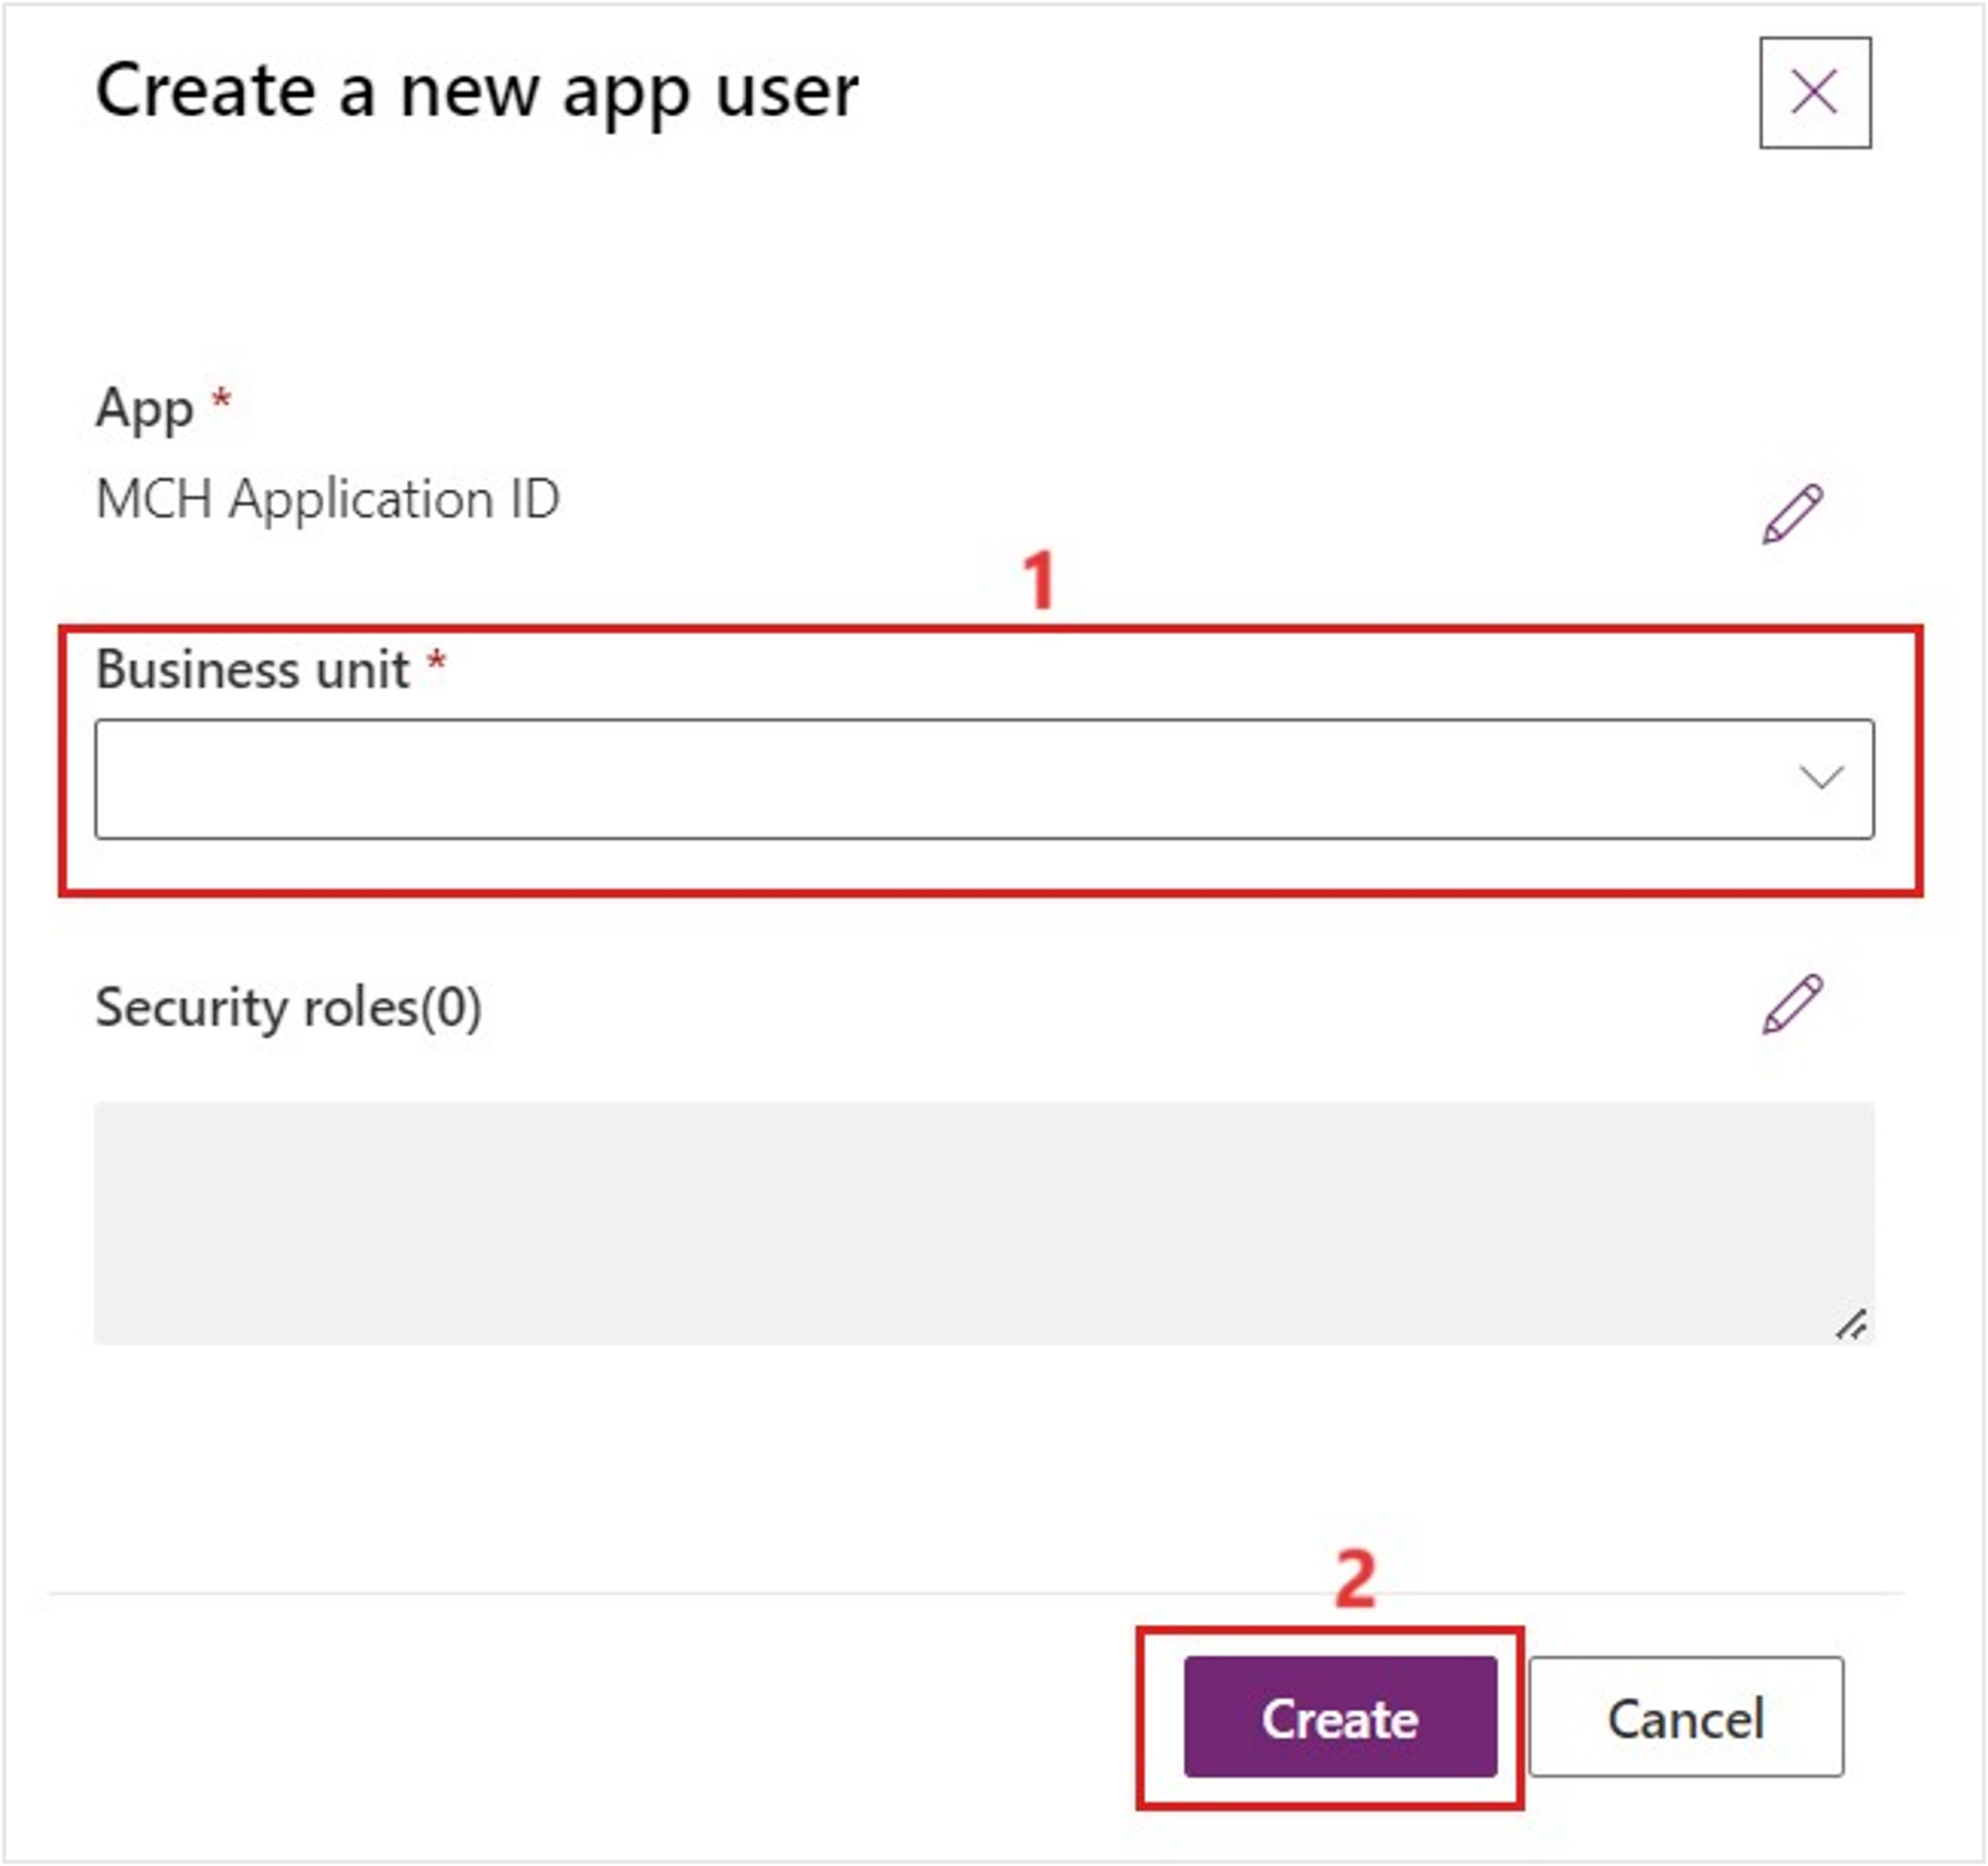
Select a Business unit from the dropdown list (the options in the list are unique for each Dynamics 365 environment). Select Create in the lower right of the page. If the application user is already created, skip this step.
Return to the Dynamics 365 User page that you previously accessed through Advanced settings. Switch the view to Enabled Users if you're not already on it. Clear the search terms, if any.
While in the Enabled Users list, search for MCH Application ID or scroll to find the bot app user. Double-click the user or select the row and then select Edit.
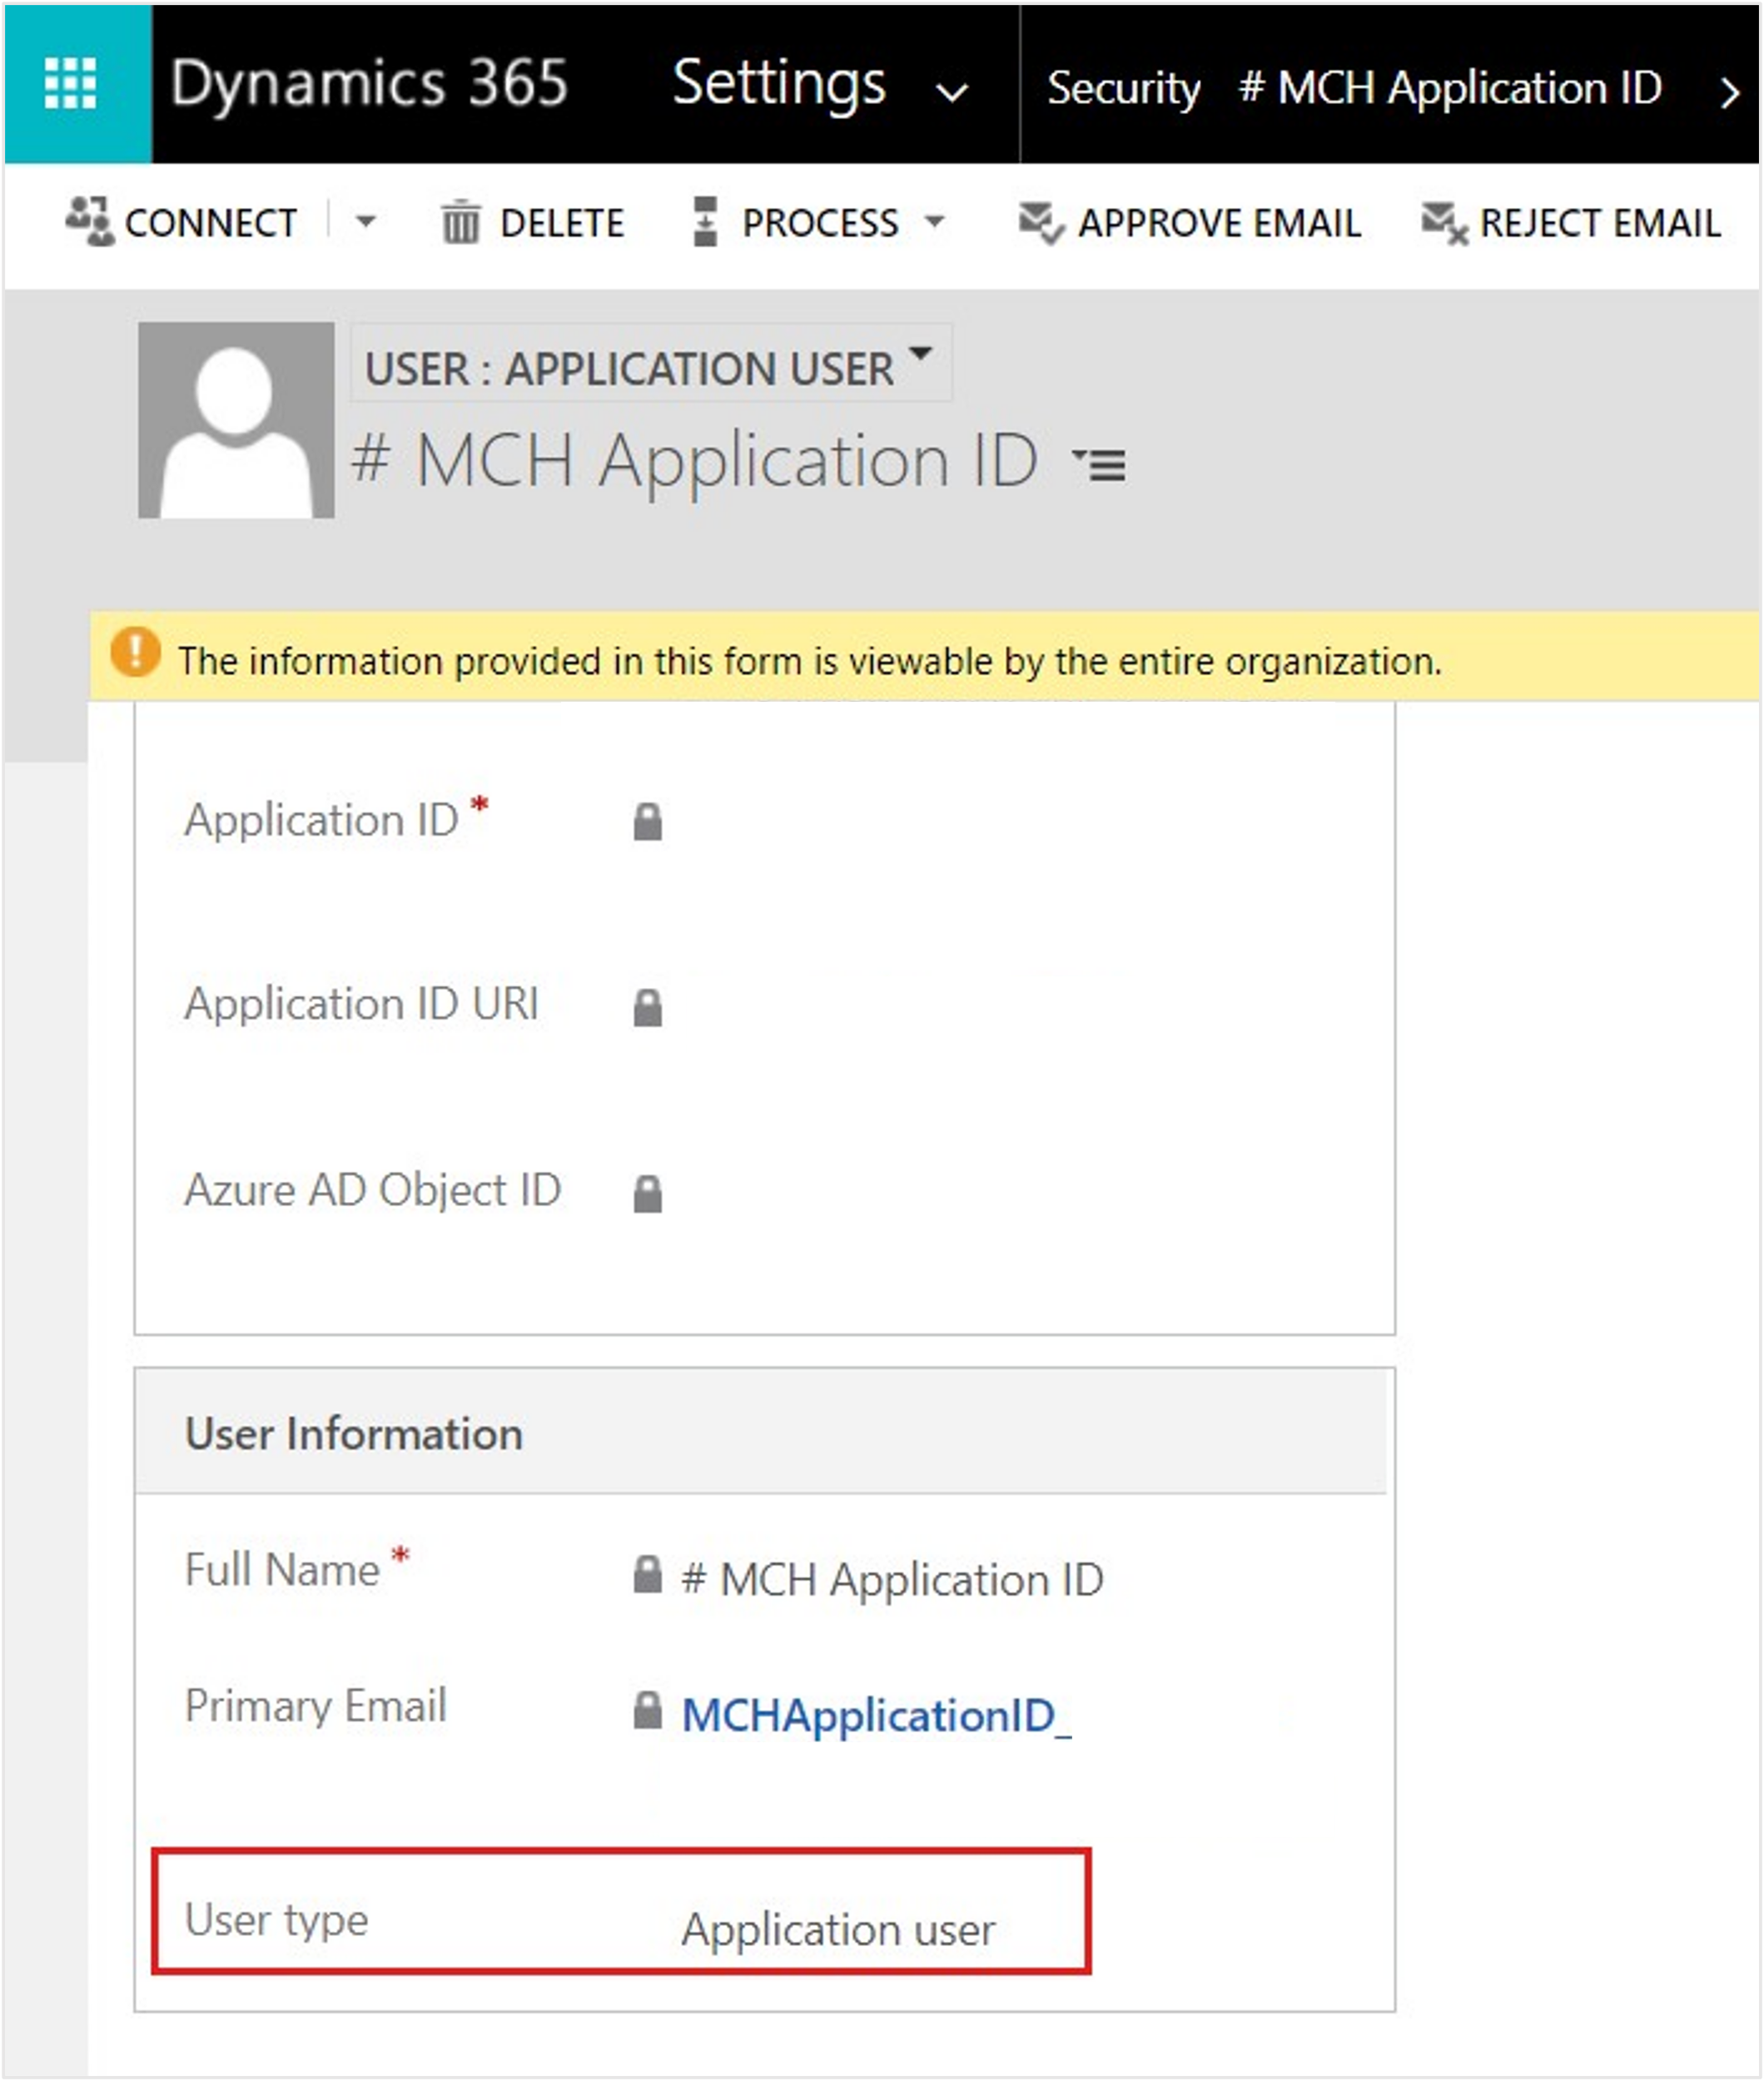
Above the user name, change the form type from User to Application User.

A new form appears, and the User type is Application user.
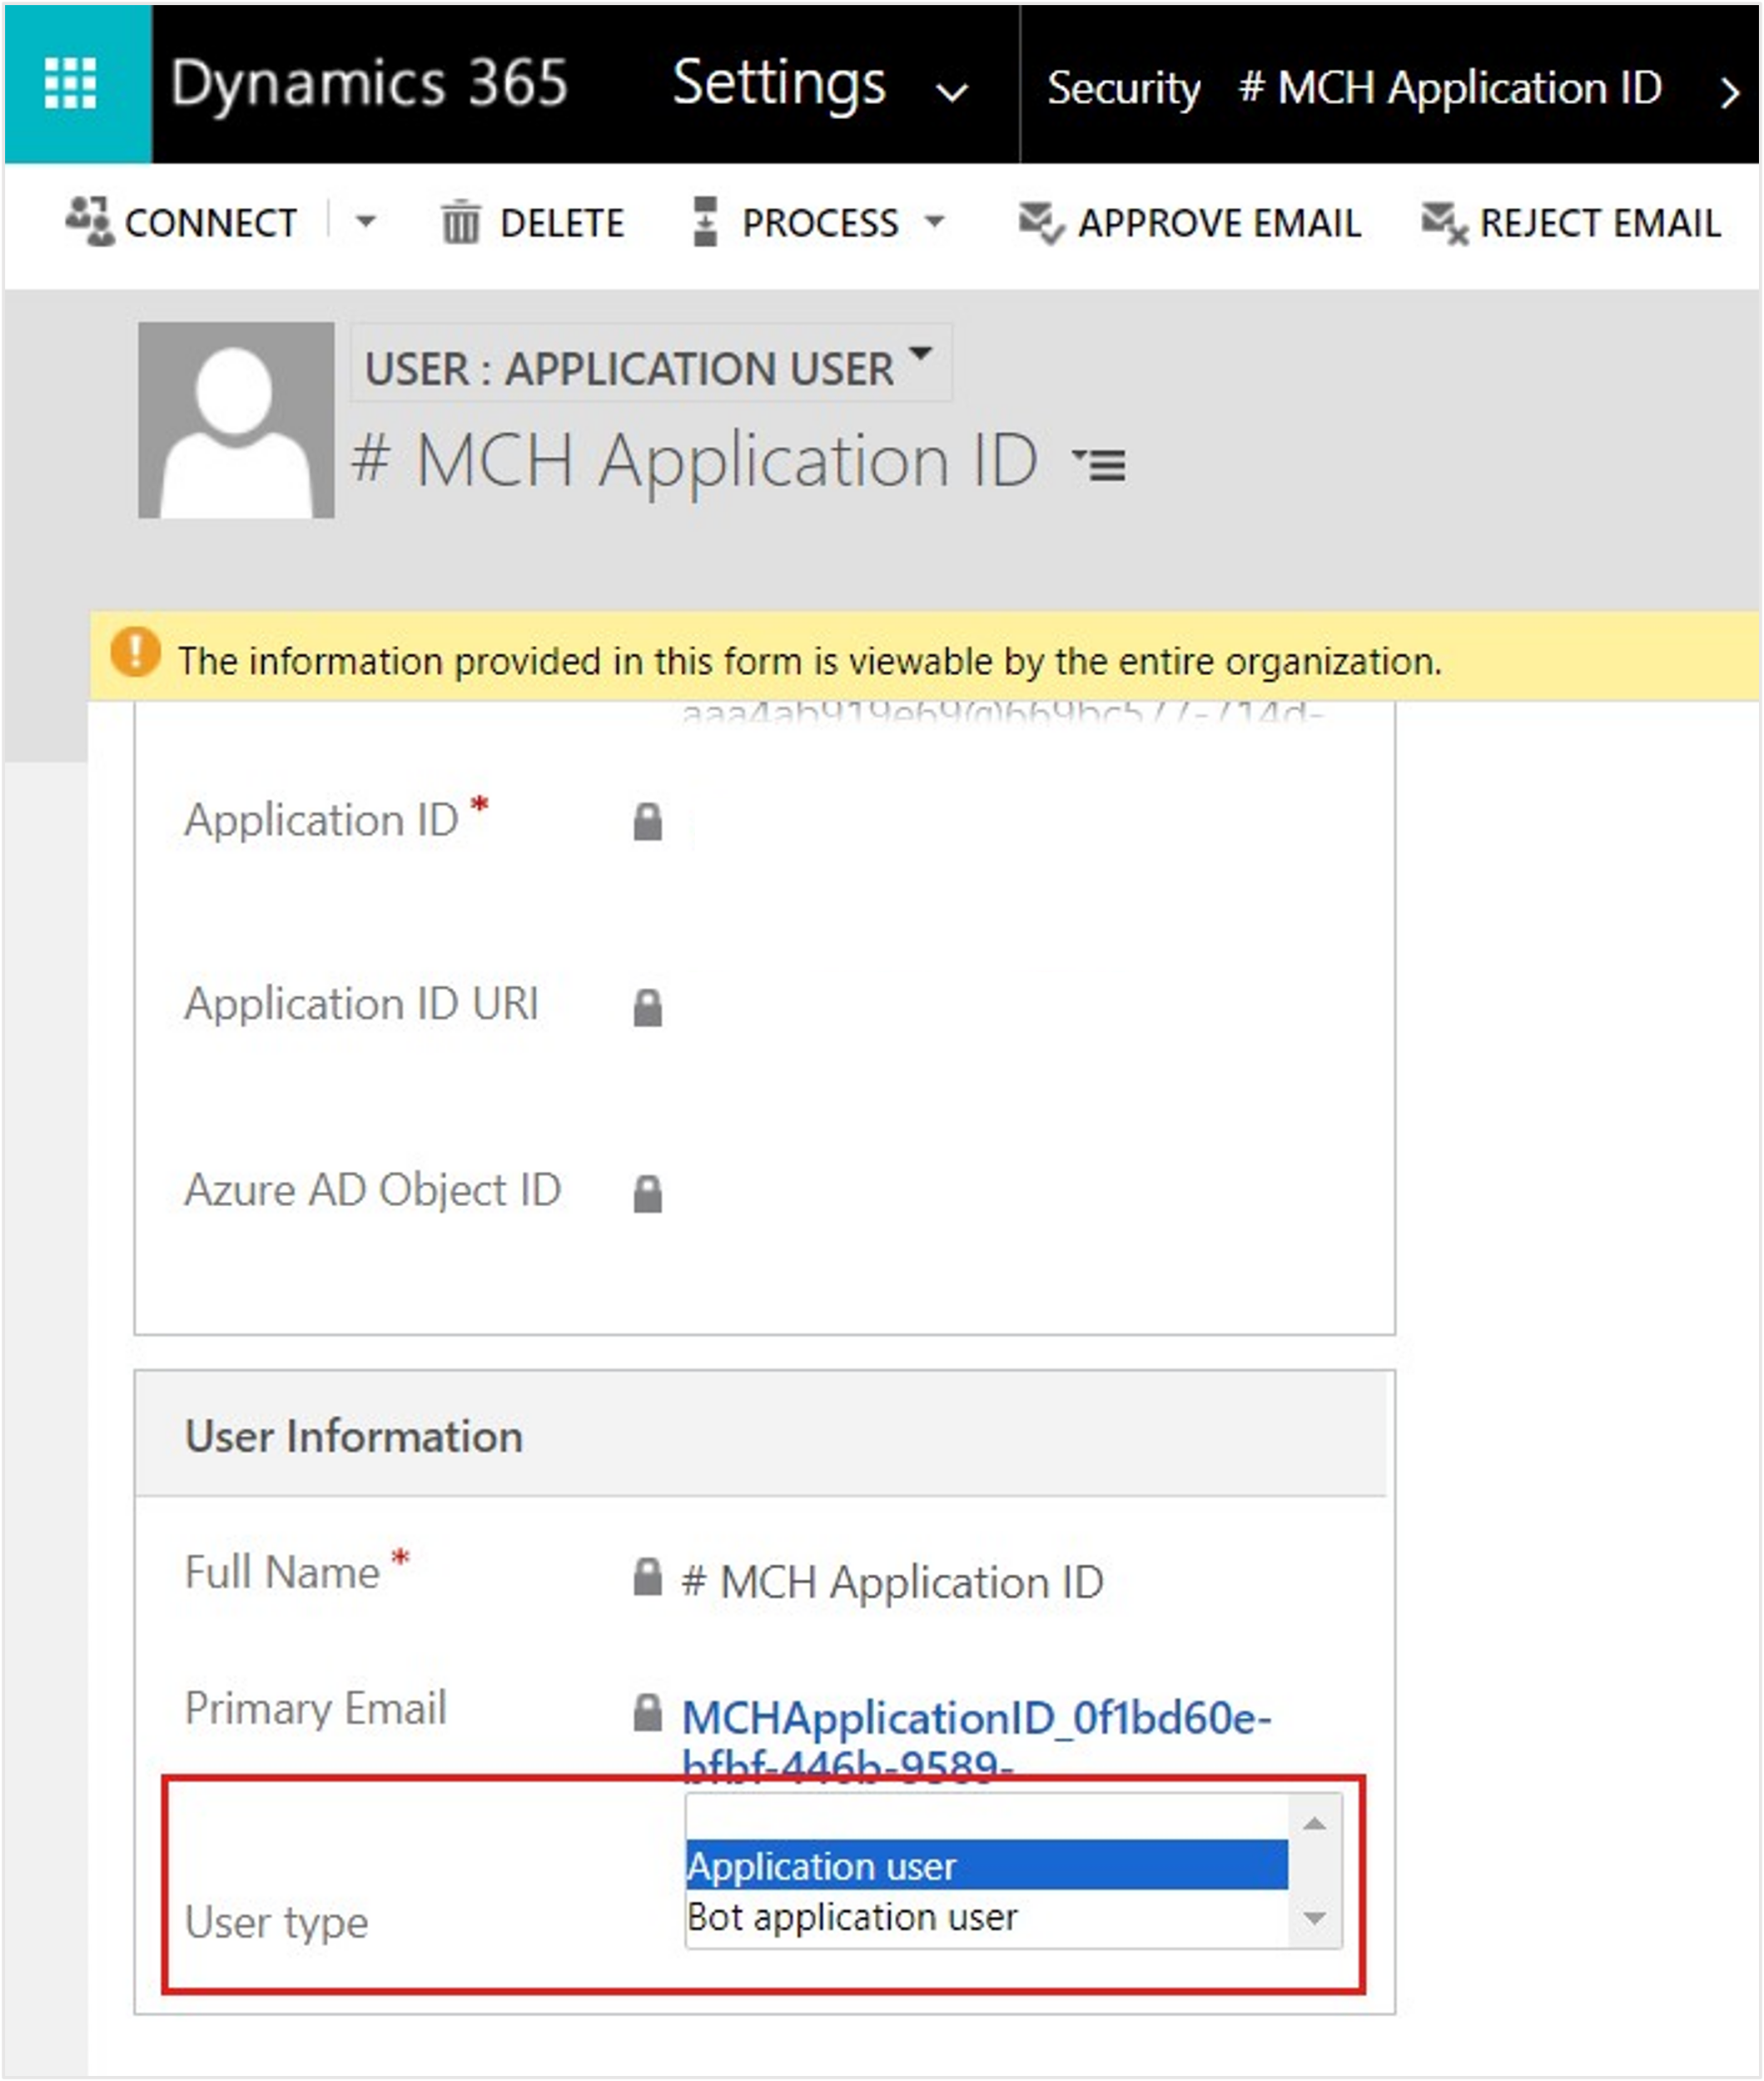
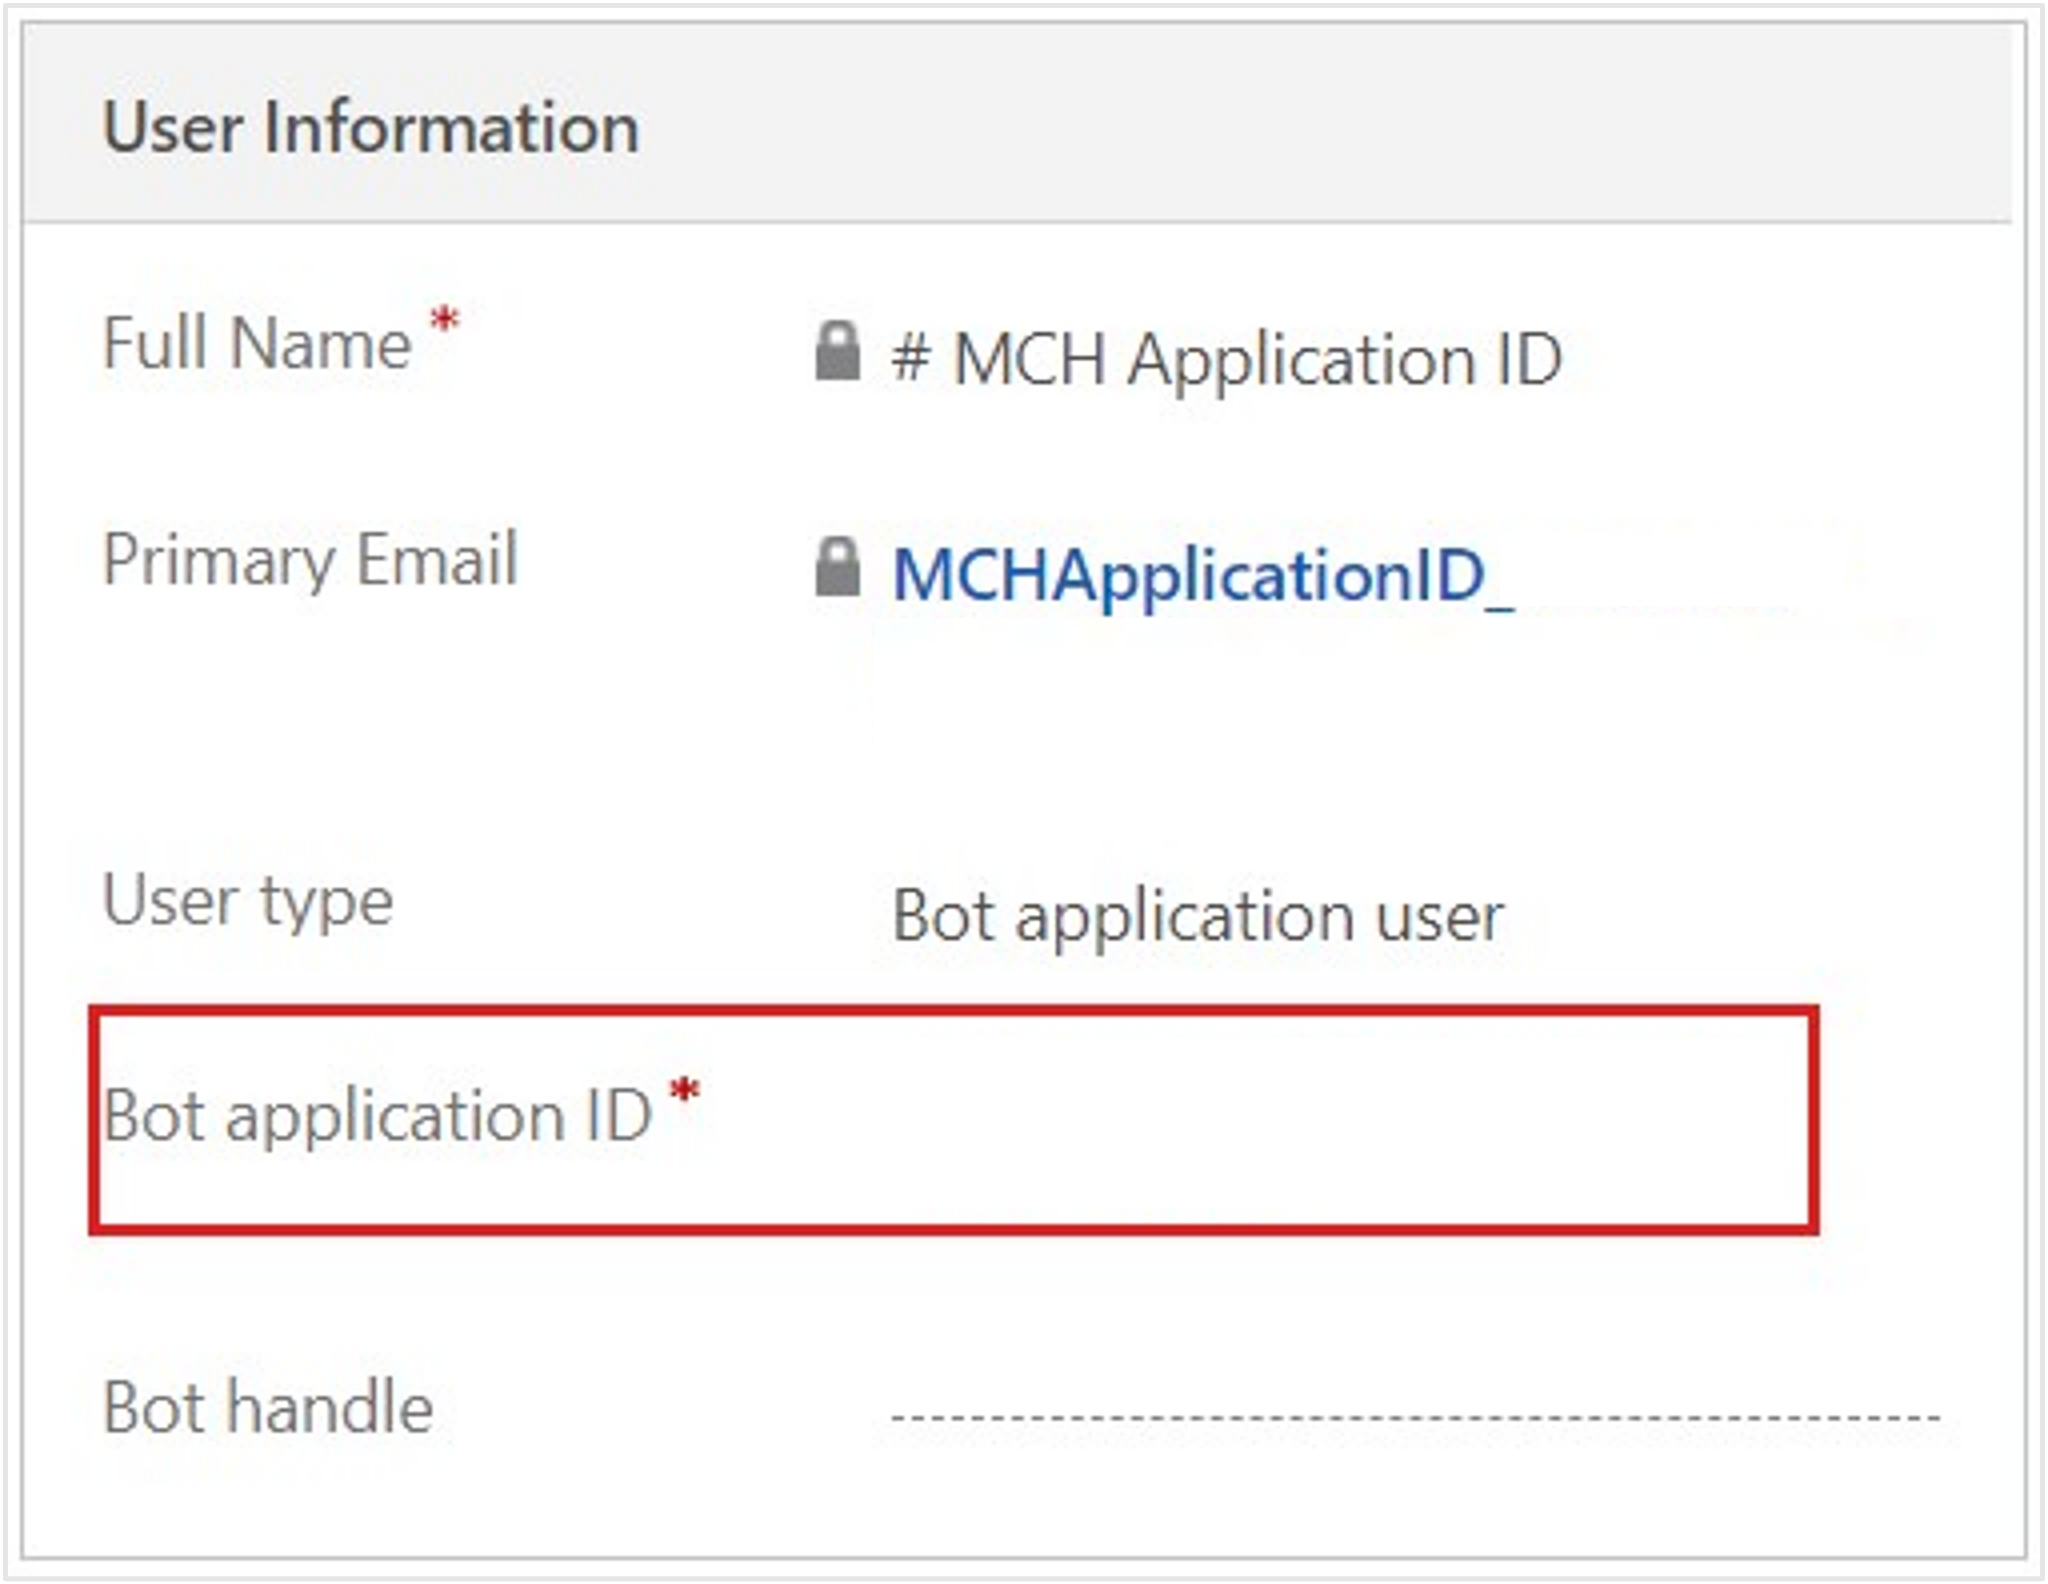
In the User Information section, change the User type from Application user to Bot application user. A new field called Bot application ID displays.
Add your details to the Bot application ID. This ID is the Azure AI Health Bot ID that you previously noted when you enabled the Teams and Omnichannel channels. This field displays after Bot application user is selected as the User type.
Select Manage Roles on the command bar.
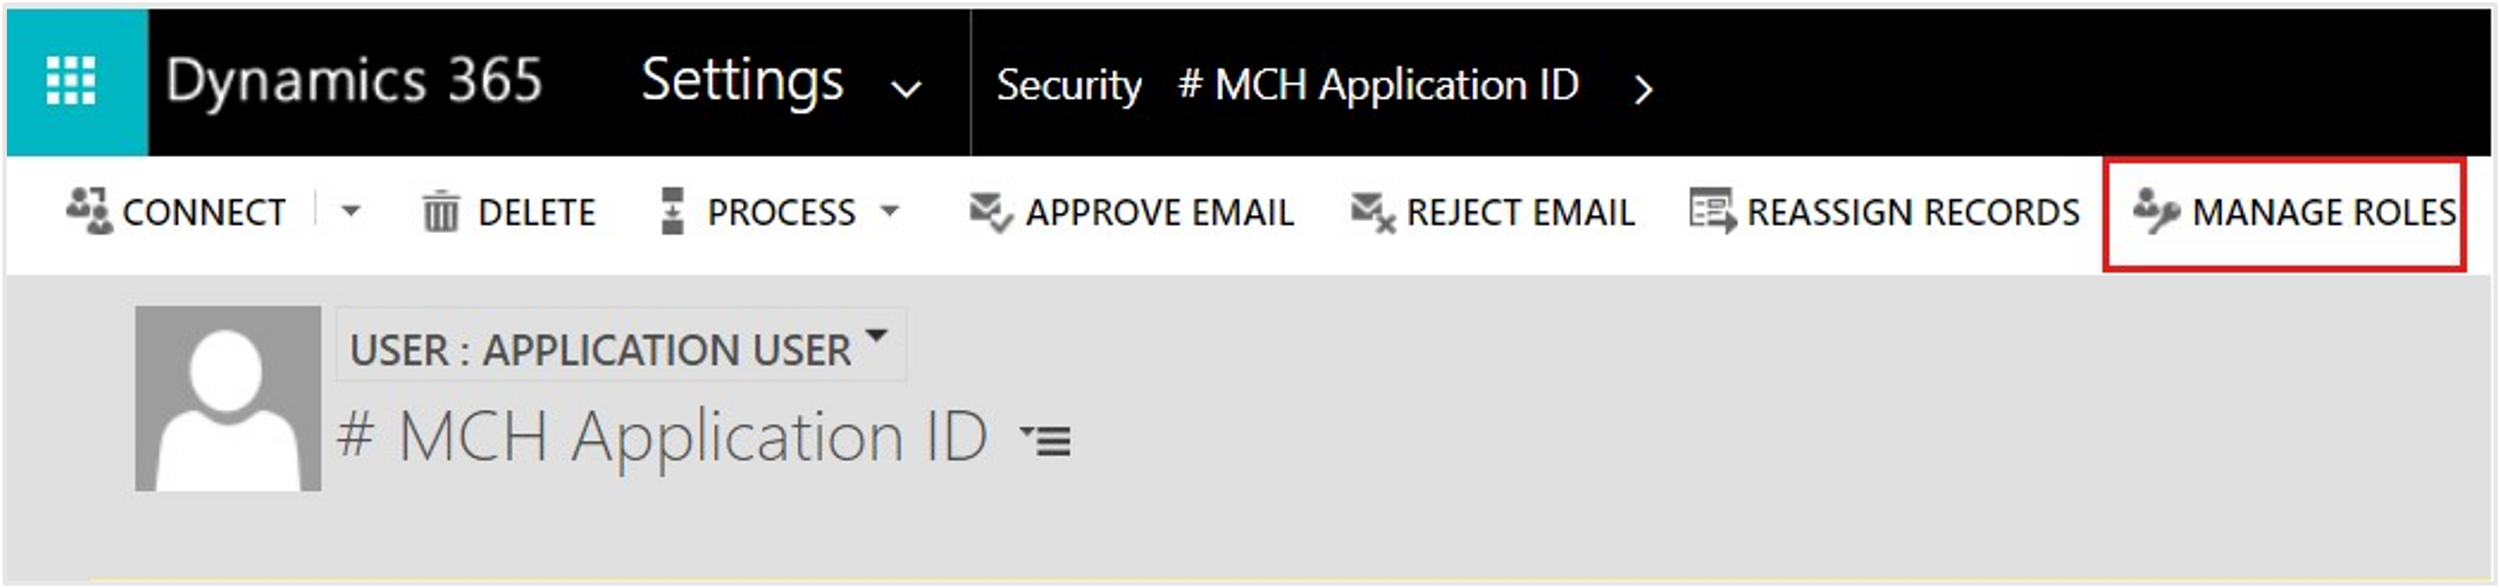
Assign the Omnichannel agent role to the bot user as you did for your own user in the previous task. This action allows the bot to act as an omnichannel agent like your user.
Select the Omnichannel Administrator role for your user ID and MCH Application ID users.


You successfully created a bot user and have assigned the Omnichannel agent role to it.
Task: Create and set up human agent queues
You can use queues to collect and distribute workload among agents. As a result, agents are added as members to the queues and the workload is distributed among the agents based on assignment methods. For more information, see Manage queues for unified routing.
In this task, you create the omnichannel queue that's necessary for communicating with a human agent.
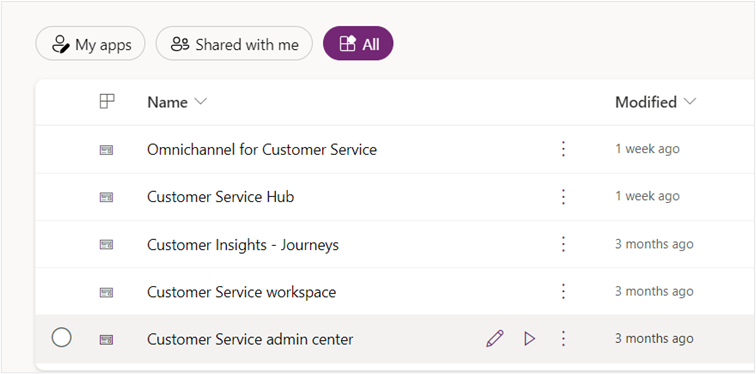
Switch back to the tab with Power Apps, select All and then Apps in the navigation pane, and open the Customer Service admin center app.
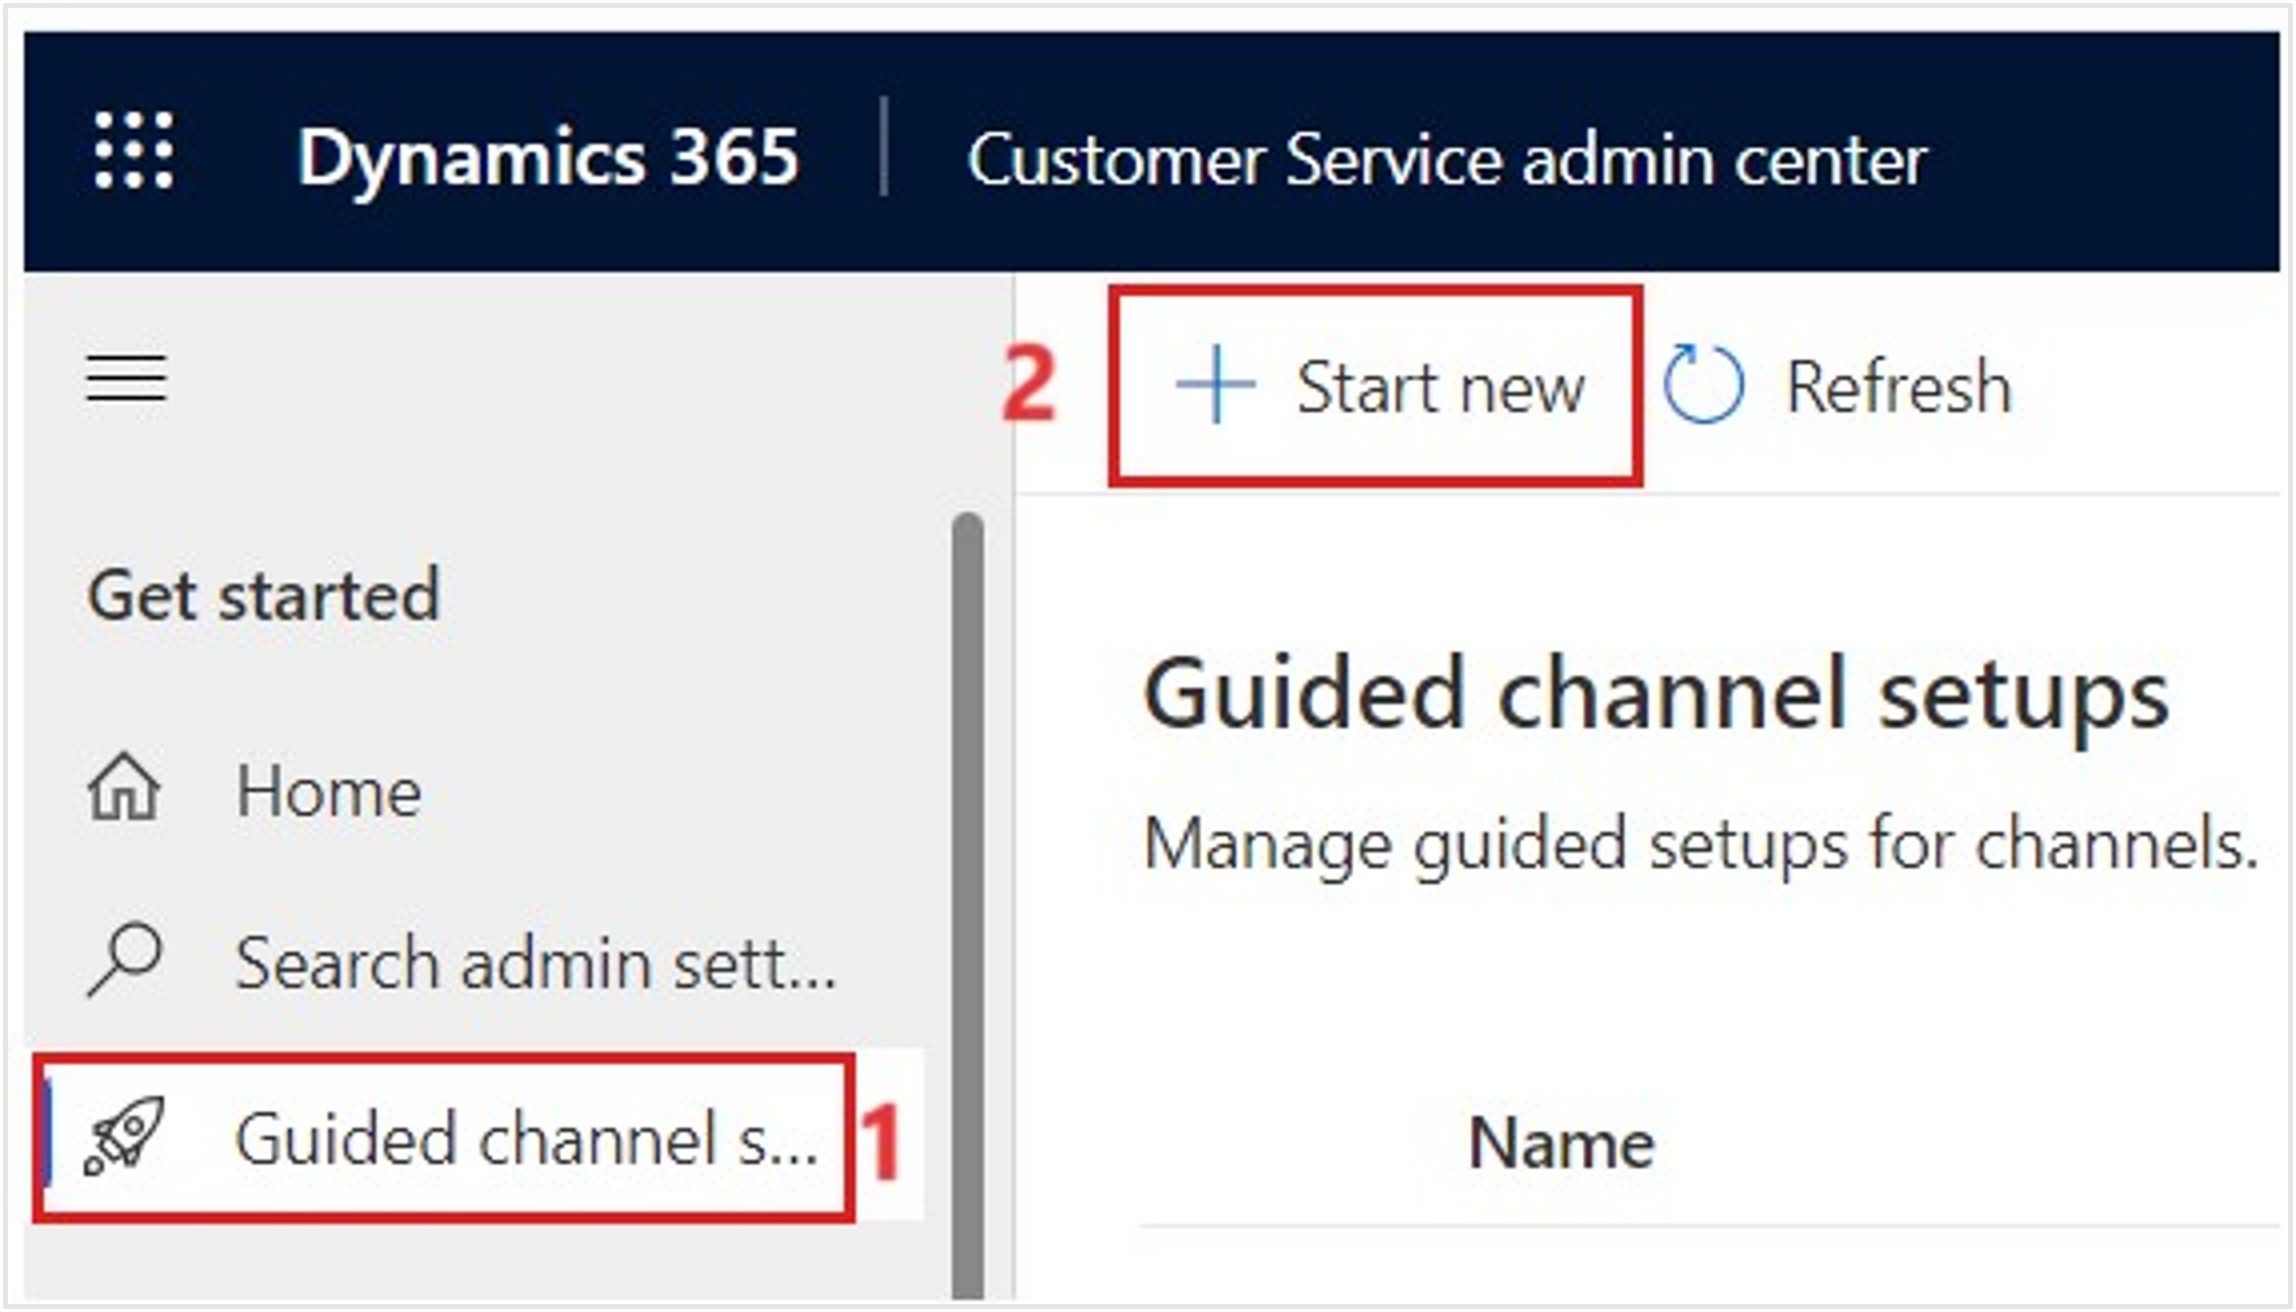
You should be on the Home page. Select Guided channel setup on the navigation pane and select Start new. You can automatically create a custom chat channel, queue, and workstream to help connect users to bots and human agents.
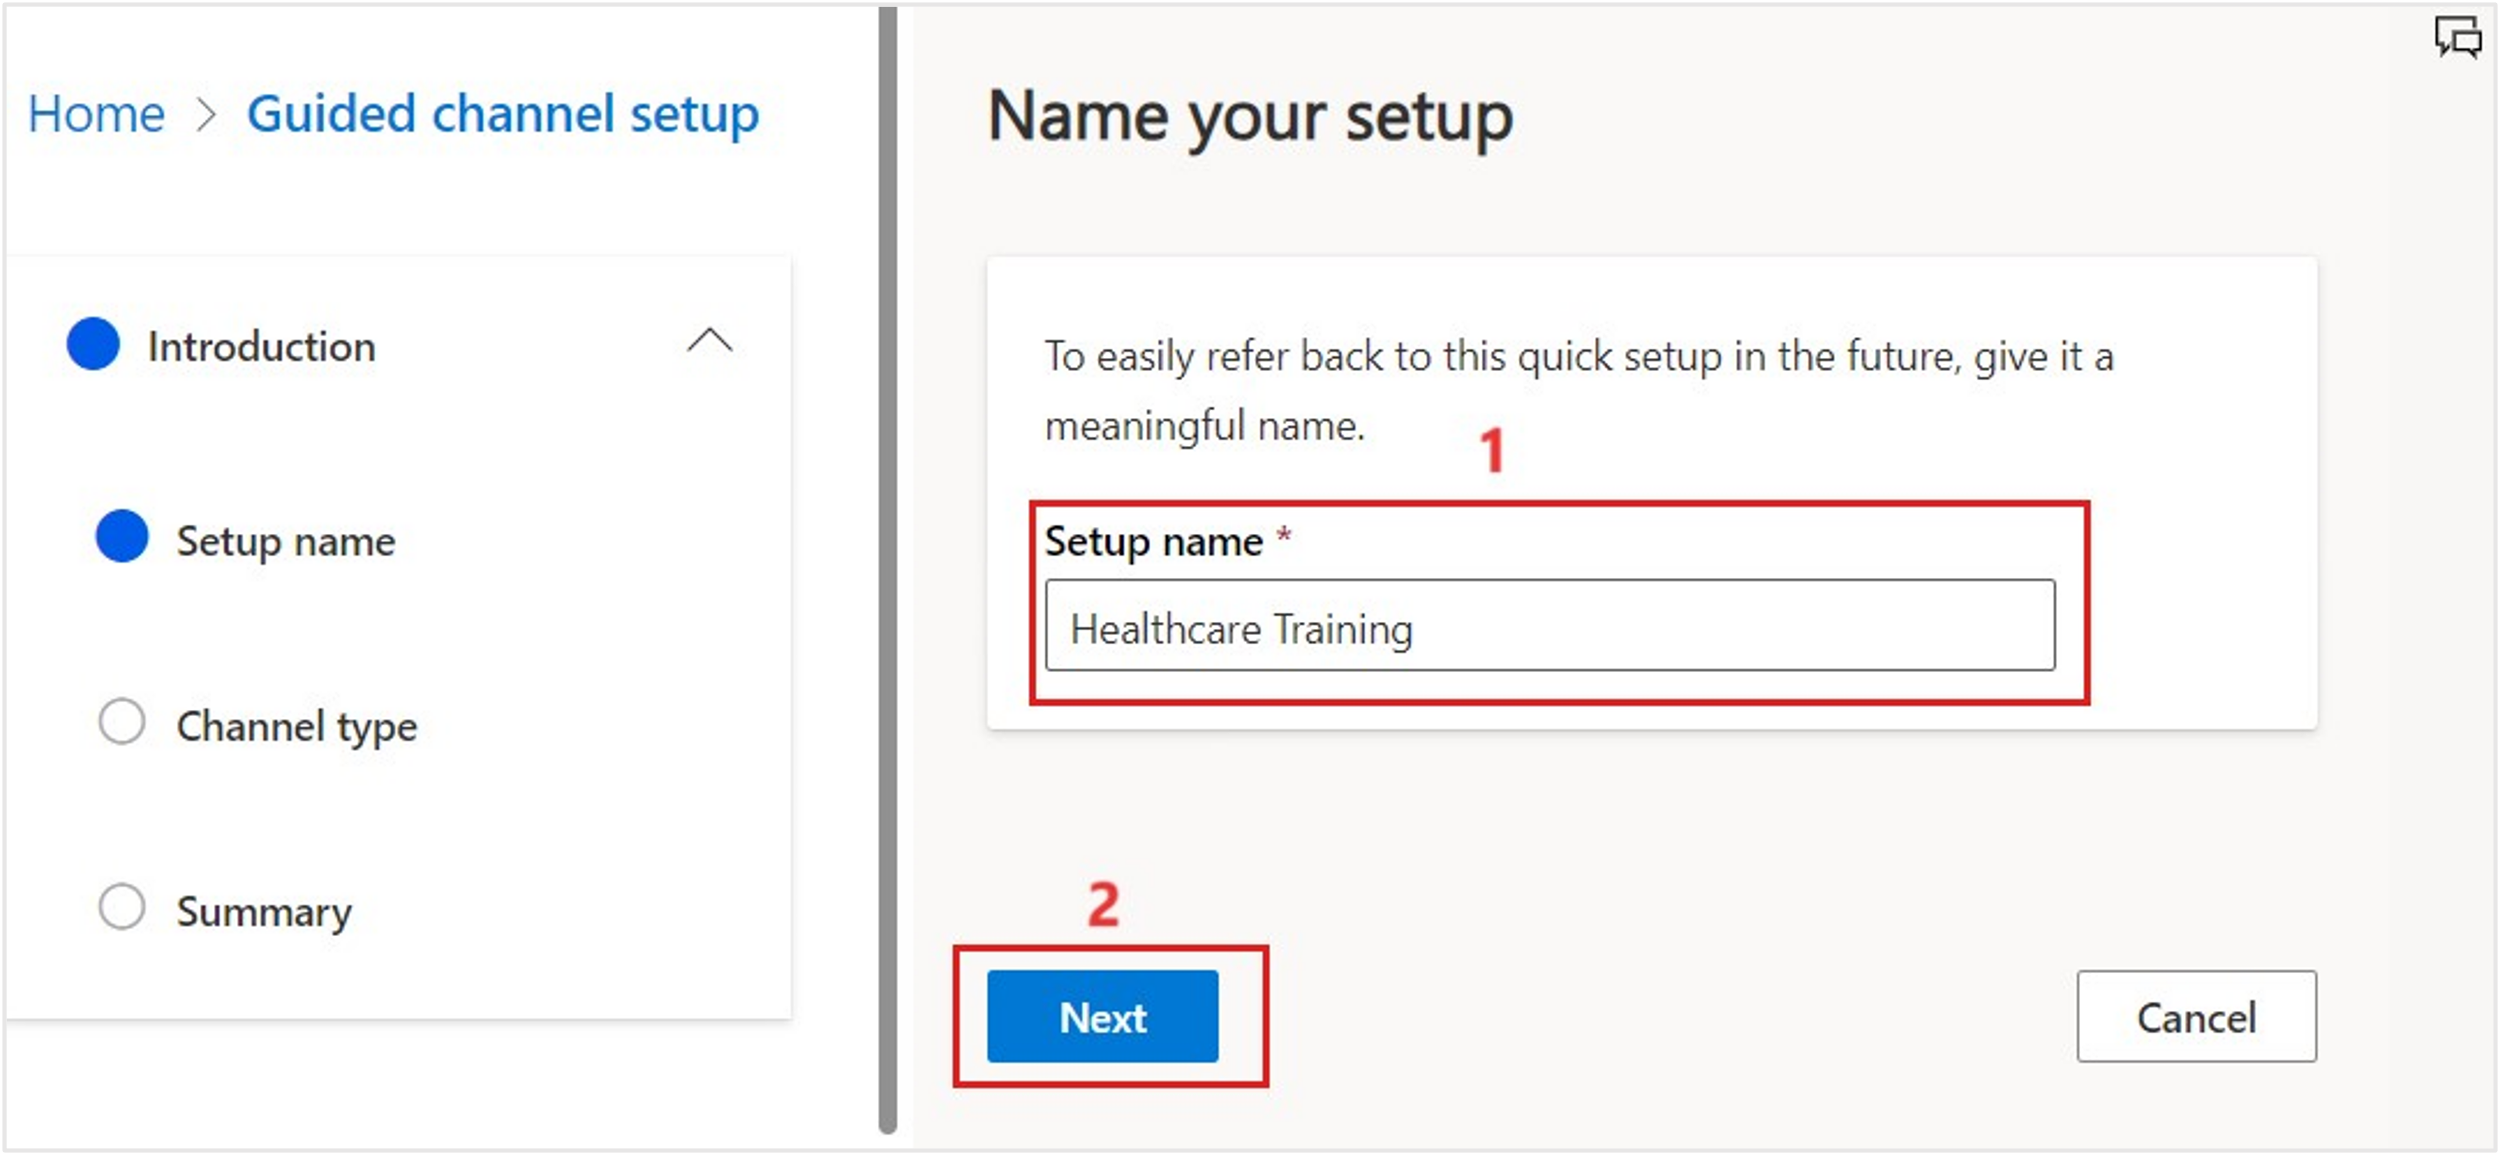
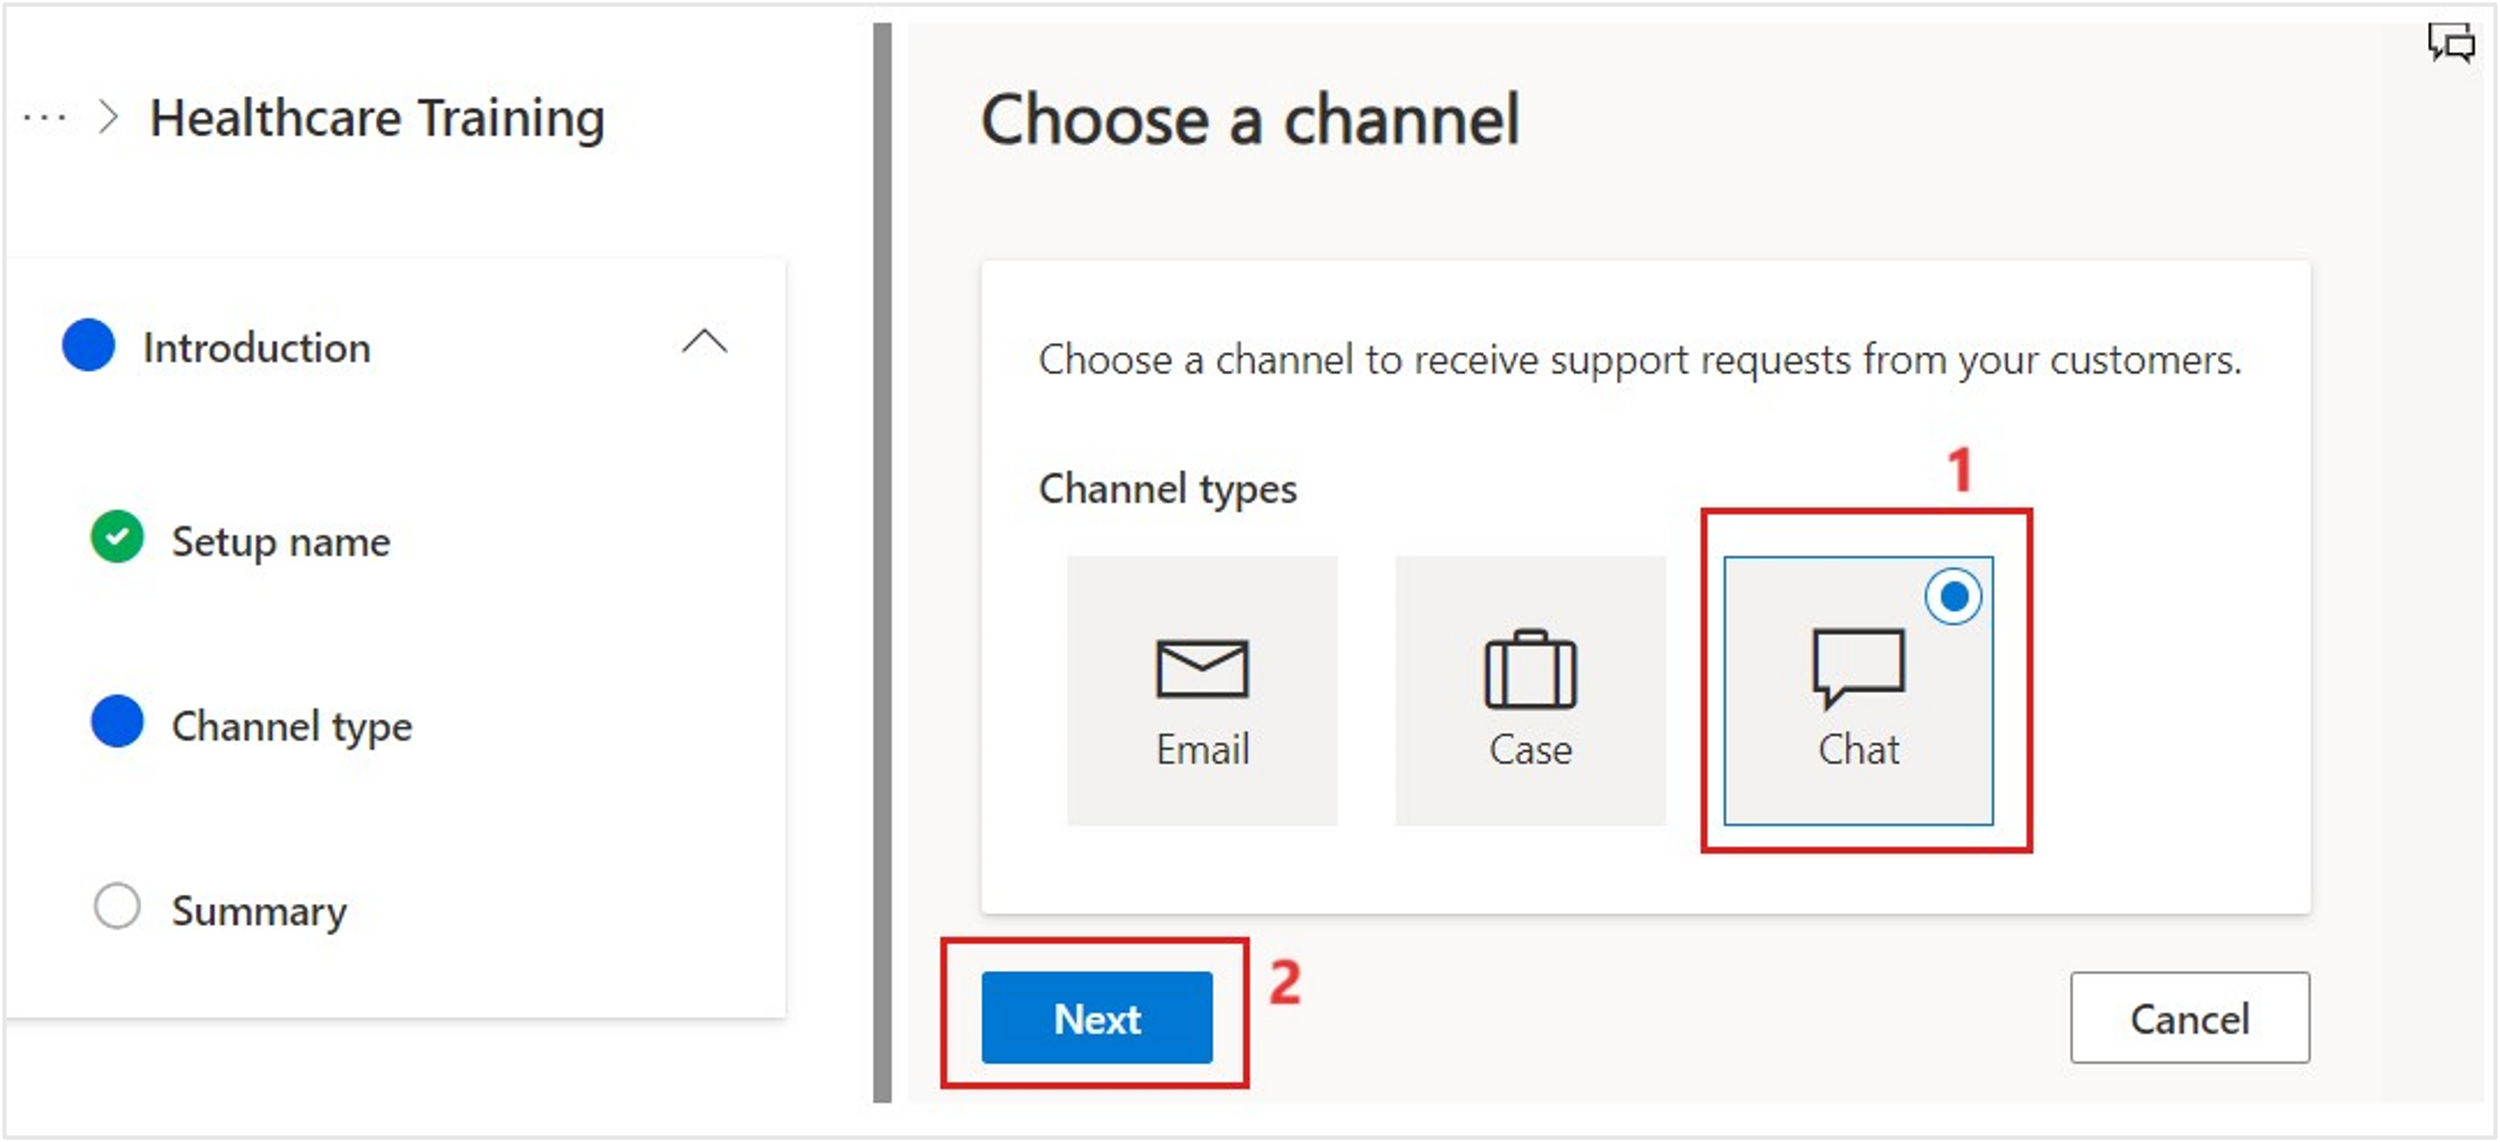
On the Name your setup page, in the Setup name field, and enter the name Healthcare Training. Select Next.
Select Chat as the channel type. Select Next.
Select Continue setup on the Summary page.
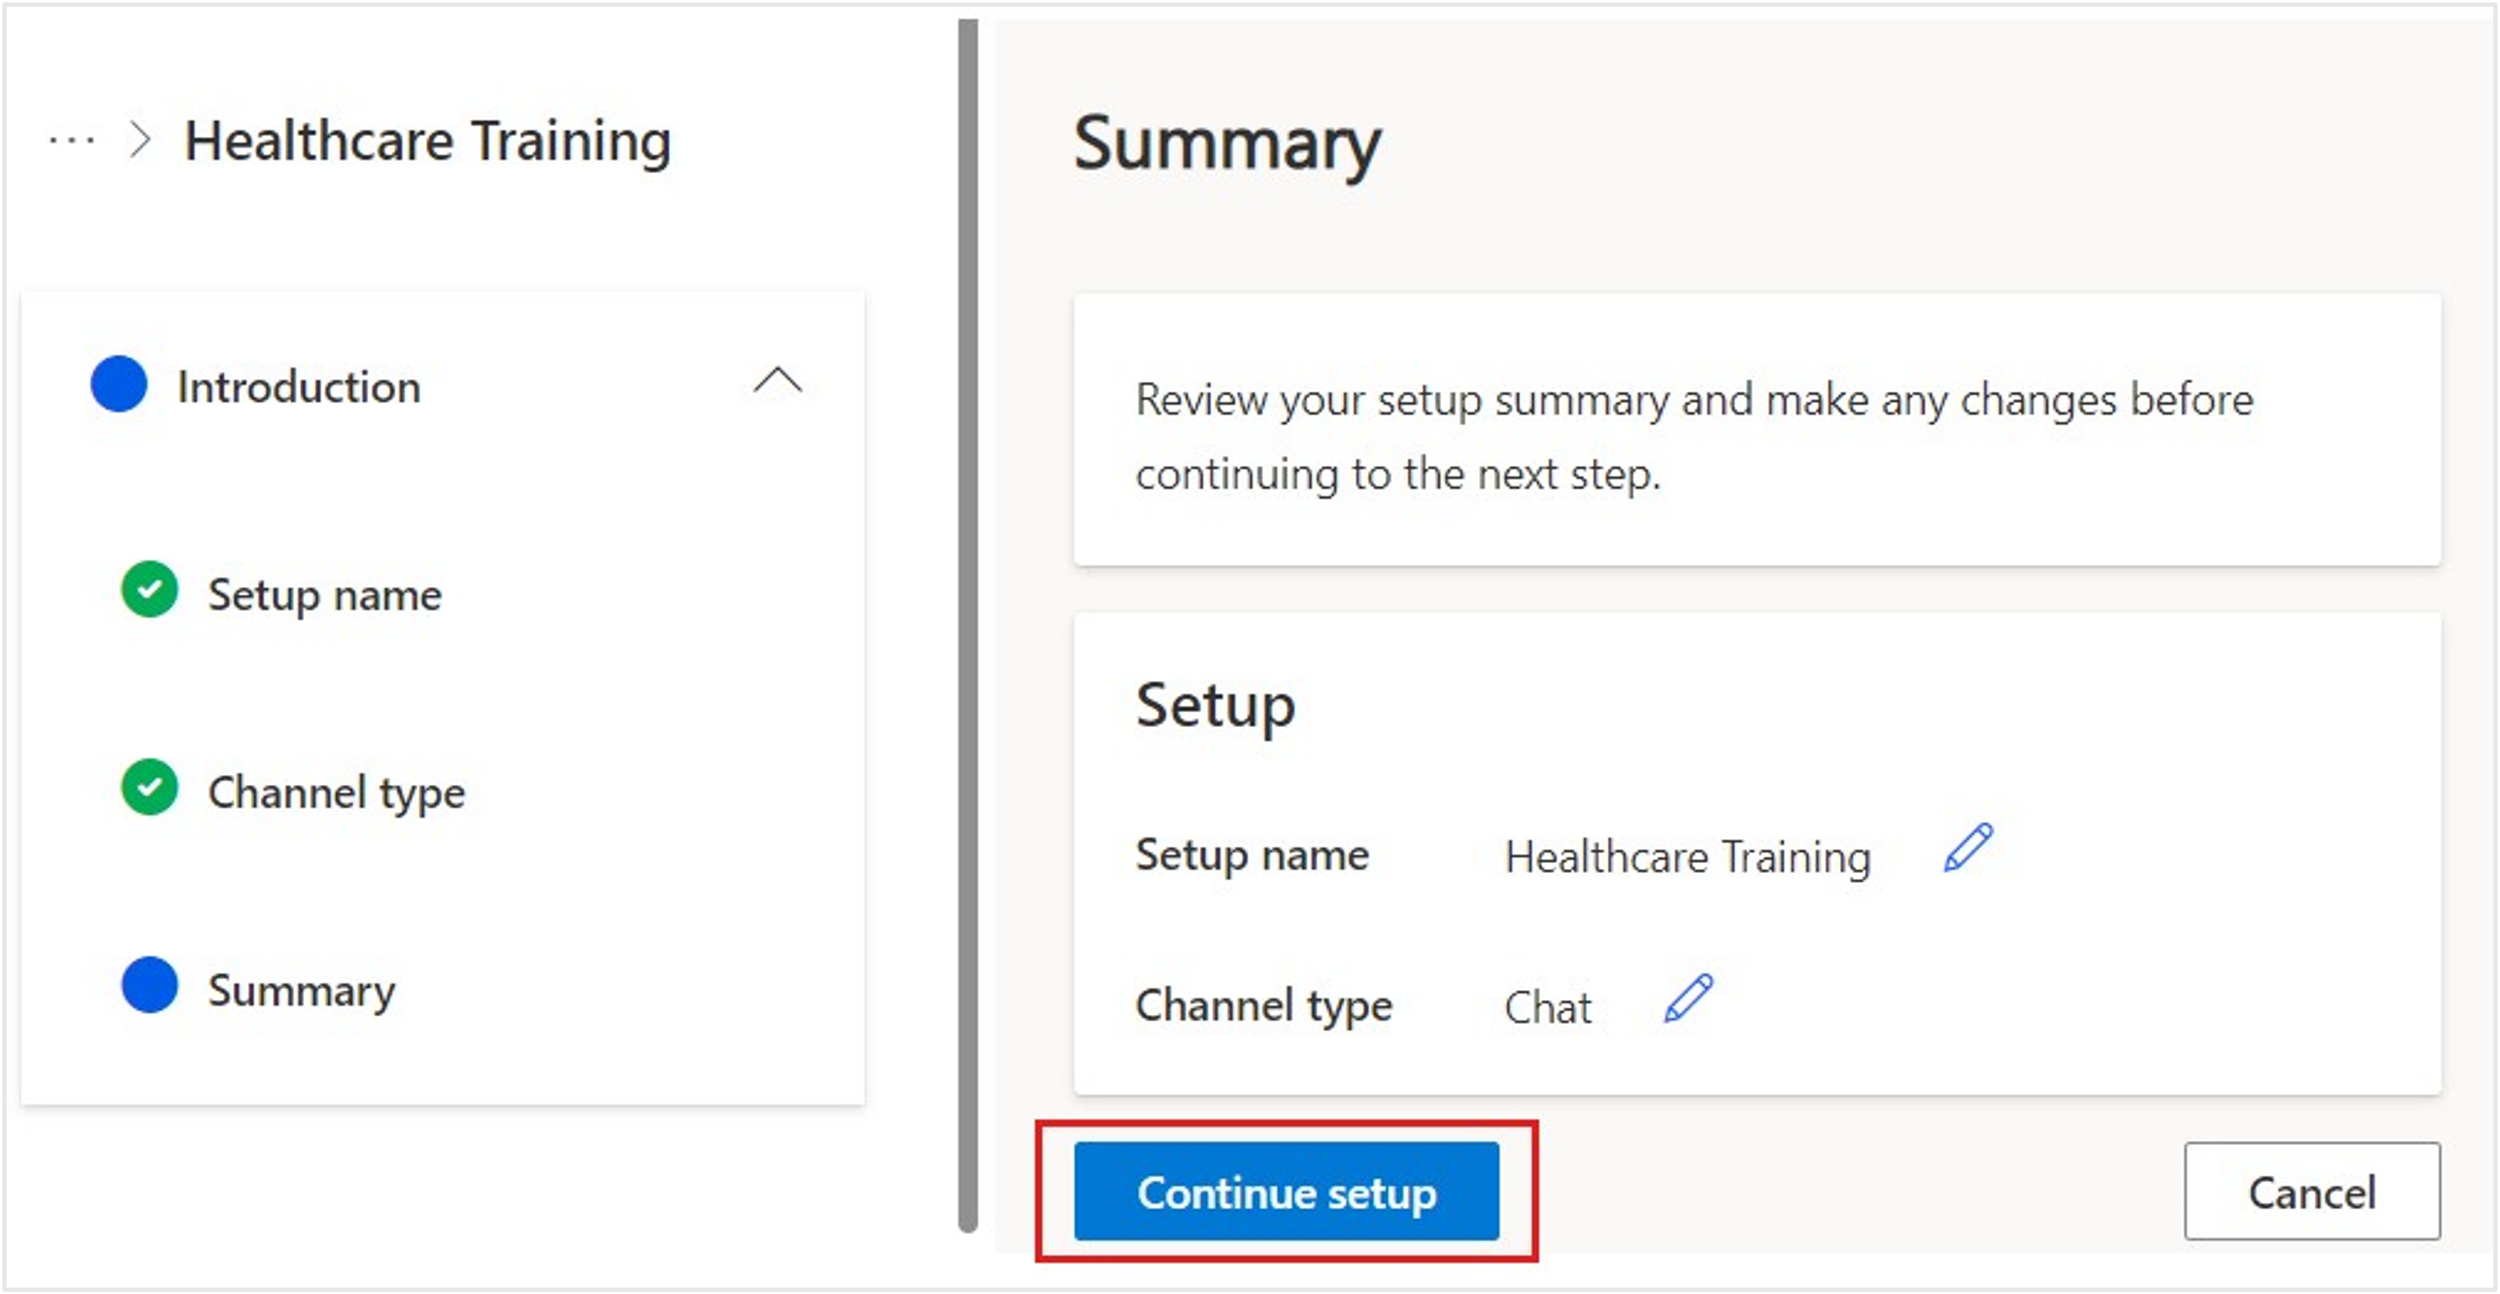
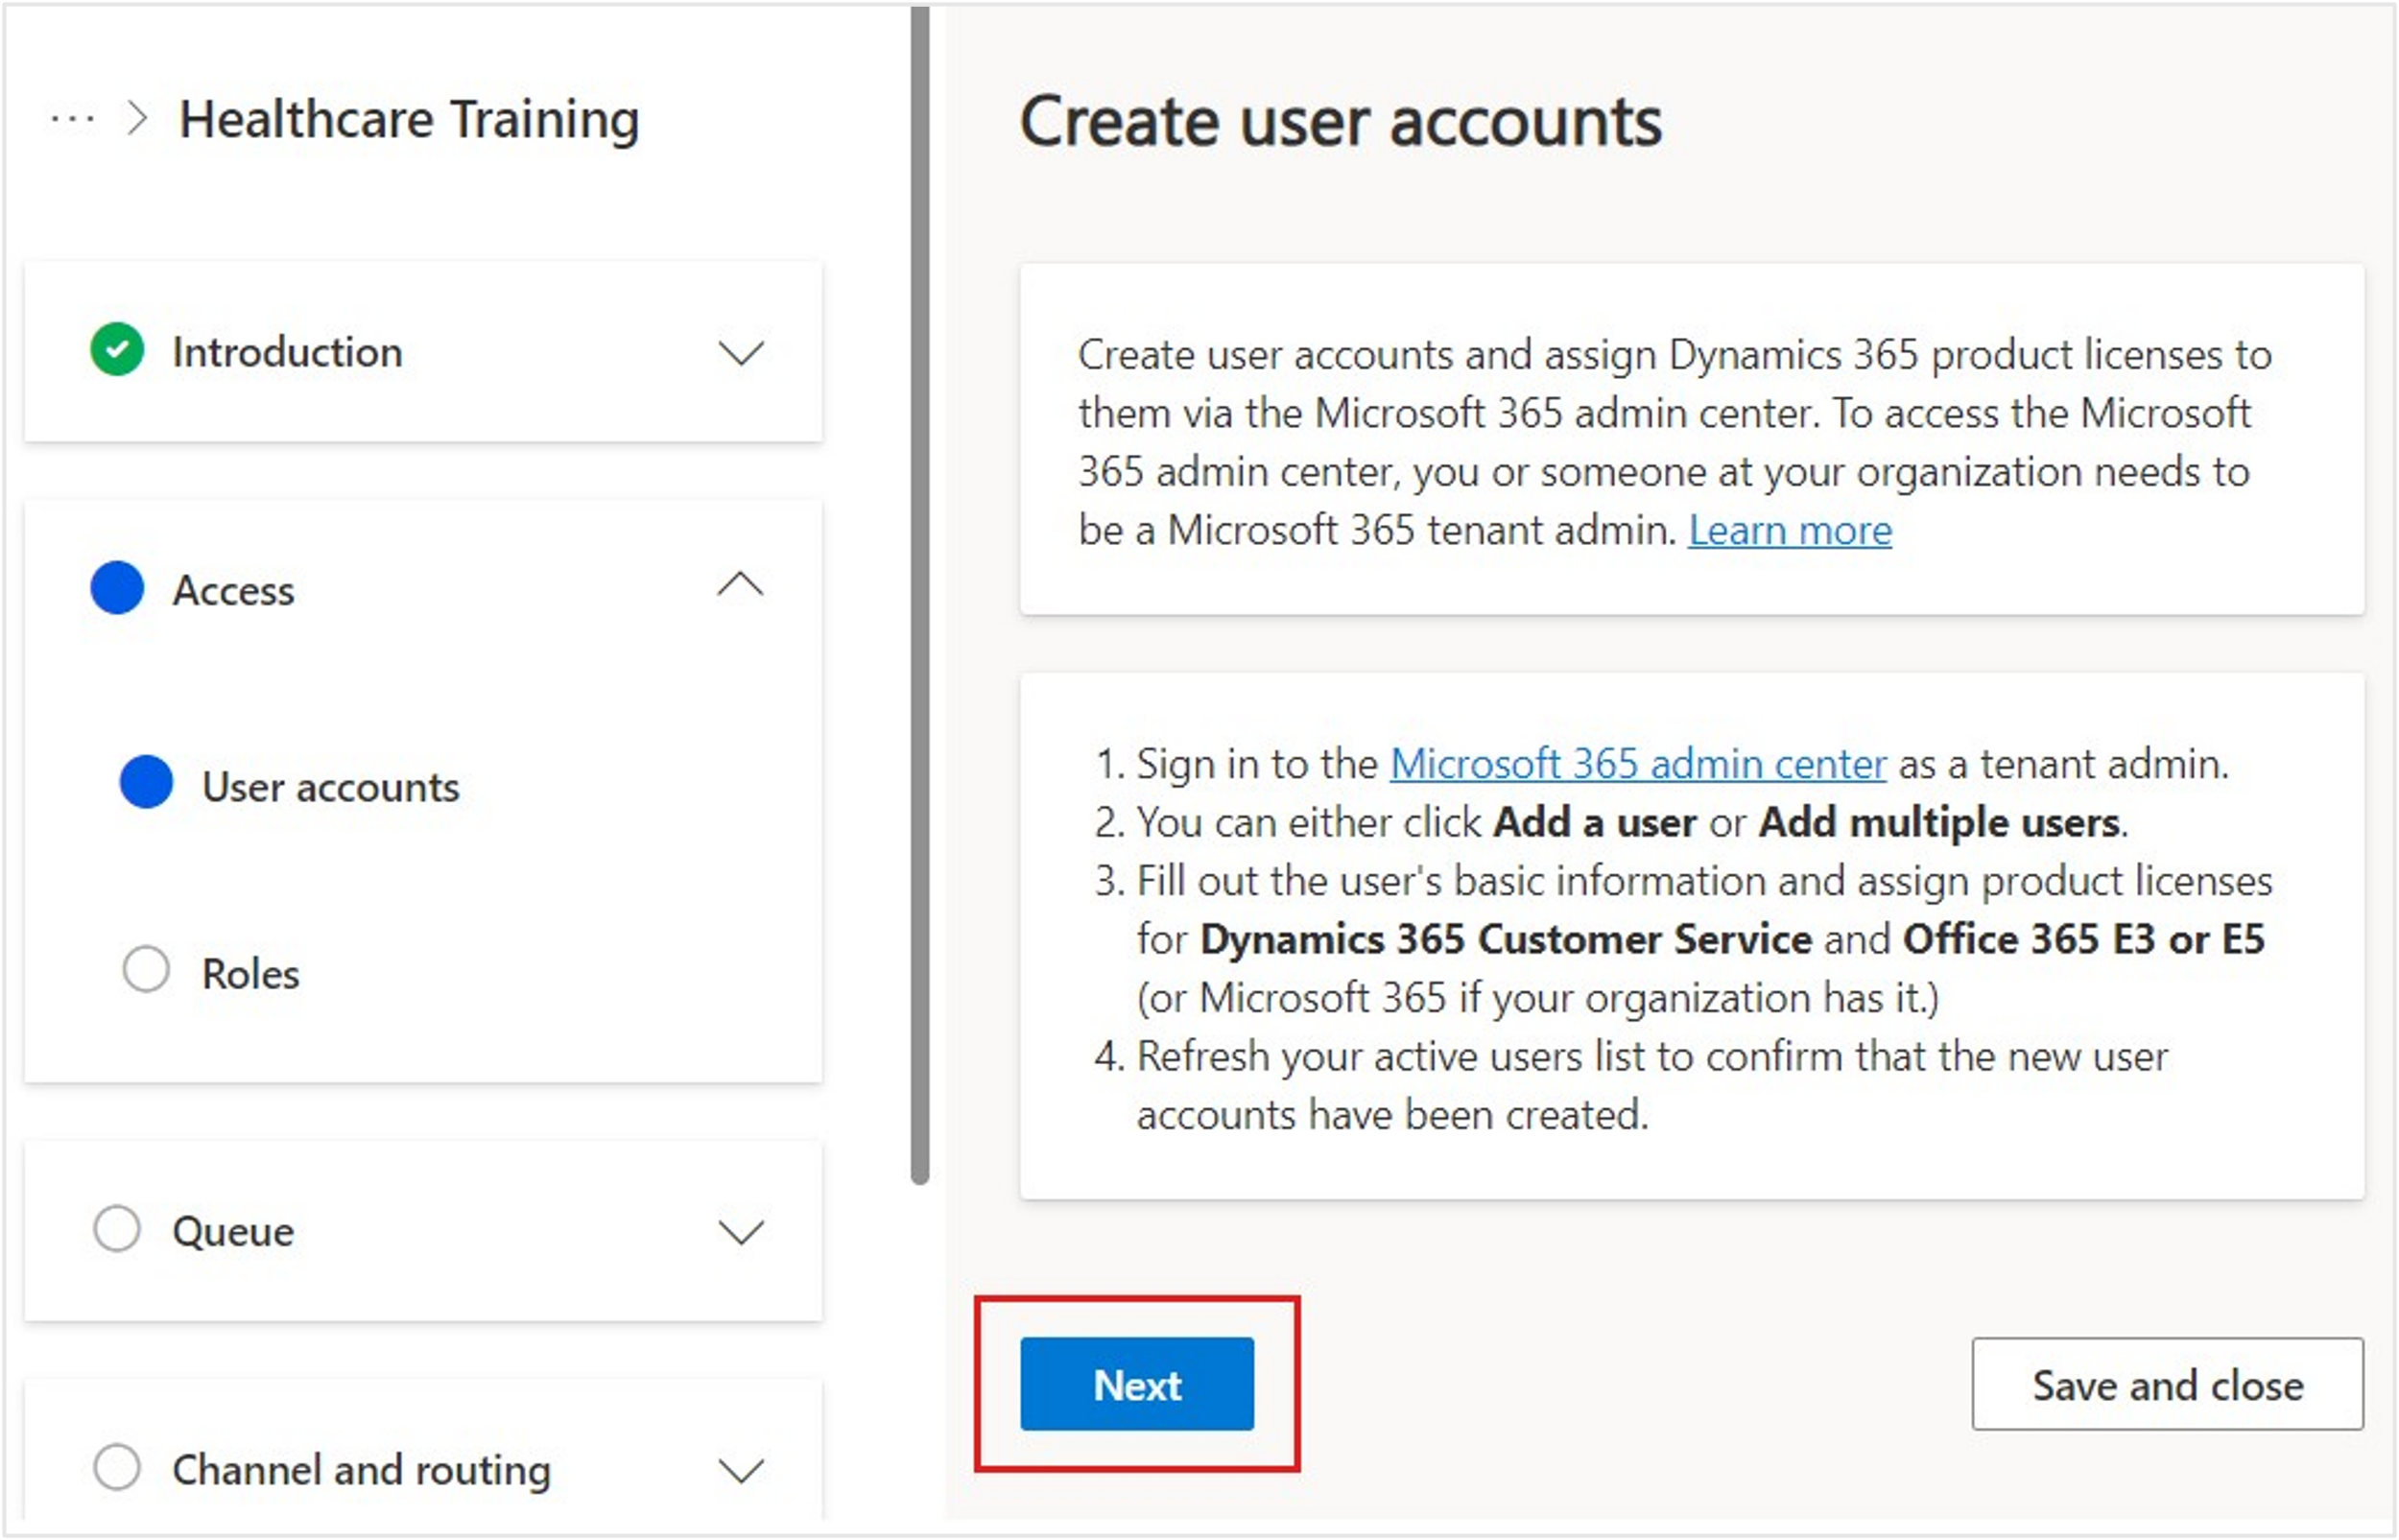
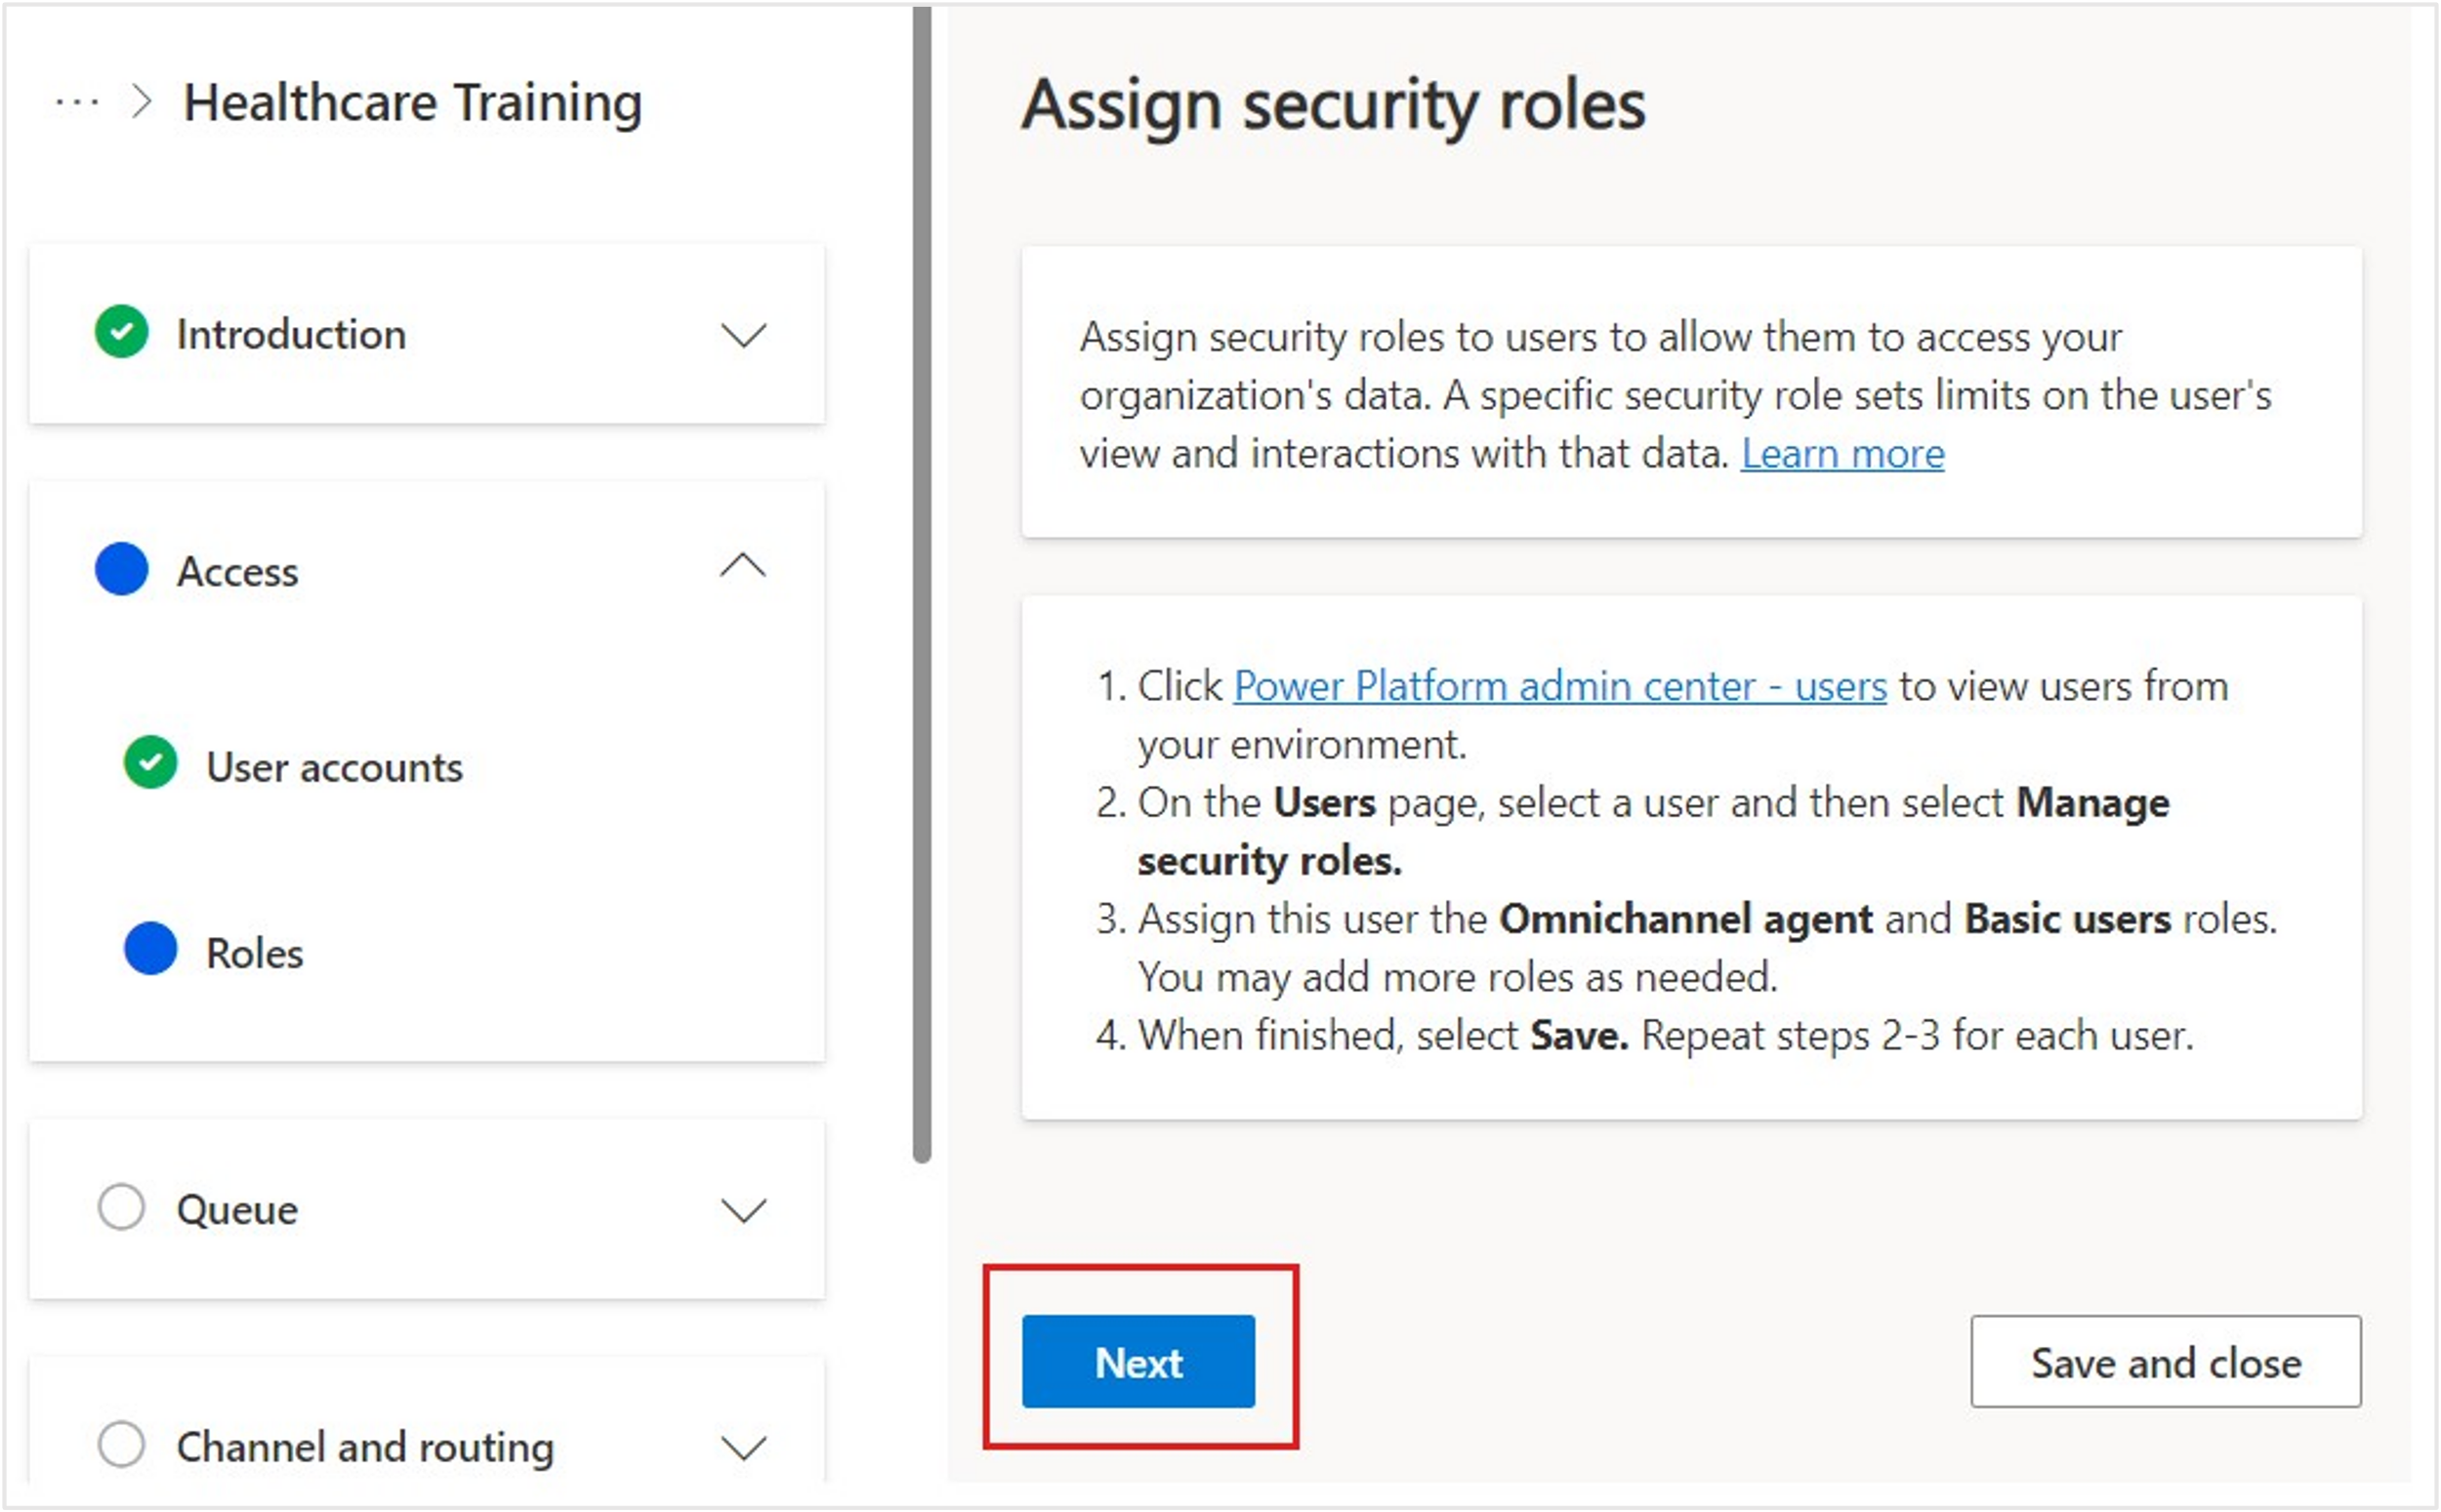
Select Next on the following two screens, which discuss creating user accounts and assigning security roles.
In the Define a queue page, create a queue called Escalate to Human, which manages and redirects the incoming messages from a user to a Customer Service (human) agent when the bot sends the user through to a live agent. Create the new queue with the following details:
- Name - Escalate to Human
- Type - Defaults to Messaging
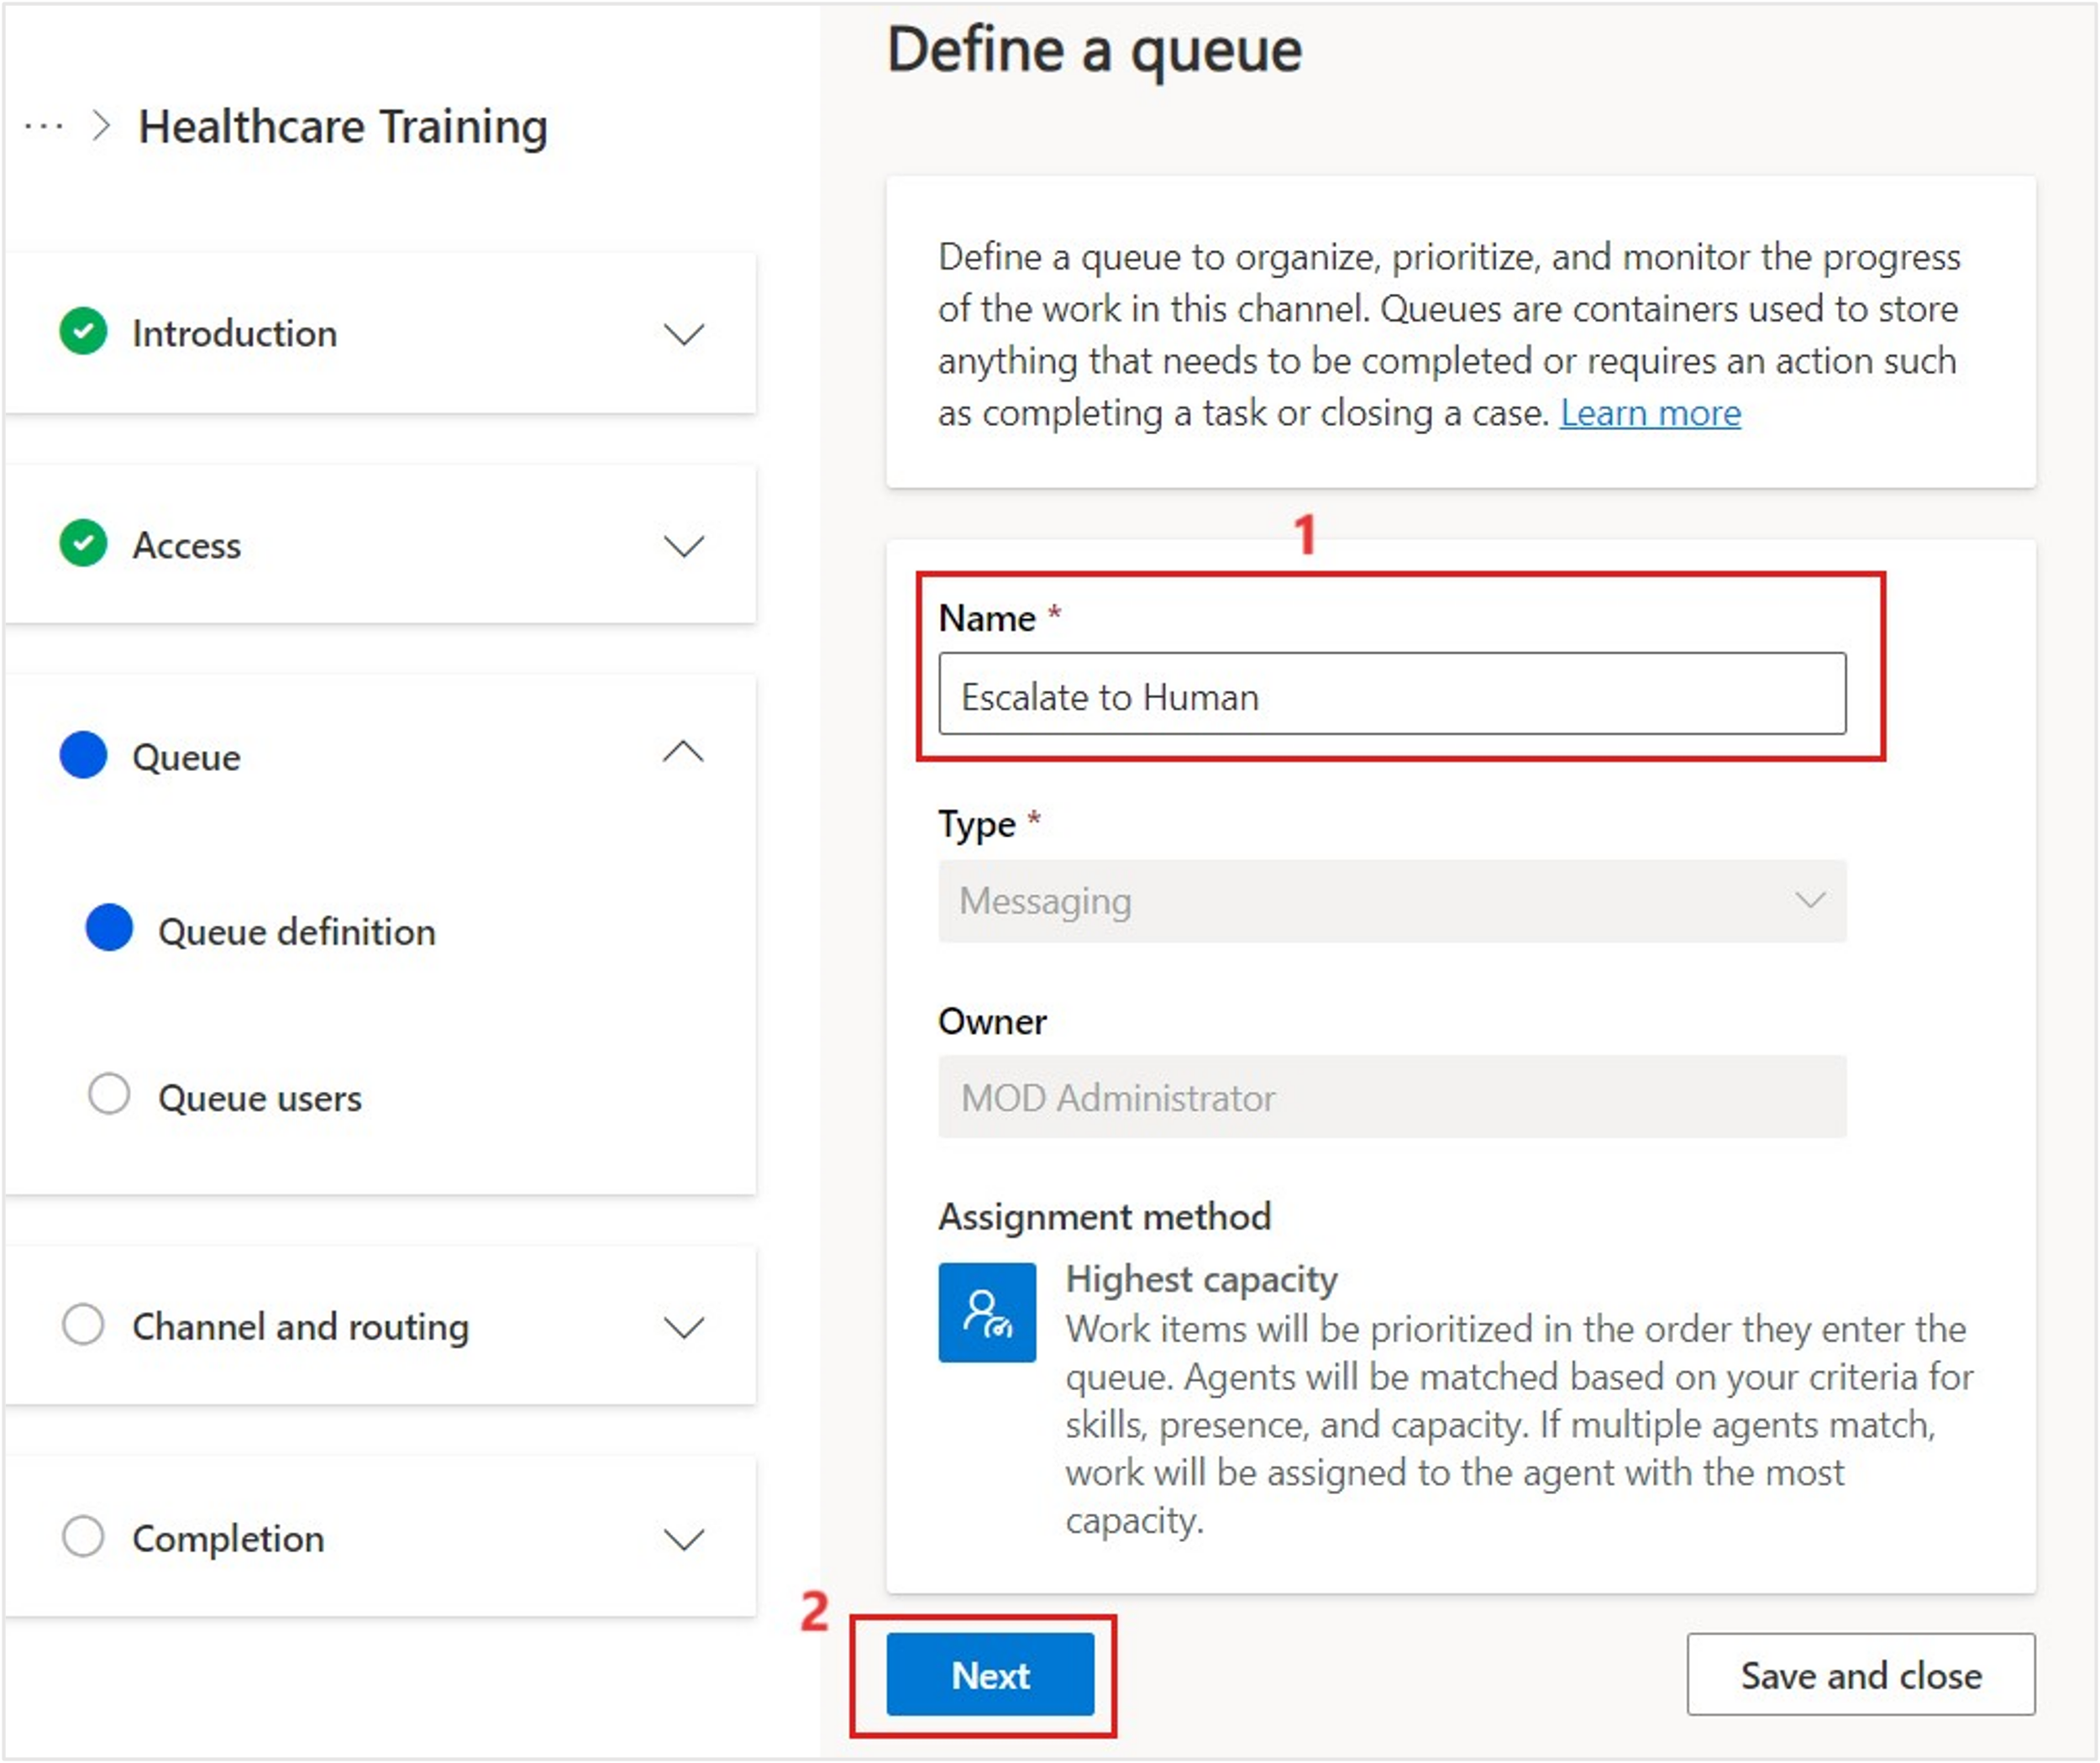
Select Next.
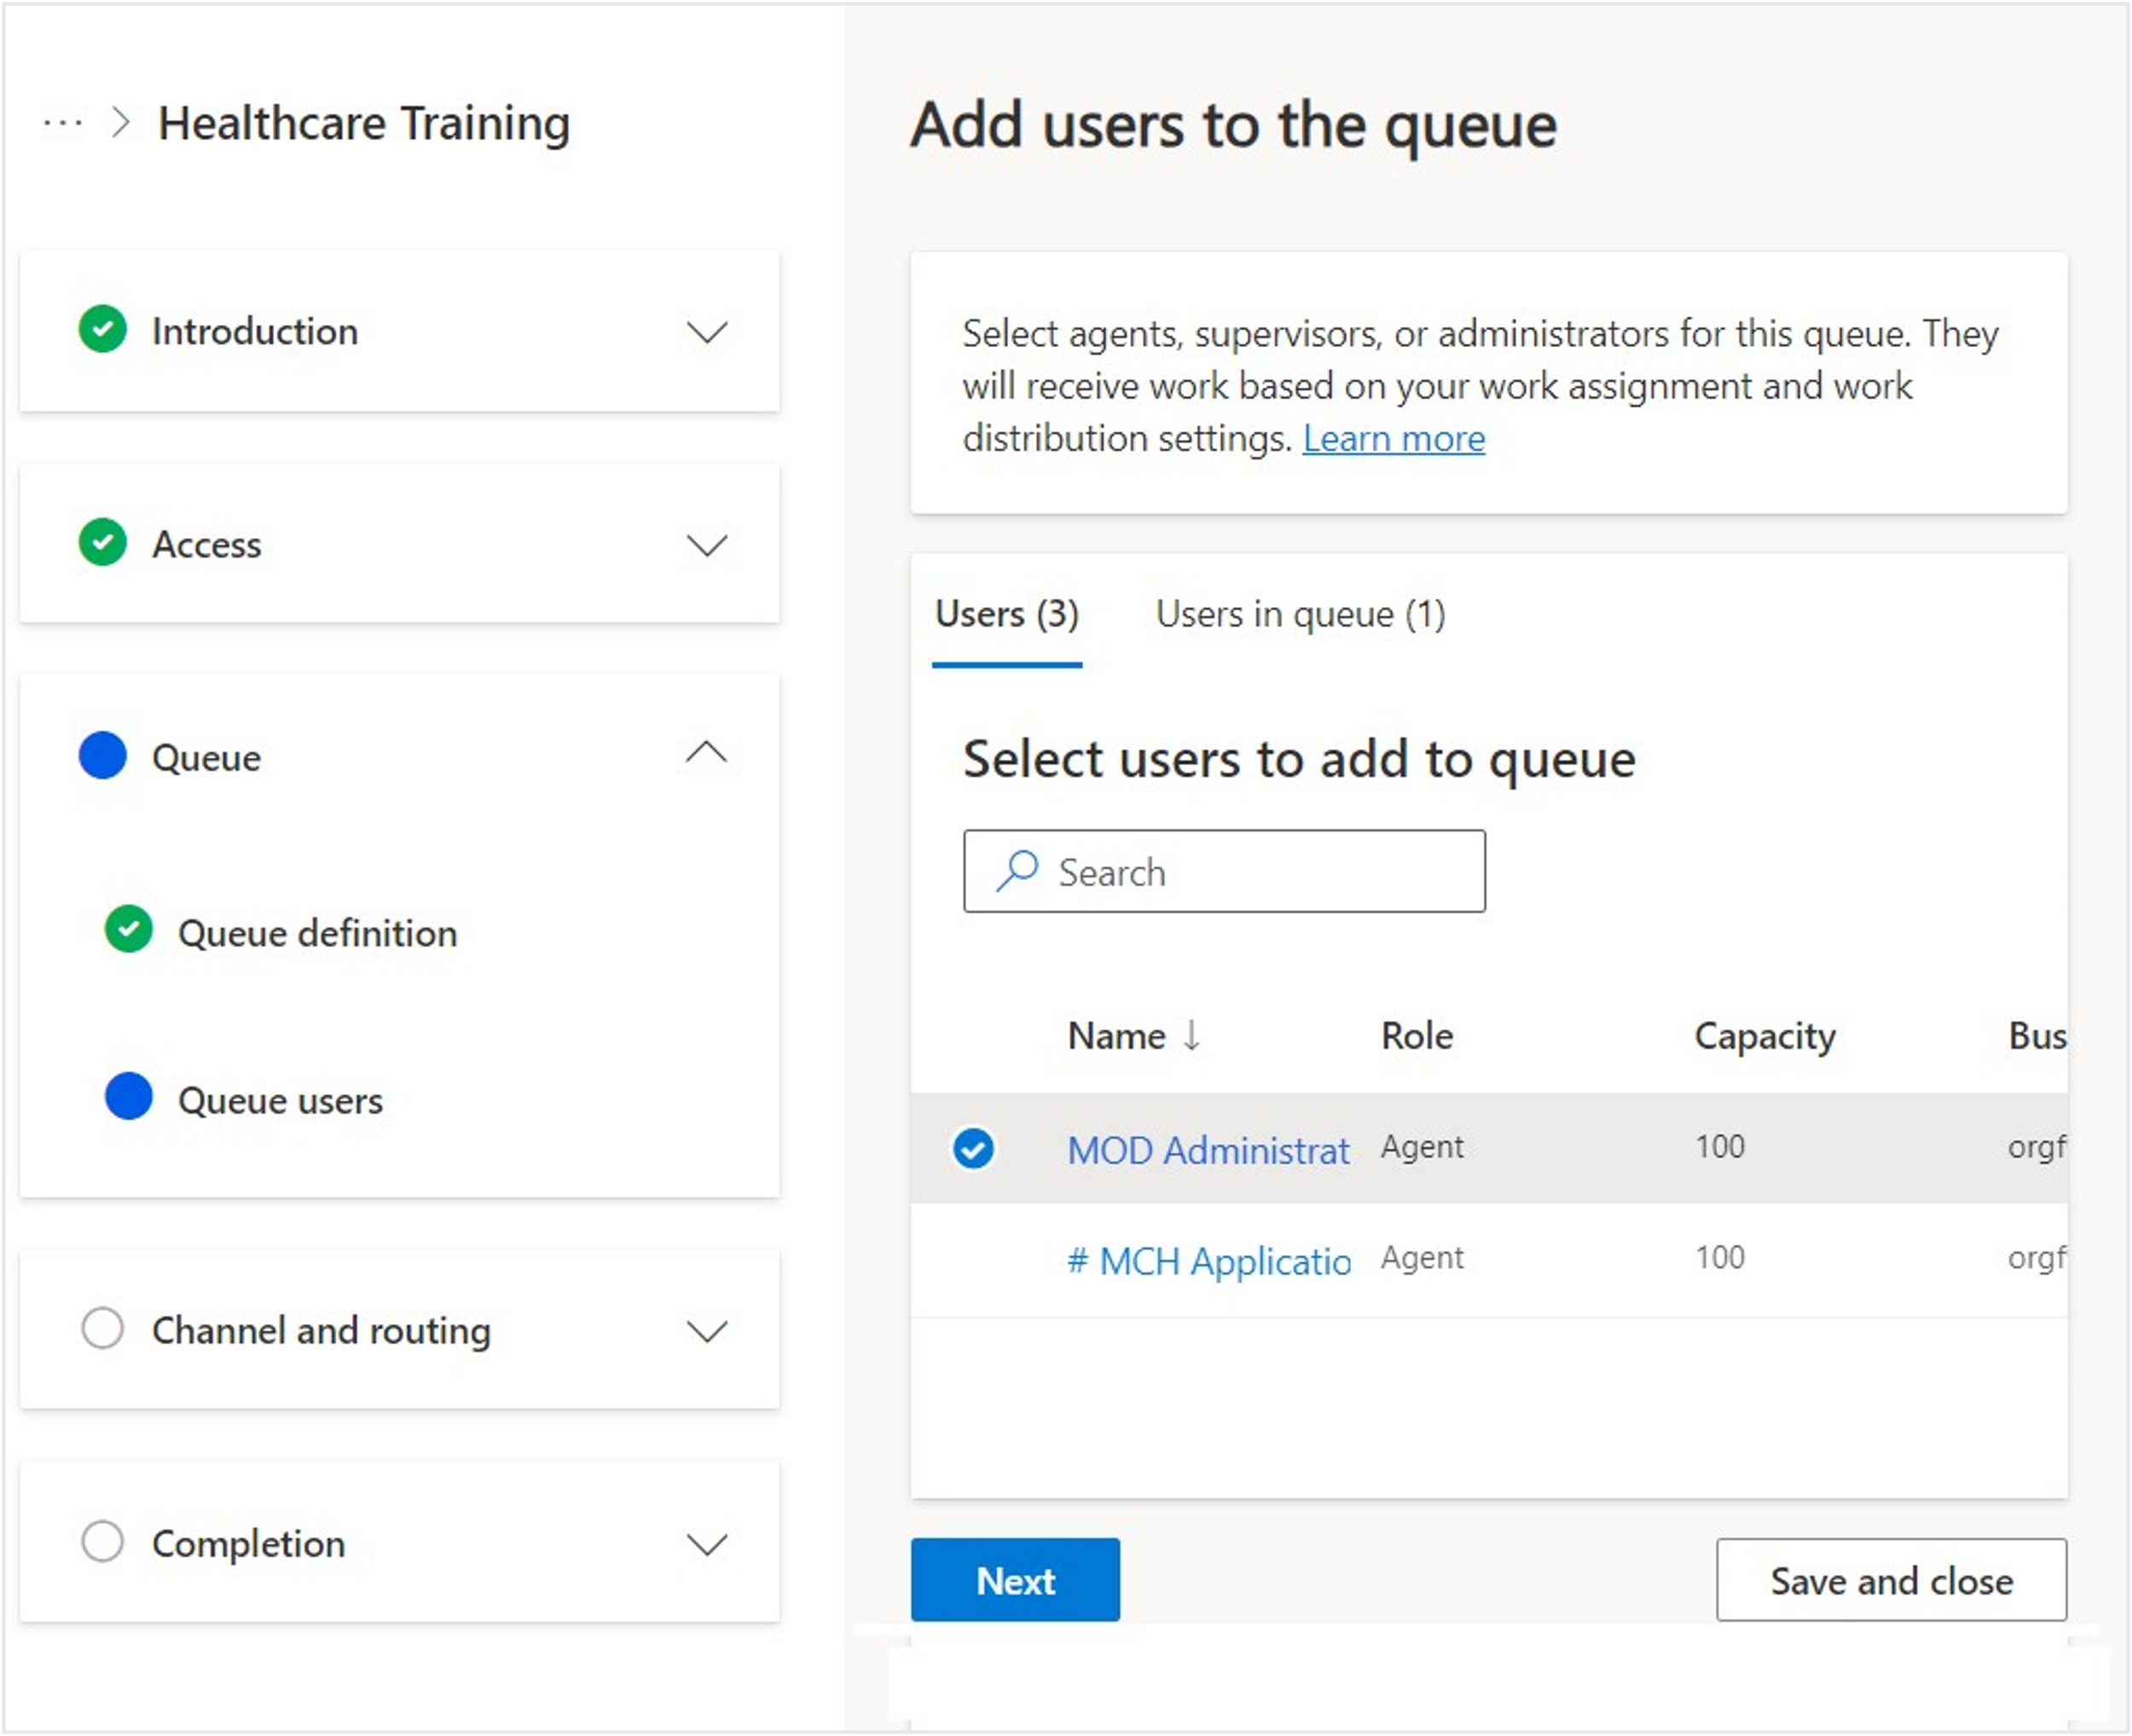
Select your user to add to the queue. Select Next.


You now created the necessary queue to escalate to a human agent and have added your user to the messaging queue. Now, you can create the workstream to initially route to a virtual bot, along with routing rules to direct the user to the Escalate to Human queue in the proper conditions.
Task: Update the live workstream with context variables and routing rules
A workstream is a container to enrich, route, and assign work items, and it's associated with a channel, such as live chat, voice, or case. After a bot is added to a workstream, the incoming work item will be routed to the selected bot at runtime based on classification rules. For more information, see Create workstreams for unified routing.
In this task, you set up basic chat routing with a new workstream. This setup allows users to chat with a bot user initially and then route to a live human agent in the proper situation.
You complete the following tasks:
Create a new channel and workstream.
Turn on proactive chat for the channel.
Add a bot for initial routing: Initial customer conversation is directed to the Azure AI Health Bot.
Create a context variable and routing rule to escalate to a human agent. When context variable EscalateToAgent is present and set to 1, route to the Escalate to Human queue that you previously set up with your user so that an agent can continue the conversation.
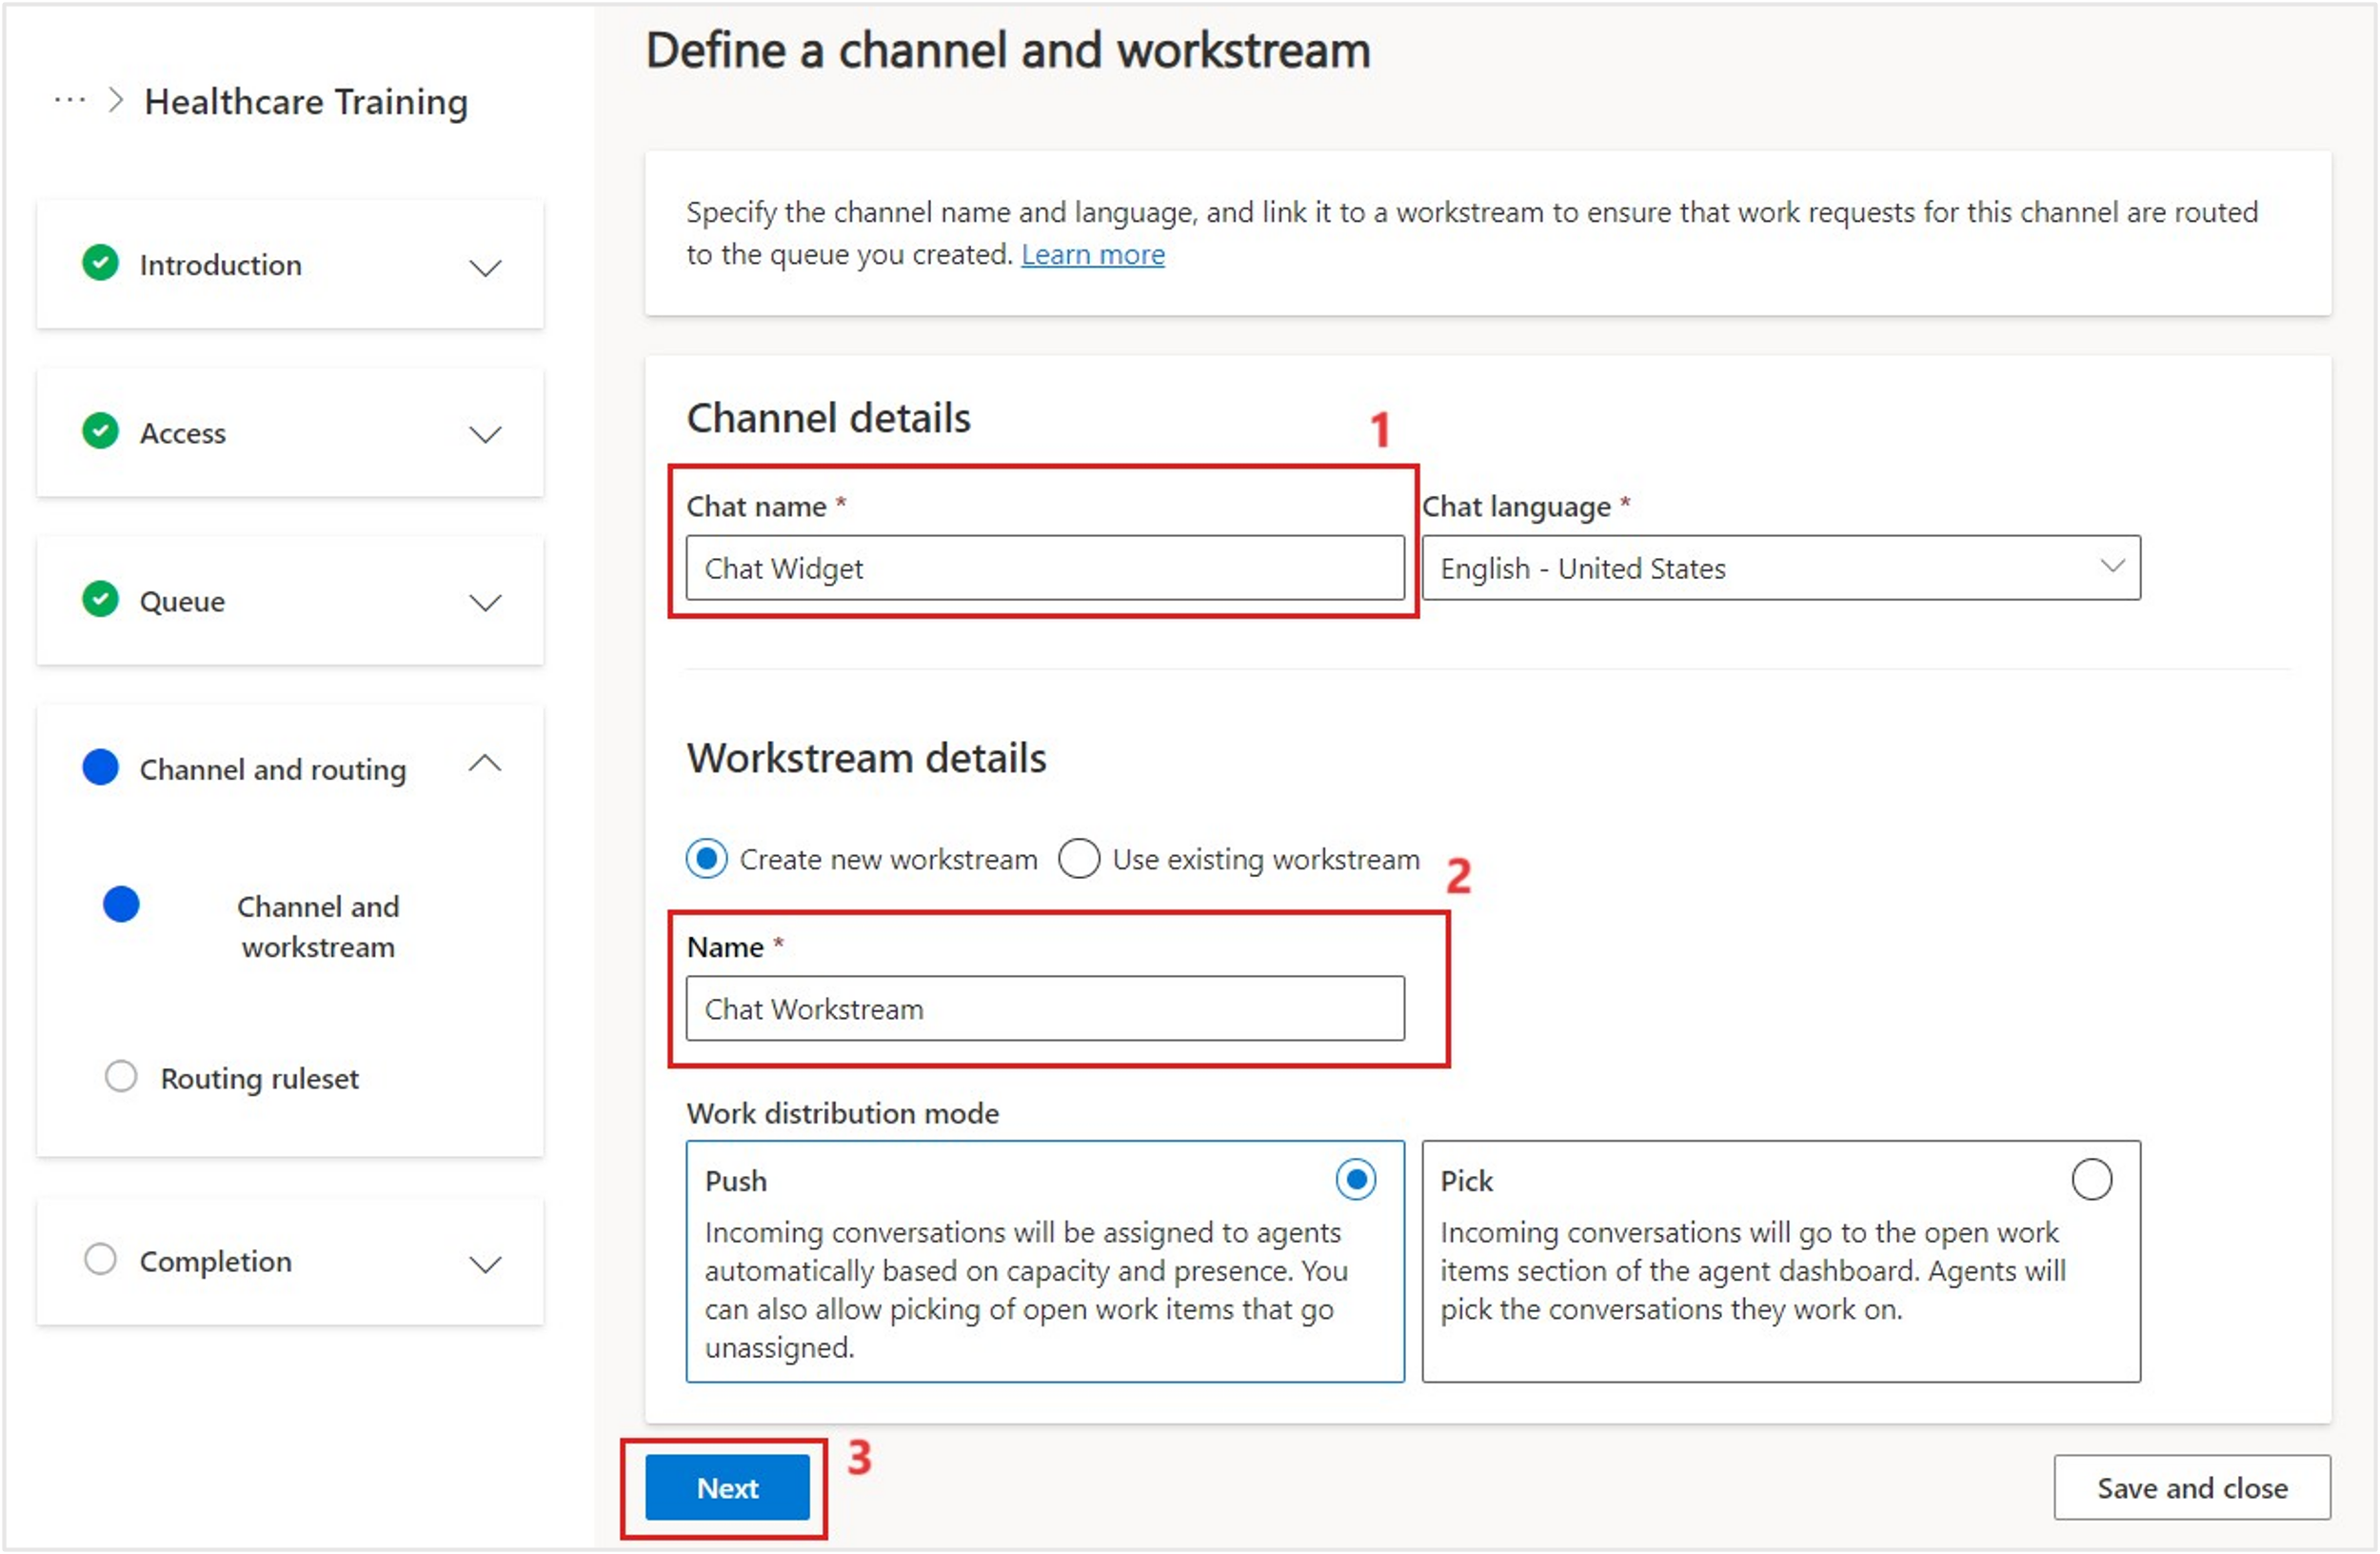
While continuing the guided setup from the previous task, enter a Chat name and Chat language for your channel and a workstream Name. Keep the Work distribution mode as Push and then select Next.
Chat name - Chat Widget
Workstream Name - Chat Workstream
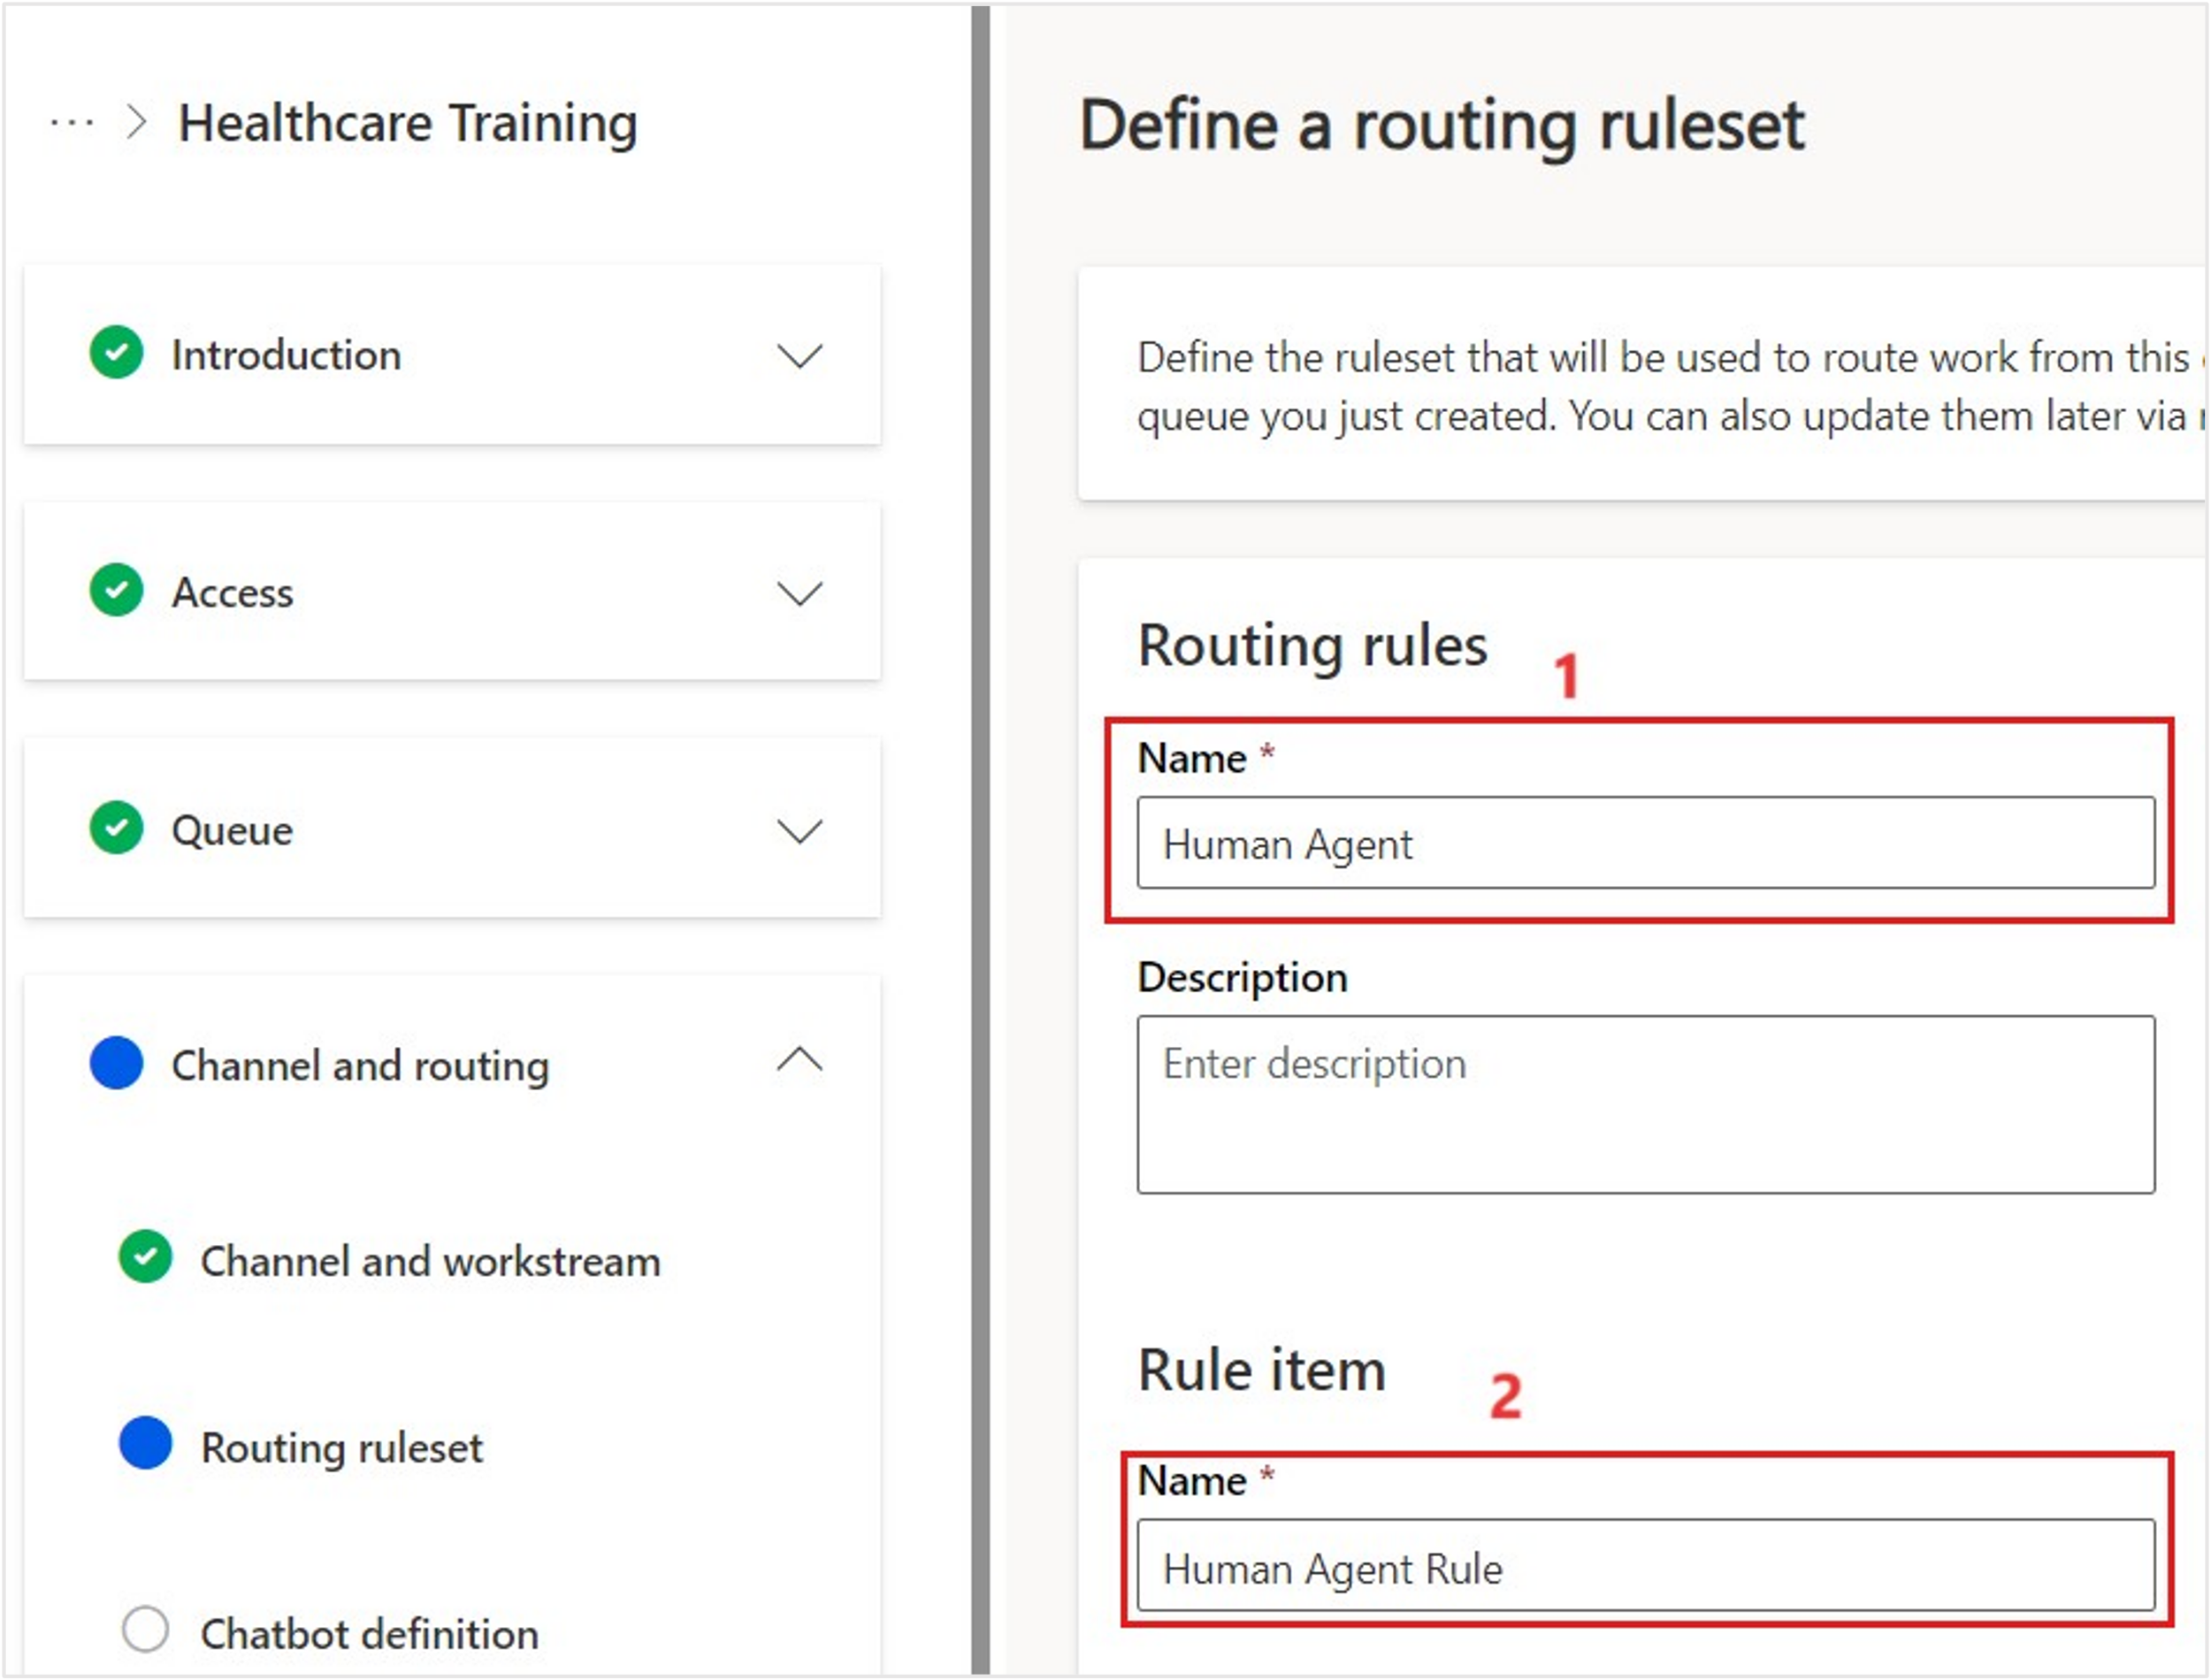
Define a ruleset that allows work from this channel to be routed to the Escalate to Human queue. Name the Routing rules as Human Agent and the Rule item as Human Agent Rule. Select Next.
Note
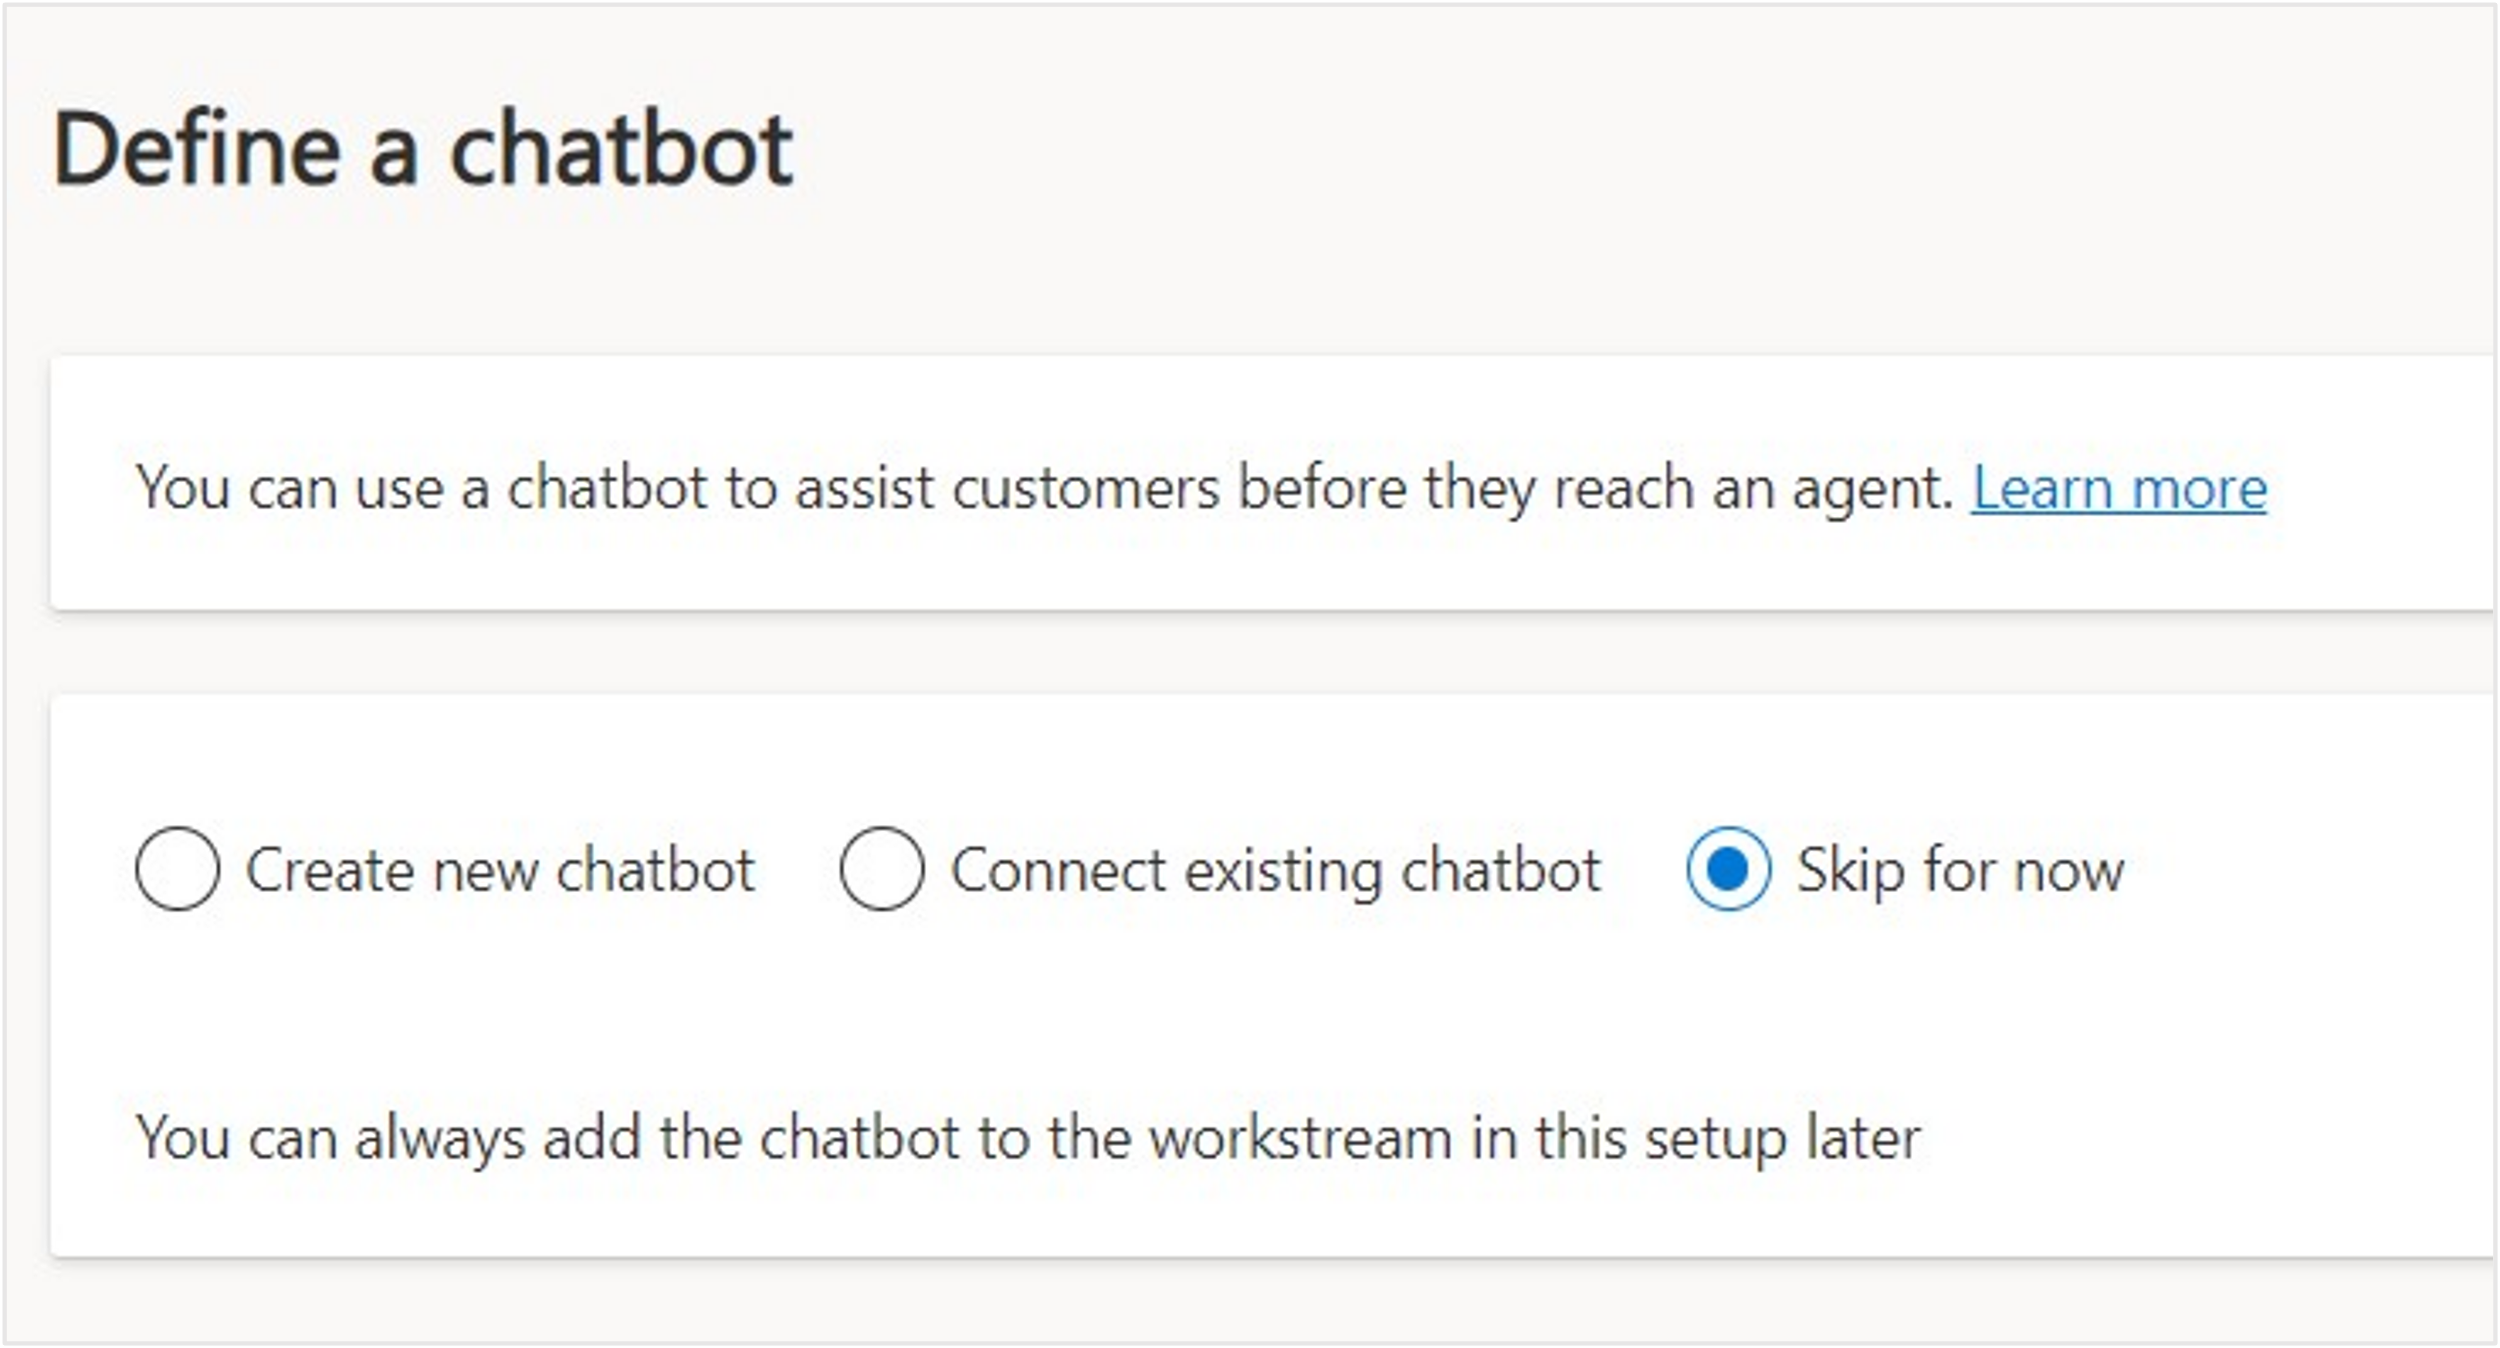
On the Define a Chatbot page, select Skip for now and select Next.
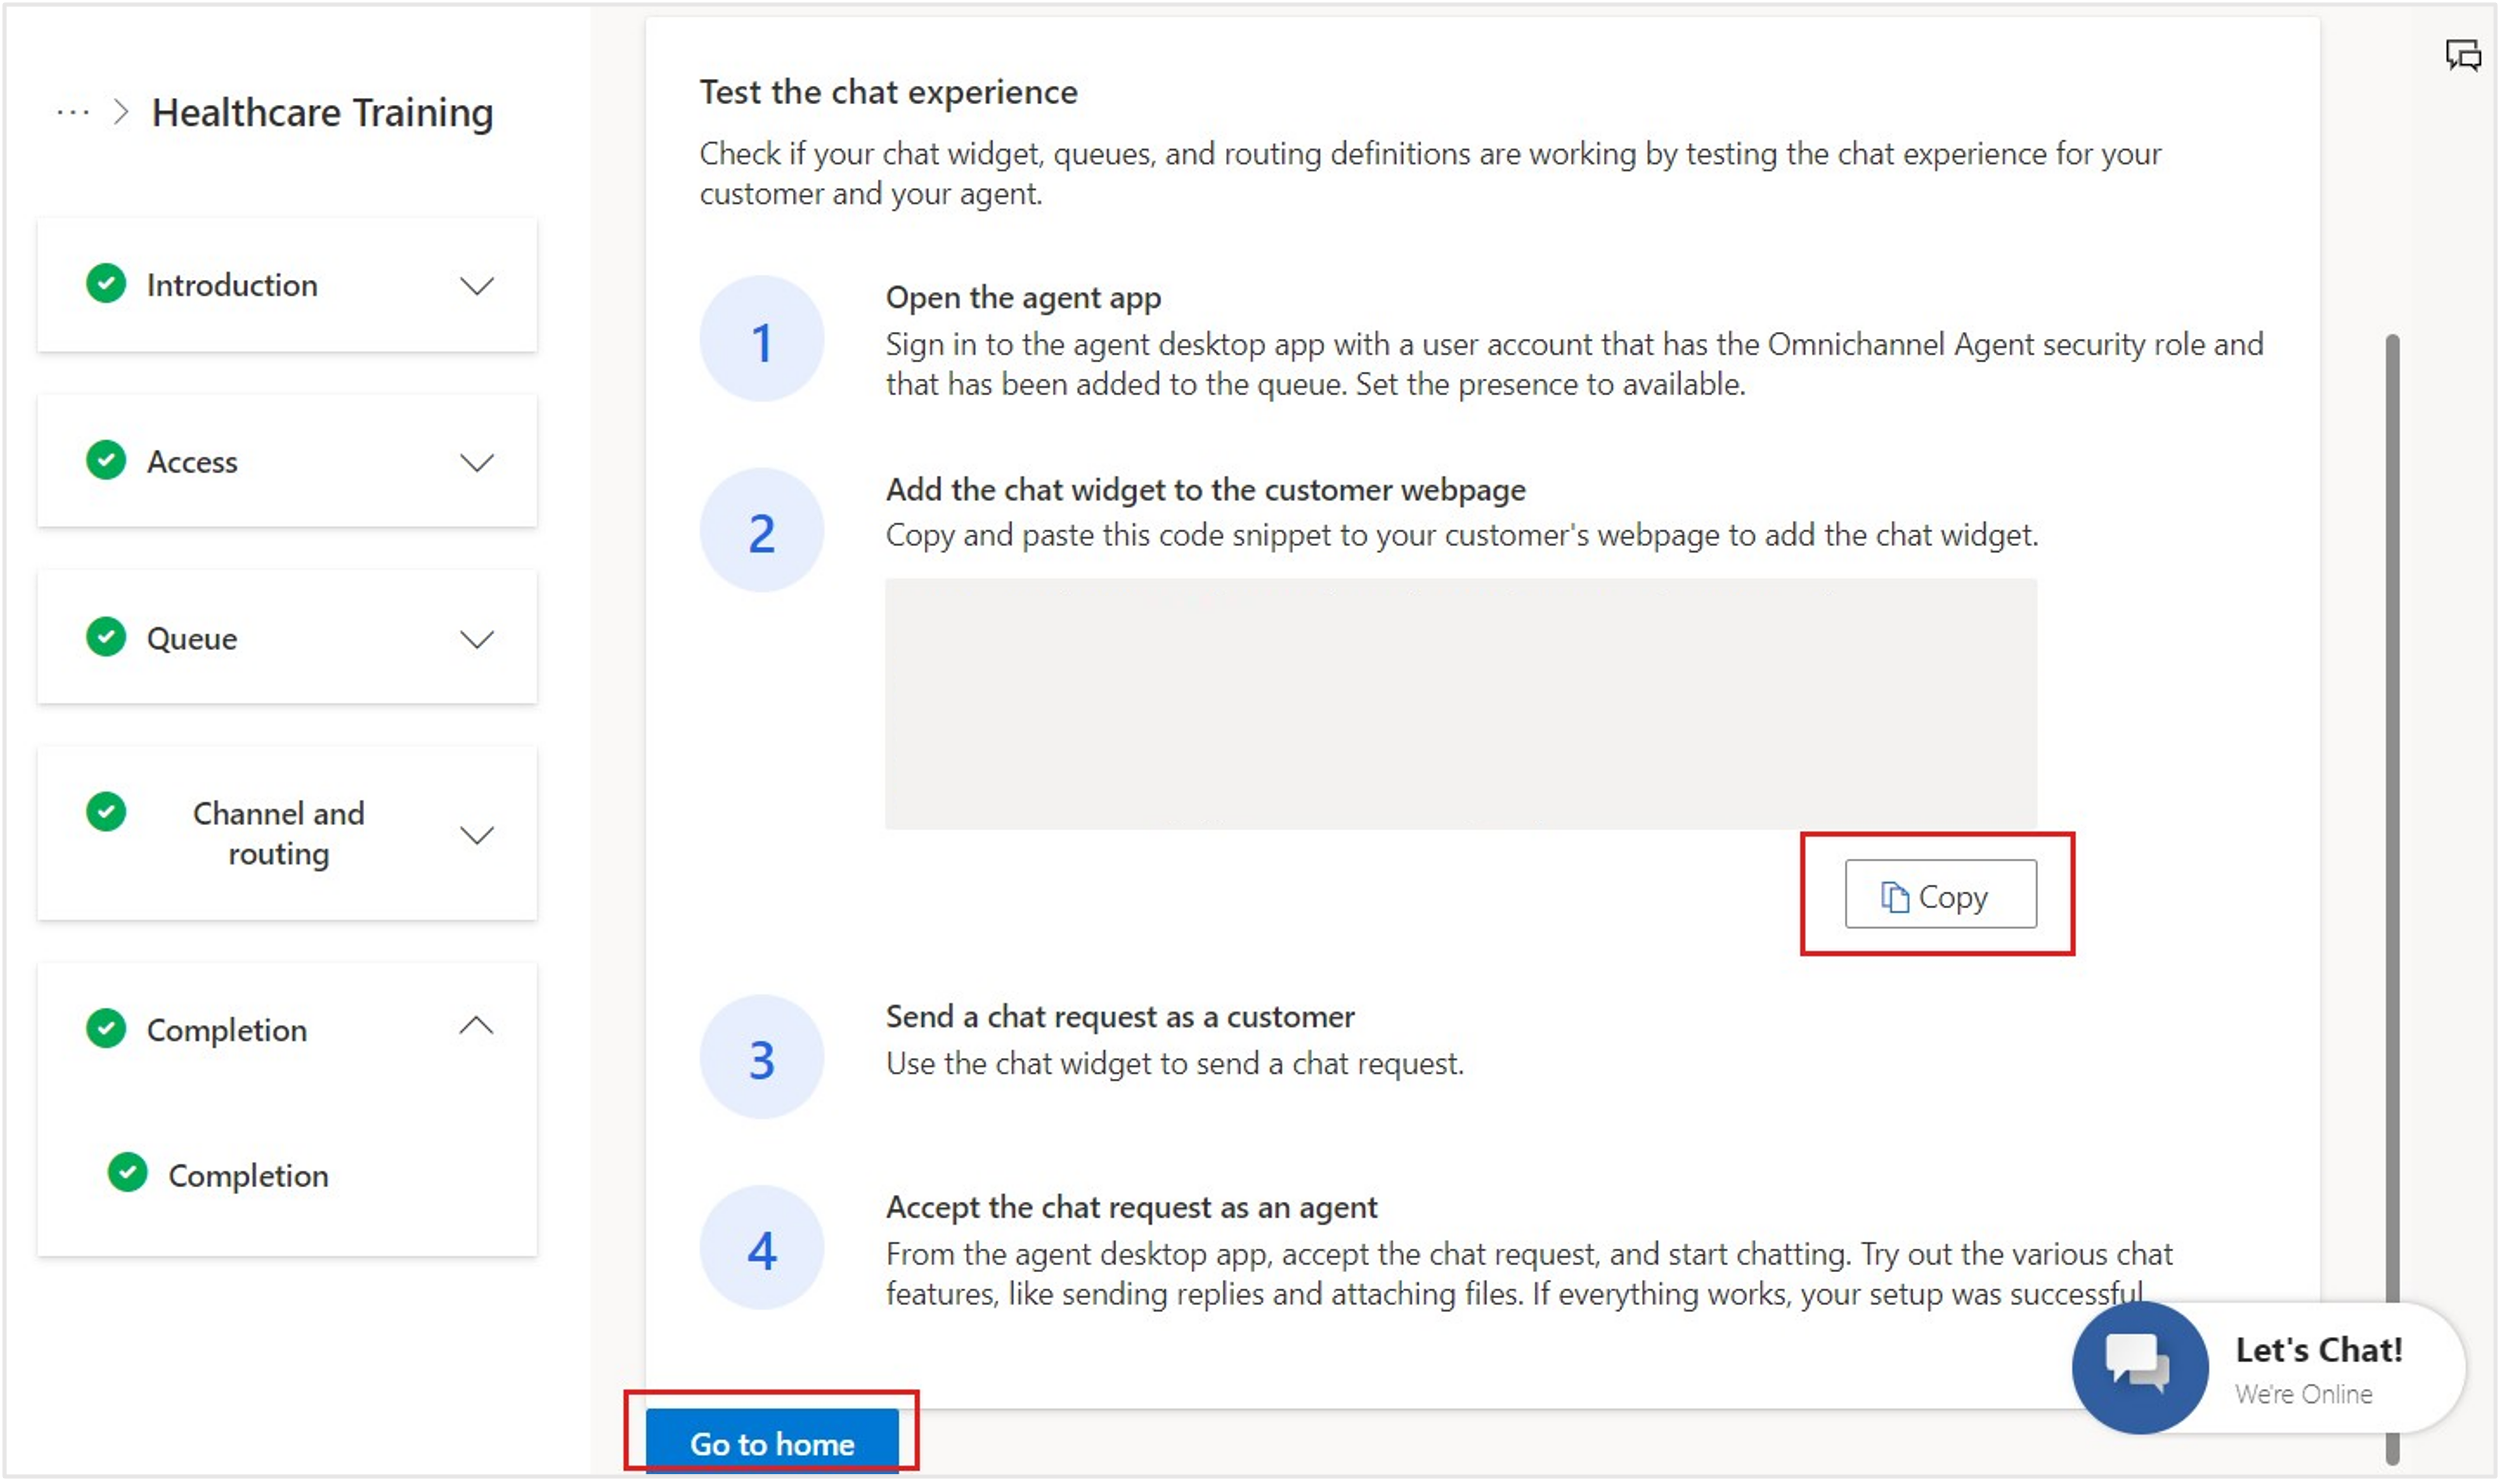
It takes a moment for the system to create the chat channel and workstream. When the process is complete, make sure that you Copy the chat widget snippet code and store it for later. Select Go to home.
You still need to set up a few components for the routing to happen correctly:
Enable proactive chat for the chat channel so that the bot can prompt the user.
Add the bot user in the default messaging queue so that conversations initially route to the bot.
Add the default messaging queue as the fallback queue for the new workstream.
Define the routing rule in the workstream for escalating to a human agent.
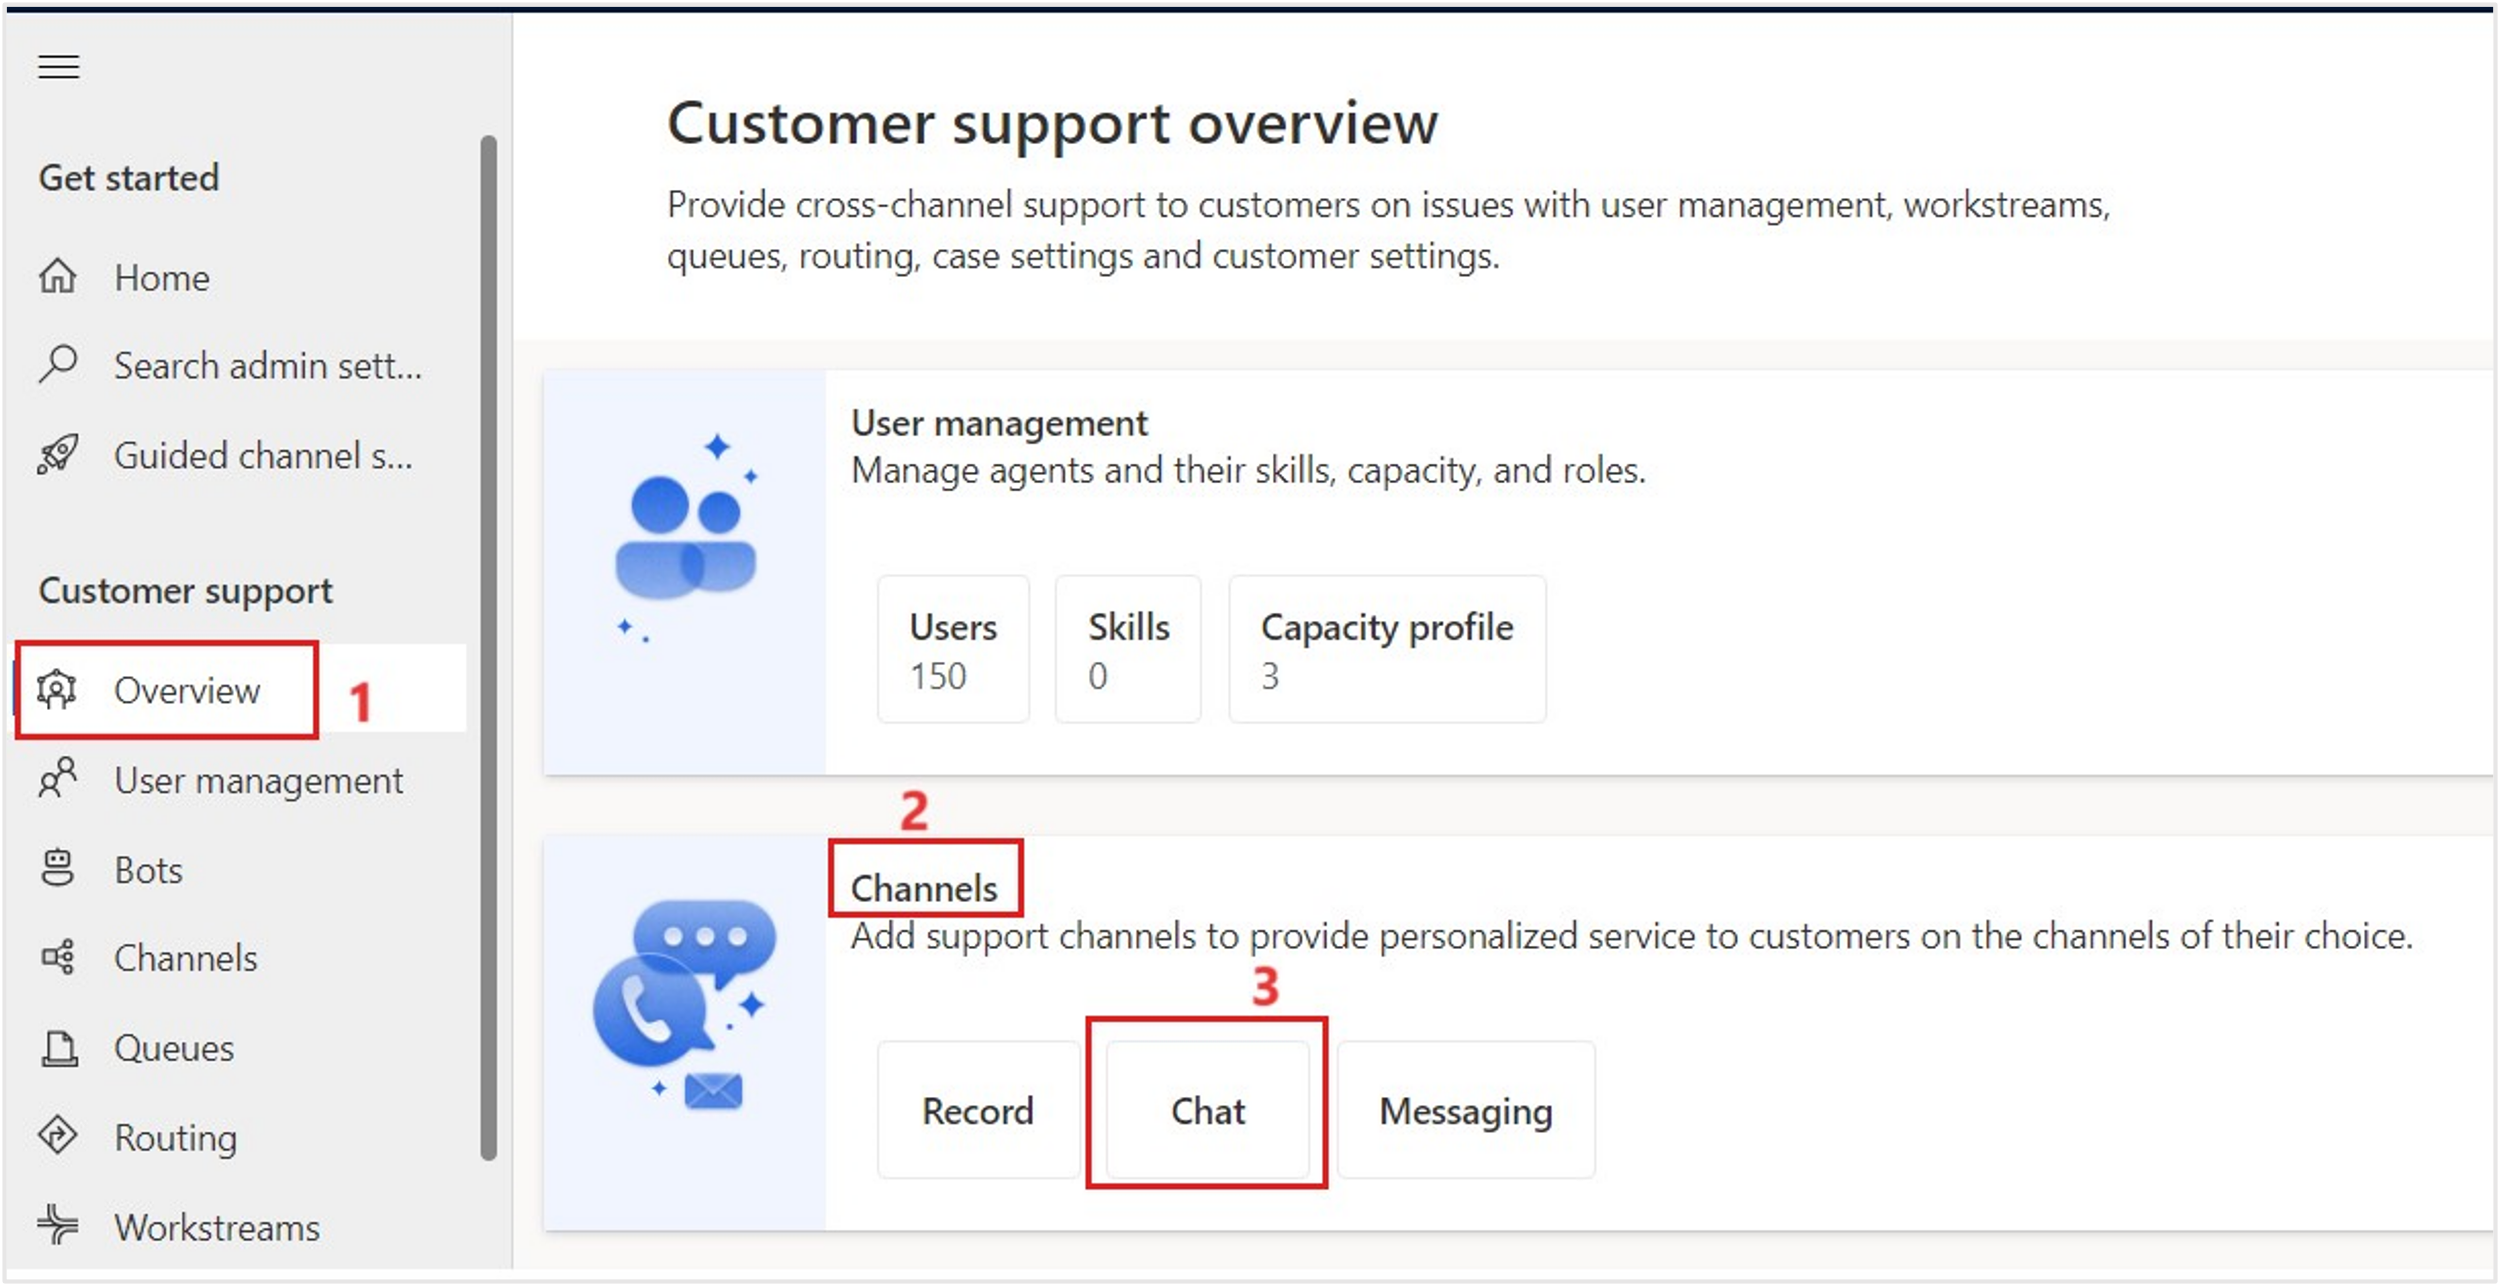
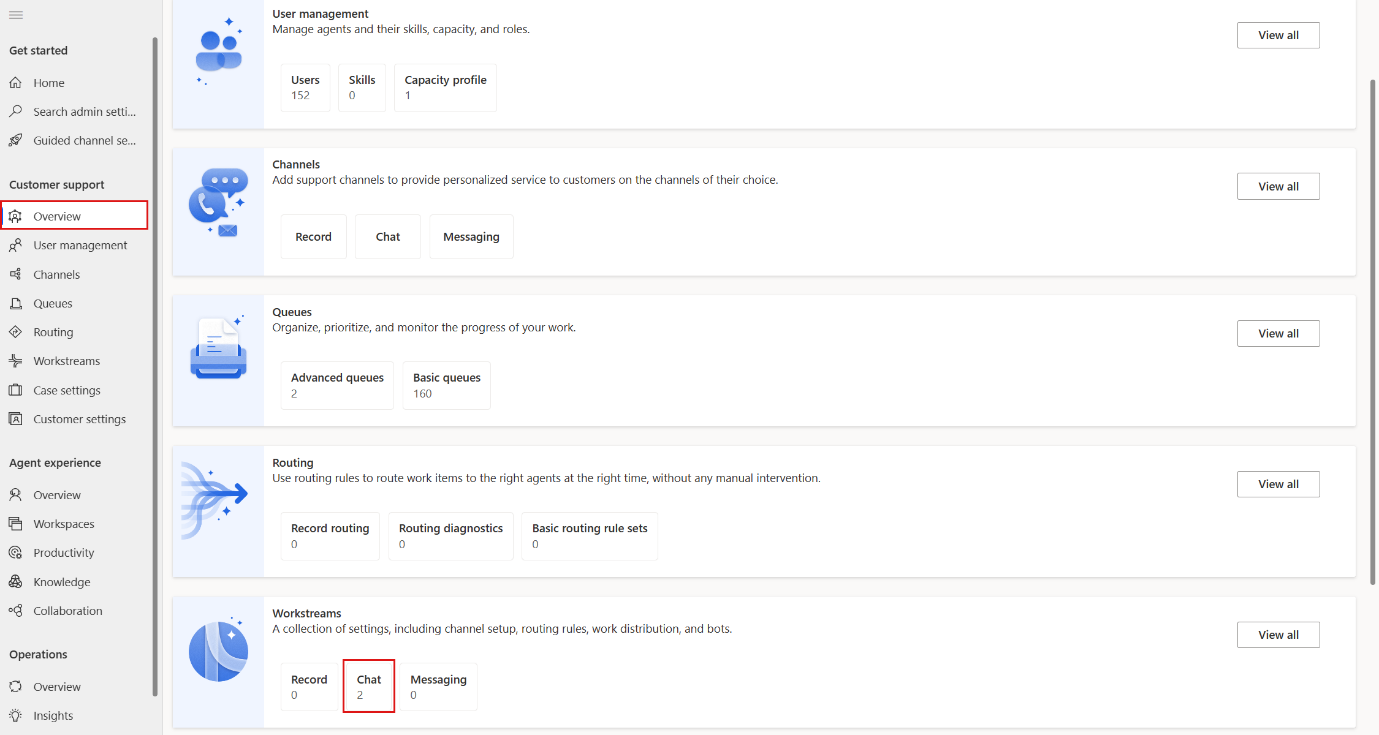
Go to Overview on the navigation pane. Select Chat in the Channels section to view all chat channels.
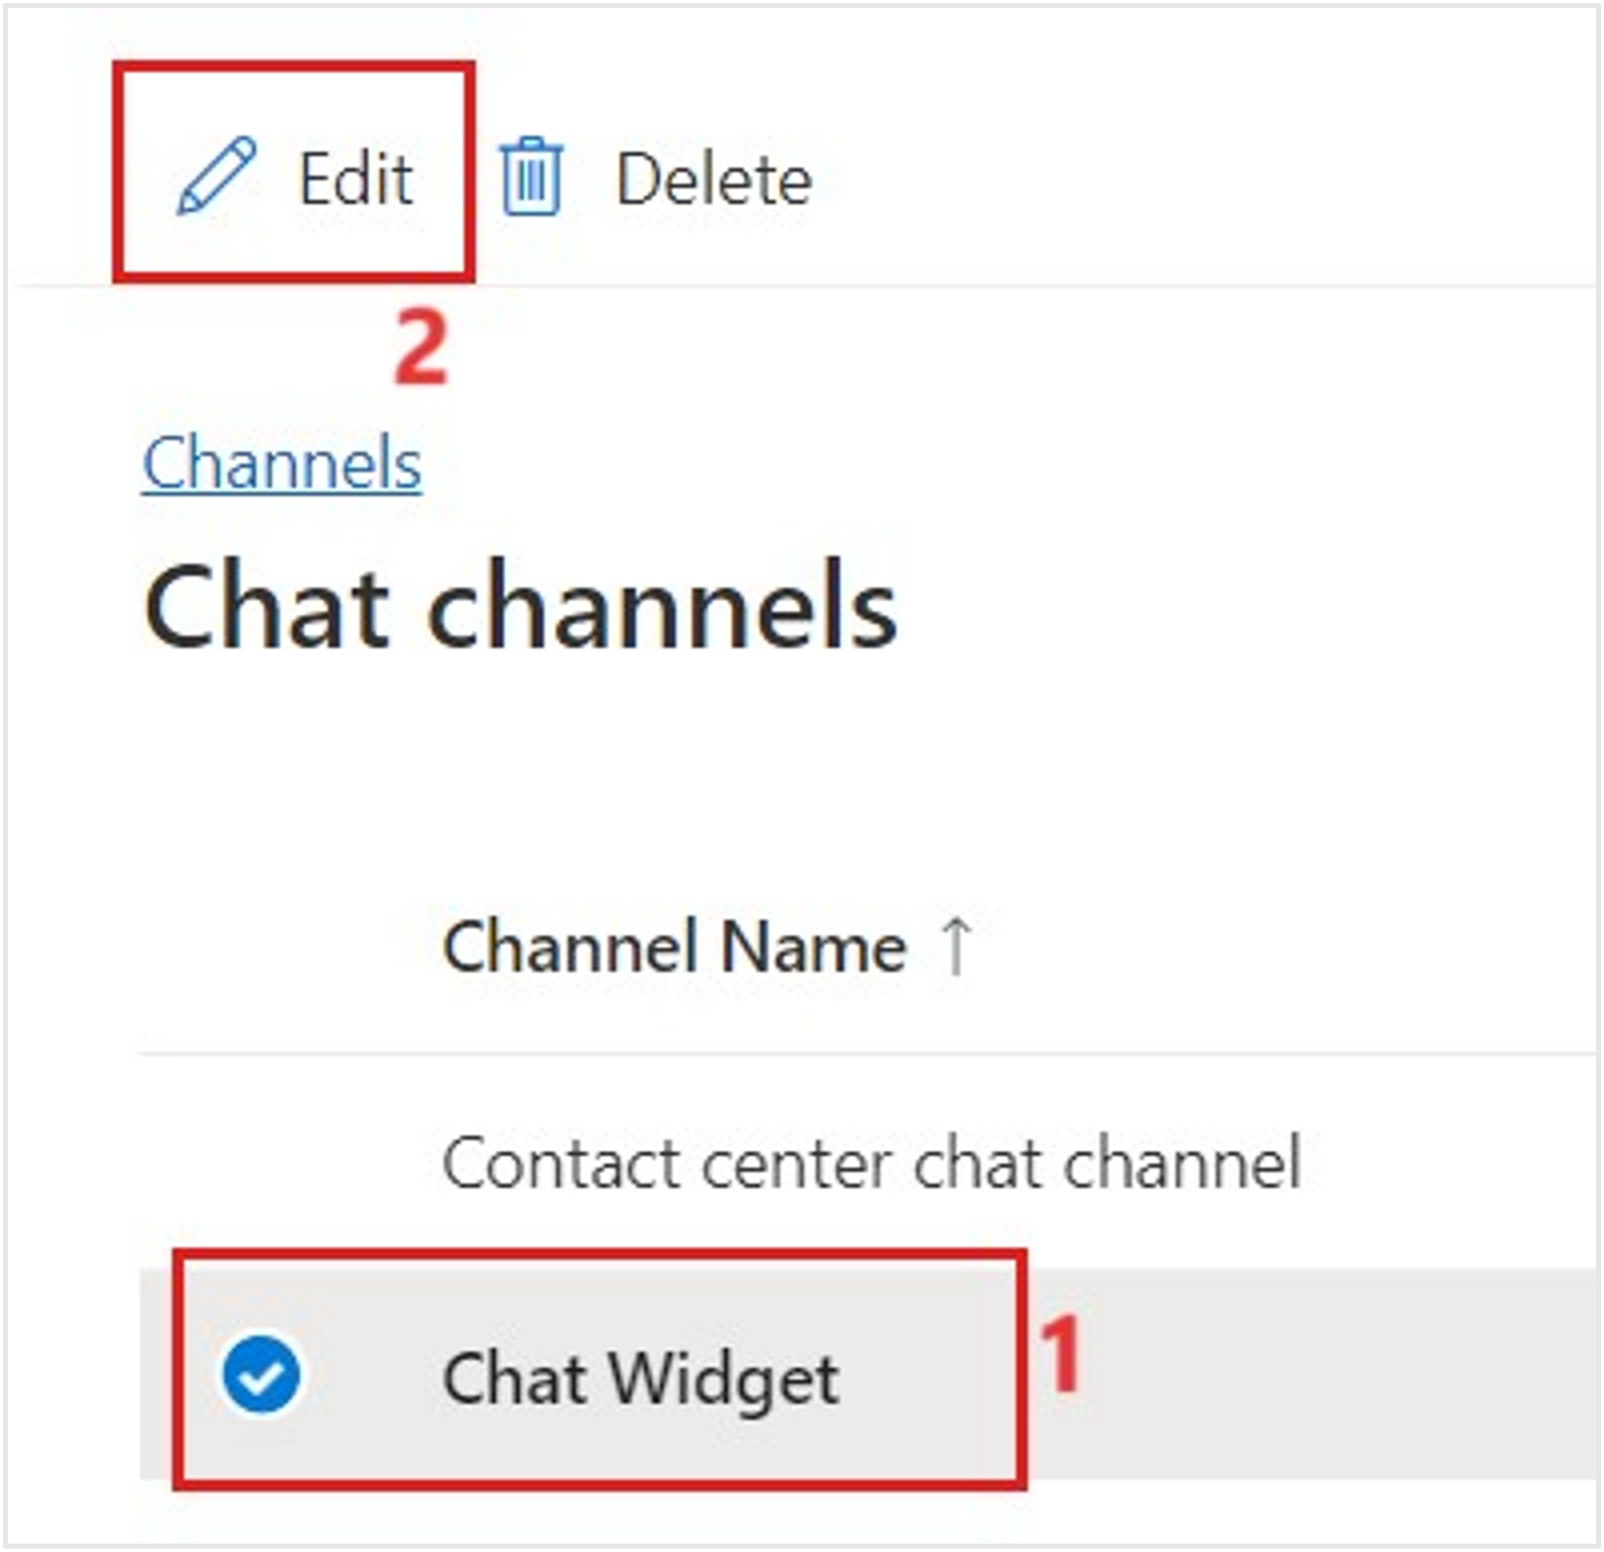
Select the newly created chat channel, Chat Widget, and then select Edit on the command bar.
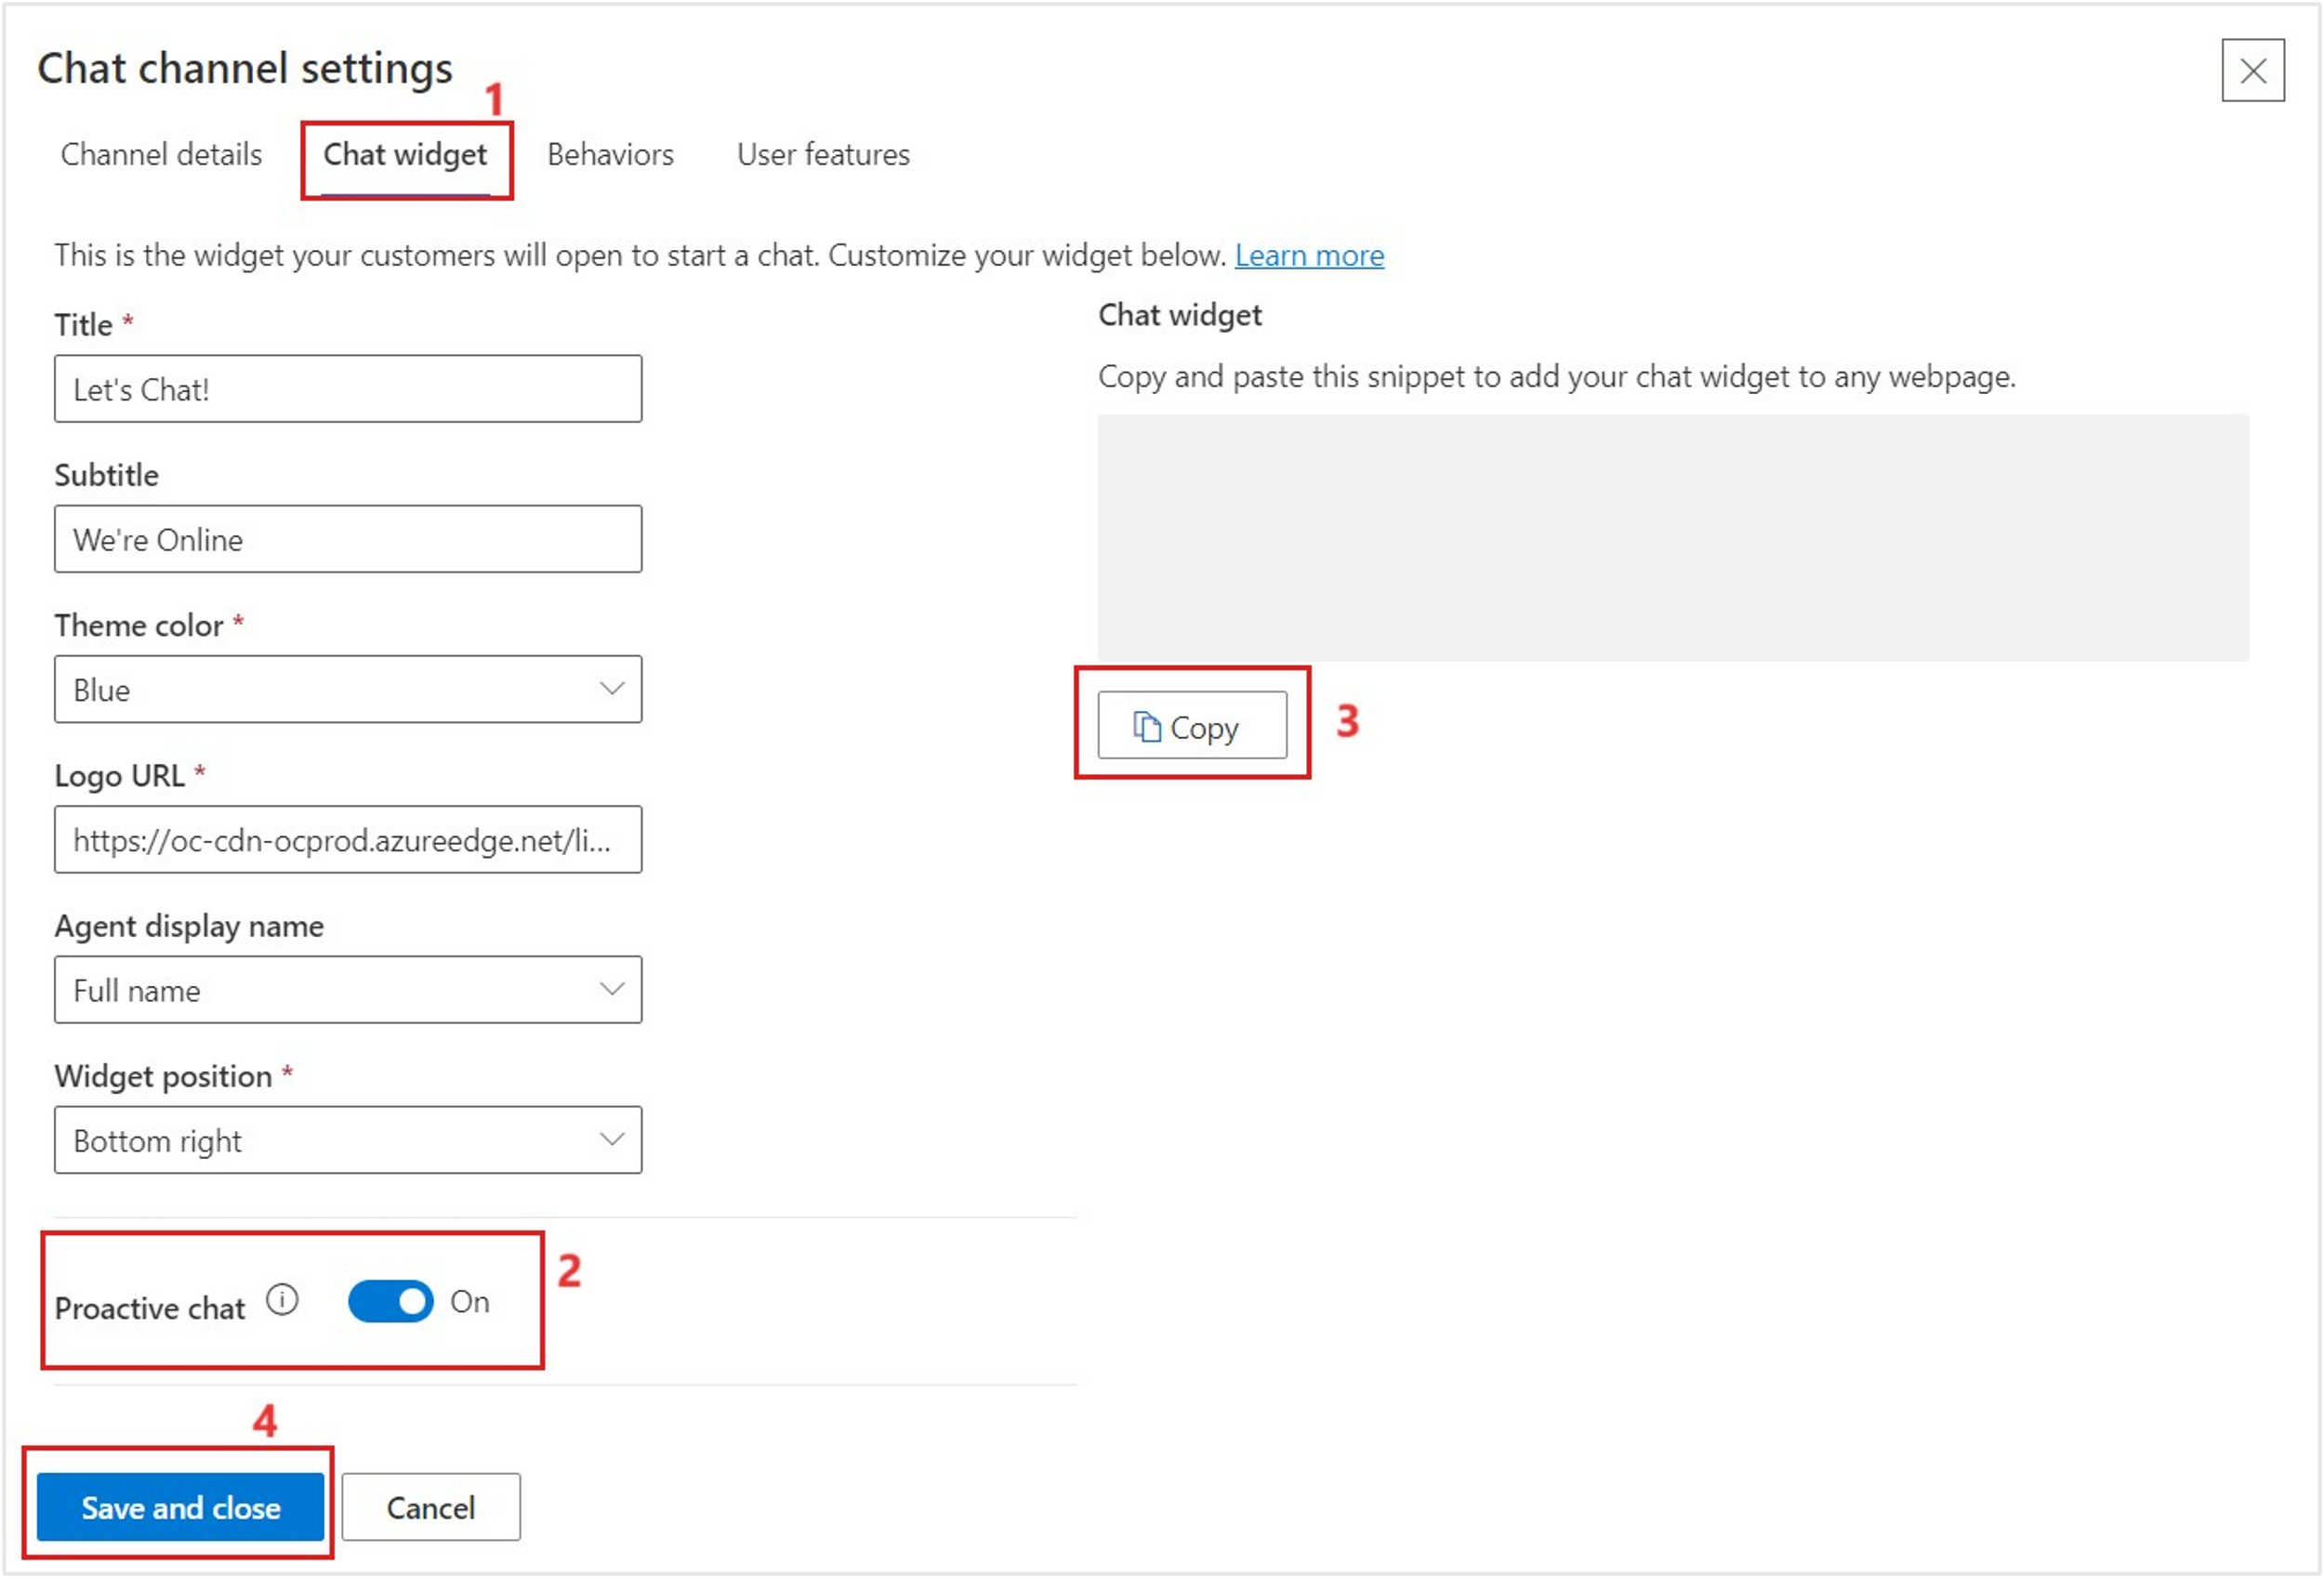
In the Chat channel settings form, select the Chat widget tab and then turn on Proactive chat. This setting allows the bot to prompt the user on the website where it's embedded. Select Copy to copy the chat widget code and store it for later use, if you haven't done so already. Select Save and close.
Return to Overview on the left navigation pane. Scroll down to Workstreams and then select Chat.
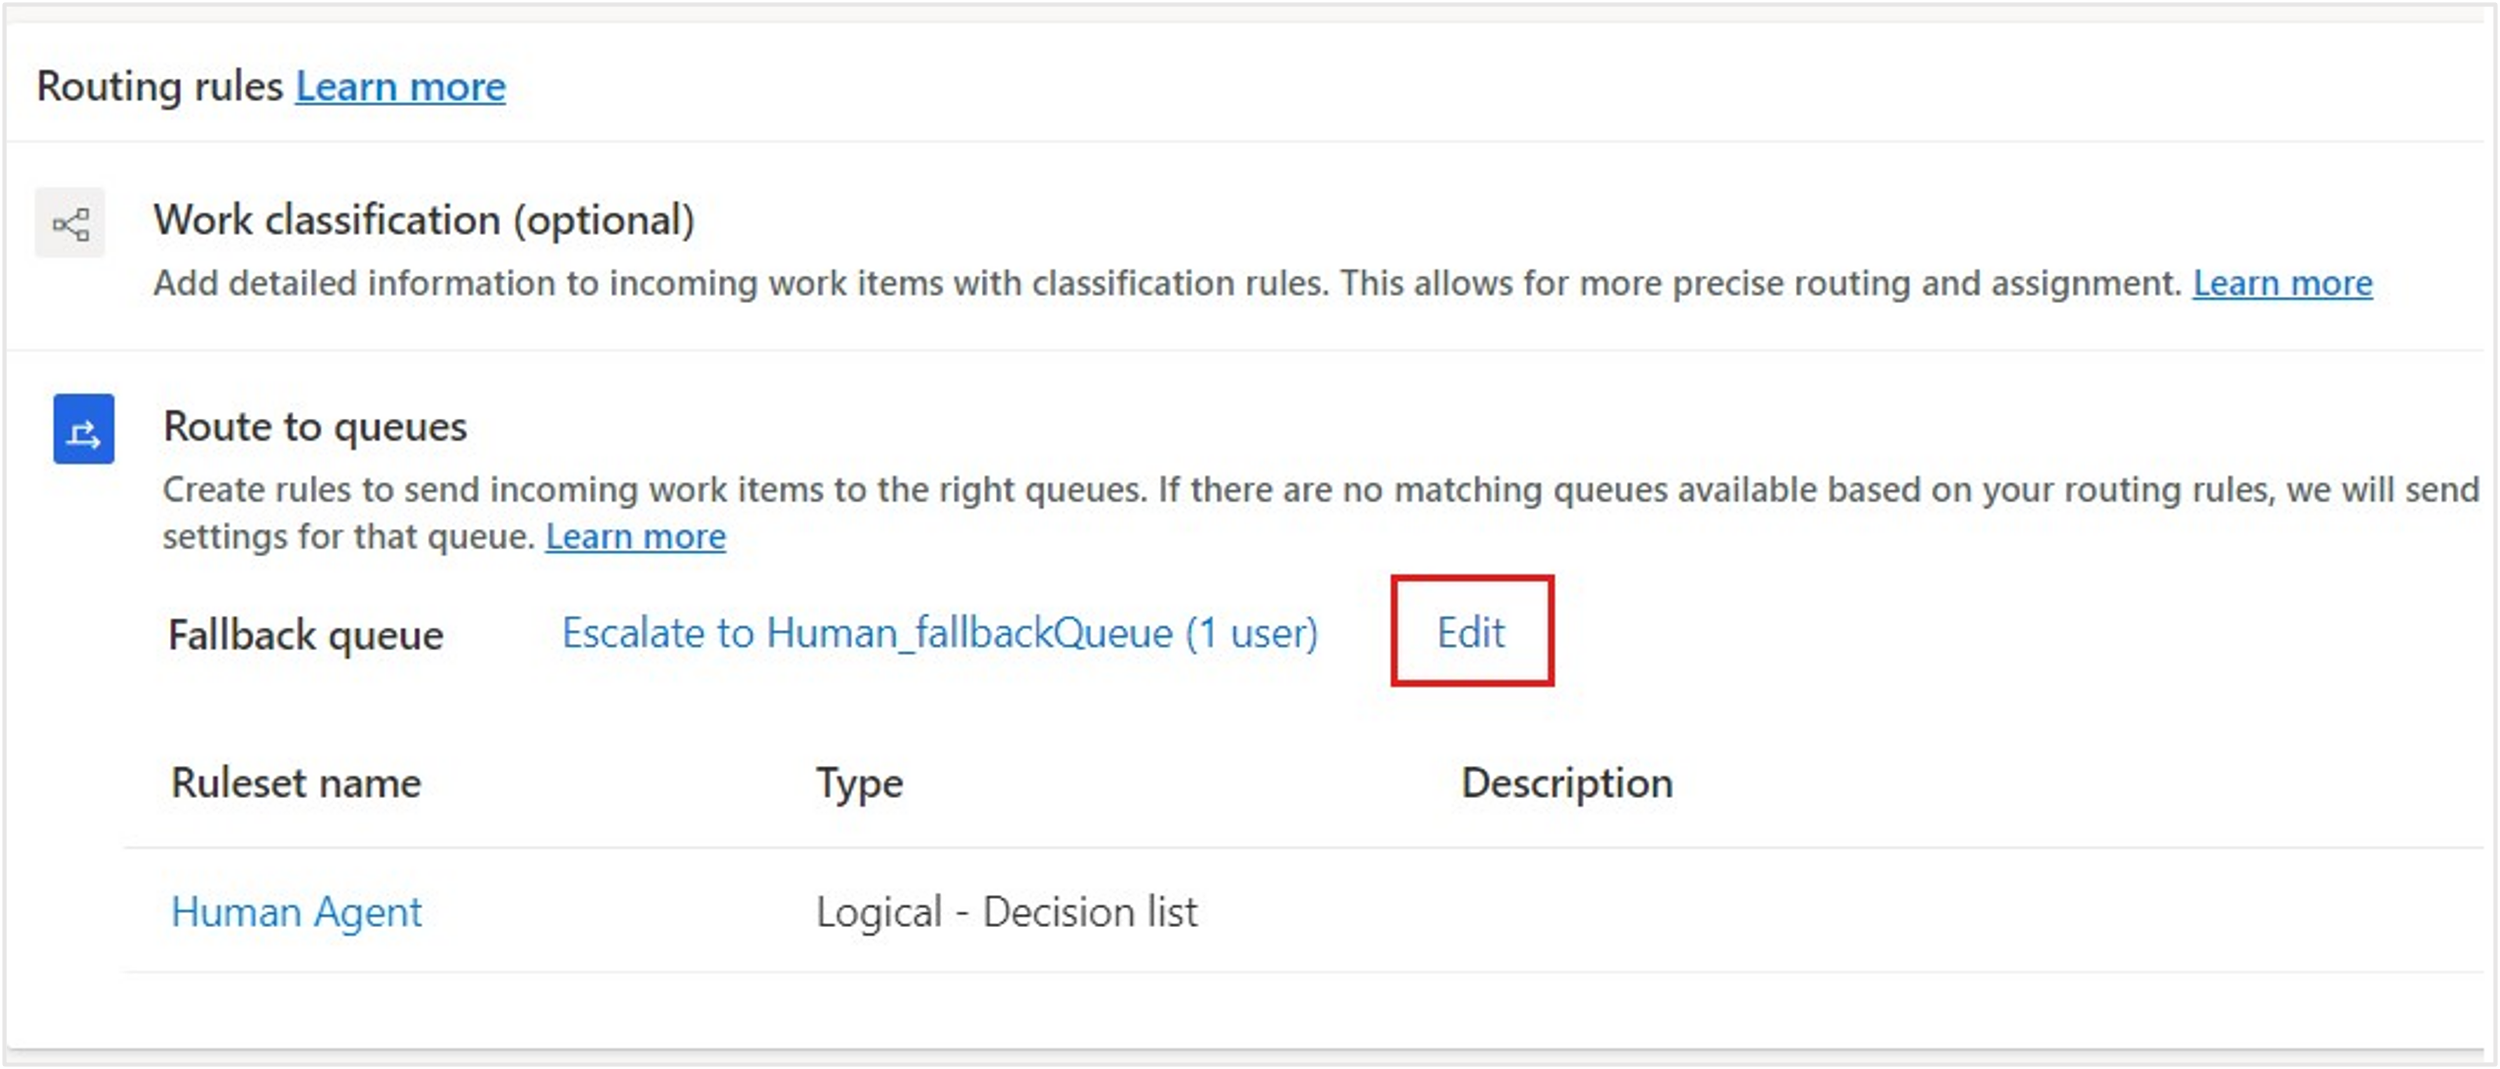
Select Chat Workstream and then select Edit.

In the Chat Workstream record, select Edit for the Fallback queue.
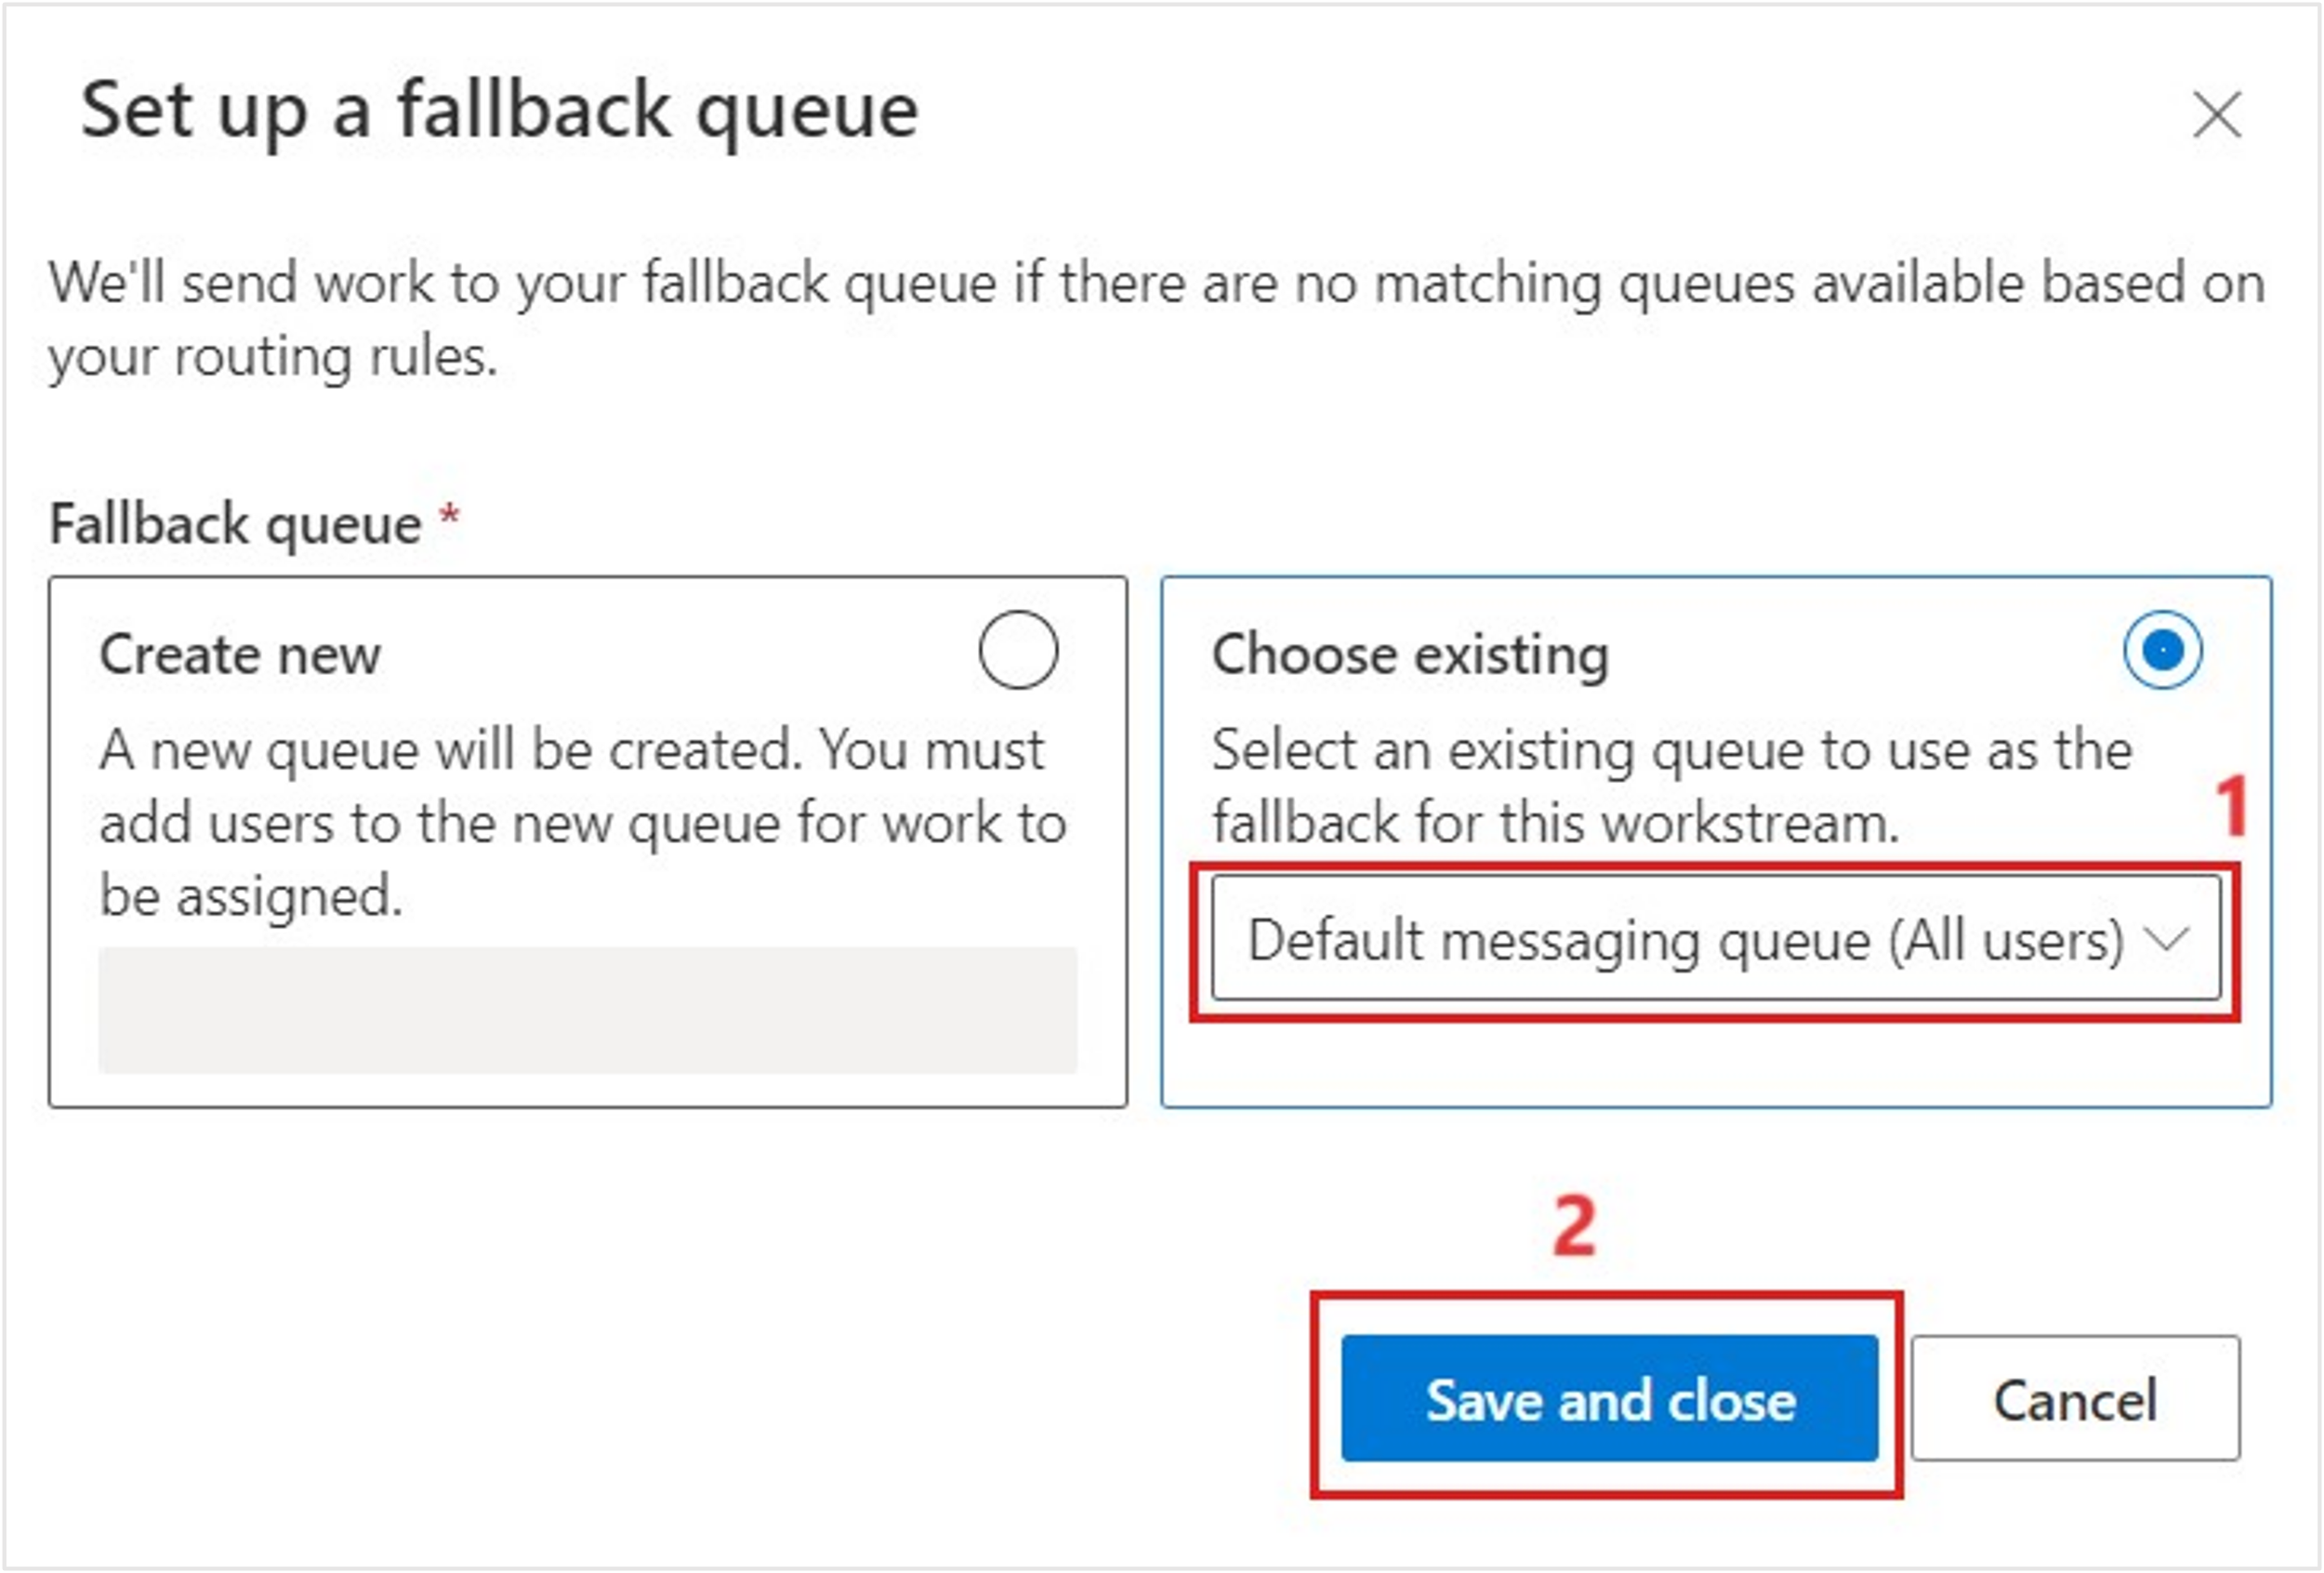
Select the Default messaging queue (All users) from the Choose existing dropdown menu. Select Save and close.
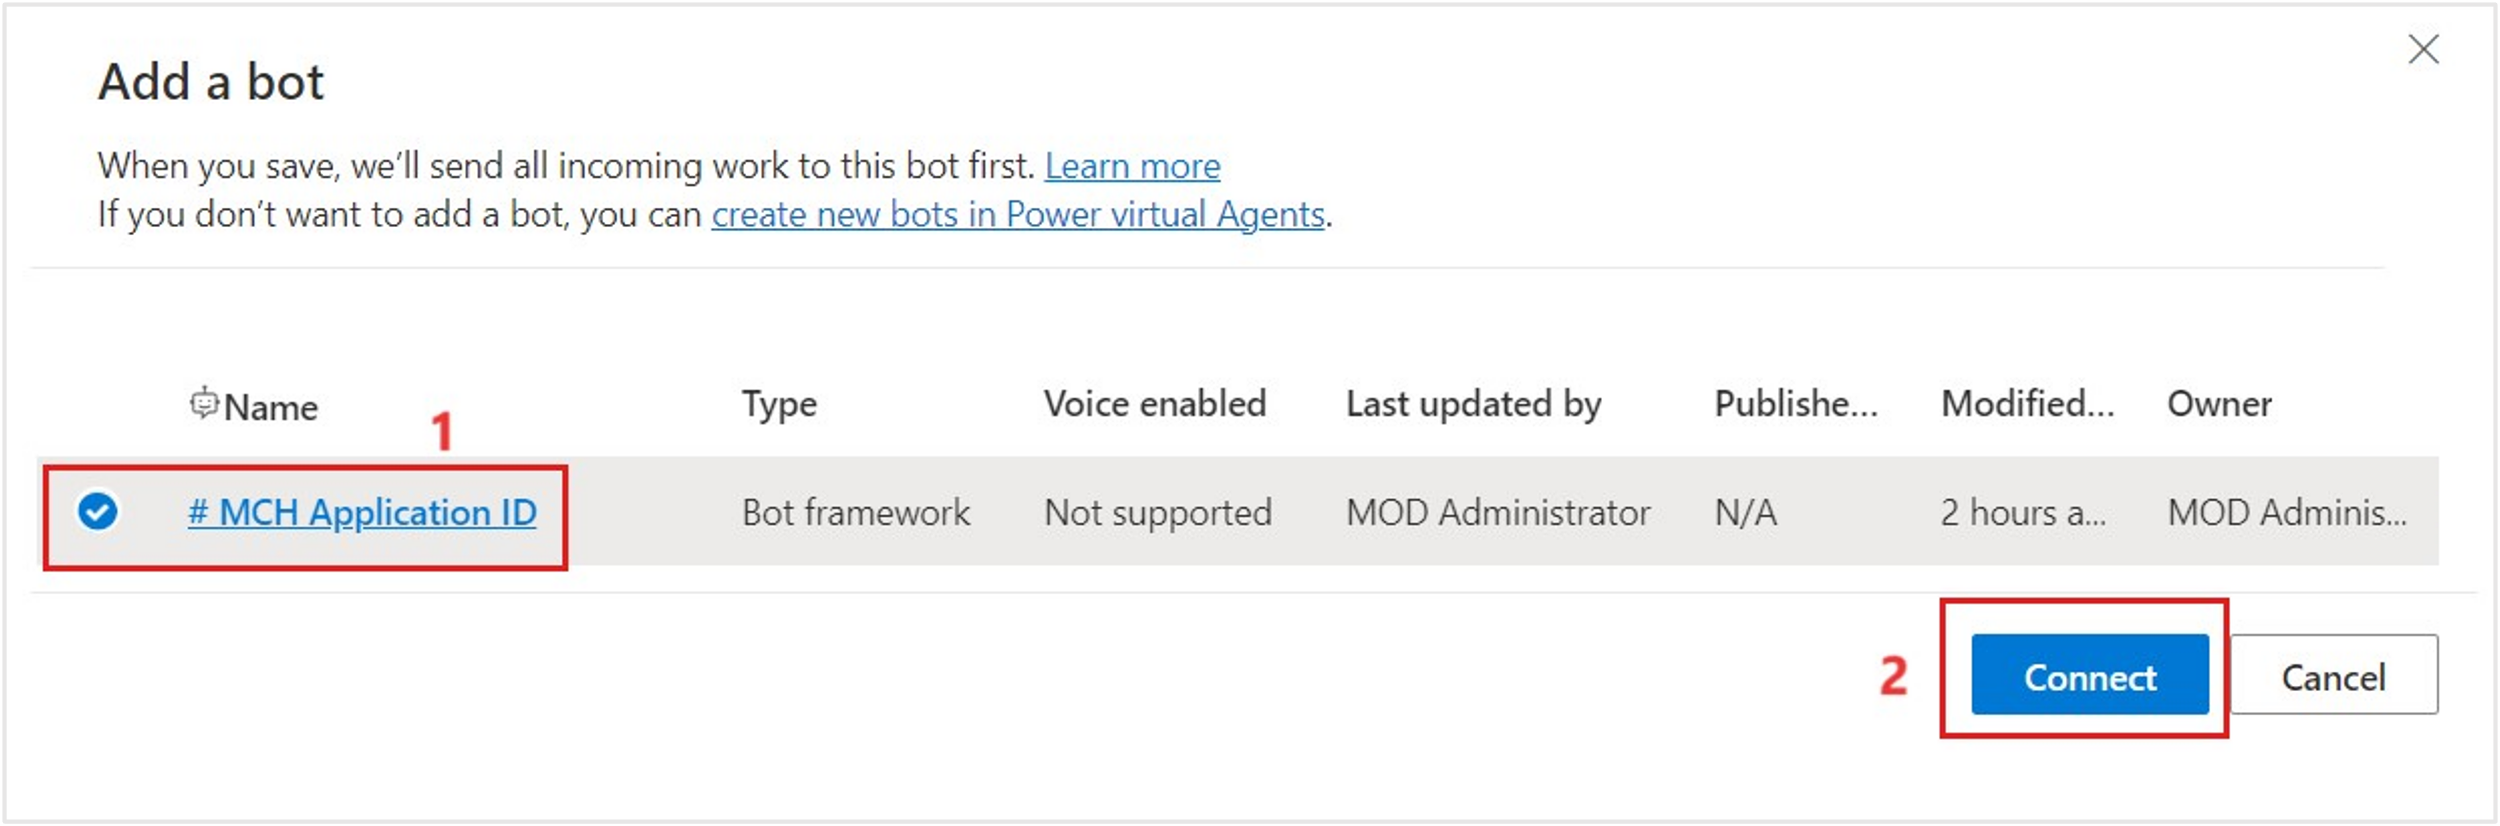
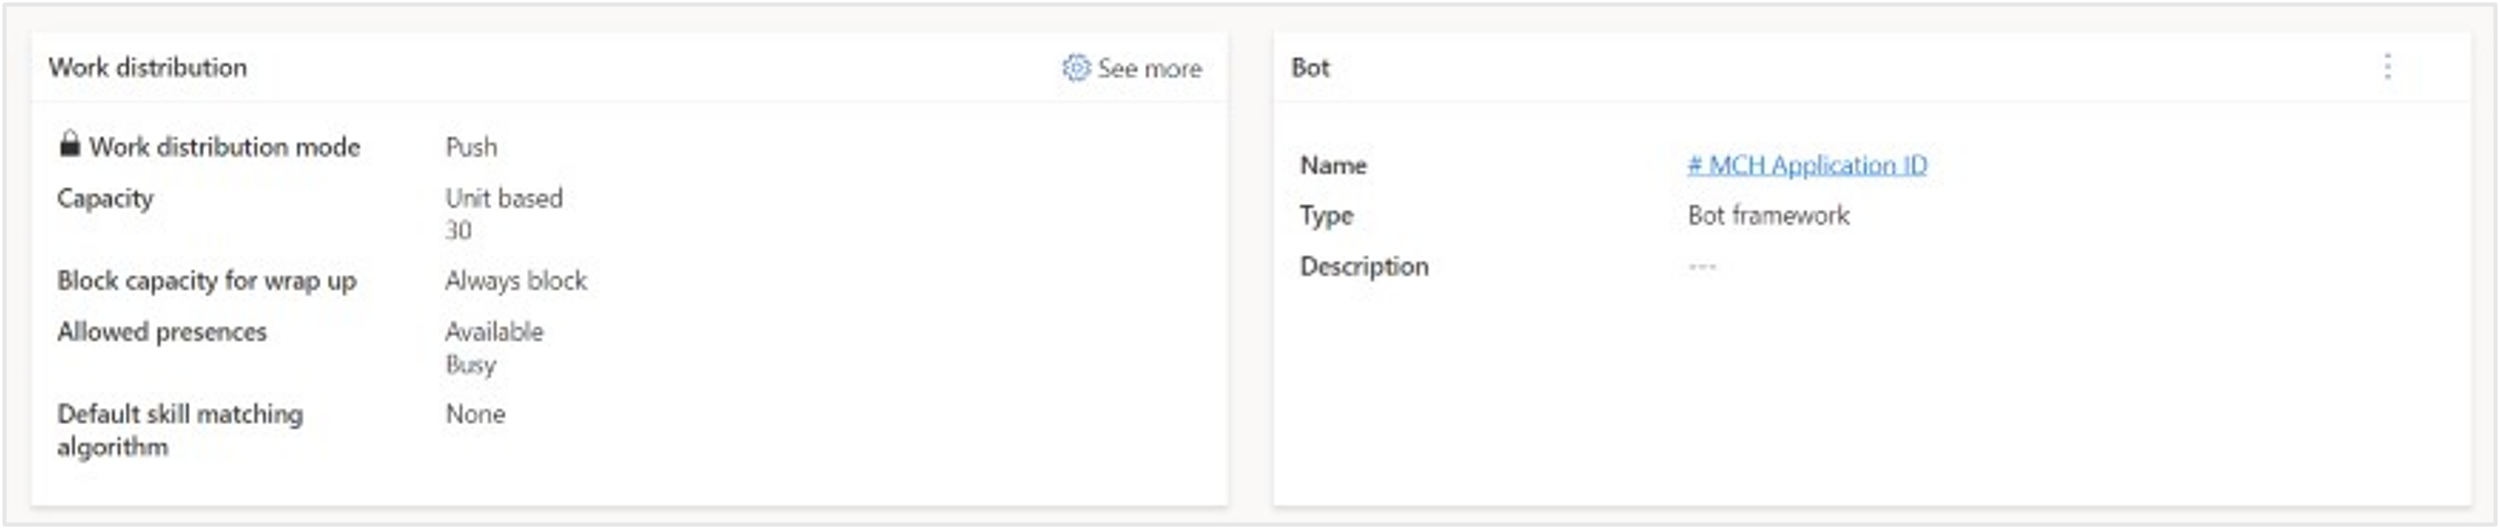
The updated fallback queue displays. Select + Add bot to add the Azure AI Health Bot for initial routing.
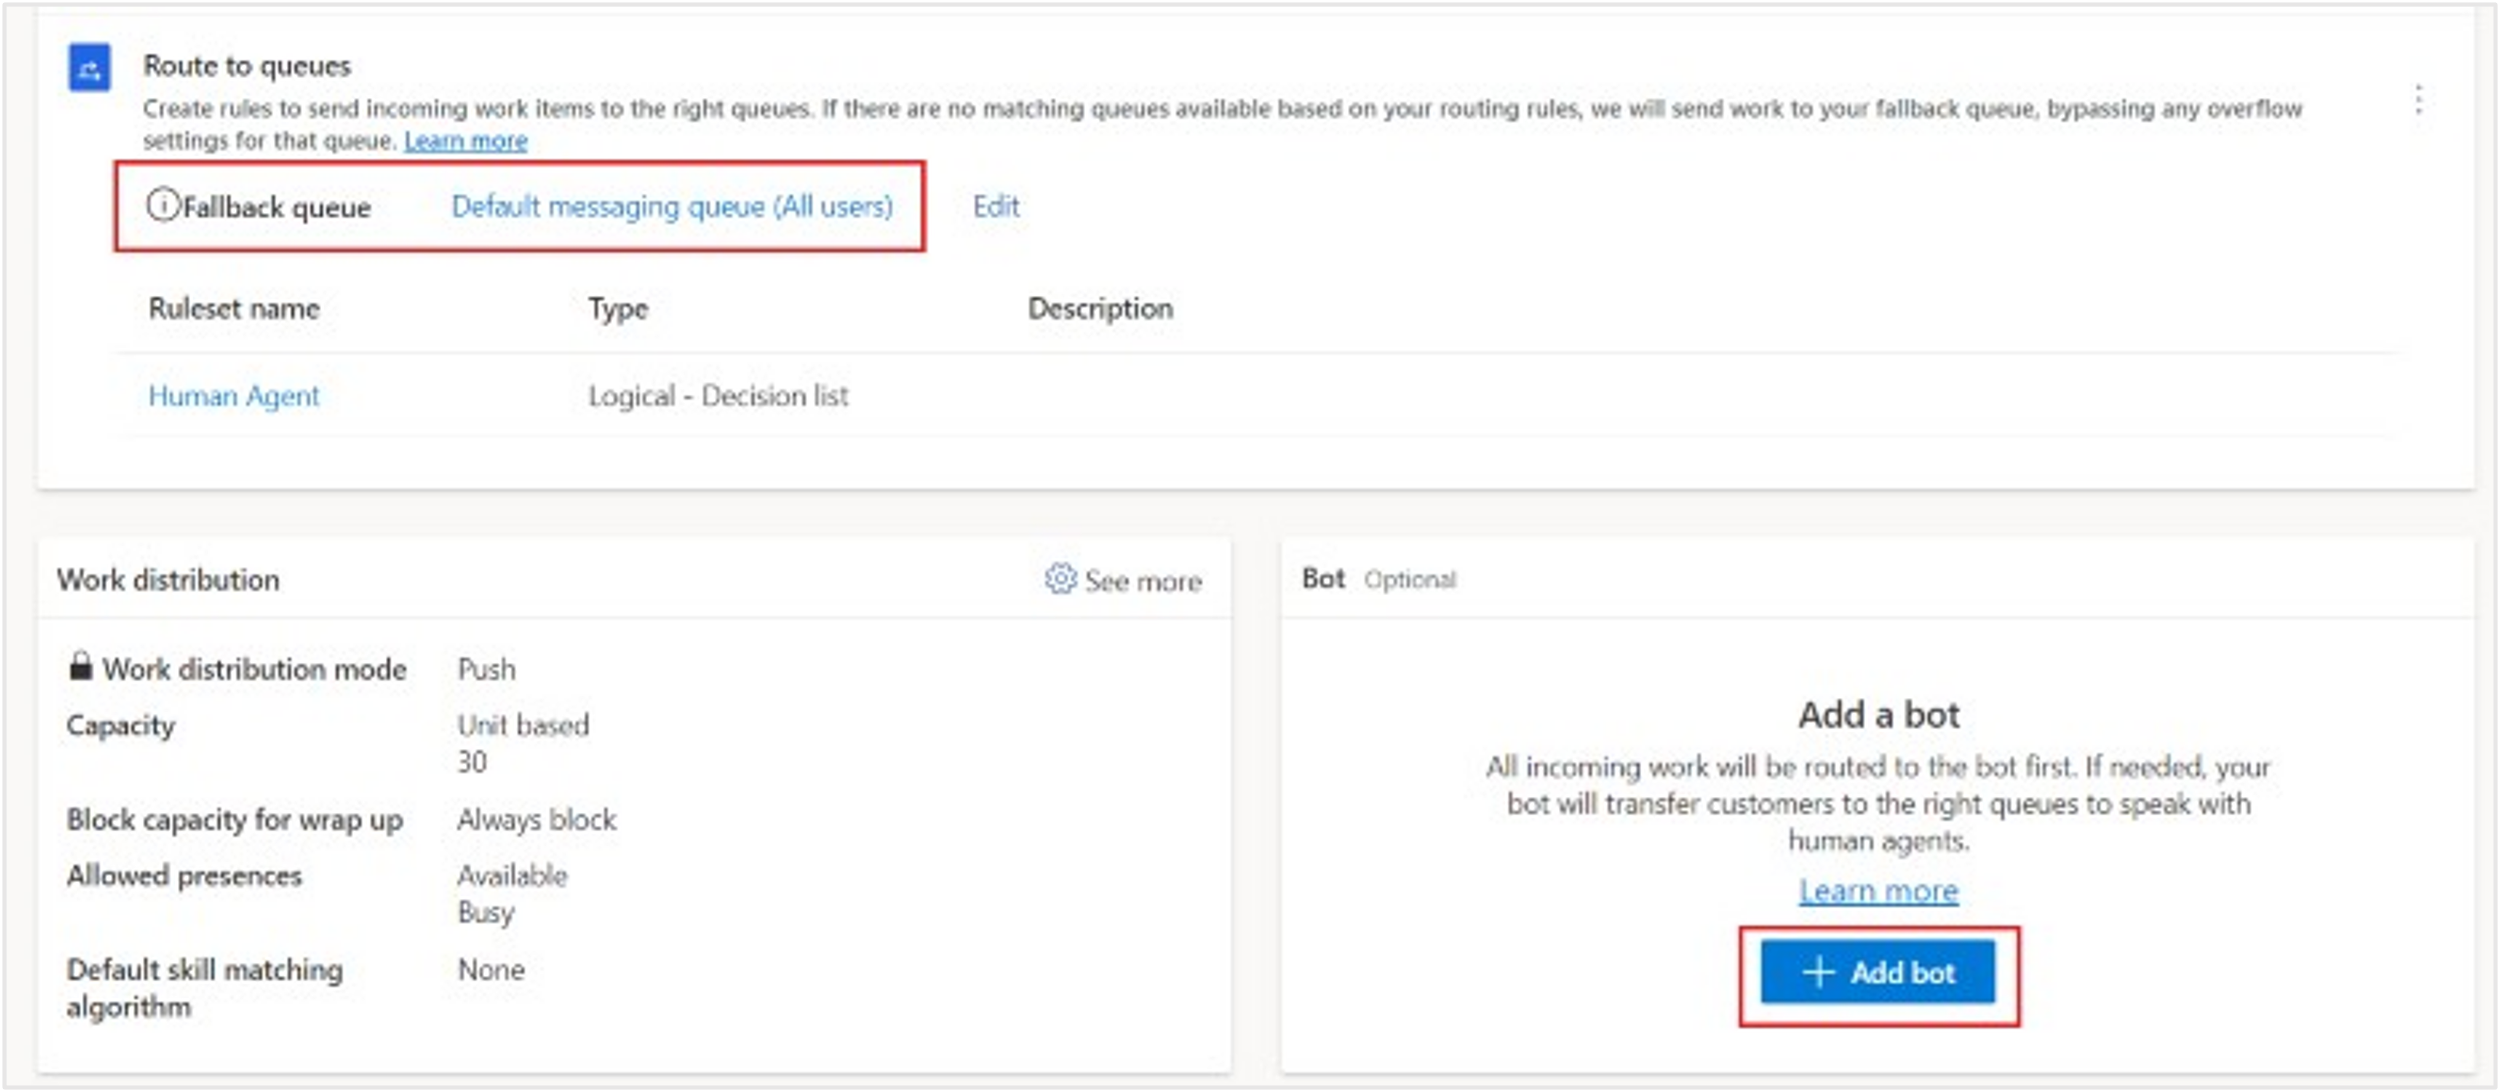
Select your bot user from the Name dropdown menu. Select Save and close.
The bot user has been added. Now, you need to edit the ruleset so that the queue properly escalates to a human agent. First, you need a number variable to use with your escalation logic. On the lower-left corner of the Workstream page, select Show advanced settings.
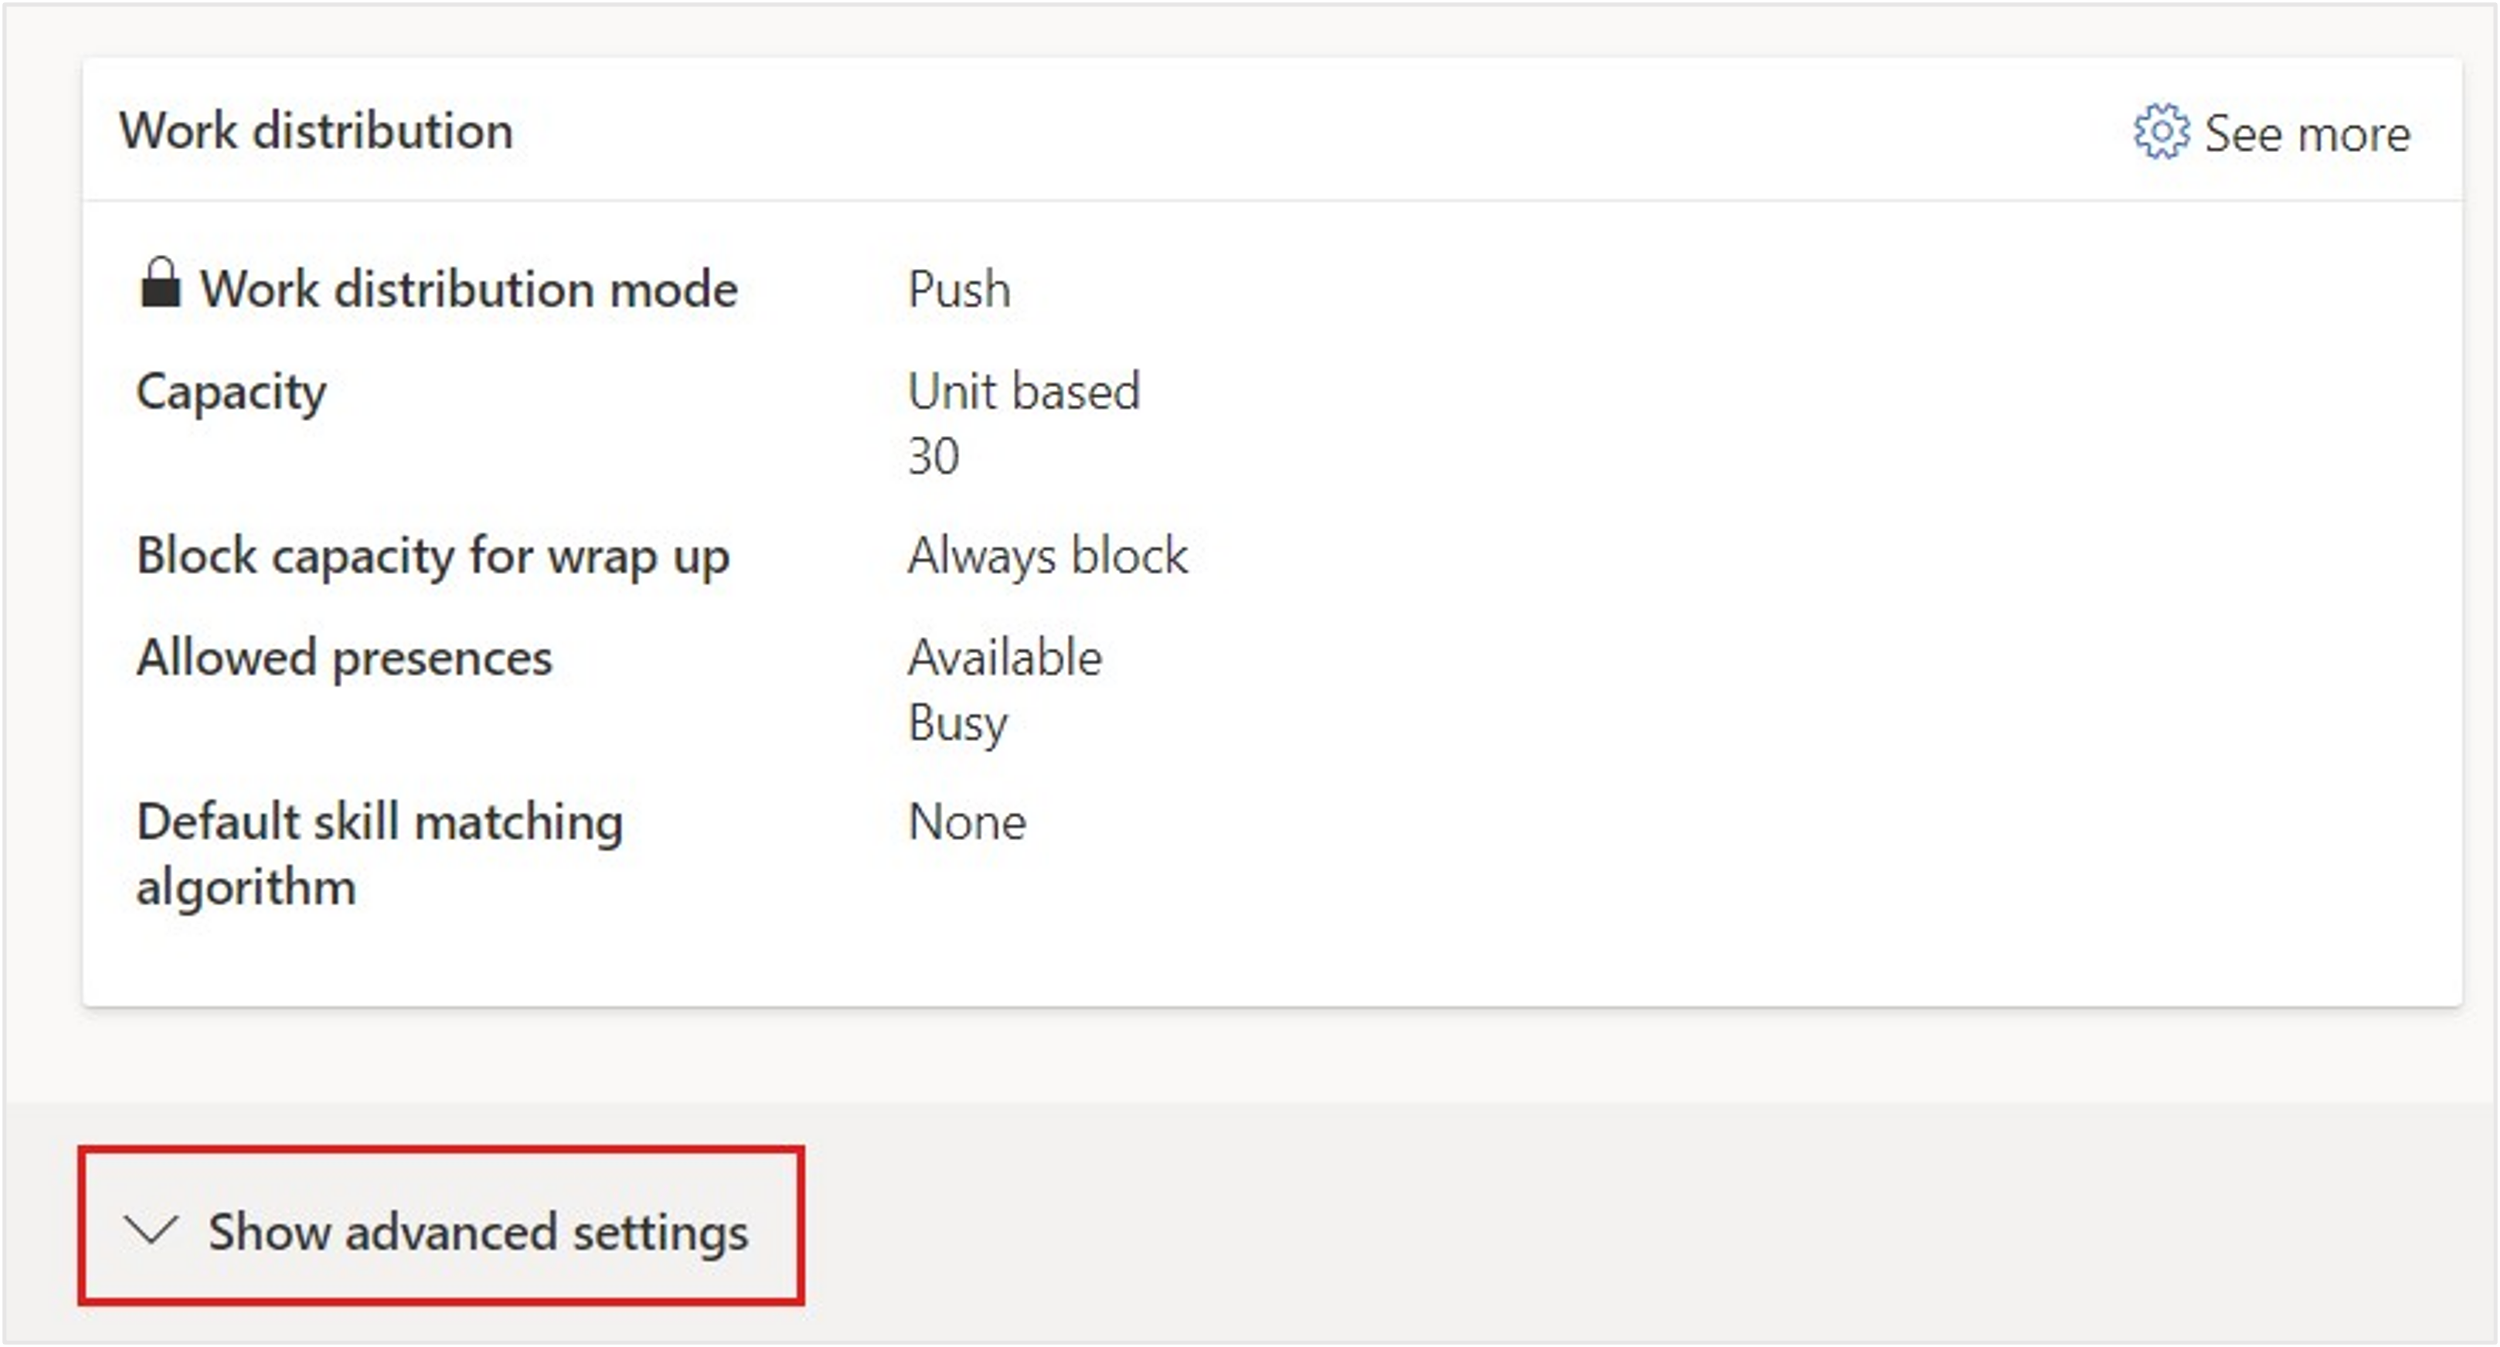
Review the advanced settings for the workstream and then select + Add context variable.

In the Add context variable screen, select + Add. Create the new context variable, which you use to determine whether you need to escalate to an agent or not. Enter EscalateToAgent as the Name and then select Number from the Type dropdown menu. Select Create.
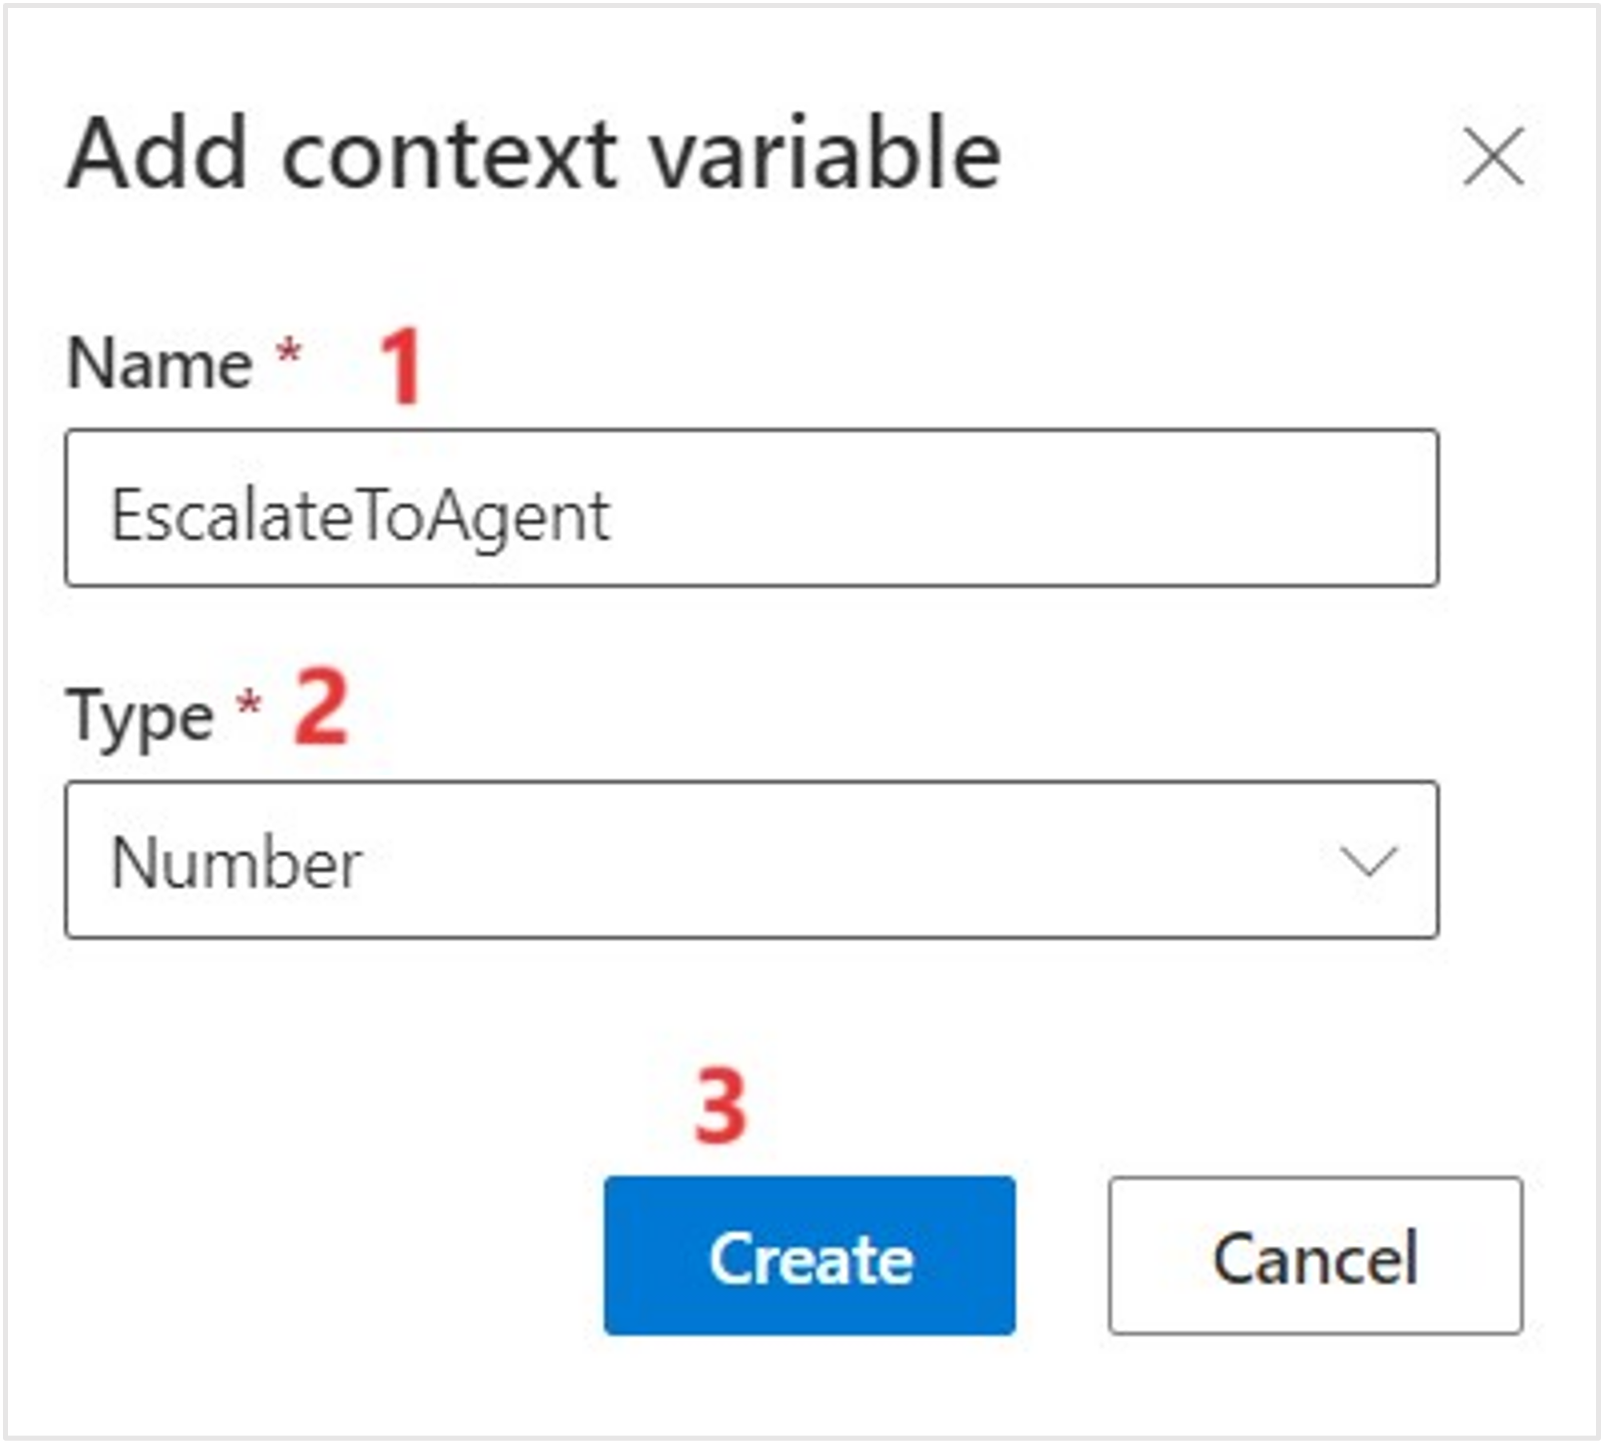
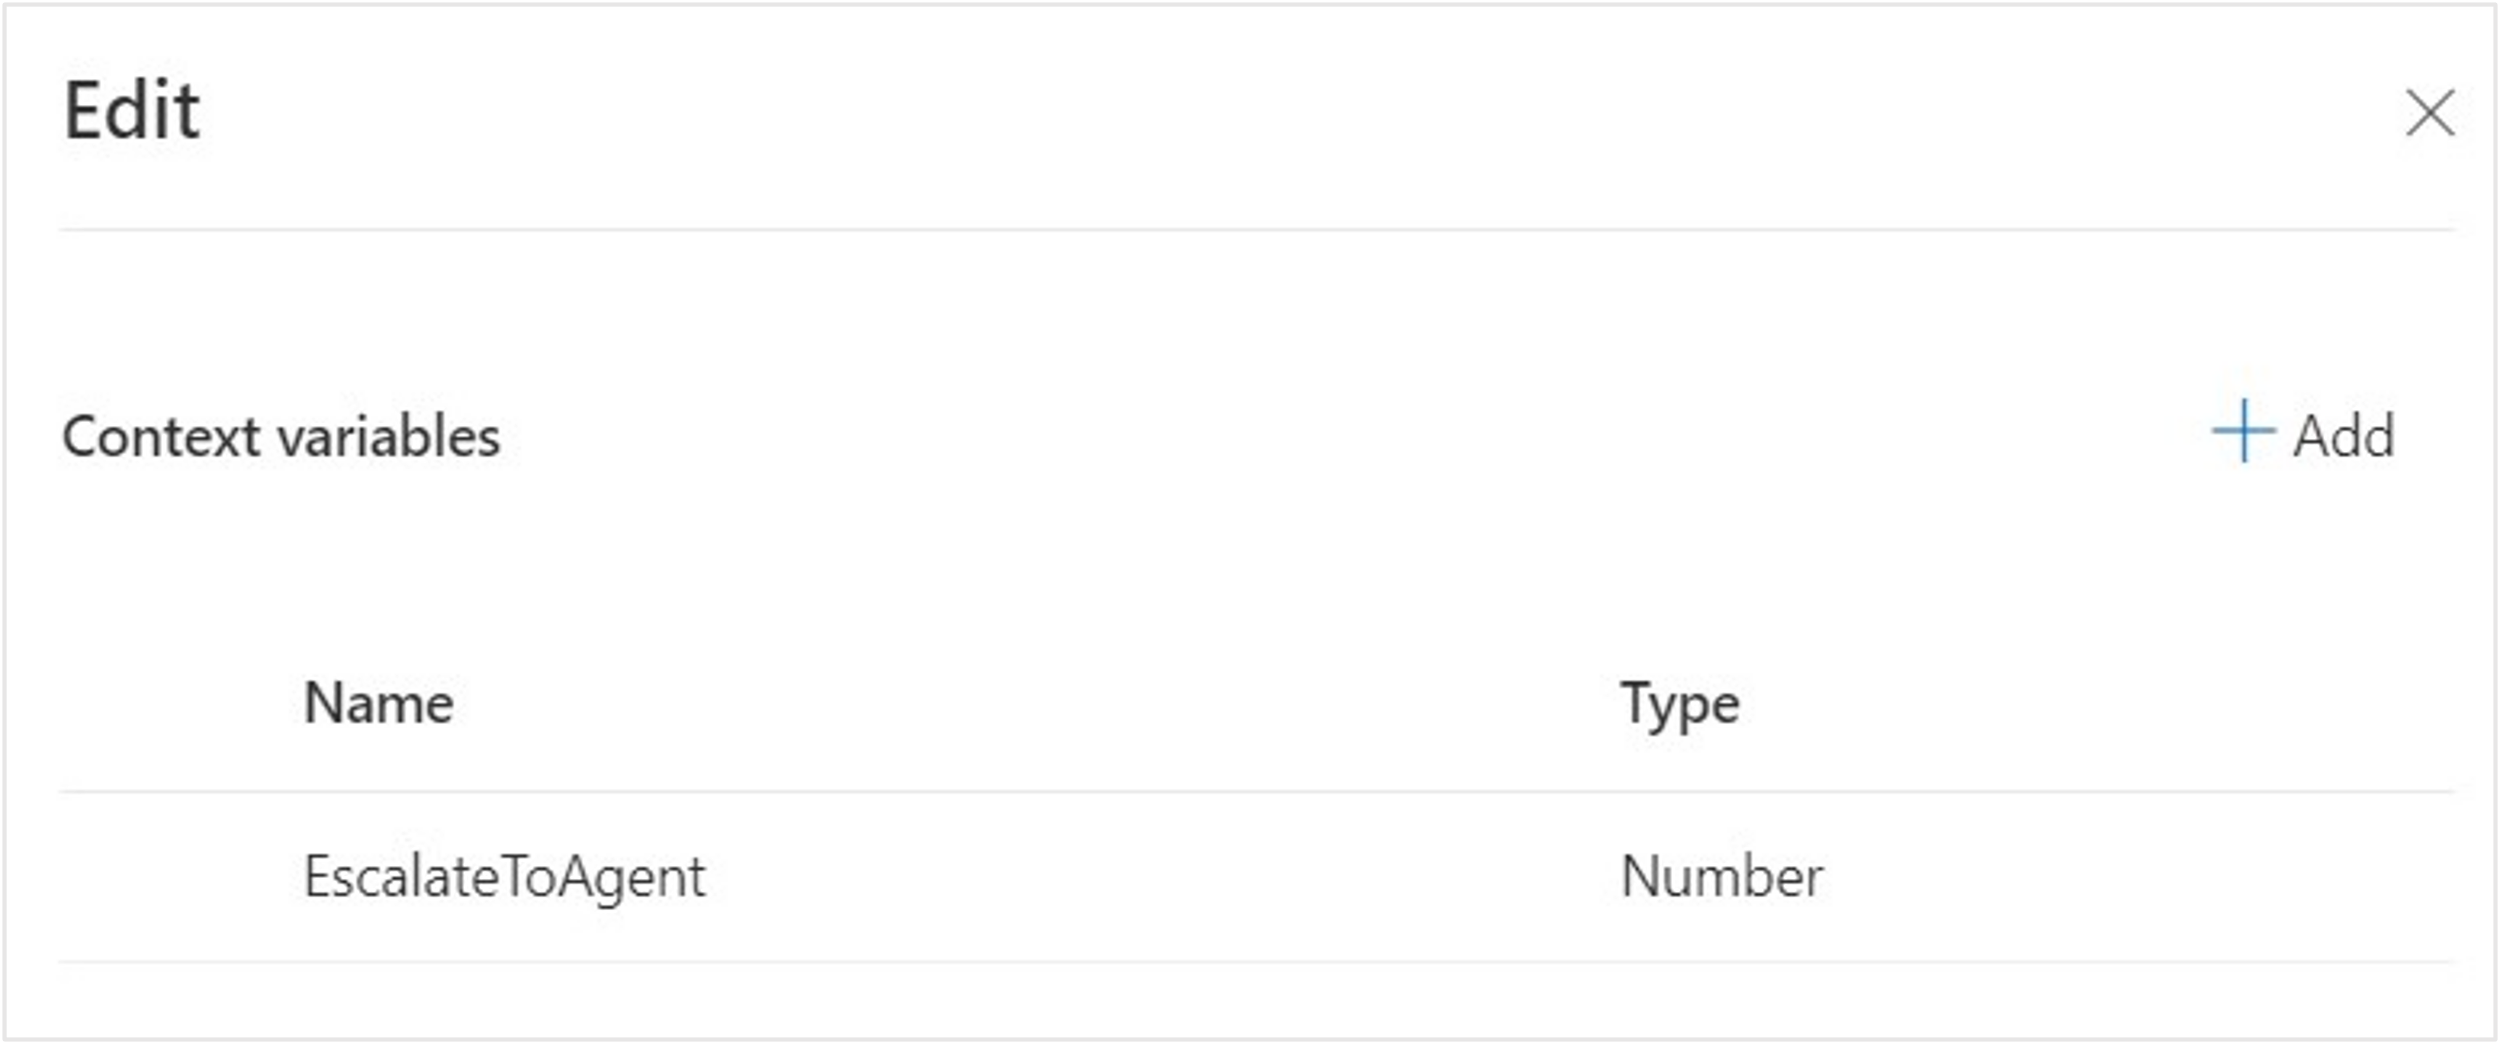
The EscalateToAgent context variable of the Number type should show as added. Close the Context variables screen.
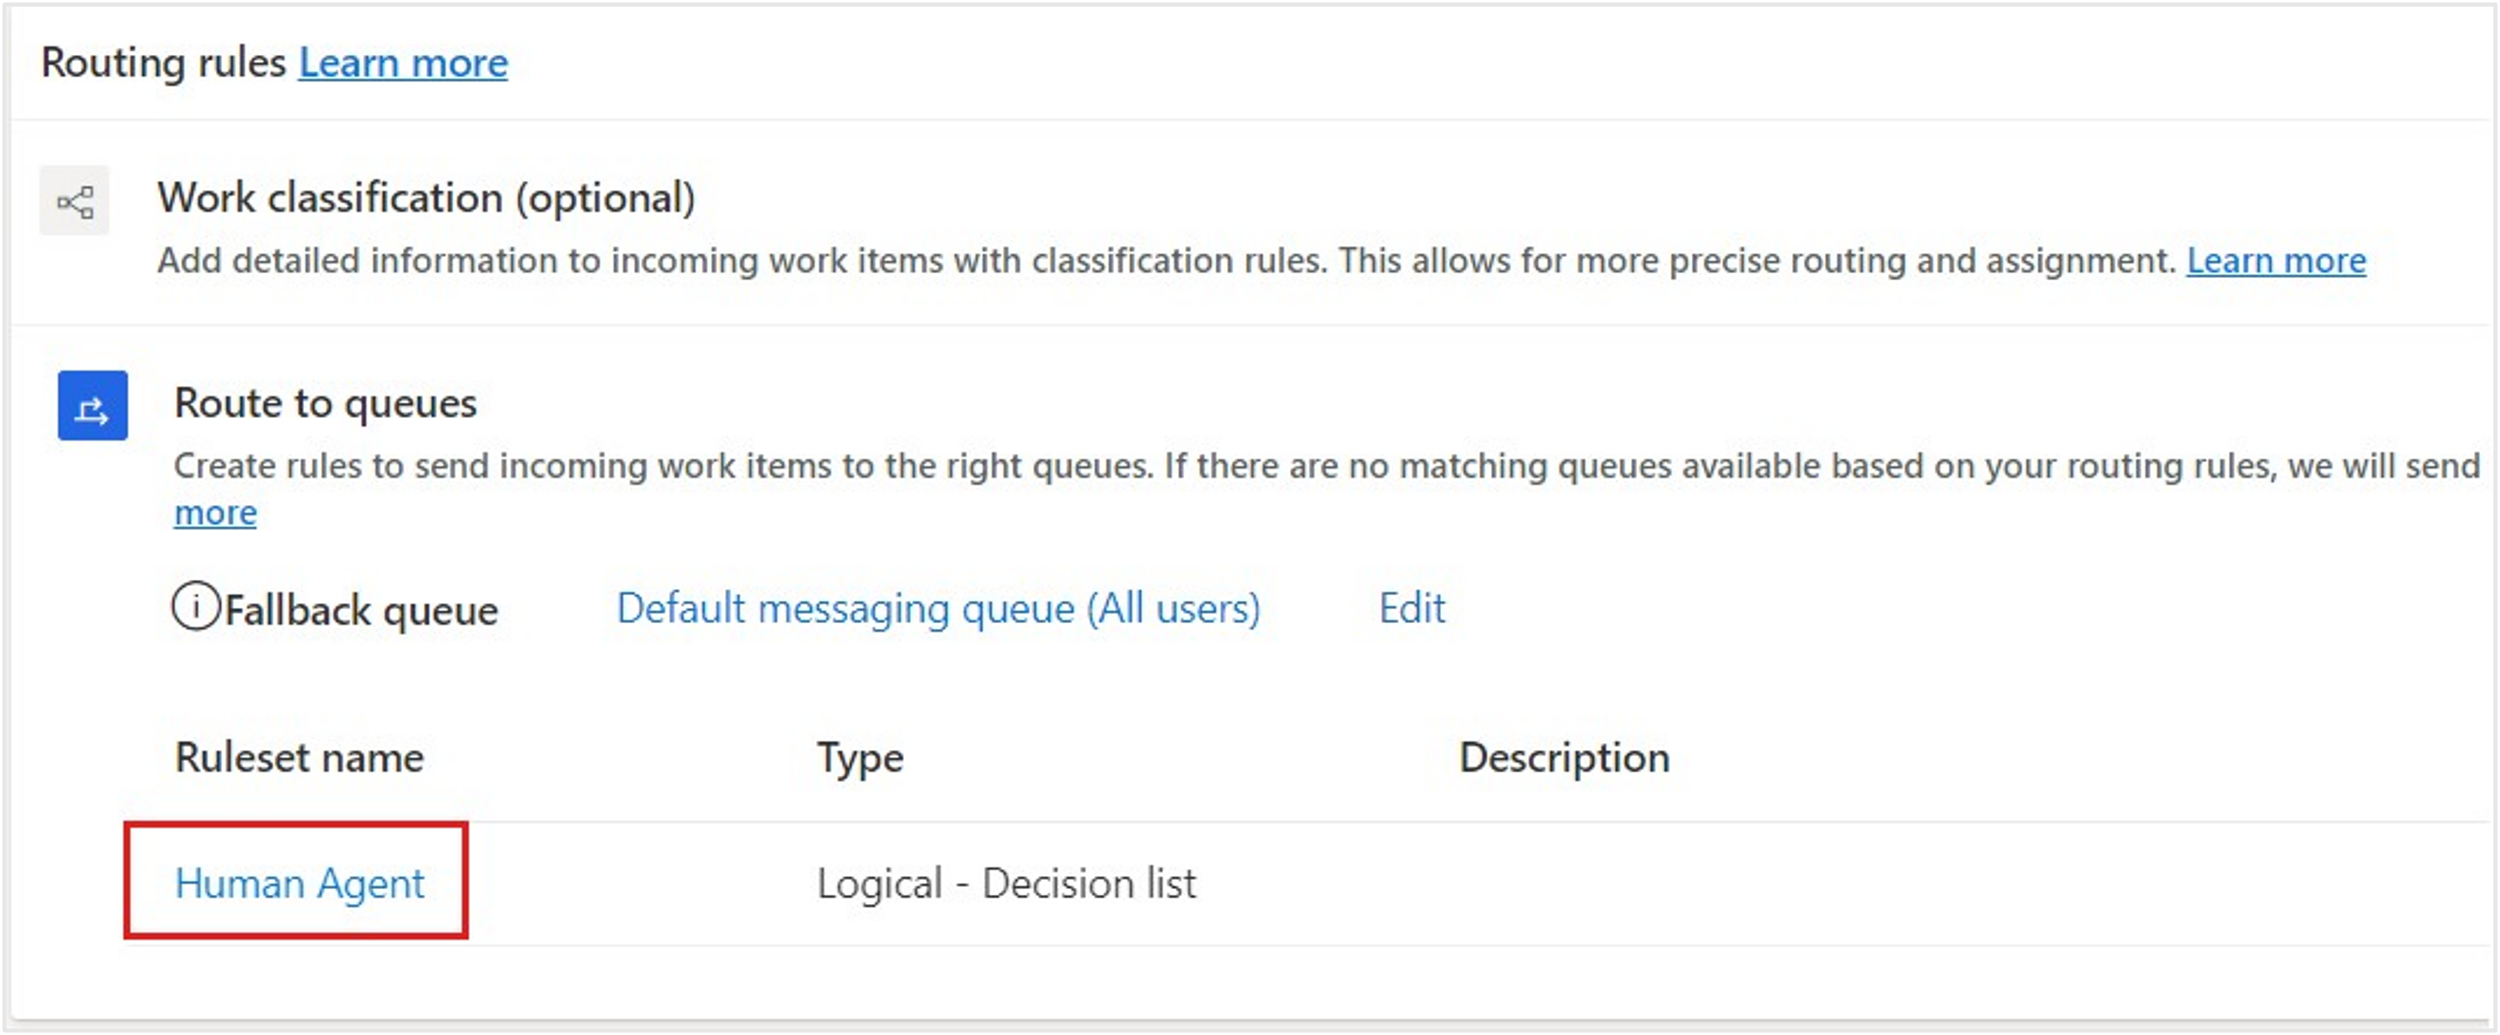
On the workstream record, select Advanced Settings to collapse it. Select Human Agent under Ruleset name.
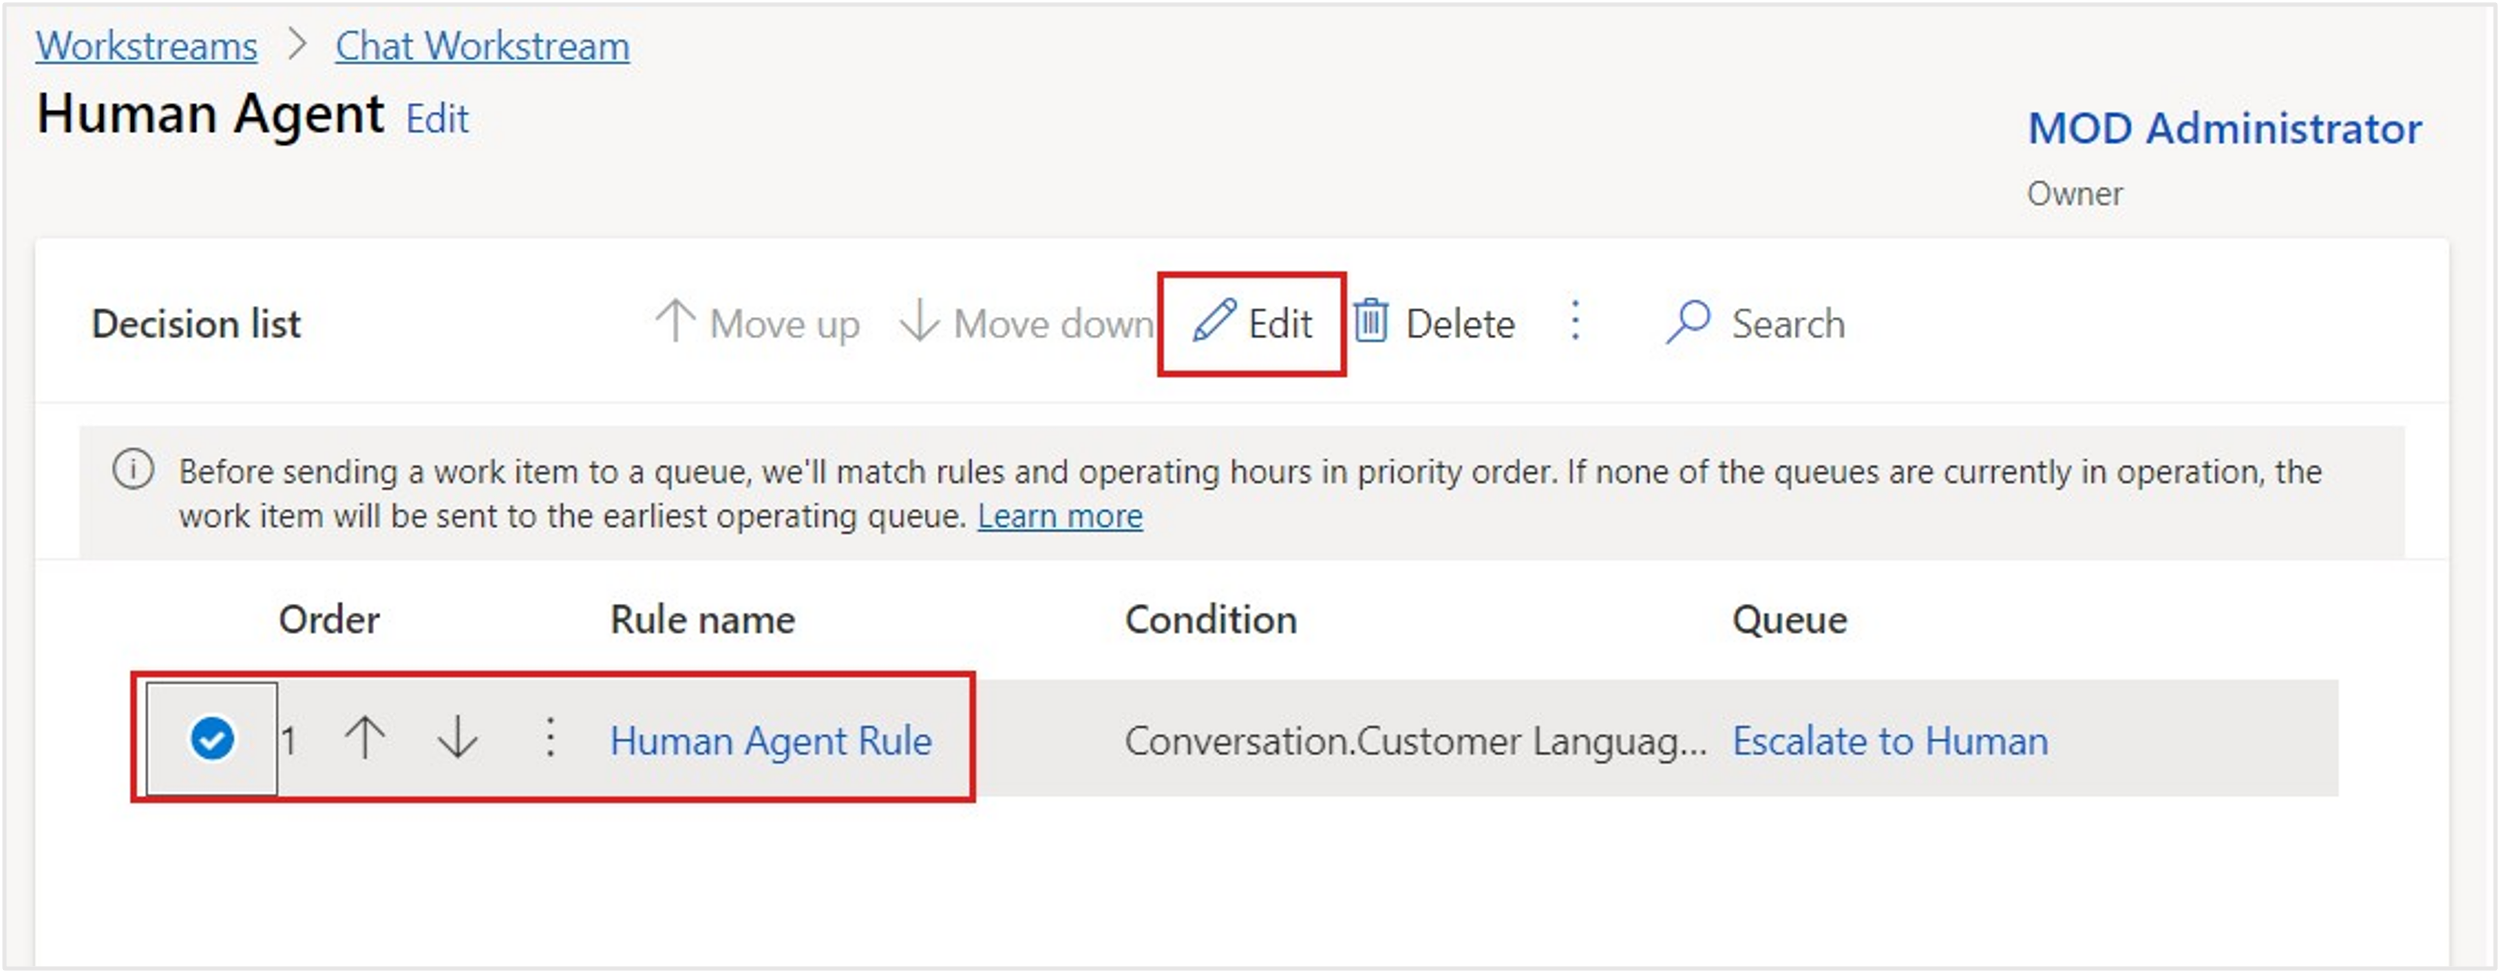
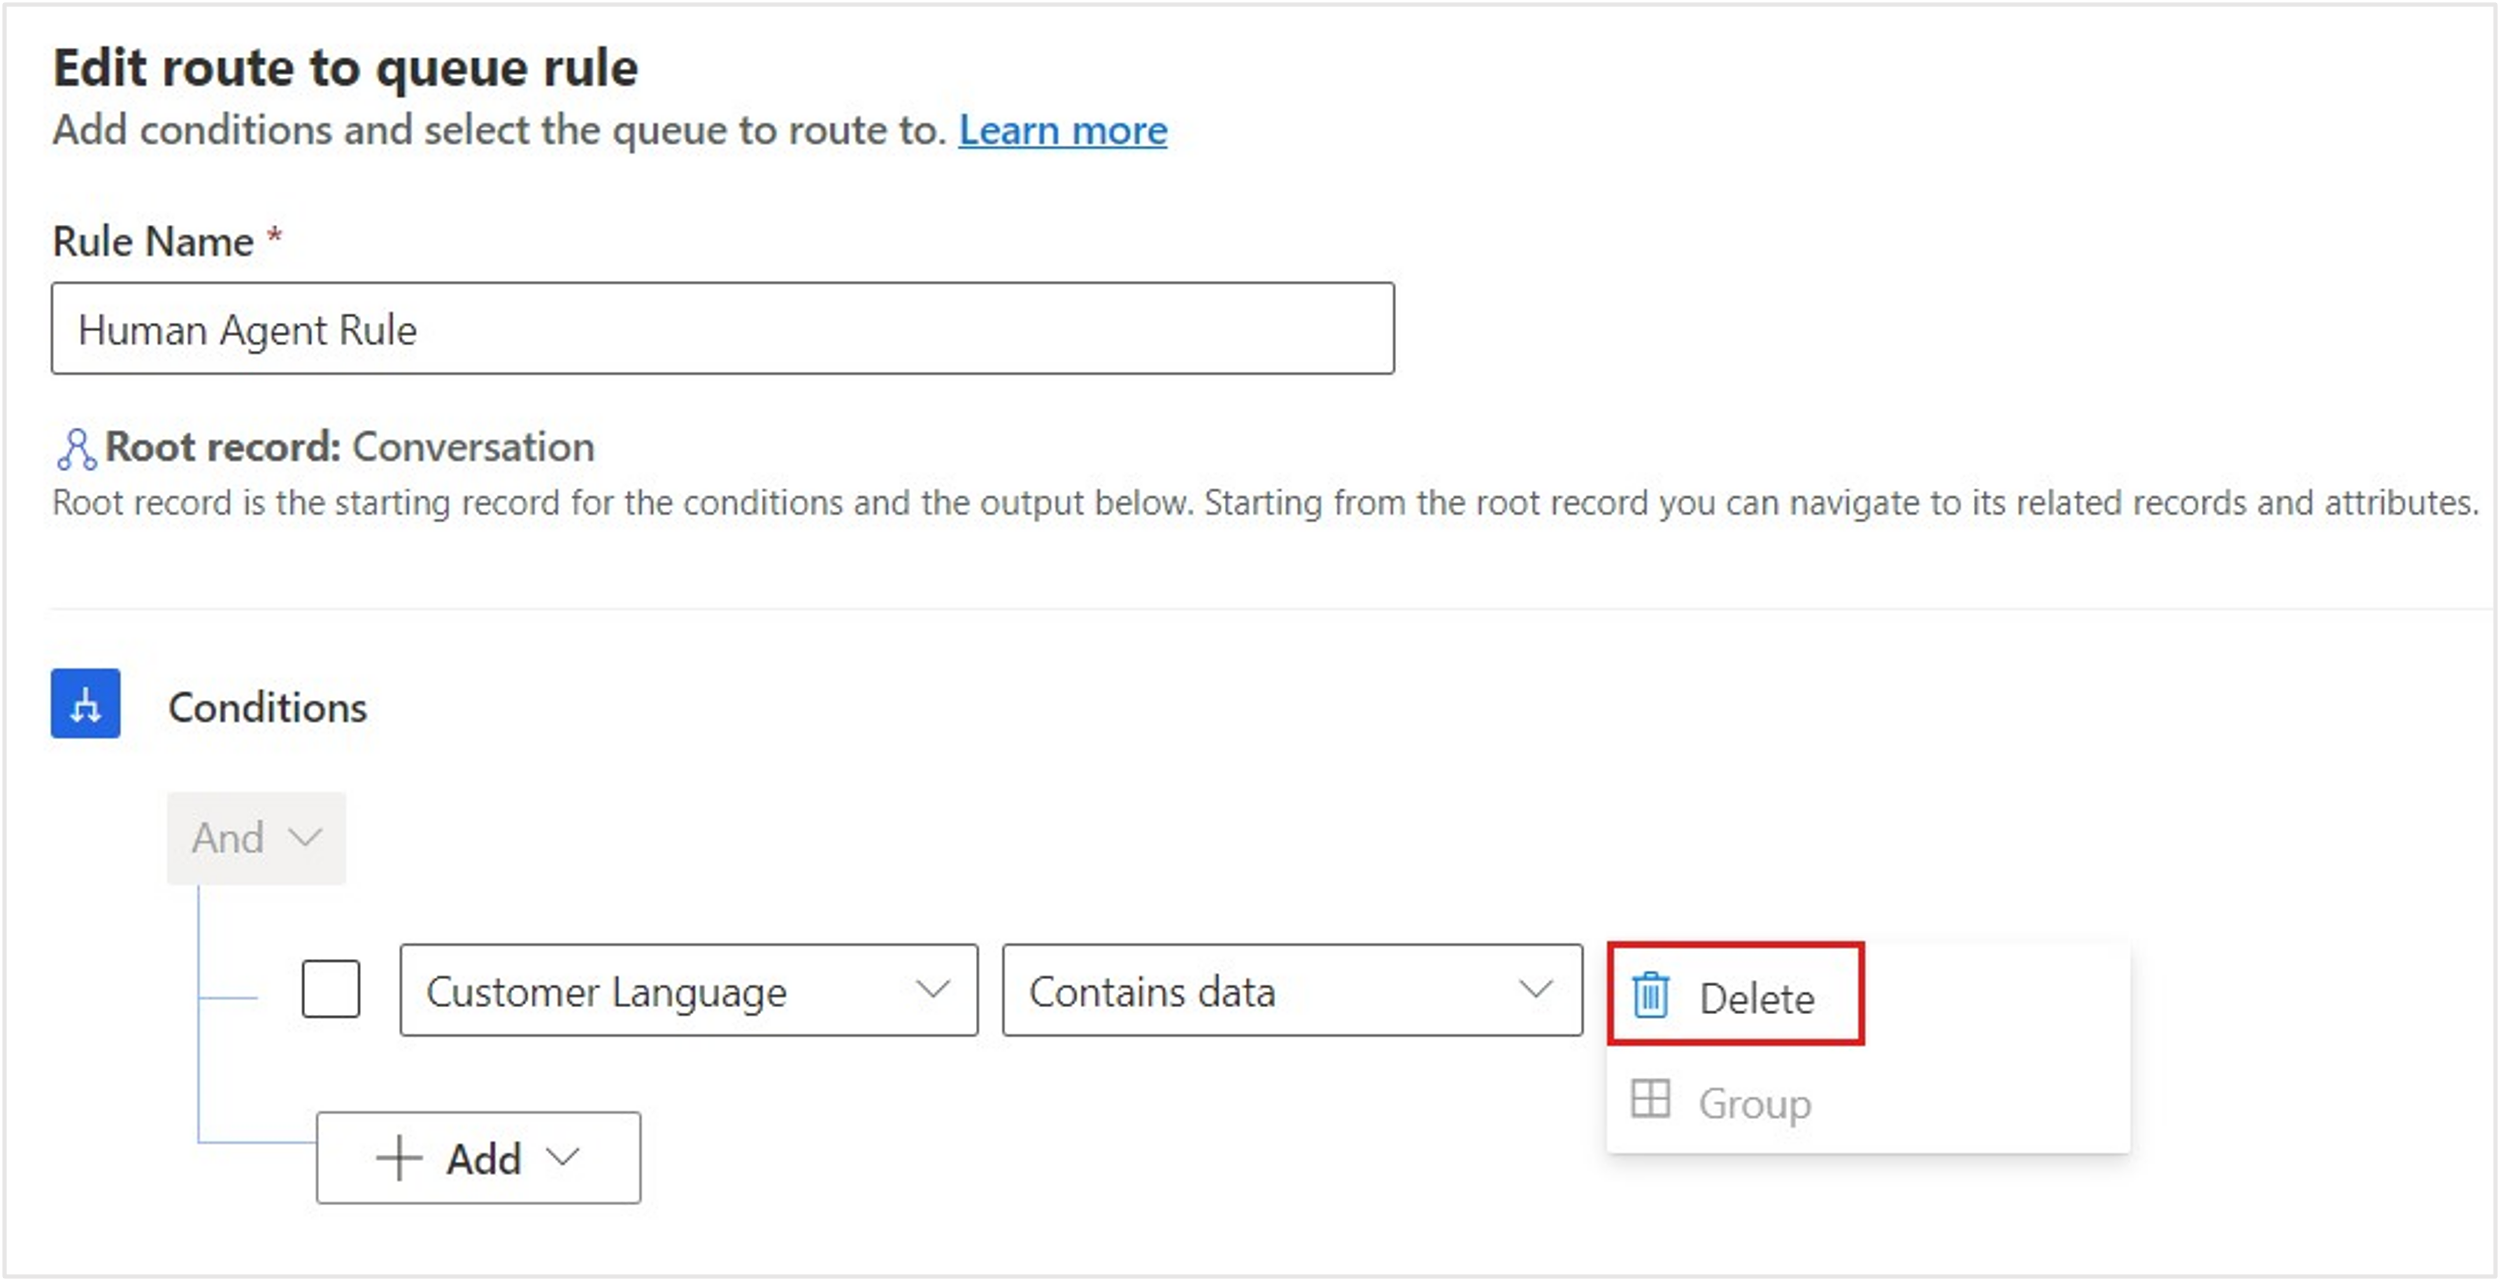
Select Human Agent Rule and then select Edit.
Delete the initial condition in the rule to start with a blank canvas. The logic to follow is having the workstream route the chat channel to a human agent if the EscalateToHuman context variable is equal to 1 in any bot conversation.
Select Add > Add related entity to add a new condition.
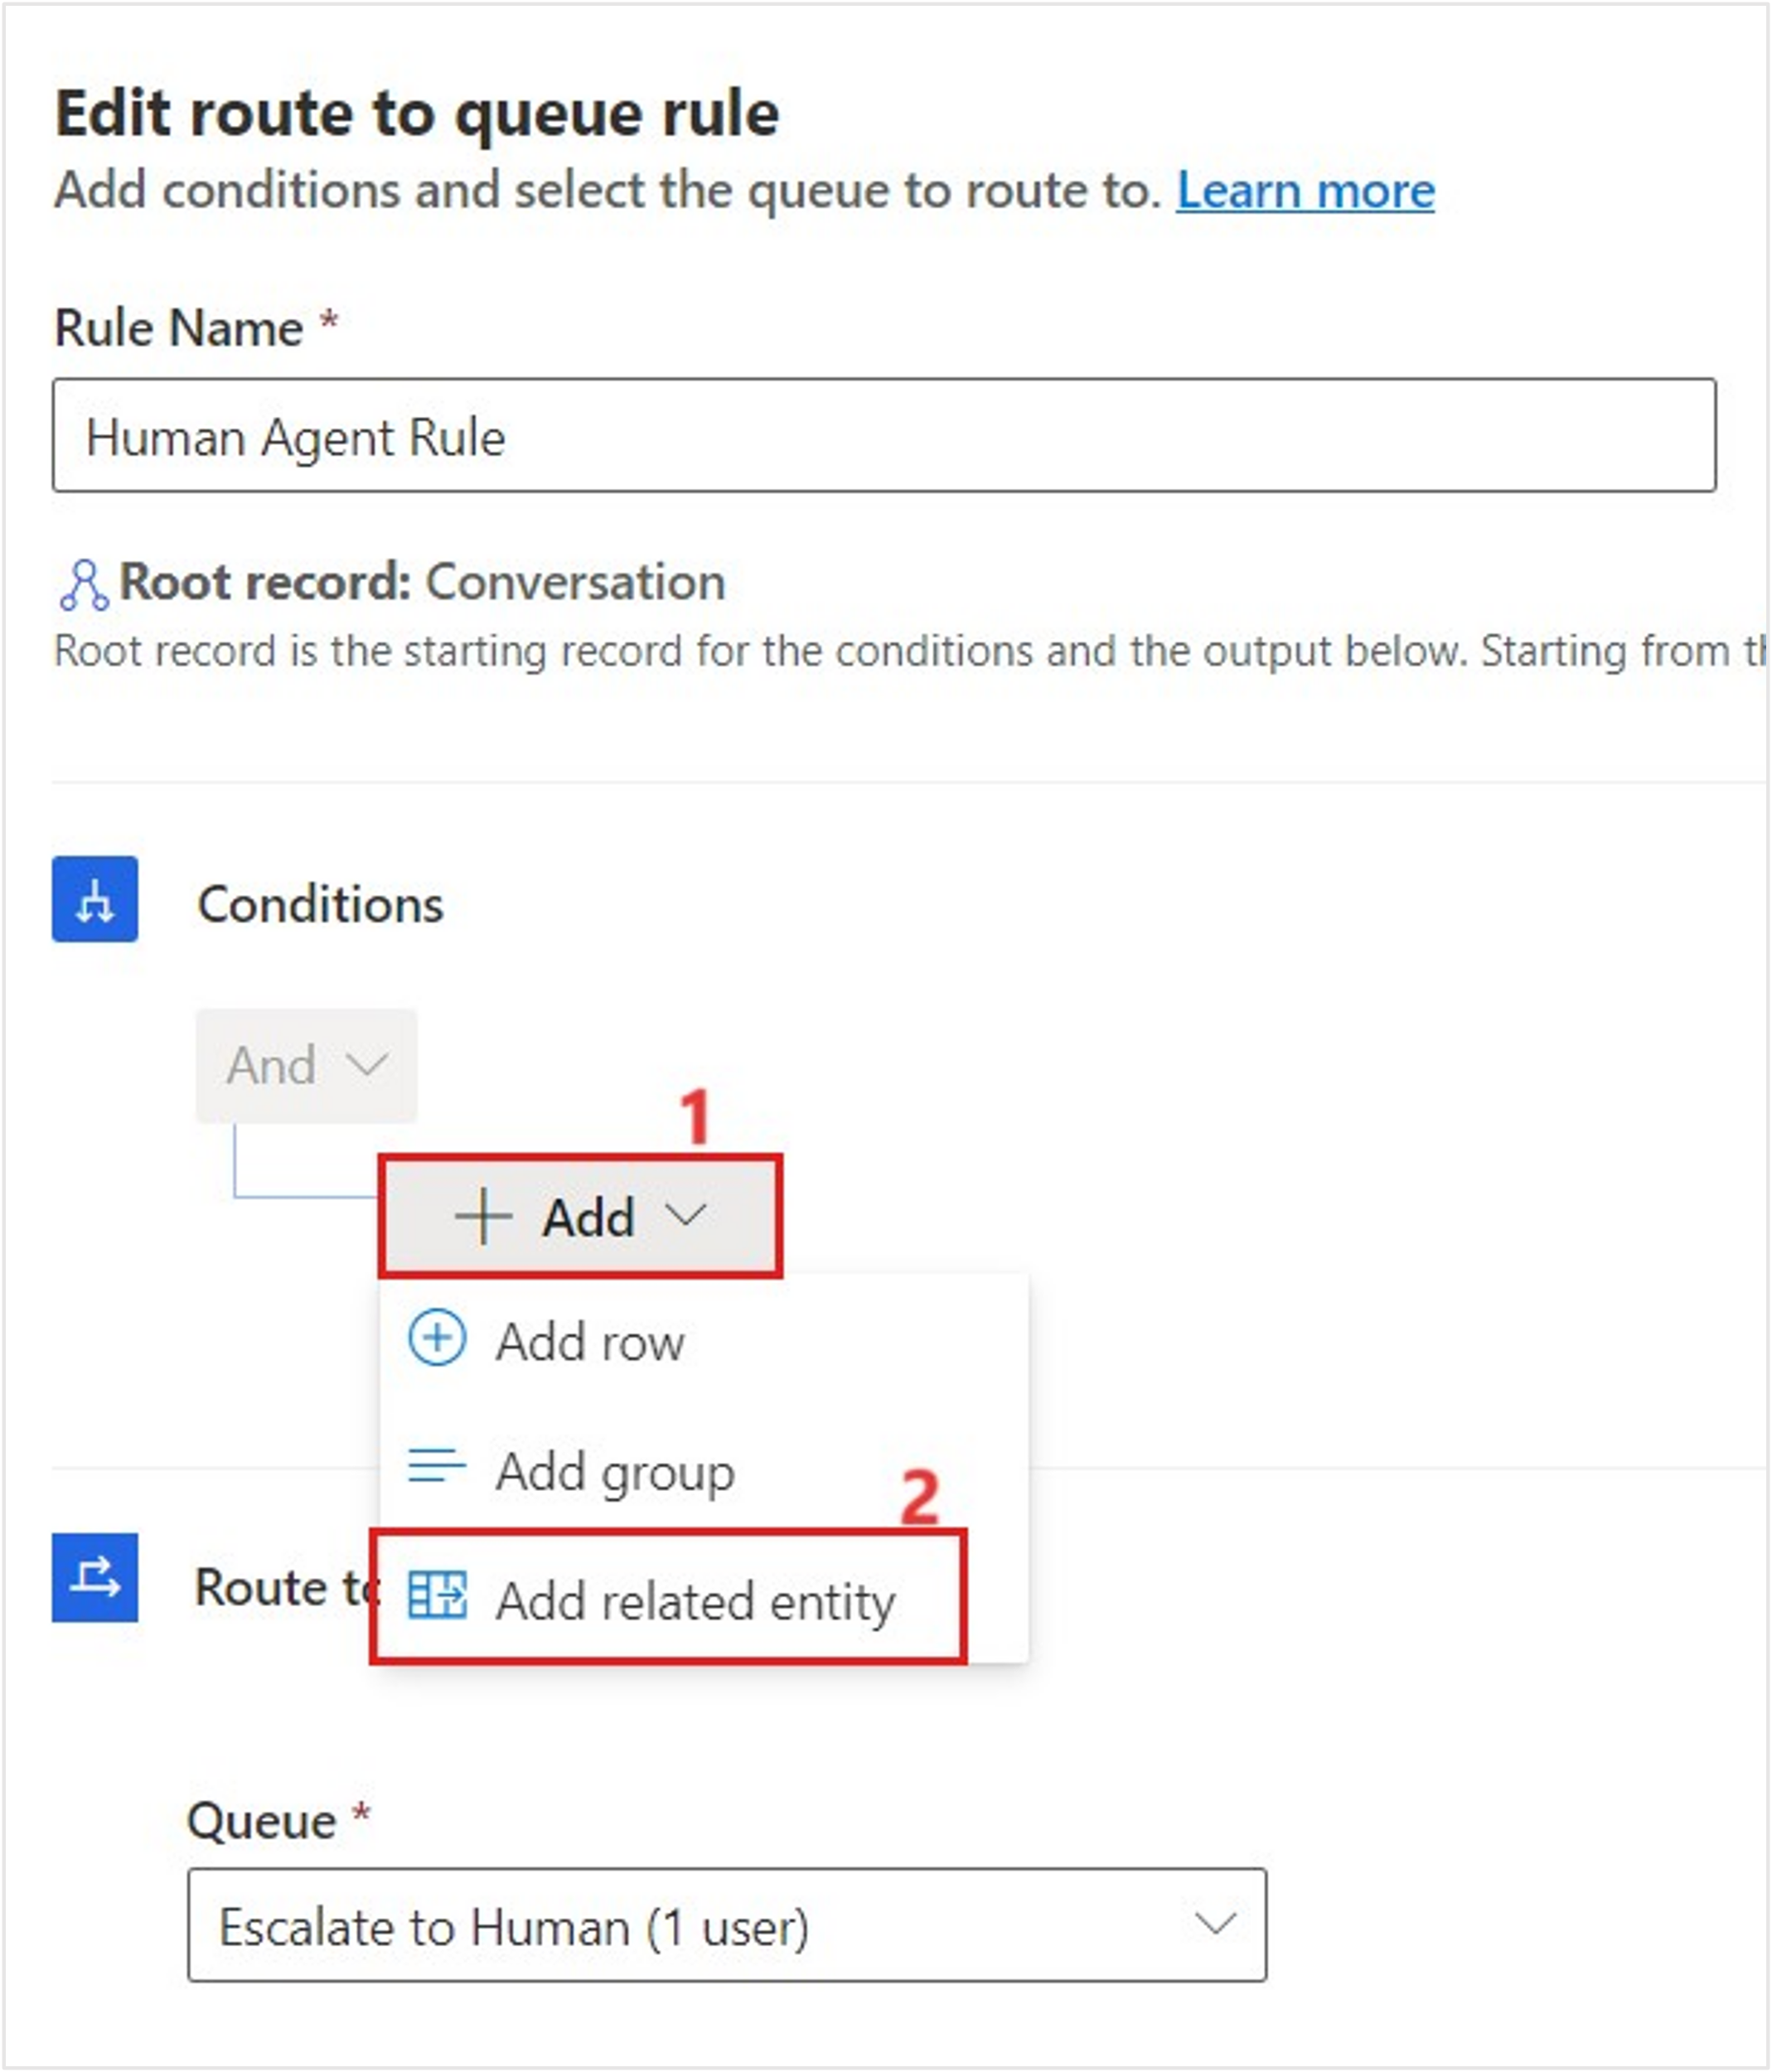
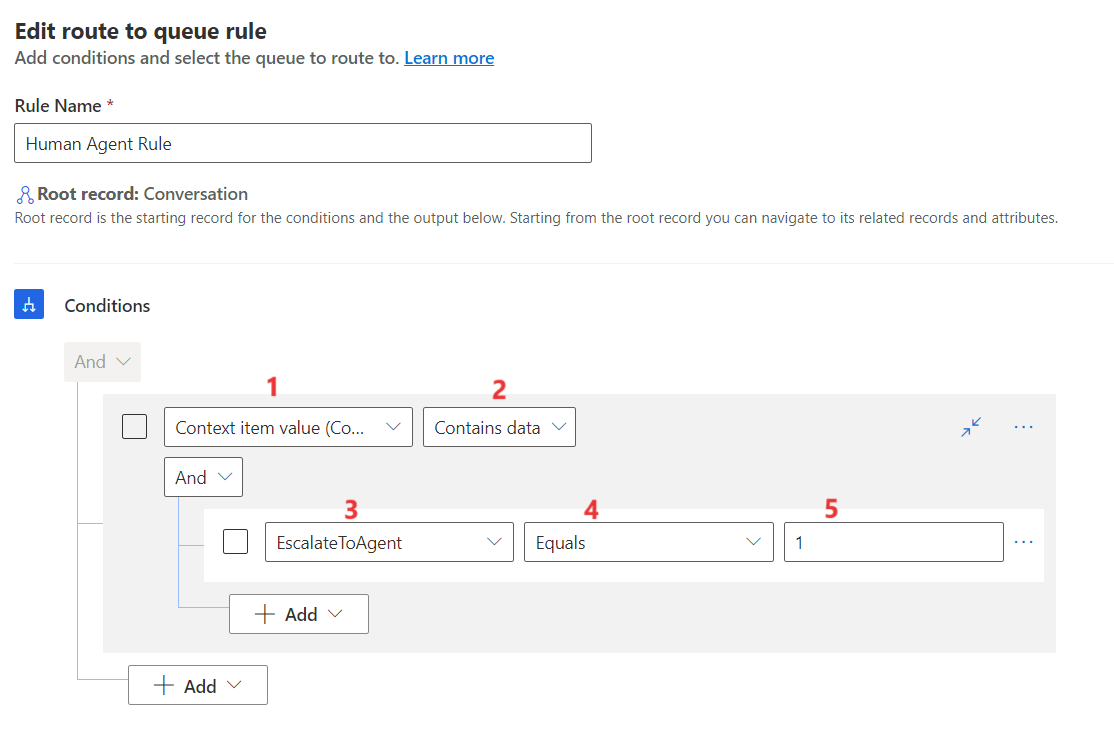
Select Context item value (Conversation) from the dropdown menu to have the routing rule check if conversation context values contain specific data.
After you select Context item value (Conversation), the following dropdown menu populates with contains data, and a sub condition appears. Select the new EscalateToAgent context variable, and then set it as Equals to 1 in the condition. This setting allows bot conversations to route to a human agent if that variable is ever set to 1. You view this result in the last exercise in this module. Select Save and close.


The Chat Workstream shows Human Agent Rule with the condition that escalates to a human agent when the context variable is set to 1.

You now created a chat channel, workstream, queue, context variable, and routing rule that allows customers to begin a conversation with a health bot and escalate to a human agent.