Exercise - Import the sample data package for training
In this exercise, you'll import sample data that was created for this training and that's required in the later modules.
Go to Power Platform admin center in an InPrivate or incognito browser session.
On your left pane, select Environments and select your environment.
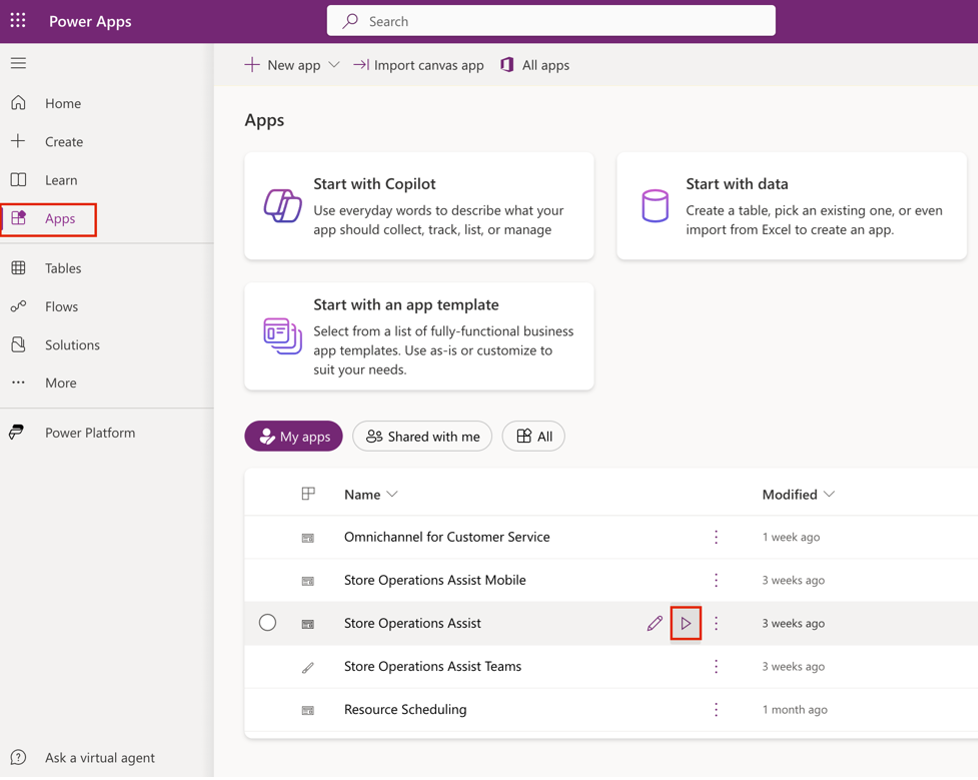
On the left navigation pane, select Apps. Select the play button that appears near Store Operations Assist.
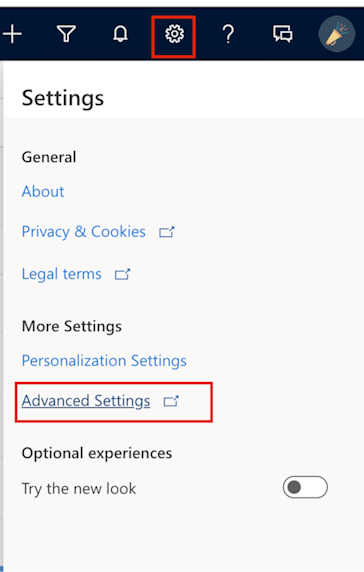
Select Settings > Advanced Settings.
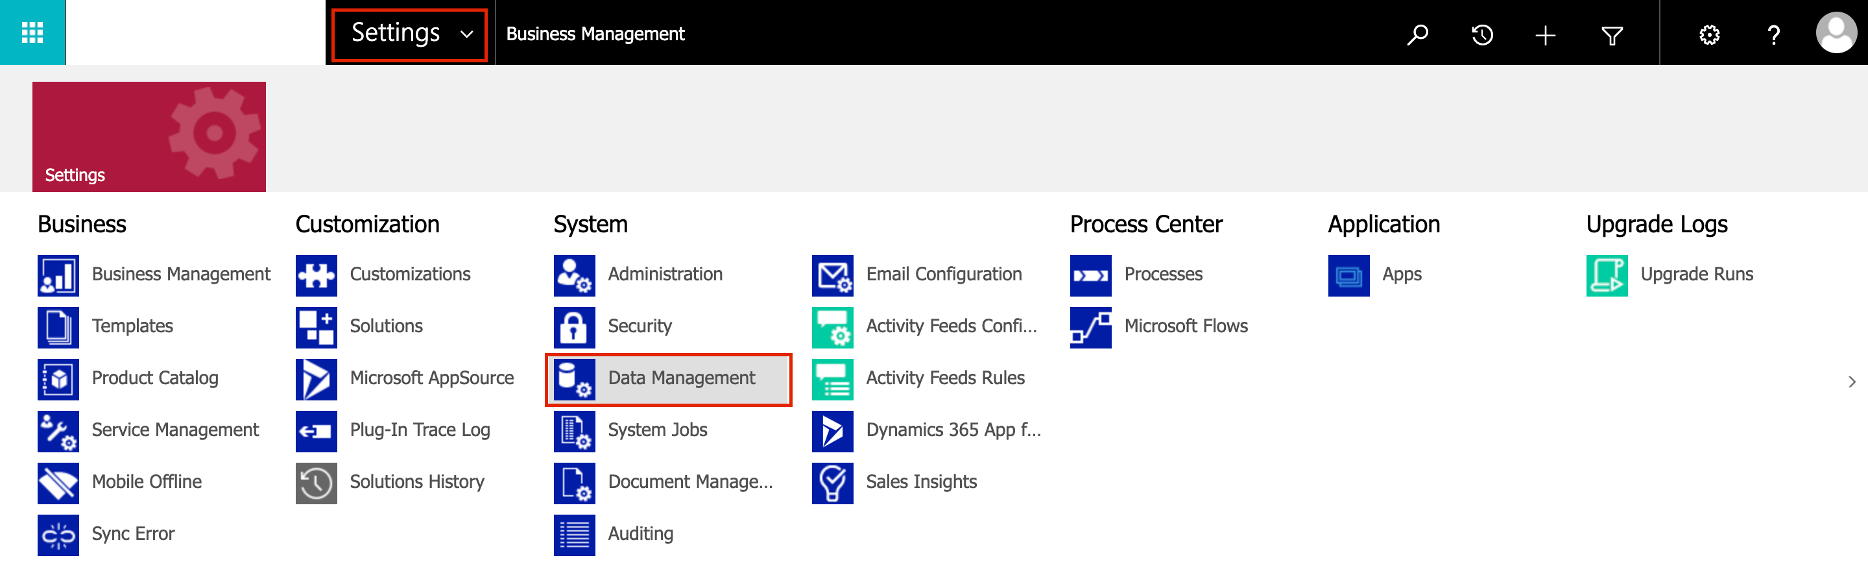
Under Settings, select Data Management.
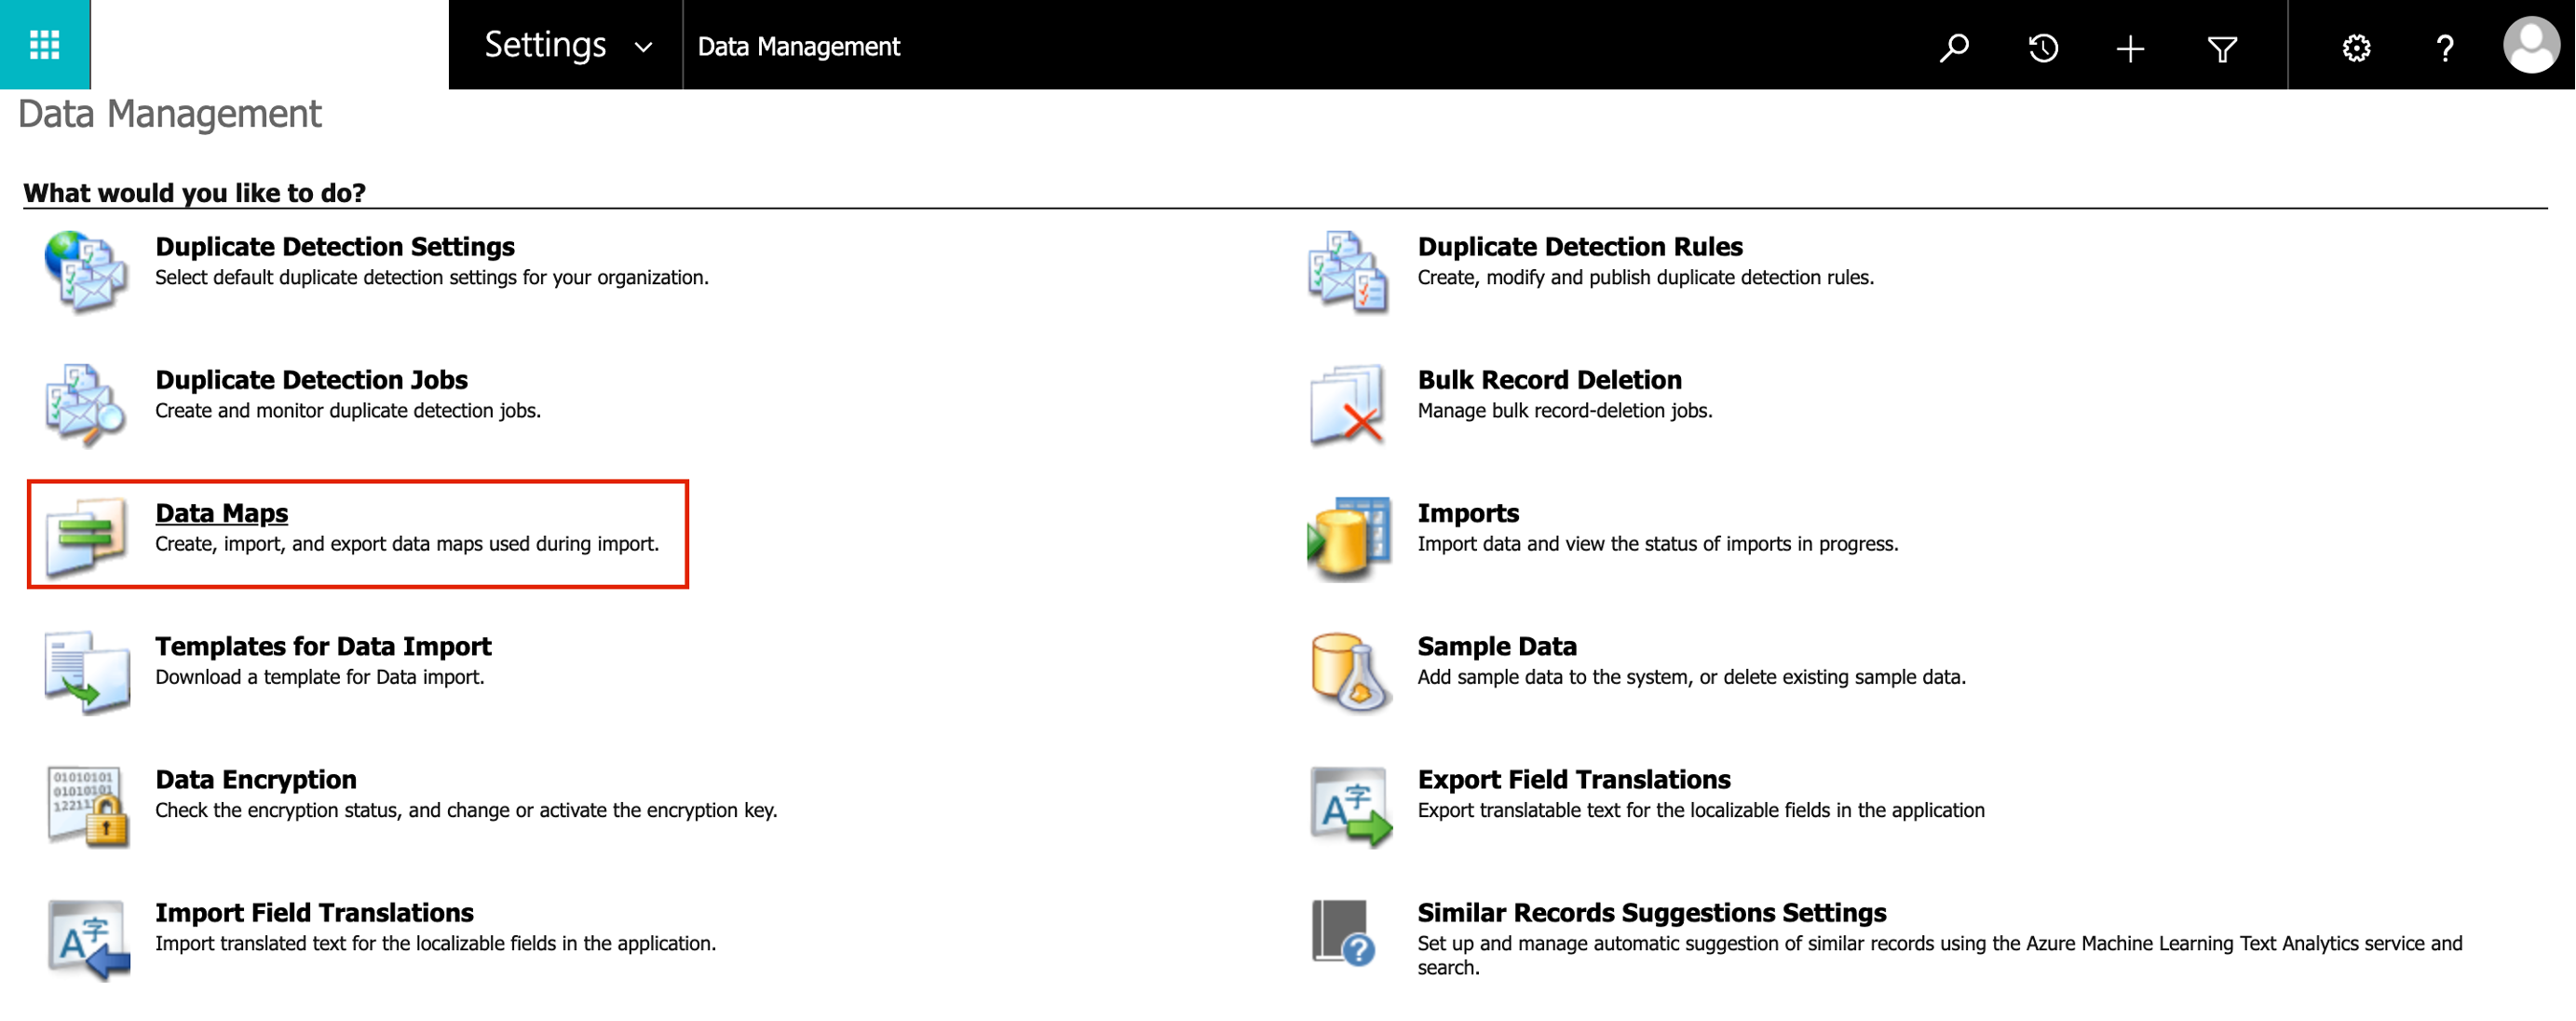
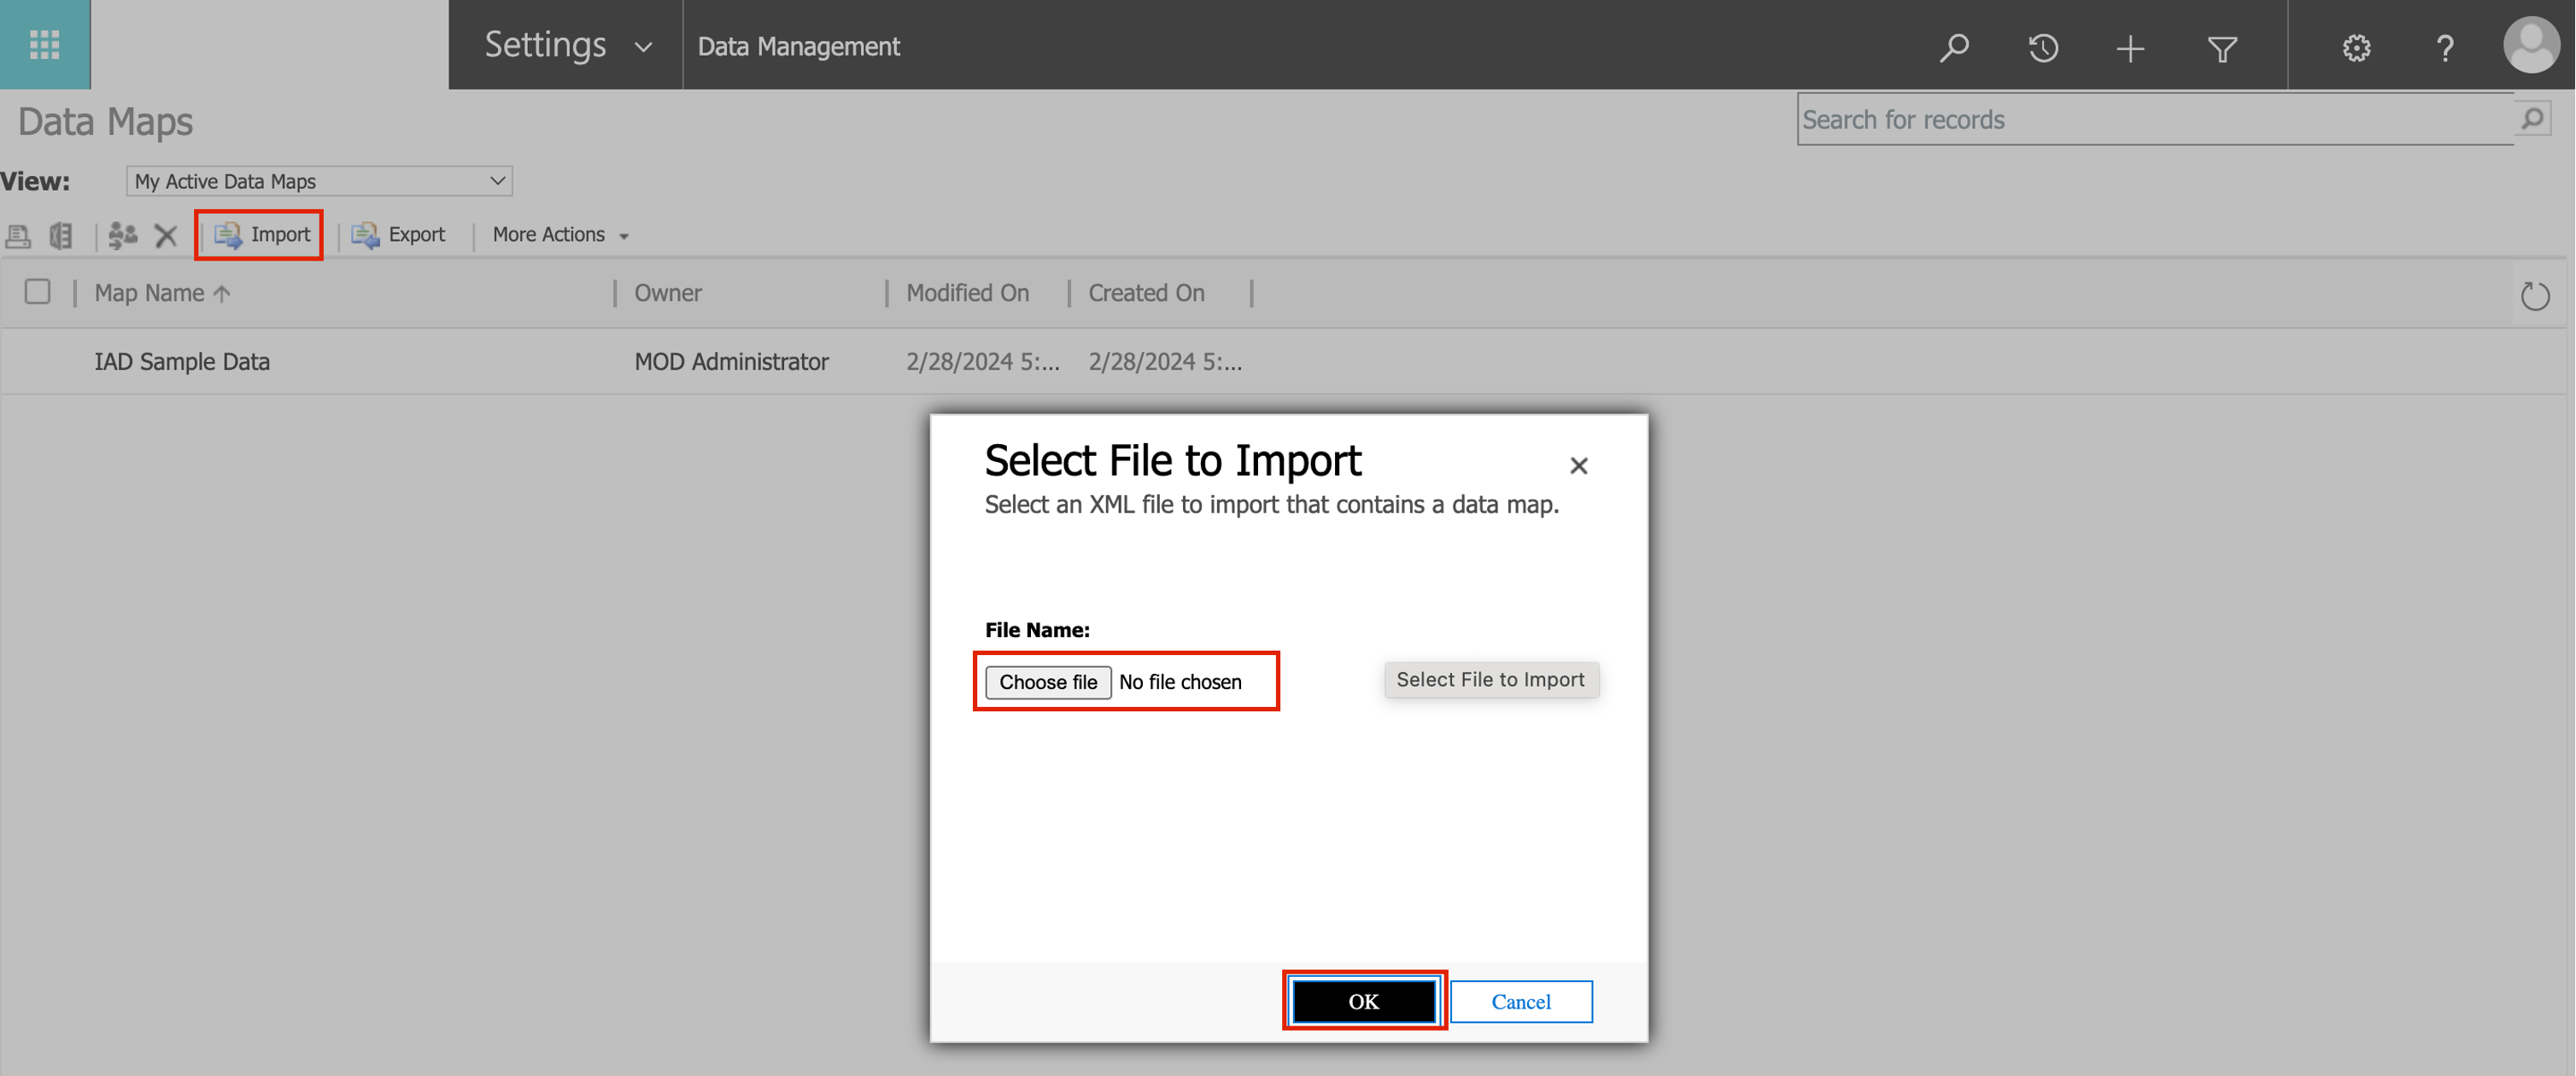
Select Data Maps.
Select Import > Choose file. Search for the data map XML file and then import it. You can download and extract the sample data map XML file from the IAD Sample Data.zip file.
Go to Power Platform admin center in an InPrivate or Incognito browser session.
On the left pane, select Environments.
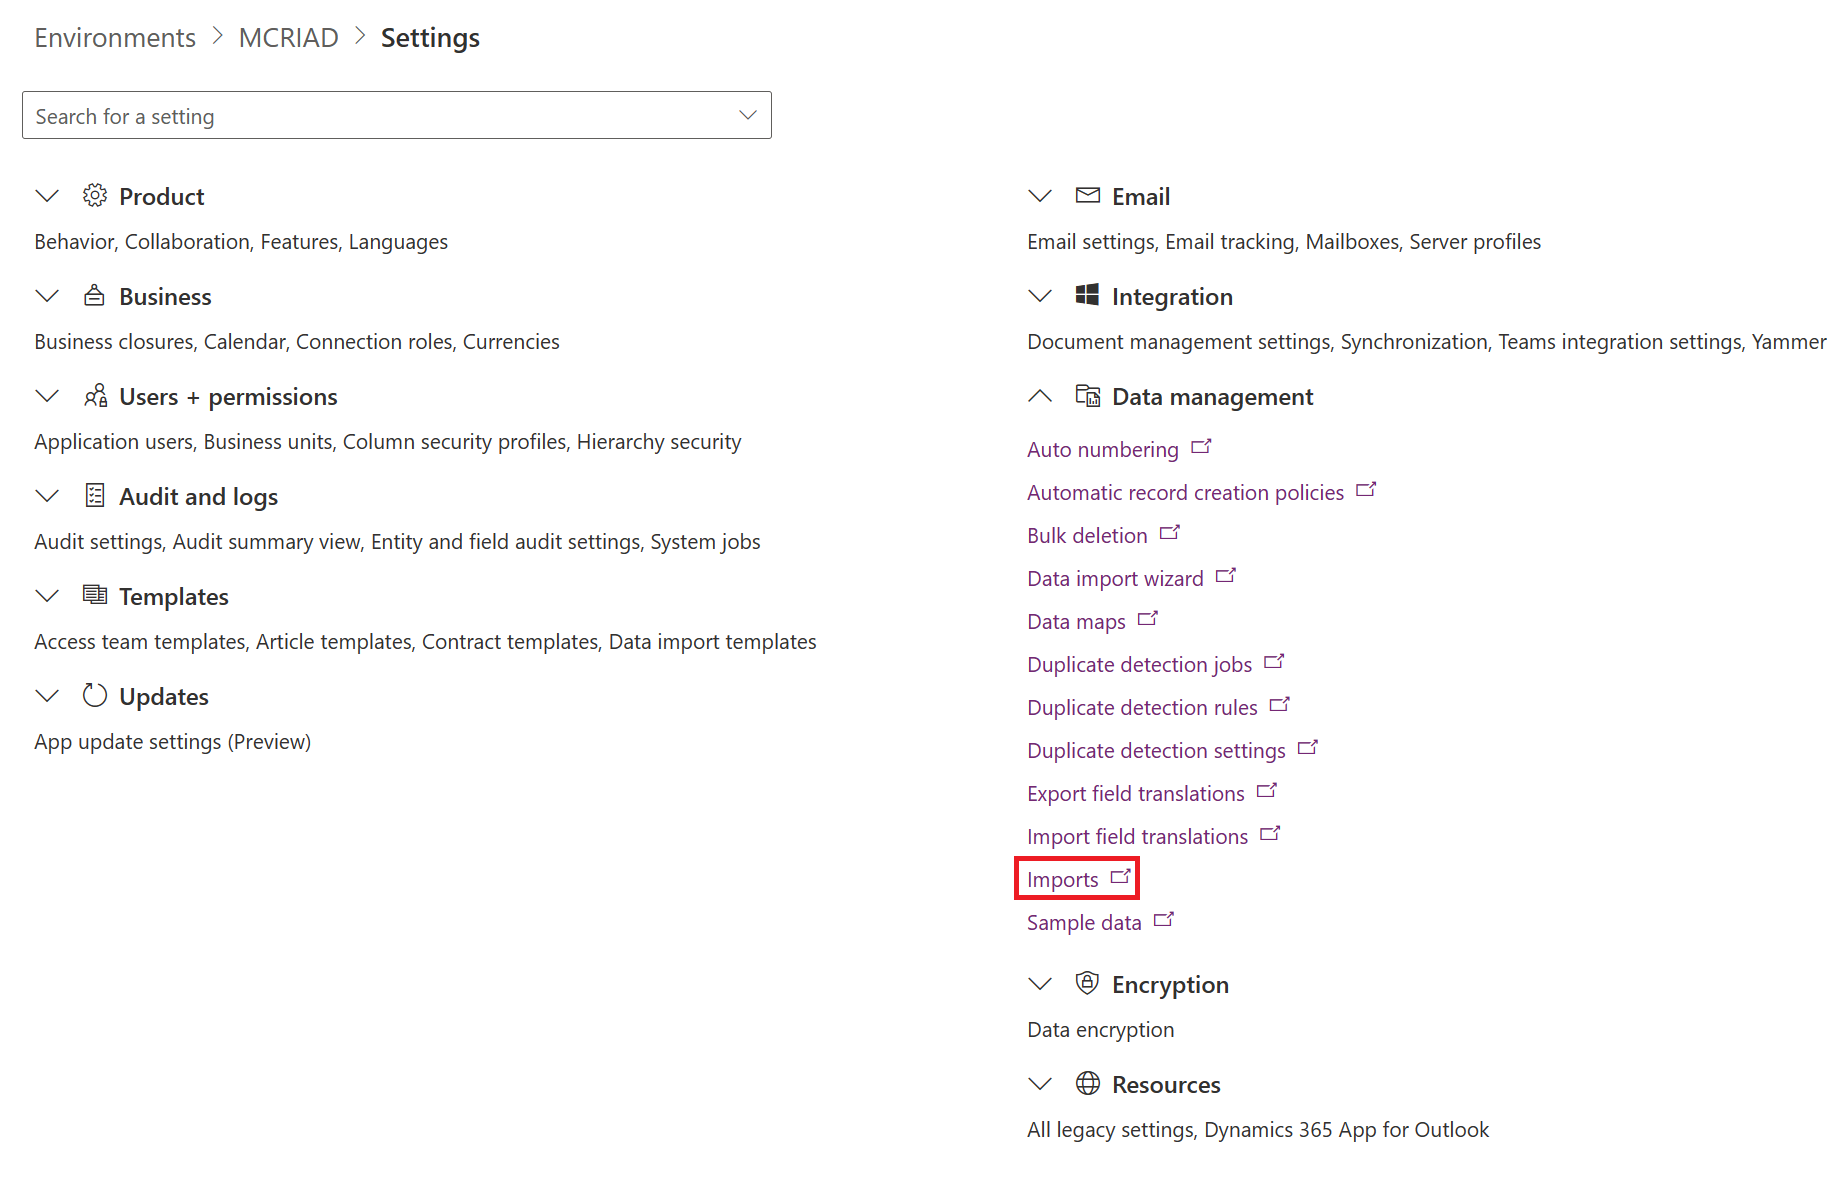
Select your environment and select Settings on the command bar.
On the Power Platform admin center browser tab page, select Data management > Imports.
Select Import Data in the command bar.
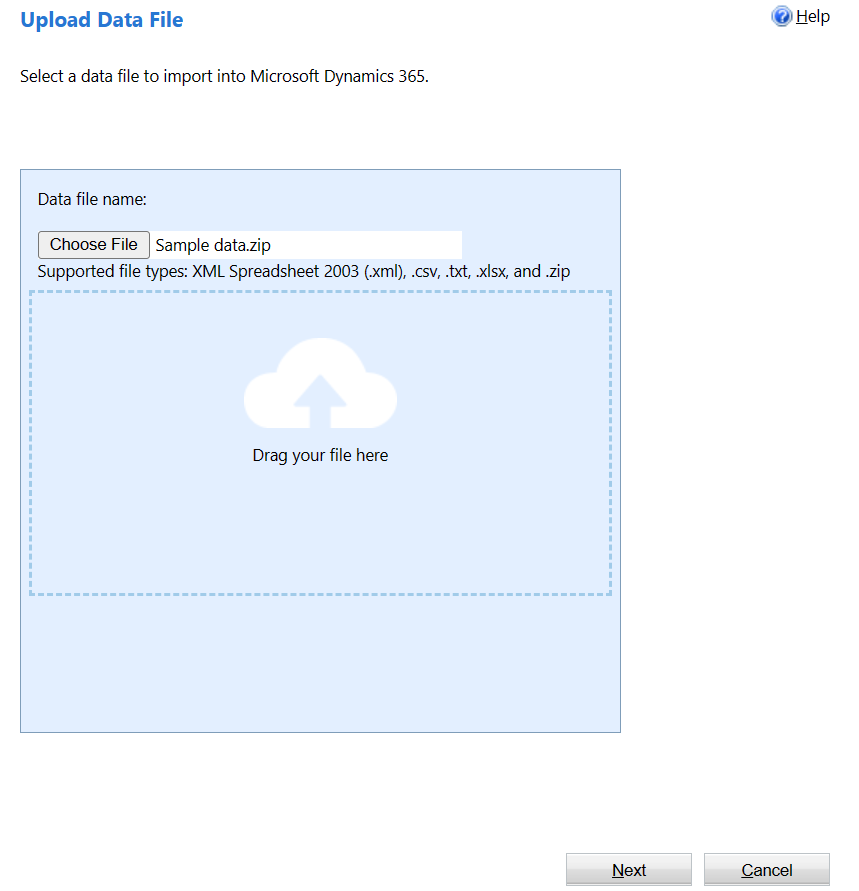
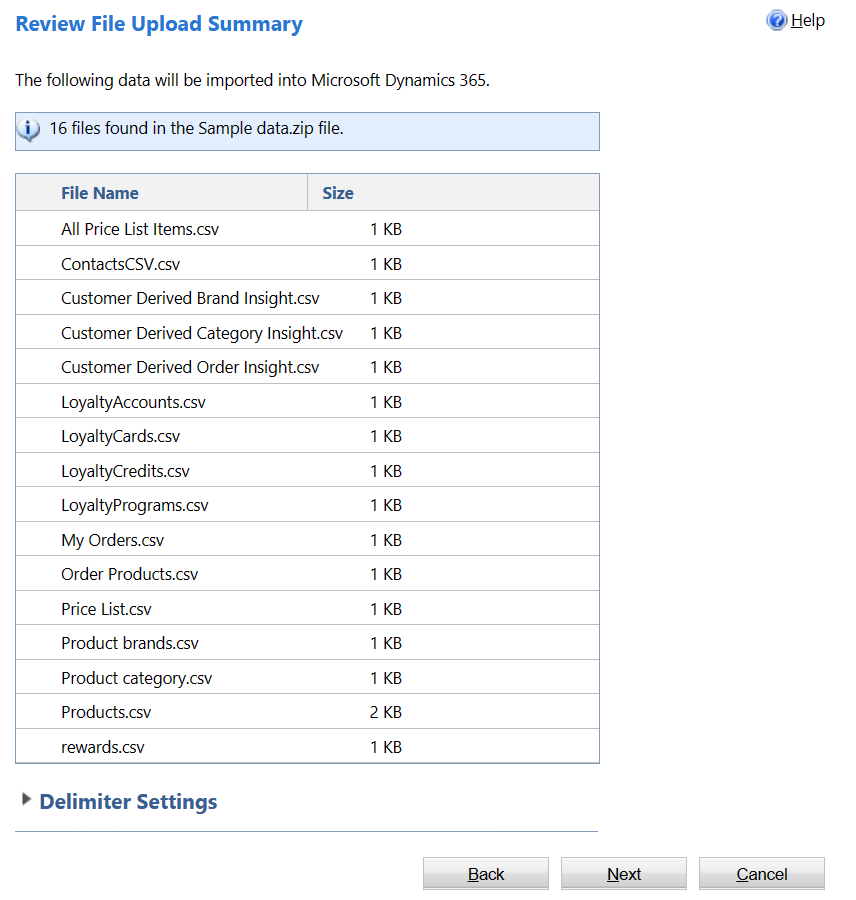
Download and go to the Sample data.zip file and then select Next.
Select Next on the Review File Upload Summary page.
Beneath the Customized Data Maps section, select the IAD Sample Data file that was previously imported. Select Next.
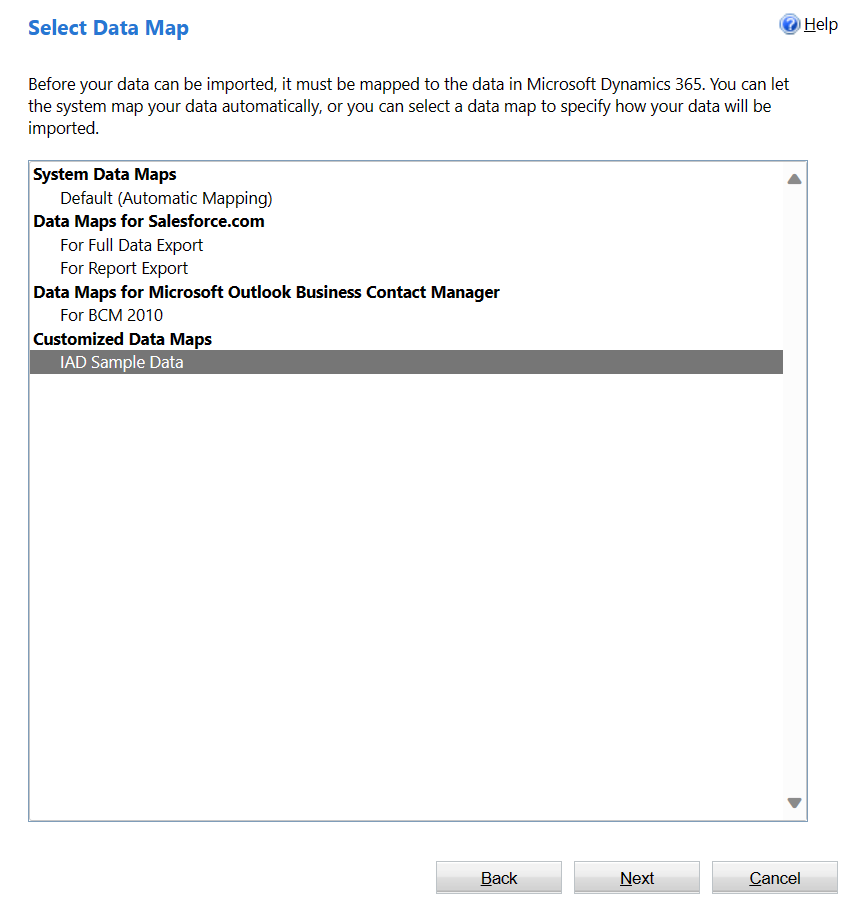
Select Next on the Map fields section because the fields are automatically mapped based on the mapping that's defined in the imported data map.
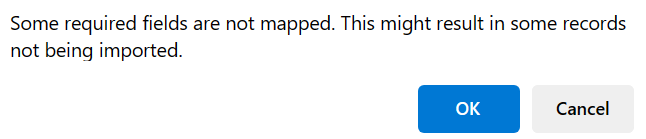
A pop-up window might appear, indicating that some fields aren't mapped. Ignore the message and select OK.
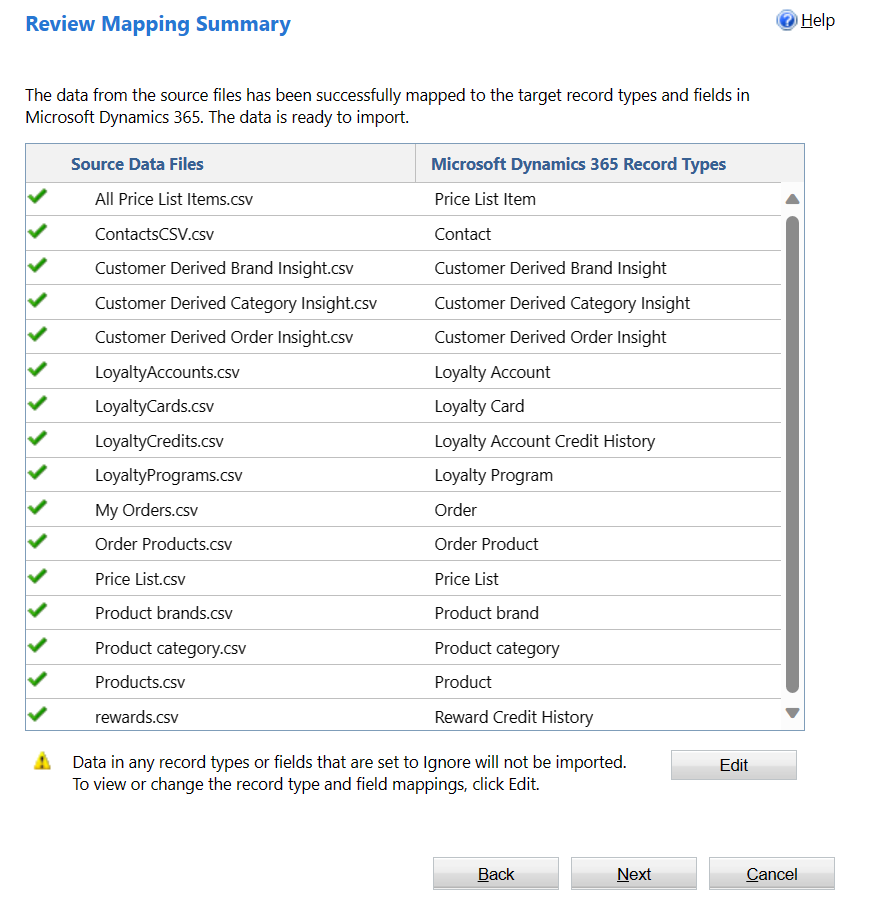
On the Review Mapping Summary screen, if a green check mark appears next to all data files in the list, select Next.
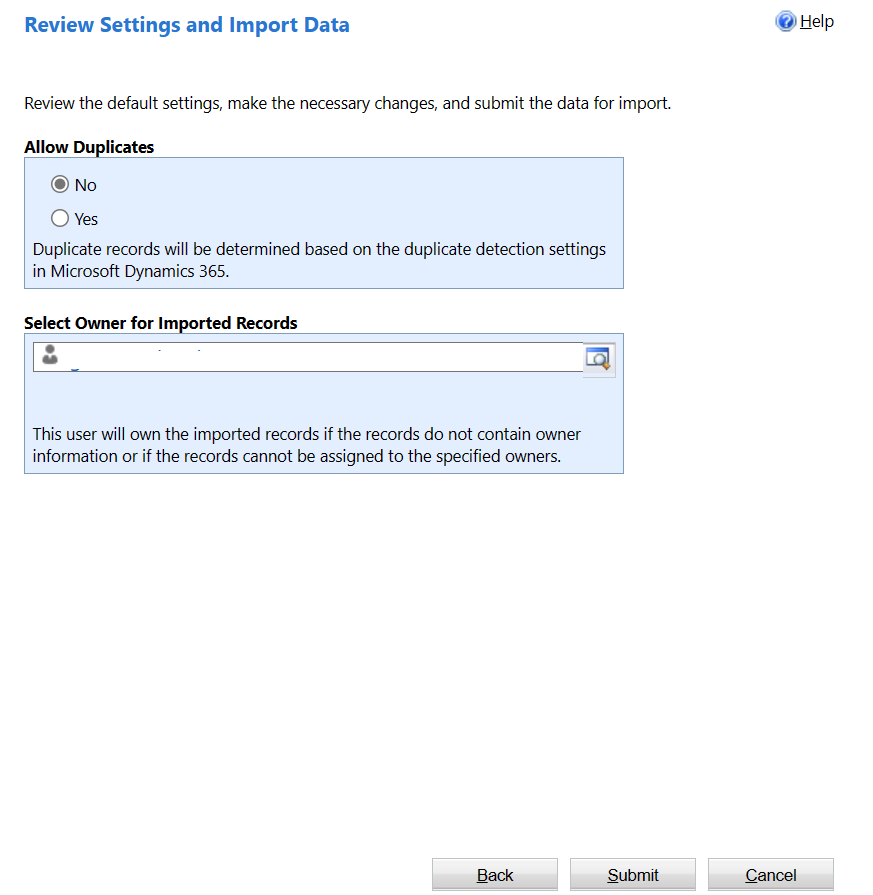
Set Allow Duplicates to No and then select Submit.
Select Finish.
After the data has successfully imported, the value in the Successes column will be equal to the value in the Total processed column for all import files.
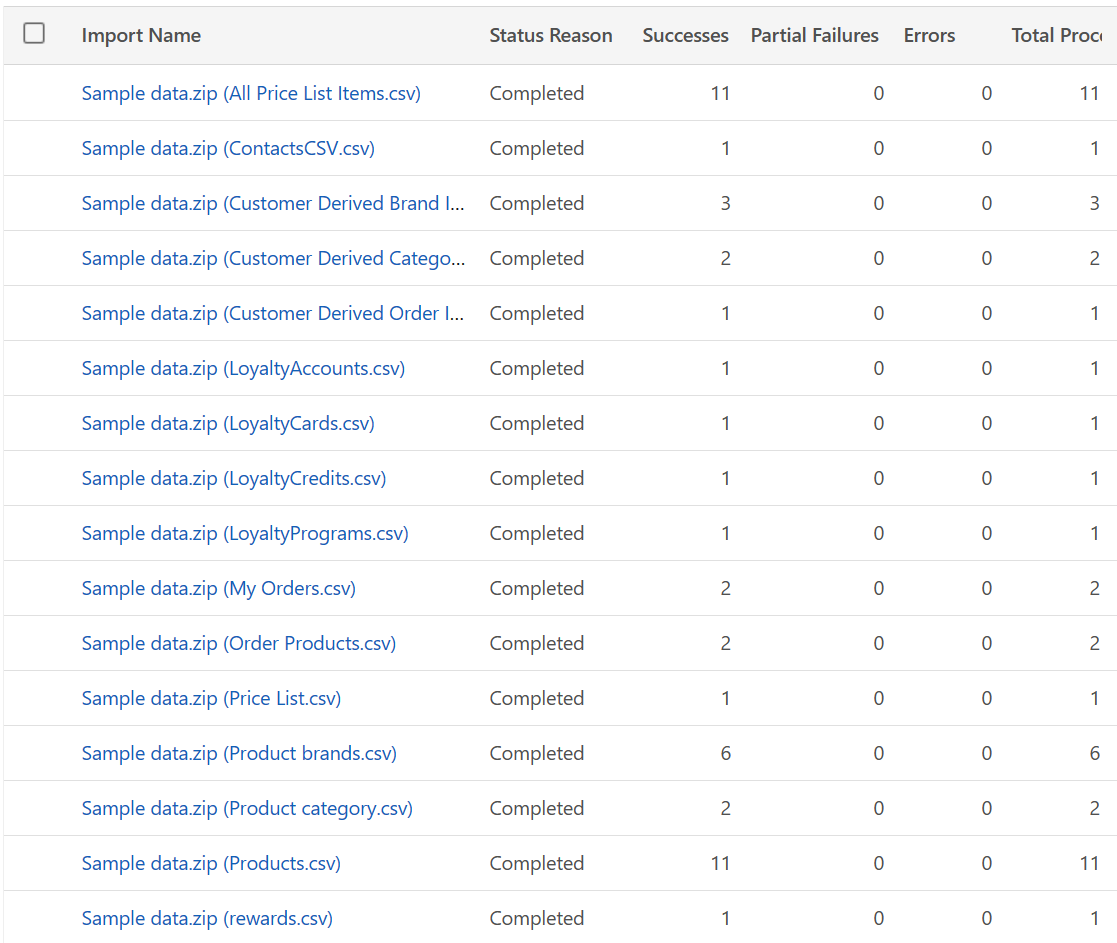


You can also validate the import by opening the respective forms in Store Operations Assist.