Tutoriel : Jouer sur le piano 3D
Dans le tutoriel précédent, nous avons créé le modèle d’un clavier de piano à 88 touches. Nous allons à présent le rendre opérationnel dans l’espace XR.
Dans ce didacticiel, vous apprendrez à :
- Ajouter des fonctionnalités interactives au piano avec des événements de pointeur
- Mettre à l’échelle les maillages
- Activer la téléportation et la prise en charge de plusieurs pointeurs dans XR
Avant de commencer
Vérifiez que vous avez bien effectué les étapes du tutoriel précédent de la série et que vous êtes prêt à ajouter du code.
index.html
<html>
    <head>
        <title>Piano in BabylonJS</title>
        <script src="https://cdn.babylonjs.com/babylon.js"></script>
        <script src="scene.js"></script>
        <style>
            body,#renderCanvas { width: 100%; height: 100%;}
        </style>
    </head>
    <body>
        <canvas id="renderCanvas"></canvas>
        <script type="text/javascript">
            const canvas = document.getElementById("renderCanvas");
            const engine = new BABYLON.Engine(canvas, true);

            createScene(engine).then(sceneToRender => {
                engine.runRenderLoop(() => sceneToRender.render());
            });

            // Watch for browser/canvas resize events
            window.addEventListener("resize", function () {
                engine.resize();
            });
        </script>
    </body>
</html>
scene.js
const buildKey = function (scene, parent, props) {
    if (props.type === "white") {
        /*
        Props for building a white key should contain:
        note, topWidth, bottomWidth, topPositionX, wholePositionX, register, referencePositionX

        As an example, the props for building the middle C white key would be
        {type: "white", note: "C", topWidth: 1.4, bottomWidth: 2.3, topPositionX: -0.45, wholePositionX: -14.4, register: 4, referencePositionX: 0}
        */

        // Create bottom part
        const bottom = BABYLON.MeshBuilder.CreateBox("whiteKeyBottom", {width: props.bottomWidth, height: 1.5, depth: 4.5}, scene);

        // Create top part
        const top = BABYLON.MeshBuilder.CreateBox("whiteKeyTop", {width: props.topWidth, height: 1.5, depth: 5}, scene);
        top.position.z =  4.75;
        top.position.x += props.topPositionX;

        // Merge bottom and top parts
        // Parameters of BABYLON.Mesh.MergeMeshes: (arrayOfMeshes, disposeSource, allow32BitsIndices, meshSubclass, subdivideWithSubMeshes, multiMultiMaterials)
        const key = BABYLON.Mesh.MergeMeshes([bottom, top], true, false, null, false, false);
        key.position.x = props.referencePositionX + props.wholePositionX;
        key.name = props.note + props.register;
        key.parent = parent;

        return key;
    }
    else if (props.type === "black") {
        /*
        Props for building a black key should contain:
        note, wholePositionX, register, referencePositionX

        As an example, the props for building the C#4 black key would be
        {type: "black", note: "C#", wholePositionX: -13.45, register: 4, referencePositionX: 0}
        */

        // Create black color material
        const blackMat = new BABYLON.StandardMaterial("black");
        blackMat.diffuseColor = new BABYLON.Color3(0, 0, 0);

        // Create black key
        const key = BABYLON.MeshBuilder.CreateBox(props.note + props.register, {width: 1.4, height: 2, depth: 5}, scene);
        key.position.z += 4.75;
        key.position.y += 0.25;
        key.position.x = props.referencePositionX + props.wholePositionX;
        key.material = blackMat;
        key.parent = parent;

        return key;
    }
}

const createScene = async function(engine) {
    const scene = new BABYLON.Scene(engine);

    const alpha =  3*Math.PI/2;
    const beta = Math.PI/50;
    const radius = 220;
    const target = new BABYLON.Vector3(0, 0, 0);

    const camera = new BABYLON.ArcRotateCamera("Camera", alpha, beta, radius, target, scene);
    camera.attachControl(canvas, true);

    const light = new BABYLON.HemisphericLight("light", new BABYLON.Vector3(0, 1, 0), scene);
    light.intensity = 0.6;

    const keyParams = [
        {type: "white", note: "C", topWidth: 1.4, bottomWidth: 2.3, topPositionX: -0.45, wholePositionX: -14.4},
        {type: "black", note: "C#", wholePositionX: -13.45},
        {type: "white", note: "D", topWidth: 1.4, bottomWidth: 2.4, topPositionX: 0, wholePositionX: -12},
        {type: "black", note: "D#", wholePositionX: -10.6},
        {type: "white", note: "E", topWidth: 1.4, bottomWidth: 2.3, topPositionX: 0.45, wholePositionX: -9.6},
        {type: "white", note: "F", topWidth: 1.3, bottomWidth: 2.4, topPositionX: -0.55, wholePositionX: -7.2},
        {type: "black", note: "F#", wholePositionX: -6.35},
        {type: "white", note: "G", topWidth: 1.3, bottomWidth: 2.3, topPositionX: -0.2, wholePositionX: -4.8},
        {type: "black", note: "G#", wholePositionX: -3.6},
        {type: "white", note: "A", topWidth: 1.3, bottomWidth: 2.3, topPositionX: 0.2, wholePositionX: -2.4},
        {type: "black", note: "A#", wholePositionX: -0.85},
        {type: "white", note: "B", topWidth: 1.3, bottomWidth: 2.4, topPositionX: 0.55, wholePositionX: 0},
    ]

    // Transform Node that acts as the parent of all piano keys
    const keyboard = new BABYLON.TransformNode("keyboard");

    // Register 1 through 7
    var referencePositionX = -2.4*14;
    for (let register = 1; register <= 7; register++) {
        keyParams.forEach(key => {
            buildKey(scene, keyboard, Object.assign({register: register, referencePositionX: referencePositionX}, key));
        })
        referencePositionX += 2.4*7;
    }

    // Register 0
    buildKey(scene, keyboard, {type: "white", note: "A", topWidth: 1.9, bottomWidth: 2.3, topPositionX: -0.20, wholePositionX: -2.4, register: 0, referencePositionX: -2.4*21});
    keyParams.slice(10, 12).forEach(key => {
        buildKey(scene, keyboard, Object.assign({register: 0, referencePositionX: -2.4*21}, key));
    })

    // Register 8
    buildKey(scene, keyboard, {type: "white", note: "C", topWidth: 2.3, bottomWidth: 2.3, topPositionX: 0, wholePositionX: -2.4*6, register: 8, referencePositionX: 84});

    // Transform node that acts as the parent of all piano components
    const piano = new BABYLON.TransformNode("piano");
    keyboard.parent = piano;

    // Import and scale piano frame
    BABYLON.SceneLoader.ImportMesh("frame", "https://raw.githubusercontent.com/MicrosoftDocs/mixed-reality/docs/mixed-reality-docs/mr-dev-docs/develop/javascript/tutorials/babylonjs-webxr-piano/files/", "pianoFrame.babylon", scene, function(meshes) {
        const frame = meshes[0];
        frame.parent = piano;
    });

    // Lift the piano keyboard
    keyboard.position.y += 80;

    const xrHelper = await scene.createDefaultXRExperienceAsync();

    return scene;
}
Rendre le clavier du piano opérationnel
Pour le moment, le clavier de piano que nous avons créé est un modèle statique qui ne répond pas aux interactions de l’utilisateur. Dans cette section, nous allons programmer les touches pour les enfoncer et émettre un signal sonore quand un utilisateur appuie dessus.
Babylon.js fournit différents types d’événements, ou observables, avec lesquels nous pouvons interagir. Dans notre cas, nous allons utiliser
onPointerObservable, car nous souhaitons programmer les touches pour exécuter des actions quand quelqu’un appuie dessus avec un pointeur (clic de souris, commande tactile, clic sur un bouton de contrôleur XR, etc.).Voici la structure de base que nous utilisons pour ajouter un comportement à un
onPointerObservable:scene.onPointerObservable.add((pointerInfo) => { // do something });Bien que Babylon.js fournisse de nombreux types d’événements de pointeur, nous utilisons uniquement les événements
POINTERDOWNetPOINTERUPpour programmer le comportement des touches du piano, avec la structure ci-dessous :scene.onPointerObservable.add((pointerInfo) => { switch (pointerInfo.type) { case BABYLON.PointerEventTypes.POINTERDOWN: // When the pointer is down on a piano key, // move the piano key downward (to show that it is pressed) // and play the sound of the note break; case BABYLON.PointerEventTypes.POINTERUP: // When the pointer is released, // move the piano key upward to its original position // and stop the sound of the note of the key that is released break; } });Commençons par modifier l’apparence des touches du piano quand nous appuyons dessus et quand nous les relâchons.
Au niveau de l’événement POINTERDOWN, nous devons détecter le maillage sur lequel un clic a été effectué, vérifier qu’il s’agit bien d’une touche du piano et soustraire de la coordonnée y du maillage une petite valeur pour donner l’impression d’une touche enfoncée.
Les choses sont un peu plus compliquées pour l’événement POINTERUP, car le pointeur qui a appuyé sur la touche peut ne pas être relâché sur cette touche. Par exemple, un utilisateur peut cliquer sur la touche C4, faire glisser la souris sur E4, puis relâcher le bouton de la souris. Dans ce cas, nous voulons toujours relâcher la touche qui a été enfoncée (C4) et non celle correspondant à l’endroit où l’événement
pointerUps’est produit (E4).Voyons comment le code suivant nous permet d’obtenir les résultats escomptés :
const pointerToKey = new Map();
scene.onPointerObservable.add((pointerInfo) => {
    switch (pointerInfo.type) {
        case BABYLON.PointerEventTypes.POINTERDOWN:
            if(pointerInfo.pickInfo.hit) {
                const pickedMesh = pointerInfo.pickInfo.pickedMesh;
                const pointerId = pointerInfo.event.pointerId;
                if (pickedMesh.parent === keyboard) {
                    pickedMesh.position.y -= 0.5;
                    // play the sound of the note
                    pointerToKey.set(pointerId, {
                        mesh: pickedMesh
                    });
                }
            }
            break;
        case BABYLON.PointerEventTypes.POINTERUP:
            const pointerId = pointerInfo.event.pointerId;
            if (pointerToKey.has(pointerId)) {
                pointerToKey.get(pointerId).mesh.position.y += 0.5;
                // stop the sound of the note of the key that is released
                pointerToKey.delete(pointerId);
            }
            break;
    }
});
Le
pointerIdest unique à chaque pointeur. Il peut nous aider à identifier un pointeur si nous avons plusieurs contrôleurs ou si nous utilisons un écran tactile. Ici, nous initialisons un objetMapnommépointerToKeypour stocker la relation entre le pointeur et la touche actionnée par celui-ci. De cette façon, nous savons quelle touche relâcher quand le pointeur est relâché, quel que soit l’endroit où cette action se produit.Voici à quoi ressemble l’interaction avec le code ci-dessus :
Examinons à présent comment lire et arrêter un son quand une touche est enfoncée et relâchée. Pour ce faire, nous allons utiliser une bibliothèque JavaScript nommée soundfont-player qui nous permet de lire facilement les sons MIDI de l’instrument de notre choix.
Téléchargez le code minifié de la bibliothèque, enregistrez-le dans le même dossier que index.html, puis incluez-le dans la balise
<header>dans index.html :<head> <title>Babylon Template</title> <script src="https://cdn.babylonjs.com/babylon.js"></script> <script src="scene.js"></script> <script src="soundfont-player.min.js"></script> <style> body,#renderCanvas { width: 100%; height: 100%;} </style> </head>Une fois la bibliothèque importée, voici comment faire pour initialiser un instrument et lire/arrêter des sons MIDI en utilisant la bibliothèque :
const pianoSound = await Soundfont.instrument(new AudioContext(), 'acoustic_grand_piano'); const C4 = piano.play("C4"); // Play note C4 C4.stop(); // Stop note C4À présent, incorporons ceci dans les événements de pointeur et finalisons le code de cette section :
const pointerToKey = new Map() const piano = await Soundfont.instrument(new AudioContext(), 'acoustic_grand_piano'); scene.onPointerObservable.add((pointerInfo) => { switch (pointerInfo.type) { case BABYLON.PointerEventTypes.POINTERDOWN: if(pointerInfo.pickInfo.hit) { let pickedMesh = pointerInfo.pickInfo.pickedMesh; let pointerId = pointerInfo.event.pointerId; if (keys.has(pickedMesh)) { pickedMesh.position.y -= 0.5; // Move the key downward pointerToKey.set(pointerId, { mesh: pickedMesh, note: pianoSound.play(pointerInfo.pickInfo.pickedMesh.name) // Play the sound of the note }); } } break; case BABYLON.PointerEventTypes.POINTERUP: let pointerId = pointerInfo.event.pointerId; if (pointerToKey.has(pointerId)) { pointerToKey.get(pointerId).mesh.position.y += 0.5; // Move the key upward pointerToKey.get(pointerId).note.stop(); // Stop the sound of the note pointerToKey.delete(pointerId); } break; } });Étant donné que nous avons nommé le maillage de chaque touche avec la note qu’il représente, nous pouvons facilement indiquer la note à lire en passant le nom du maillage à la fonction
pianoSound.play(). Notez également que nous stockons le son dans le mappagepointerToKeypour savoir quel son arrêter quand une touche est relâchée.
Mise à l’échelle du piano pour le mode VR immersif
À ce stade, vous avez probablement déjà testé le piano avec votre souris (ou même un écran tactile) quand vous avez ajouté des fonctionnalités interactives. Dans cette section, nous allons passer à l’espace VR immersif.
Pour ouvrir la page dans votre casque VR immersif, vous devez d’abord connecter votre casque à votre ordinateur de développement et vérifier qu’il est configuré pour une utilisation dans l’application Windows Mixed Reality. Si vous utilisez le simulateur Windows Mixed Reality, vérifiez qu’il est activé.
Un bouton de VR immersive apparaît alors en bas à droite de la page web. Cliquez dessus pour voir le piano dans l’appareil XR auquel vous êtes connecté.

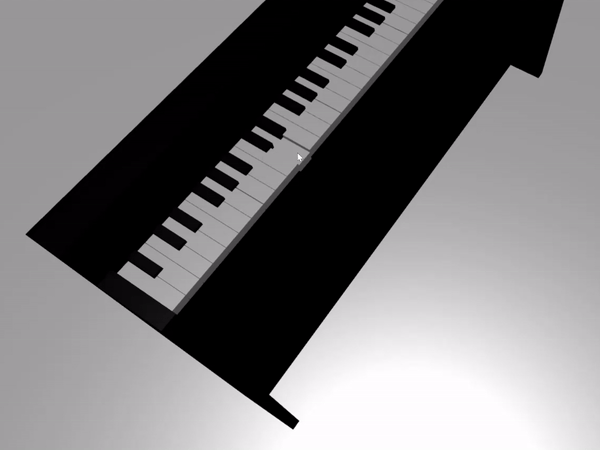
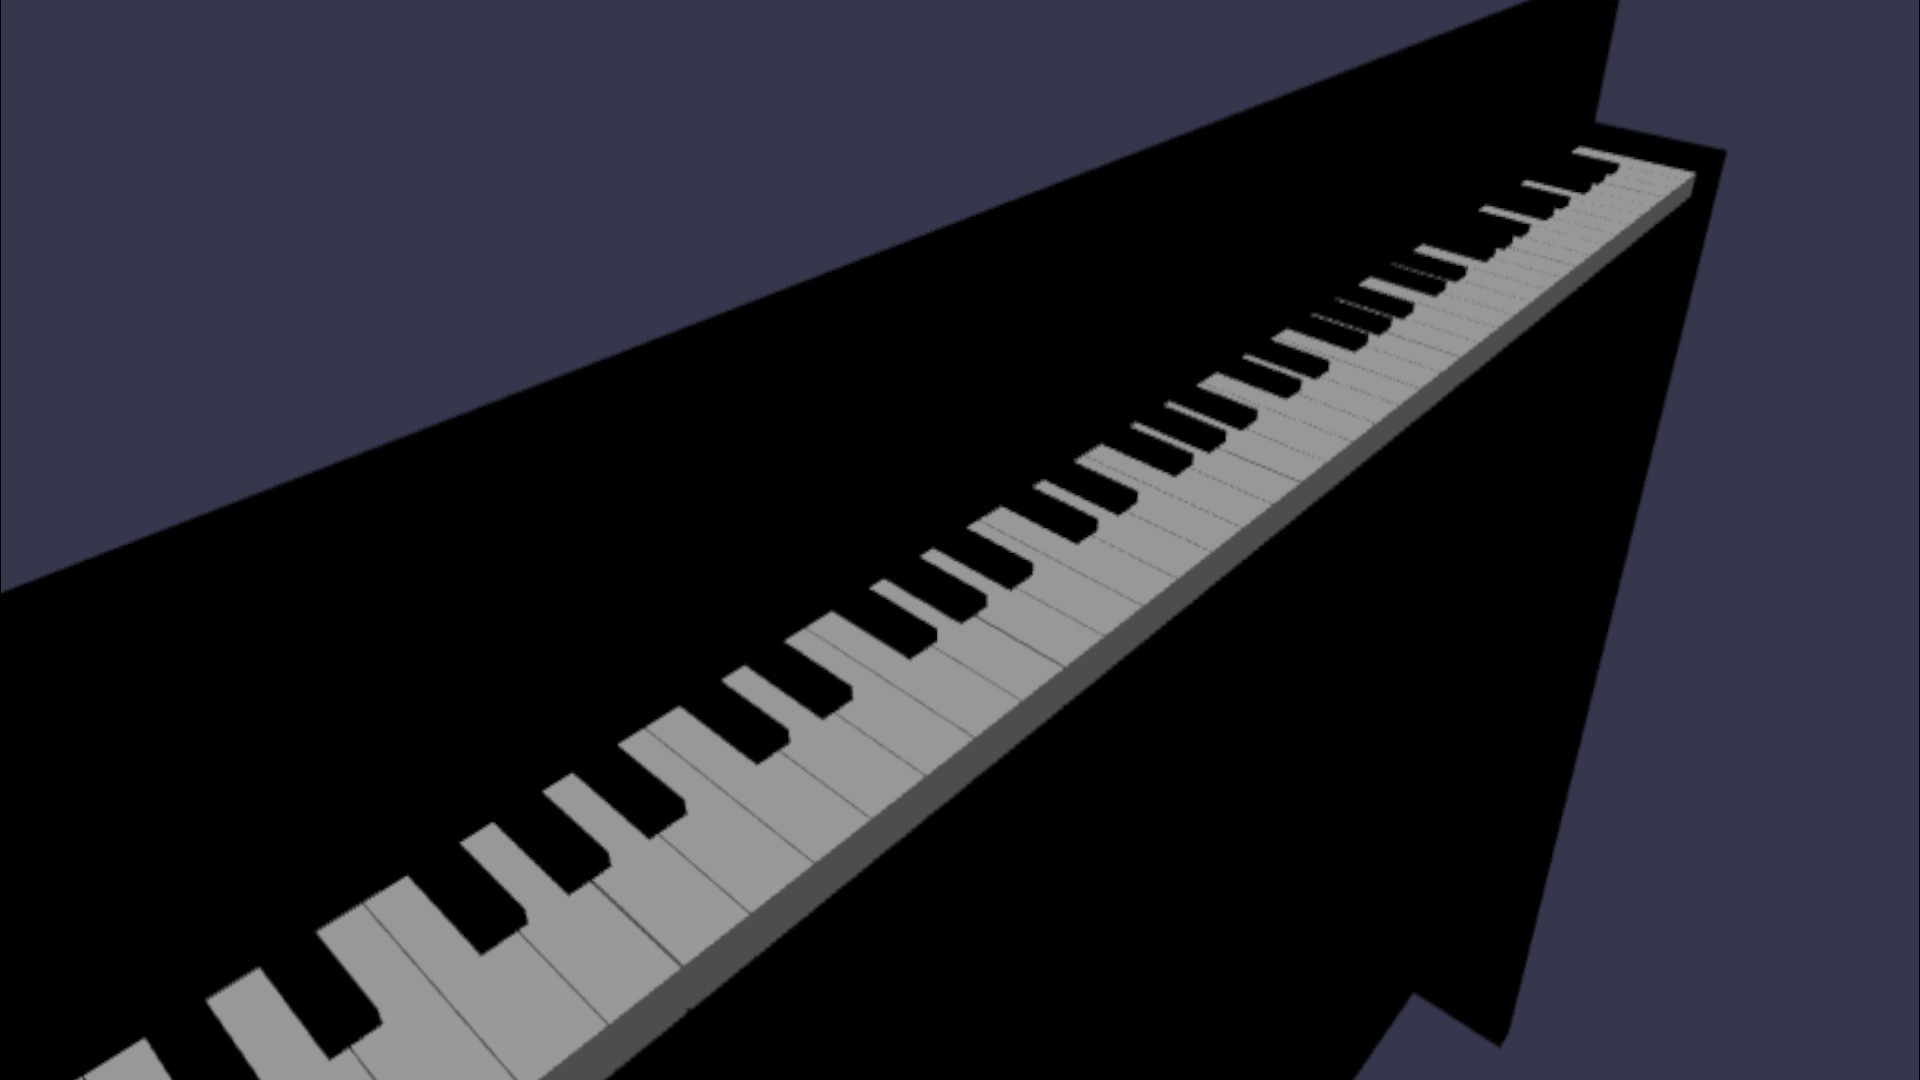
Une fois dans l’espace virtuel, vous remarquerez peut-être que le piano que nous avons créé est énorme. Dans le monde VR, nous pouvons uniquement nous placer en bas du piano et en jouer en pointant le pointeur sur les touches situées à distance.

Réduisons l’échelle du piano pour que sa taille ressemble davantage à celle d’un piano droit normal dans la vraie vie. Pour ce faire, nous allons employer une fonction utilitaire qui nous permet de mettre à l’échelle un maillage par rapport à un point dans l’espace. Ajoutez cette fonction à scene.js (en dehors de
createScene()) :const scaleFromPivot = function(transformNode, pivotPoint, scale) { const _sx = scale / transformNode.scaling.x; const _sy = scale / transformNode.scaling.y; const _sz = scale / transformNode.scaling.z; transformNode.scaling = new BABYLON.Vector3(_sx, _sy, _sz); transformNode.position = new BABYLON.Vector3(pivotPoint.x + _sx * (transformNode.position.x - pivotPoint.x), pivotPoint.y + _sy * (transformNode.position.y - pivotPoint.y), pivotPoint.z + _sz * (transformNode.position.z - pivotPoint.z)); }Cette fonction accepte 3 paramètres :
- transformNode :
TransformNodeà mettre à l’échelle - pivotPoint : objet
Vector3indiquant le point par rapport auquel effectuer la mise à l’échelle - scale : facteur d’échelle
- transformNode :
Nous allons utiliser cette fonction pour mettre à l’échelle la structure et les touches du piano selon un facteur de 0,015, avec un point pivot à l’origine. Ajoutez l’appel de fonction à la fonction
createScene()en le plaçant aprèskeyboard.position.y += 80;:// Put this line at the beginning of createScene() const scale = 0.015;// Put this function call after keyboard.position.y += 80; // Scale the entire piano scaleFromPivot(piano, new BABYLON.Vector3(0, 0, 0), scale);N’oubliez pas de mettre à l’échelle la position de la caméra :
const alpha = 3*Math.PI/2; const beta = Math.PI/50; const radius = 220*scale; // scale the radius const target = new BABYLON.Vector3(0, 0, 0); const camera = new BABYLON.ArcRotateCamera("Camera", alpha, beta, radius, target, scene); camera.attachControl(canvas, true);Maintenant, quand nous entrons dans l’espace VR, le piano a la taille d’un piano droit ordinaire.
Activation des fonctionnalités WebXR
Après avoir redimensionné le piano à la bonne taille dans l’espace VR, nous allons activer quelques fonctionnalités WebXR intéressantes pour améliorer notre expérience avec le piano dans l’espace.
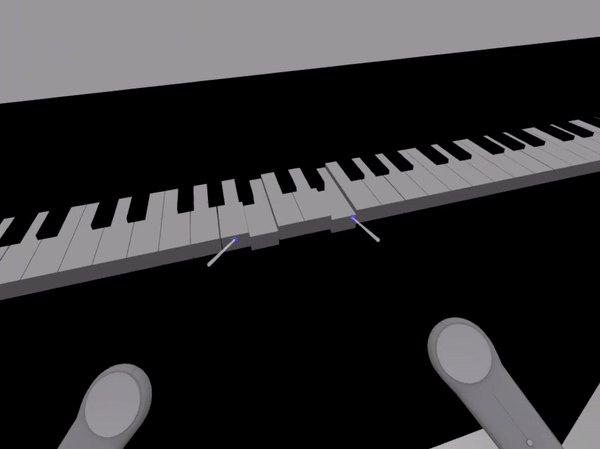
Si vous avez joué sur ce piano avec vos contrôleurs VR immersifs, vous avez peut-être remarqué que vous ne pouvez utiliser qu’un seul contrôleur à la fois. Nous allons activer la prise en charge de plusieurs pointeurs dans l’espace XR en utilisant le gestionnaire des fonctionnalités WebXR de Babylon.js.
Ajoutez le code suivant à la fonction
createScene(), après la ligne d’initialisation dexrHelper:const featuresManager = xrHelper.baseExperience.featuresManager; const pointerSelection = featuresManager.enableFeature(BABYLON.WebXRFeatureName.POINTER_SELECTION, "stable", { xrInput: xrHelper.input, enablePointerSelectionOnAllControllers: true });Par ailleurs, en fonction de l’emplacement de votre point de départ, vous aurez peut-être un peu de mal à vous placer devant le piano. Si vous avez déjà utilisé l’environnement VR immersif, vous connaissez peut-être la téléportation, une fonctionnalité qui vous permet de passer instantanément à un autre endroit de l’espace en pointant dessus.
Pour utiliser la fonctionnalité de téléportation de Babylon.js, nous devons d’abord créer un maillage de surface sur lequel « poser nos pieds » dans l’espace VR. Ajoutez le code suivant à la fonction
createScene()pour créer une surface :const ground = BABYLON.MeshBuilder.CreateGround("ground", {width: 400, height: 400});La prise en charge de la téléportation est également accompagnée d’une fonctionnalité très utile appelée « positions d’ancrage ». En bref, les positions d’ancrage sont des positions spécifiques où nous souhaitons que les utilisateurs atterrissent.
Par exemple, nous pouvons définir une position d’ancrage devant le piano pour que les utilisateurs puissent facilement se téléporter à cet endroit quand ils dirigent leurs pointeurs près du piano.
Ajoutez le code ci-dessous pour activer la fonctionnalité de téléportation et spécifier un point d’ancrage :
const teleportation = featuresManager.enableFeature(BABYLON.WebXRFeatureName.TELEPORTATION, "stable", { xrInput: xrHelper.input, floorMeshes: [ground], snapPositions: [new BABYLON.Vector3(2.4*3.5*scale, 0, -10*scale)], });Vous devriez à présent pouvoir vous placer facilement devant le piano en vous téléportant au point d’ancrage situé devant le piano, et vous devriez pouvoir jouer deux touches à la fois en utilisant les deux contrôleurs.
Résumé
Félicitations ! Vous venez de terminer notre série de tutoriels de création d’un piano avec Babylon.js. Vous avez appris à :
- Créer, positionner et fusionner des maillages pour créer un modèle de clavier de piano
- Importer un modèle Babylon.js d’une structure de piano droit
- Ajouter des interactions de pointeur à chaque touche du piano
- Mettre à l’échelle la taille des maillages en fonction d’un point pivot
- Activer des fonctionnalités WebXR clés telles que la téléportation et la prise en charge de plusieurs pointeurs
Voici le code final pour scene.js et index.html :
scene.js
const buildKey = function (scene, parent, props) {
if (props.type === "white") {
/*
Props for building a white key should contain:
note, topWidth, bottomWidth, topPositionX, wholePositionX, register, referencePositionX
As an example, the props for building the middle C white key would be
{type: "white", note: "C", topWidth: 1.4, bottomWidth: 2.3, topPositionX: -0.45, wholePositionX: -14.4, register: 4, referencePositionX: 0}
*/
// Create bottom part
const bottom = BABYLON.MeshBuilder.CreateBox("whiteKeyBottom", {width: props.bottomWidth, height: 1.5, depth: 4.5}, scene);
// Create top part
const top = BABYLON.MeshBuilder.CreateBox("whiteKeyTop", {width: props.topWidth, height: 1.5, depth: 5}, scene);
top.position.z = 4.75;
top.position.x += props.topPositionX;
// Merge bottom and top parts
// Parameters of BABYLON.Mesh.MergeMeshes: (arrayOfMeshes, disposeSource, allow32BitsIndices, meshSubclass, subdivideWithSubMeshes, multiMultiMaterials)
const key = BABYLON.Mesh.MergeMeshes([bottom, top], true, false, null, false, false);
key.position.x = props.referencePositionX + props.wholePositionX;
key.name = props.note + props.register;
key.parent = parent;
return key;
}
else if (props.type === "black") {
/*
Props for building a black key should contain:
note, wholePositionX, register, referencePositionX
As an example, the props for building the C#4 black key would be
{type: "black", note: "C#", wholePositionX: -13.45, register: 4, referencePositionX: 0}
*/
// Create black color material
const blackMat = new BABYLON.StandardMaterial("black");
blackMat.diffuseColor = new BABYLON.Color3(0, 0, 0);
// Create black key
const key = BABYLON.MeshBuilder.CreateBox(props.note + props.register, {width: 1.4, height: 2, depth: 5}, scene);
key.position.z += 4.75;
key.position.y += 0.25;
key.position.x = props.referencePositionX + props.wholePositionX;
key.material = blackMat;
key.parent = parent;
return key;
}
}
const scaleFromPivot = function(transformNode, pivotPoint, scale) {
const _sx = scale / transformNode.scaling.x;
const _sy = scale / transformNode.scaling.y;
const _sz = scale / transformNode.scaling.z;
transformNode.scaling = new BABYLON.Vector3(_sx, _sy, _sz);
transformNode.position = new BABYLON.Vector3(pivotPoint.x + _sx * (transformNode.position.x - pivotPoint.x), pivotPoint.y + _sy * (transformNode.position.y - pivotPoint.y), pivotPoint.z + _sz * (transformNode.position.z - pivotPoint.z));
}
const createScene = async function(engine) {
const scale = 0.015;
const scene = new BABYLON.Scene(engine);
const alpha = 3*Math.PI/2;
const beta = Math.PI/50;
const radius = 220*scale;
const target = new BABYLON.Vector3(0, 0, 0);
const camera = new BABYLON.ArcRotateCamera("Camera", alpha, beta, radius, target, scene);
camera.attachControl(canvas, true);
const light = new BABYLON.HemisphericLight("light", new BABYLON.Vector3(0, 1, 0), scene);
light.intensity = 0.6;
const keyParams = [
{type: "white", note: "C", topWidth: 1.4, bottomWidth: 2.3, topPositionX: -0.45, wholePositionX: -14.4},
{type: "black", note: "C#", wholePositionX: -13.45},
{type: "white", note: "D", topWidth: 1.4, bottomWidth: 2.4, topPositionX: 0, wholePositionX: -12},
{type: "black", note: "D#", wholePositionX: -10.6},
{type: "white", note: "E", topWidth: 1.4, bottomWidth: 2.3, topPositionX: 0.45, wholePositionX: -9.6},
{type: "white", note: "F", topWidth: 1.3, bottomWidth: 2.4, topPositionX: -0.55, wholePositionX: -7.2},
{type: "black", note: "F#", wholePositionX: -6.35},
{type: "white", note: "G", topWidth: 1.3, bottomWidth: 2.3, topPositionX: -0.2, wholePositionX: -4.8},
{type: "black", note: "G#", wholePositionX: -3.6},
{type: "white", note: "A", topWidth: 1.3, bottomWidth: 2.3, topPositionX: 0.2, wholePositionX: -2.4},
{type: "black", note: "A#", wholePositionX: -0.85},
{type: "white", note: "B", topWidth: 1.3, bottomWidth: 2.4, topPositionX: 0.55, wholePositionX: 0},
]
// Transform Node that acts as the parent of all piano keys
const keyboard = new BABYLON.TransformNode("keyboard");
// Register 1 through 7
var referencePositionX = -2.4*14;
for (let register = 1; register <= 7; register++) {
keyParams.forEach(key => {
buildKey(scene, keyboard, Object.assign({register: register, referencePositionX: referencePositionX}, key));
})
referencePositionX += 2.4*7;
}
// Register 0
buildKey(scene, keyboard, {type: "white", note: "A", topWidth: 1.9, bottomWidth: 2.3, topPositionX: -0.20, wholePositionX: -2.4, register: 0, referencePositionX: -2.4*21});
keyParams.slice(10, 12).forEach(key => {
buildKey(scene, keyboard, Object.assign({register: 0, referencePositionX: -2.4*21}, key));
})
// Register 8
buildKey(scene, keyboard, {type: "white", note: "C", topWidth: 2.3, bottomWidth: 2.3, topPositionX: 0, wholePositionX: -2.4*6, register: 8, referencePositionX: 84});
// Transform node that acts as the parent of all piano components
const piano = new BABYLON.TransformNode("piano");
keyboard.parent = piano;
// Import and scale piano frame
BABYLON.SceneLoader.ImportMesh("frame", "https://raw.githubusercontent.com/MicrosoftDocs/mixed-reality/docs/mixed-reality-docs/mr-dev-docs/develop/javascript/tutorials/babylonjs-webxr-piano/files/", "pianoFrame.babylon", scene, function(meshes) {
const frame = meshes[0];
frame.parent = piano;
});
// Lift the piano keyboard
keyboard.position.y += 80;
// Scale the entire piano
scaleFromPivot(piano, new BABYLON.Vector3(0, 0, 0), scale);
const pointerToKey = new Map()
const pianoSound = await Soundfont.instrument(new AudioContext(), 'acoustic_grand_piano');
scene.onPointerObservable.add((pointerInfo) => {
switch (pointerInfo.type) {
case BABYLON.PointerEventTypes.POINTERDOWN:
// Only take action if the pointer is down on a mesh
if(pointerInfo.pickInfo.hit) {
let pickedMesh = pointerInfo.pickInfo.pickedMesh;
let pointerId = pointerInfo.event.pointerId;
if (pickedMesh.parent === keyboard) {
pickedMesh.position.y -= 0.5; // Move the key downward
pointerToKey.set(pointerId, {
mesh: pickedMesh,
note: pianoSound.play(pointerInfo.pickInfo.pickedMesh.name) // Play the sound of the note
});
}
}
break;
case BABYLON.PointerEventTypes.POINTERUP:
let pointerId = pointerInfo.event.pointerId;
// Only take action if the released pointer was recorded in pointerToKey
if (pointerToKey.has(pointerId)) {
pointerToKey.get(pointerId).mesh.position.y += 0.5; // Move the key upward
pointerToKey.get(pointerId).note.stop(); // Stop the sound of the note
pointerToKey.delete(pointerId);
}
break;
}
});
const xrHelper = await scene.createDefaultXRExperienceAsync();
const featuresManager = xrHelper.baseExperience.featuresManager;
featuresManager.enableFeature(BABYLON.WebXRFeatureName.POINTER_SELECTION, "stable", {
xrInput: xrHelper.input,
enablePointerSelectionOnAllControllers: true
});
const ground = BABYLON.MeshBuilder.CreateGround("ground", {width: 400, height: 400});
featuresManager.enableFeature(BABYLON.WebXRFeatureName.TELEPORTATION, "stable", {
xrInput: xrHelper.input,
floorMeshes: [ground],
snapPositions: [new BABYLON.Vector3(2.4*3.5*scale, 0, -10*scale)],
});
return scene;
}
index.html
<html>
<head>
    <title>Babylon Template</title>
    <script src="https://cdn.babylonjs.com/babylon.js"></script>
    <script src="scene.js"></script>
    <script src="soundfont-player.min.js"></script>
    <style>
            body,#renderCanvas { width: 100%; height: 100%;}
    </style>
</head>
<body>
<canvas id="renderCanvas"></canvas>
<script>
const canvas = document.getElementById("renderCanvas"); // Get the canvas element
const engine = new BABYLON.Engine(canvas, true); // Generate the BABYLON 3D engine
// Register a render loop to repeatedly render the scene
createScene(engine).then(sceneToRender => {
engine.runRenderLoop(() => sceneToRender.render());
});
// Watch for browser/canvas resize events
window.addEventListener("resize", function () {
engine.resize();
});
</script>
</body>
</html>
Étapes suivantes
Pour plus d’informations sur le développement de Mixed Reality JavaScript, consultez Vue d’ensemble du développement JavaScript.