הערה
גישה לעמוד זה דורשת אישור. אתה יכול לנסות להיכנס או לשנות תיקיות.
גישה לעמוד זה דורשת אישור. אתה יכול לנסות לשנות מדריכים.
You can easily connect Dapr APIs to backing Azure services by using a combination of Service Connector and Dapr. This feature creates Dapr components on your behalf with valid metadata and authenticated identity to access the Azure service.
In this guide, you connect the Dapr publish and subscribe (pub/sub) API to an Azure Service Bus:
- Select pub/sub as the API.
- Specify Azure Service Bus as the service and required properties like namespace, queue name, and identity.
- Use your Azure Service Bus pub/sub component!
Prerequisites
- An Azure account with an active subscription. Create a free Azure account.
- An existing Azure Container App.
Create a Dapr component
Start by navigating to the Dapr component creation feature.
In the Azure portal, navigate to your Container Apps environment.
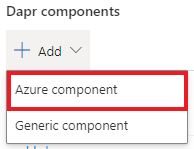
In the sidebar menu, under Settings, select Dapr components.
Select + Add > Azure component to open the Add Dapr Component configuration pane.
Note
Currently, creating Dapr components using Service Connector in the Azure portal is in preview and only works with Azure services (Azure Service Bus, Azure Cosmos DB, etc.). To create non-Azure Dapr components (Redis), use the manual component creation option.
Provide required metadata
For the component creation tool to map to the required component metadata, you need to provide the required metadata from predefined dropdowns in the Basics tab.
For example, for a pub/sub Azure Service Bus component, you start with the following fields:
| Field | Example | Description |
|---|---|---|
| Component name | mycomponent |
Enter a name for your Dapr component. The name must match the component referenced in your application code. |
| Building block | Pub/sub | Select the building block/API for your component from the drop-down. |
| Component type | Service Bus | Select a component type from the drop-down. |
The component creation pane populates with different fields depending on the building block and component type you select. For example, the following table and image demonstrate the fields associated with an Azure Service Bus pub/sub component type, but the fields you see might vary.
| Field | Example | Description |
|---|---|---|
| Subscription | My subscription | Select your Azure subscription. |
| Namespace | mynamespace |
Select the Service Bus namespace. |
| Authentication | User assigned managed identity | Select the subscription that contains the component you're looking for. Recommended: User assigned managed identity. |
| User assigned managed identity | testidentity |
Select an existing identity from the dropdown. If you don't already have one, you can create a new managed identity client ID. |

What happened?
After you fill out these required fields, they automatically map to the required component metadata. In this Service Bus example, the only required metadata is the connection string. The component creation tool takes the information you provided and maps the input to create a connection string in the component YAML file.
Provide optional metadata
While the component creation tool automatically populates all required metadata for the component, you can also customize the component by adding optional metadata.
Select Next : Metadata + Scopes.
Under Metadata, select Add to select extra, optional metadata for your Dapr component from a dropdown of supported fields.
Under Scopes, select Add or type in the app IDs for the container apps that you want to load this component. By default, when the scope is unspecified, Dapr applies the component to all app IDs.
Select Review + Create to review the component values.
Select Create.
Save the component YAML
After the component is added to the Container Apps environment, the portal displays the YAML (or Bicep) for the component.
Copy and save the YAML file for future use.
Select Done to exit the configuration pane.
You can then check the YAML/Bicep artifact into a repo and recreate it outside of the portal experience.
Note
When using Managed Identity, the selected identification is assigned to all containers apps in scope and target services.
Manage Dapr components
In your Container Apps environment, go to Settings > Dapr components.
The Dapr components that are tied to your Container Apps environment are listed on this page. Review the list and select the Delete icon to delete a component, or select a component's name to review or edit its details.
