הערה
הגישה לדף זה מחייבת הרשאה. באפשרותך לנסות להיכנס או לשנות מדריכי כתובות.
הגישה לדף זה מחייבת הרשאה. באפשרותך לנסות לשנות מדריכי כתובות.
Question
Wednesday, October 18, 2017 12:06 AM
I use the following code to draw diagrams without tools and I want to print the result of the drawing in the photo box and move the print
Sub graphic()
        On Error Resume Next
        Dim m As Integer = TextBox1.Text
        Dim df As Integer = m / 6
        Dim a As Graphics = PictureBox1.CreateGraphics
        Dim m_matrix As New Matrix(1, 0, 0, -1, 0, PictureBox1.ClientSize.Height)
        a.Transform = m_matrix

        Dim lgbBrush As New LinearGradientBrush(New Rectangle(0, 0, PictureBox1.ClientSize.Width, PictureBox1.ClientSize.Height), Color.White, Color.White, 90, True)

        a.FillRectangle(lgbBrush, New Rectangle(0, 0, PictureBox1.ClientSize.Width, PictureBox1.ClientSize.Height))
        '
        a.DrawLine(Pens.Gray, 50, 30, 290, 30)  '
        a.DrawLine(Pens.LightGray, 50, 60, 290, 60)
        a.DrawLine(Pens.LightGray, 50, 90, 290, 90)
        a.DrawLine(Pens.LightGray, 50, 120, 290, 120)
        a.DrawLine(Pens.LightGray, 50, 150, 290, 150)
        a.DrawLine(Pens.LightGray, 50, 180, 290, 180)
        a.DrawLine(Pens.LightGray, 50, 210, 290, 210)

        a.DrawLine(Pens.Gray, 50, 30, 50, 210) '

        '
        For x As Integer = 1 To 6
            a.DrawLine(Pens.Gray, 45, 30 + (30 * x), 50, 30 + (30 * x)) '
            ' a.DrawLine(Pens.Gray, 50 + (30 * x), 25, 50 + (30 * x), 30) '
        Next

        For r As Integer = 1 To 4
            a.DrawLine(Pens.Gray, 50 + (50 * r), 25, 50 + (50 * r), 30) '
        Next

        Dim m_pens As Pen() = New Pen() {Pens.Red, Pens.Blue, Pens.Green, Pens.Red}
        Dim m_GraphicsSave As GraphicsState = a.Save()

        Dim m_MatrixCloned As Matrix = m_matrix.Clone()

        m_MatrixCloned.Translate(50, 30)

        a.Transform = m_MatrixCloned

        '
        '
        ' 180-6 , 150-5  ,120-4 , 90-3, 60-2,  30-1)

        Dim hhh As Integer = 178

        Dim employ1 As Integer = (Val(TextBox2.Text) / m) * hhh

        Dim employ2 As Integer = (Val(TextBox3.Text) / m) * hhh

        Dim employ3 As Integer = (Val(TextBox4.Text) / m) * hhh

        Dim employ4 As Integer = (Val(TextBox5.Text) / m) * hhh


        Dim bruch4 As New SolidBrush(Color.FromArgb(121, 86, 141))

        Dim bruch4 As New SolidBrush(Color.FromArgb(68, 112, 165))


        Dim bruch4 As New SolidBrush(Color.FromArgb(135, 163, 76))

        Dim bruch4 As New SolidBrush(Color.FromArgb(215, 129, 60))

        If CheckBox1.Checked = True Then

            '
            a.DrawRectangle(Pens.LightGray, 35, 1, 22, employ1)
            a.FillRectangle(bruch4, New Rectangle(35, 1, 22, employ1))

            a.DrawRectangle(Pens.LightGray, 90, 1, 22, employ2)
            a.FillRectangle(bruch4, New Rectangle(90, 1, 22, employ2))

            a.DrawRectangle(Pens.LightGray, 135, 1, 22, employ3)
            a.FillRectangle(bruch4, New Rectangle(135, 1, 22, employ3))

            a.DrawRectangle(Pens.LightGray, 185, 1, 22, employ4)
            a.FillRectangle(bruch4, New Rectangle(185, 1, 22, employ4))

        Else
            '

            a.DrawRectangle(Pens.LightGray, 48, employ1 - 1, 6, 4)
            a.FillRectangle(bruch4, New Rectangle(48, employ1 - 1, 6, 4))
            a.DrawRectangle(Pens.LightGray, 100, employ2 - 1, 6, 4)
            a.FillRectangle(bruch4, New Rectangle(100, employ2 - 1, 6, 4))
            a.DrawRectangle(Pens.LightGray, 145, employ3 - 2, 6, 4)
            a.FillRectangle(bruch4, New Rectangle(145, employ3 - 2, 6, 4))
            a.DrawRectangle(Pens.LightGray, 197, employ4 - 1, 6, 4)
            a.FillRectangle(bruch4, New Rectangle(197, employ4 - 1, 6, 4))


            a.DrawLine(Pens.LightSteelBlue, 56, employ1 + 2, 99, employ2)
            a.DrawLine(Pens.LightSteelBlue, 104, employ2 + 2, 143, employ3 + 2)
            a.DrawLine(Pens.LightSteelBlue, 151, employ3 + 1, 197, employ4 + 2)

        End If

        '
        a.DrawRectangle(Pens.LightGray, 271, 218, 90, 82)
        '
        a.DrawRectangle(Pens.LightGray, 275, 284, 10, 10)
        a.FillRectangle(bruch4, New Rectangle(275, 284, 10, 10))

        a.DrawRectangle(Pens.LightGray, 275, 264, 10, 10)
        a.FillRectangle(bruch4, New Rectangle(275, 264, 10, 10))

        a.DrawRectangle(Pens.LightGray, 275, 244, 10, 10)
        a.FillRectangle(bruch4, New Rectangle(275, 244, 10, 10))

        a.DrawRectangle(Pens.LightGray, 275, 224, 10, 10)
        a.FillRectangle(bruch4, New Rectangle(275, 224, 10, 10))


        '


        '
        For i As Integer = df To m Step df
            m_GraphicsSave = a.Save()
            Dim m_MatrixOffsetY As New Matrix(1, 0, 0, -1, 15, 30 + (i / df * 30) + (Font.Height / 2))

            m_MatrixCloned = m_matrix.Clone()
            m_MatrixCloned.Multiply(m_MatrixOffsetY)

            a.Transform = m_MatrixCloned
            a.DrawString(i.ToString(), Font, New SolidBrush(Color.FromArgb(140, 140, 140)), 0, 0, StringFormat.GenericTypographic)

            a.Restore(m_GraphicsSave)

        Next
        '
        For s As Integer = 1 To 4 Step 1

            m_GraphicsSave = a.Save()
            Dim m_matrixOffsetX As New Matrix(1, 0, 0, -1, 40 + (s / 1 * 50) + (Font.Height / 2), 25)
            m_MatrixCloned = m_matrix.Clone()
            m_MatrixCloned.Multiply(m_matrixOffsetX)
            a.Transform = m_MatrixCloned

            a.DrawString(s.ToString(), Font, New SolidBrush(Color.FromArgb(140, 140, 140)), 0, 0, StringFormat.GenericTypographic)

            a.Restore(m_GraphicsSave)

        Next

        a.Dispose()
All replies (10)
Wednesday, October 18, 2017 11:35 AM ✅Answered
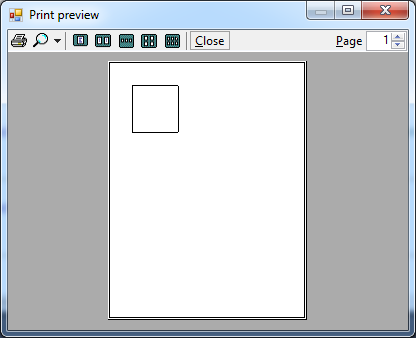
You can print the image of the chart in the picturebox as a bitmap as Cherry shows. However for the best print quality it is best to redraw the image on the printer graphics. You can do this using the same drawing routine for drawing on the picturebox and printout. You just need to deal with the difference in size by scaling as required with scale transform or whatever works for your drawing routine. See code comments.
Here is an example where I replaced your create graphics by passing the graphics argument to the drawing routine. You can see in the picture paint event the e.graphics is used to draw upon. In the print page event the printer graphics object (e.graphics) is used.
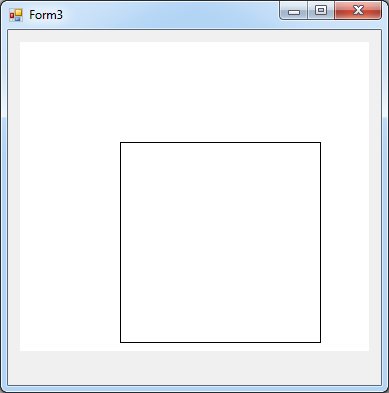
This is the form drawing in screen pixels.
This is the print preview in printer pixels.
Public Class Form3

    Private WithEvents pd As New Printing.PrintDocument

    Private Sub Form7_Load(sender As Object, e As EventArgs) Handles MyBase.Load

        'show the print preview
        'click the print button on th print dialog to print
        Dim printPreview As New PrintPreviewDialog()

        printPreview.Document = pd
        printPreview.ShowDialog()

    End Sub

    Private Sub OnPrintPage(ByVal sender As Object, ByVal e As System.Drawing.Printing.PrintPageEventArgs) Handles pd.PrintPage
        'call the drawing routine with the printer drawing surface
        RenderGraphic(e.Graphics)
    End Sub

    Private Sub PictureBox1_Paint(sender As Object, e As PaintEventArgs) Handles PictureBox1.Paint
        'call the drawing routine with the picturebox drawing surface
        RenderGraphic(e.Graphics)
    End Sub

    Private Sub RenderGraphic(a As Graphics)
        'put your drawing code here dont use create graphics.
        'you will need to scale this viewport etc depending on your drawing
        'if you want to match the picturebox properties
        a.DrawRectangle(Pens.Black, New Rectangle(100, 100, 200, 200))

    End Sub
End Class
Wednesday, October 18, 2017 1:20 PM ✅Answered
Thank you so much code work with me but I have two questions
- How to extend the image width to take the entire print page view
- When adding text values appear upside down inside the print
The code used to add a text variable
 a.DrawString("week1", Me.Font, Brushes.Black, 344, 31)
        a.DrawString("week2 ", Me.Font, Brushes.Black, 340, 51)
        a.DrawString("week3 ", Me.Font, Brushes.Black, 340, 71)
        a.DrawString("week4", Me.Font, Brushes.Black, 344, 91)
        '
        a.DrawString("profit", Me.Font, New SolidBrush(Color.FromArgb(140, 140, 140)), 15, 110)
        a.DrawString("week", Me.Font, New SolidBrush(Color.FromArgb(140, 140, 140)), 320, 325)
ahmed,
1. That's complicated. It depends on the exact result you want. Do you want the picturebox image to have the exact proportions of the printer page or other way around etc. See if you can extract the scaling transform you need from this thread near the end with the rect center or left example.
It depends on how you want to fit the image to the picturebox and the printer. In windows the picturebox size is 96 pixels per inch (dots per inch dpi) (can change based on monitor and control panel settings. Normally the screen is 96 dpi and the printer can be 600, 1200, 2400 etc.
If you show your form with picturebox with the graph and then what you want the printout to look like I can make more examples.
2. The text will draw upside down if you have a negative transform for the yaxis. Somewhere in your matrix you are using a neg value for the scale y axis. Probably to make the y axis increase value positive from bottom to top (not the default windows top to bottom increasing coordinates). But this makes the text reverse as well and draw upside down.
So you need to change that. You may need to reset your transform and then draw the text. You can also use a yoffset instead of a neg transform. That would require much rewrite but it will eliminate the upside down text.
Wednesday, October 18, 2017 3:30 PM ✅Answered | 1 vote
My account is not supported by showing images
See the link for what is needed and how to modify ithttps://www.dropbox.com/s/3mbpkpeoncbtnhq/drawing.png?dl=0
Change the place of the graphic on the print page from top to bottom and extend the drawing width
Who wrote the code to draw the graph? Do you understand it?
It appears you need to change:
Dim m_matrix As New Matrix(1, 0, 0, -1, 0, PictureBox1.ClientSize.Height)
to something like
Dim m_matrix As New Matrix(1, 0, 0, -1, 0, e.Graphics.VisibleClipBounds.Height)
where visibleclipbounds is the graphic surface rectangle for the picturebox or the printer.
to move to the bottom:
e.graphics.translatetransform(0, e.Graphics.VisibleClipBounds.Height - graphheight.
or add the transform to the matrix.
If you dont understand your drawing code then you wont understand how to do it.
Wednesday, October 18, 2017 6:50 AM | 1 vote
Hi ahmeddc,
Based on your description, you want to print picturebox content? If yes, please refer to the following code:
Private Sub Form3_Load(sender As Object, e As EventArgs) Handles MyBase.Load
        PictureBox1.Image = Image.FromFile("D:\Picture\6.png")
    End Sub

    Private Sub Button1_Click(sender As Object, e As EventArgs) Handles Button1.Click
        If PrintDialog1.ShowDialog = DialogResult.OK Then
            PrintDocument1.Print()
            'PrintPreviewDialog1.Document = PrintDocument1
            'PrintPreviewDialog1.ShowDialog()
        End If
    End Sub

    Private Sub PrintDocument1_PrintPage(sender As Object, e As Printing.PrintPageEventArgs) Handles PrintDocument1.PrintPage
        e.Graphics.DrawImage(PictureBox1.Image, 0, 0)
    End Sub
Best Regards,
Cherry
MSDN Community Support
Please remember to click "Mark as Answer" the responses that resolved your issue, and to click "Unmark as Answer" if not. This can be beneficial to other community members reading this thread. If you have any compliments or complaints to MSDN Support, feel free to contact MSDNFSF@microsoft.com.
Wednesday, October 18, 2017 8:57 AM
Did not understand me
The picture box shows the chart and can not print the picture box after drawing the chart
I do not know why I want to print the image box after adding the chart
Your code gives
Value cannot be null.
Parameter name: image
Wednesday, October 18, 2017 12:49 PM
Thank you so much code work with me but I have two questions
- How to extend the image width to take the entire print page view
- When adding text values appear upside down inside the print
The code used to add a text variable
 a.DrawString("week1", Me.Font, Brushes.Black, 344, 31)
        a.DrawString("week2 ", Me.Font, Brushes.Black, 340, 51)
        a.DrawString("week3 ", Me.Font, Brushes.Black, 340, 71)
        a.DrawString("week4", Me.Font, Brushes.Black, 344, 91)
        '
        a.DrawString("profit", Me.Font, New SolidBrush(Color.FromArgb(140, 140, 140)), 15, 110)
        a.DrawString("week", Me.Font, New SolidBrush(Color.FromArgb(140, 140, 140)), 320, 325)
Wednesday, October 18, 2017 1:56 PM
I want to extend the image display as it appears below the print page
Wednesday, October 18, 2017 2:02 PM
I want to extend the image display as it appears below the print page
ahmed,
I dont know what you mean. You will need to show an image of what you want to do.
ie the picturebox graph on the form looks like this:
I want the printout to show this and look like this:
then add the images to your post.
Wednesday, October 18, 2017 2:36 PM
My account is not supported by showing images
See the link for what is needed and how to modify it
https://www.dropbox.com/s/3mbpkpeoncbtnhq/drawing.png?dl=0
Change the place of the graphic on the print page from top to bottom and extend the drawing width
Thursday, October 19, 2017 5:08 PM | 1 vote
Thank you very much tommytworrain
The code is modified and works well