QuickStart: Create and configure Azure DDoS IP Protection using Azure portal
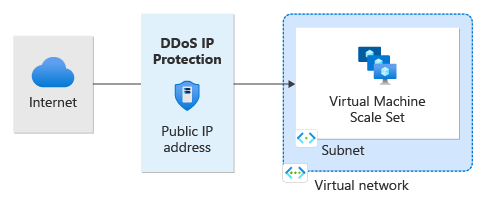
Get started with Azure DDoS IP Protection by using the Azure portal. In this quickstart, you'll enable DDoS IP protection and link it to a public IP address.
Prerequisites
- If you don't have an Azure subscription, create a free account before you begin.
- Sign in to the Azure portal.
Enable DDoS IP Protection on a public IP address
Important
Ensure that your account is assigned to the network contributor role or to a custom role that is assigned the appropriate actions listed in the how-to guide on Permissions.
Create a public IP address
Select Create a resource in the upper left corner of the Azure portal.
Select Networking, and then select Public IP address.
Select Create.
Enter or select the following values.
Setting Value Subscription Select your subscription. Resource group Select Create new, enter MyResourceGroup.
Select OK.Region Select your region. In this example, we selected (US) East US. Name Enter your resource name. In this example, we selected myStandardPublicIP. IP Version Select IPv4 or IPv6. In this example, we selected IPv4. SKU Select Standard. DDoS IP Protection is enabled only on Public IP Standard SKU. Availability Zone You can specify an availability zone in which to deploy your public IP address. In this example, we selected zone-redundant. Tier Select Global or Regional. In this example, we selected Regional. IP address assignment Locked as Static. Routing Preference Select Microsoft network or Internet. In this example, we selected Microsoft network. Idle Timeout (minutes) Keep a TCP or HTTP connection open without relying on clients to send keep-alive messages. In this example, we'll leave the default of 4. DNS name label Enter a DNS name label. In this example, we left the value blank. 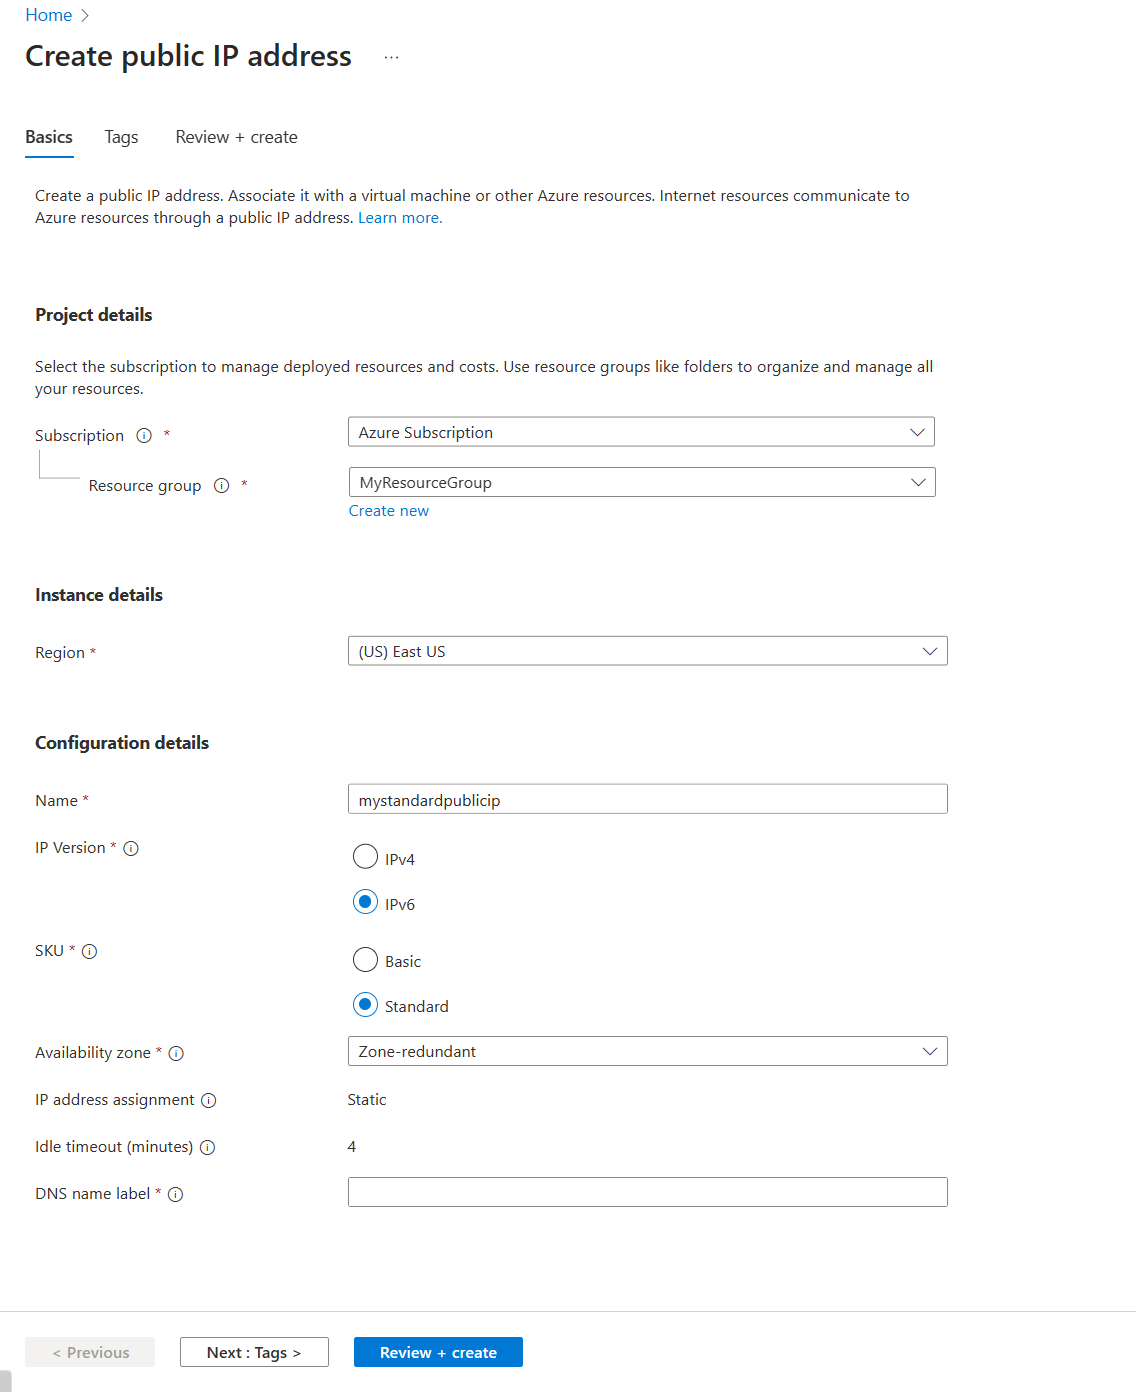
Select Create.
Enable for an existing Public IP address
In the search box at the top of the portal, enter public IP Address. Select public IP Address.
Select your Public IP address. In this example, select myStandardPublicIP.
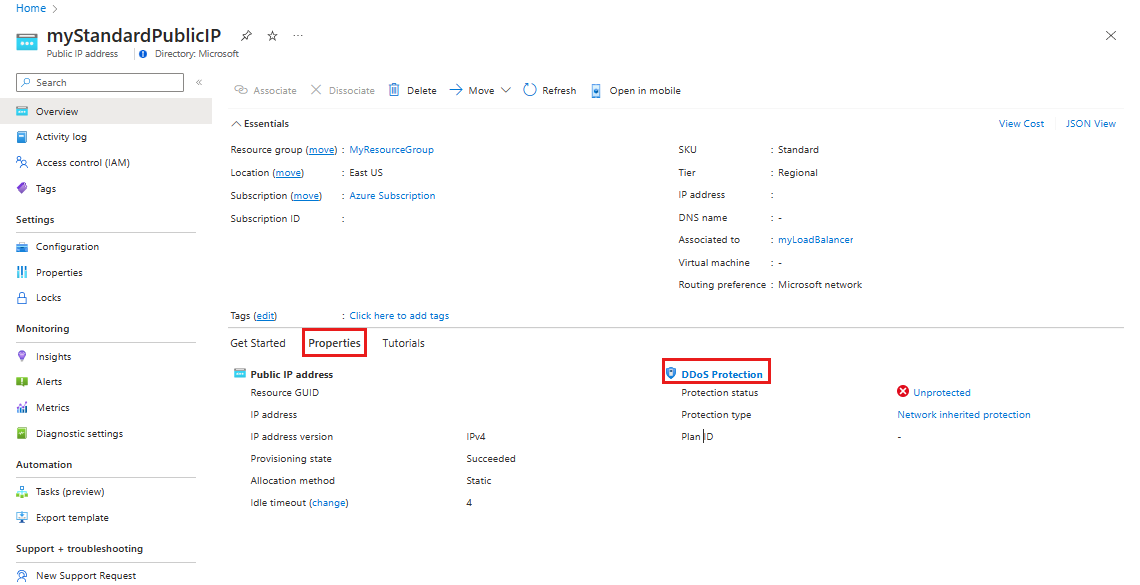
In the Overview pane, select the Properties tab, then select DDoS protection.
In the Configure DDoS protection pane, under Protection type, select IP, then select Save.
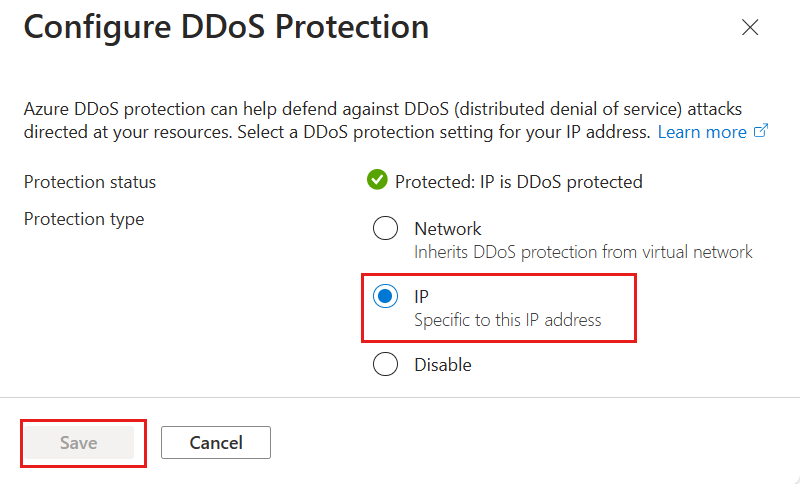
Disable for a Public IP address:
Enter the name of the public IP address you want to disable DDoS IP Protection for in the Search resources, services, and docs box at the top of the portal. When the name of public IP address appears in the search results, select it.
Under Properties in the overview pane, select DDoS Protection.
Under Protection type select Disable, then select Save.
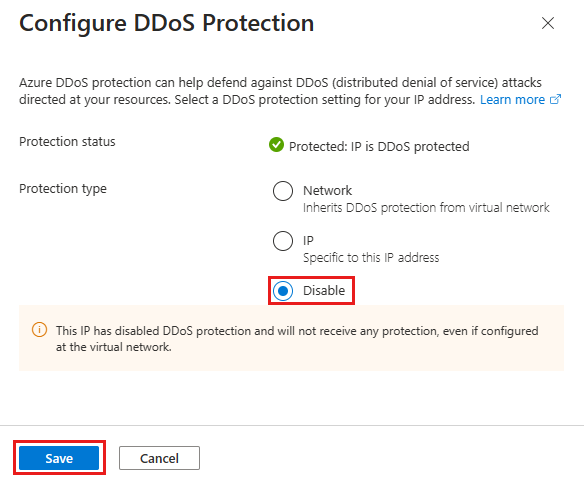
Note
When changing DDoS IP protection from Enabled to Disabled, telemetry for the public IP resource will no longer be active.
Validate and test
First, check the details of your public IP address:
Select All resources on the top, left of the portal.
Enter public IP address in the Filter box. When public IP address appear in the results, select it.
Select your public IP Address from the list.
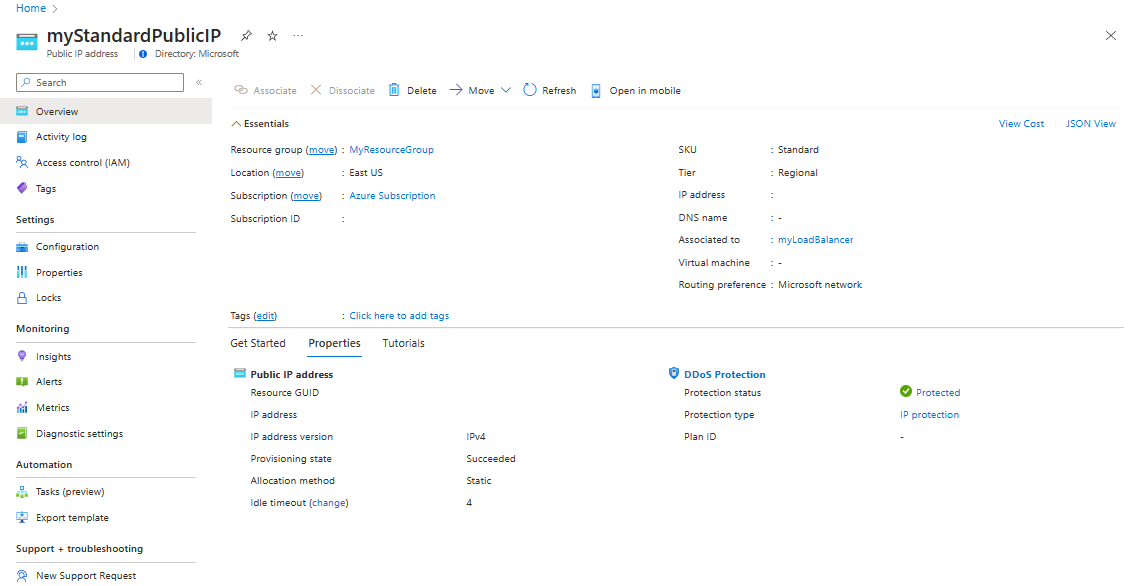
In the Overview pane, select the Properties tab in the middle of the page, then select DDoS protection.
View Protection status and verify your public IP is protected.
Clean up resources
You can keep your resources for the next article. If no longer needed, delete the MyResourceGroup resource group. When you delete the resource group, you also remove DDoS IP Protection and all its related resources.
Warning
This action is irreversible.
In the Azure portal, search for and select Resource groups, or select Resource groups from the Azure portal menu.
Filter or scroll down to find the MyResourceGroup resource group.
Select the resource group, then select Delete resource group.
Type the resource group name to verify, and then select Delete.
Next steps
To learn how to configure metric alerts through the Azure portal, continue to the next article.
