Manage existing SIMs for Azure Private 5G Core - Azure portal
SIM resources represent physical SIMs or eSIMs used by user equipment (UEs) served by the private mobile network. In this how-to guide, you'll learn how to manage existing SIMs, including how to assign static IP addresses and SIM policies.
Prerequisites
- Ensure you can sign in to the Azure portal using an account with access to the active subscription you identified in Complete the prerequisite tasks for deploying a private mobile network. This account must have the built-in Contributor role at the subscription scope.
- Identify the name of the Mobile Network resource corresponding to your private mobile network.
View existing SIMs
You can view your configured SIMs in the Azure portal.
Sign in to the Azure portal.
Search for and select the Mobile Network resource representing the private mobile network containing your SIMs.
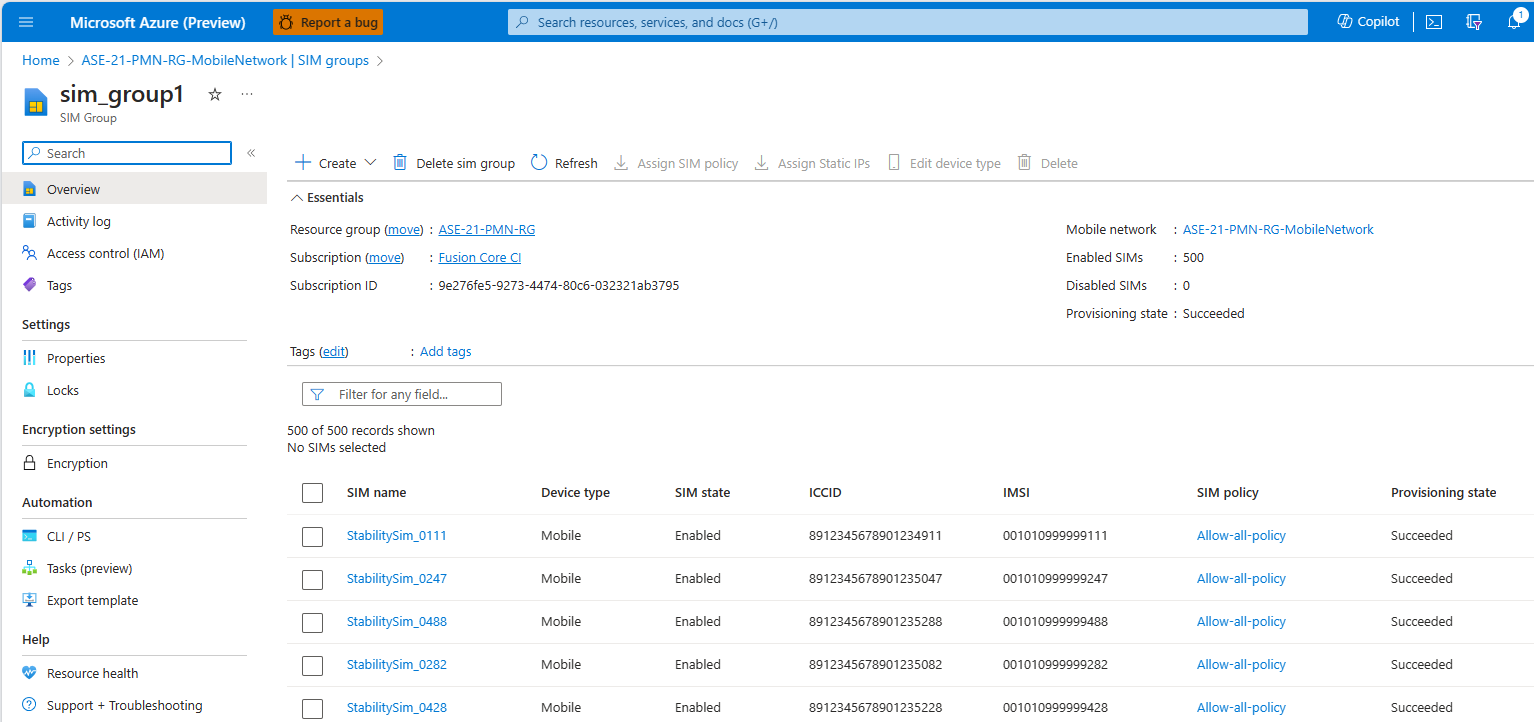
To see a list of all existing SIMs in the private mobile network, select SIMs from the Resource menu.
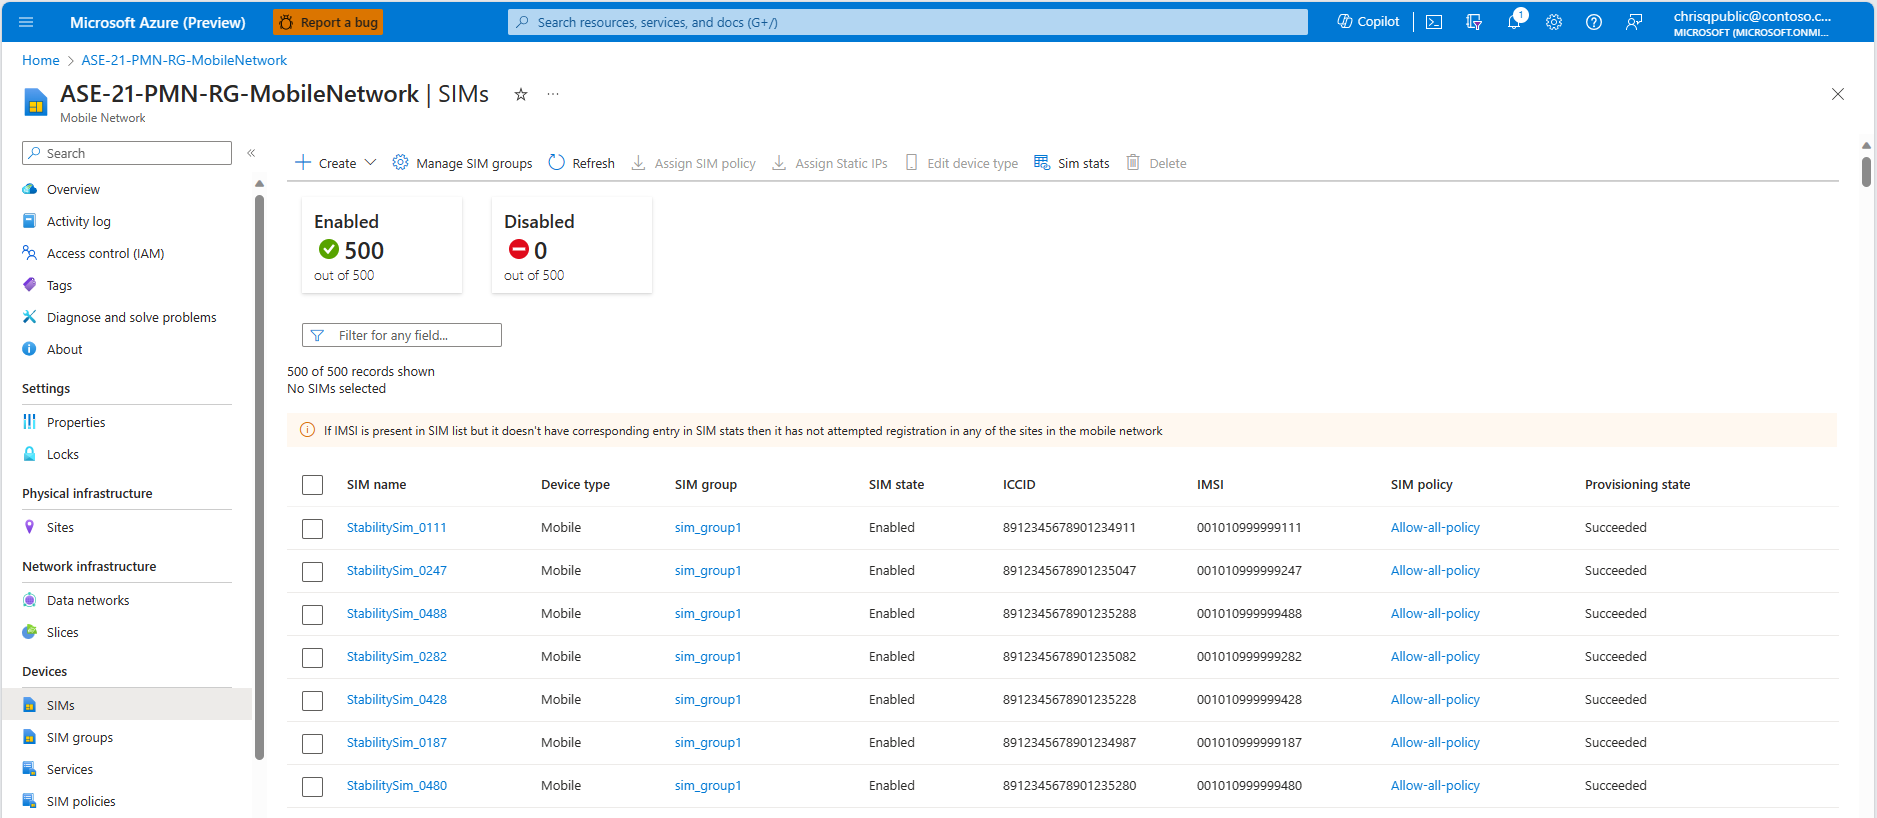
To see a list of existing SIMs in a particular SIM group, select SIM groups from the resource menu, and then select your chosen SIM group from the list.


View SIM statistics
You can also view status information for connected devices in the Azure portal.
Search for and select the Mobile Network resource representing the private mobile network containing your SIMs.
In the resource menu, select SIMs.
Select SIM stats from the ribbon.
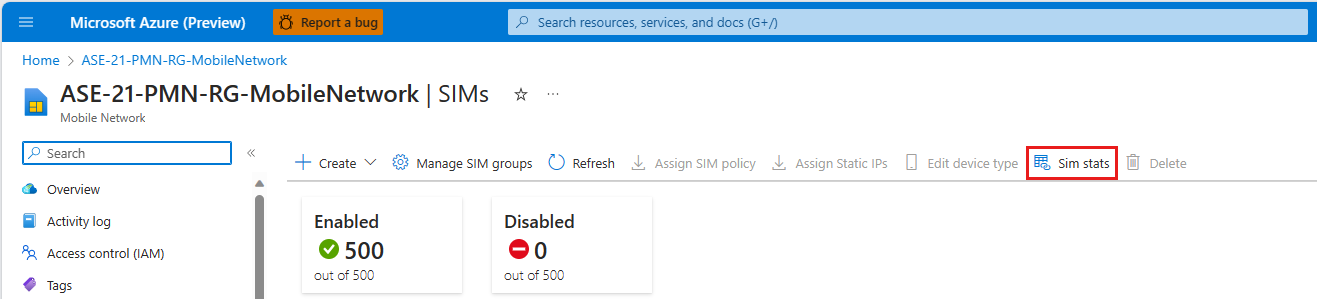
The SIM stats page displays connected, disconnected and idle devices on the mobile network with basic status information for each device.
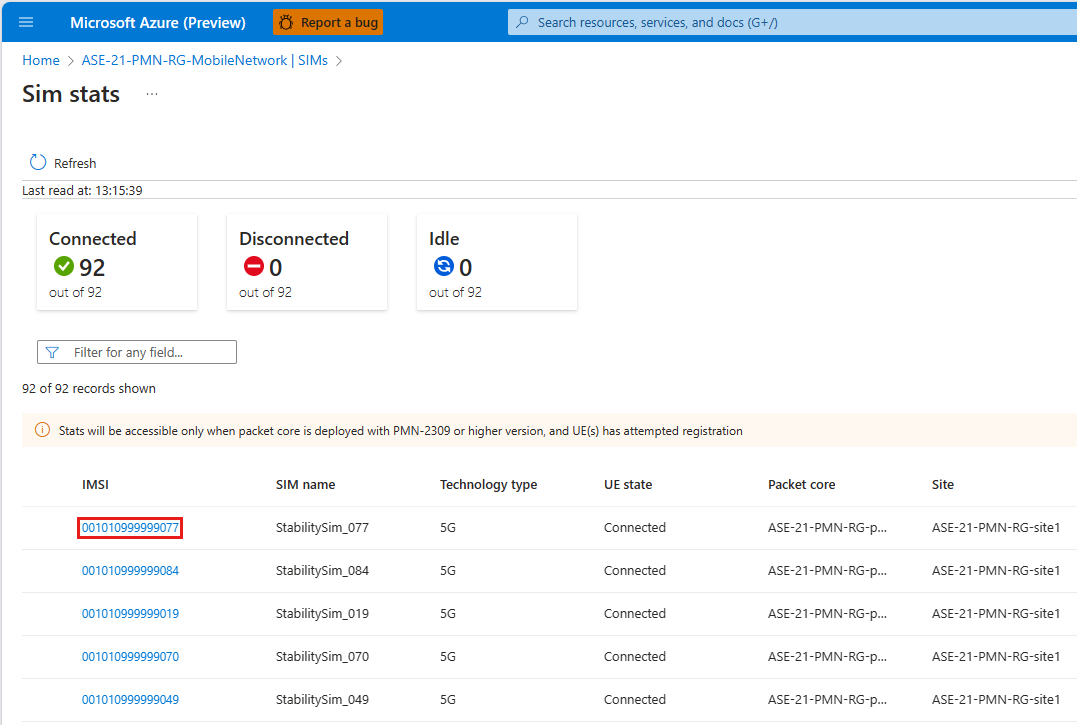
Select an IMSI number from the list to view detailed information for that device, including mobile identities, location information, connection information and session information. The information shown varies depending on the device state and whether it is connected to 4G or 5G.


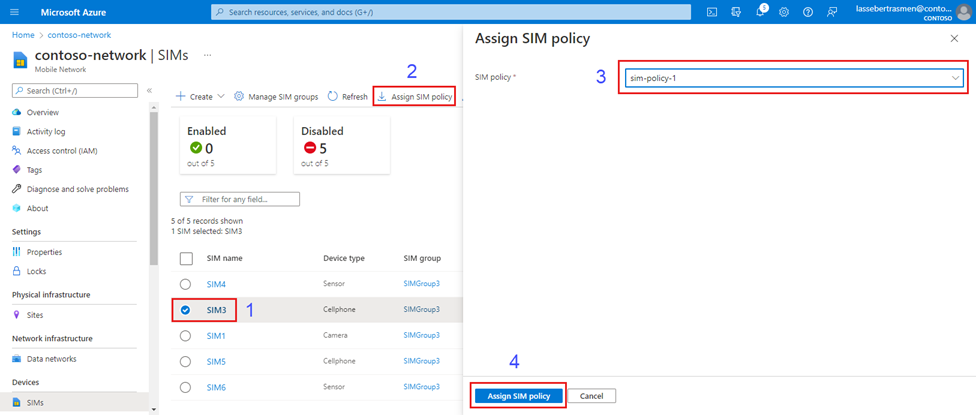
Assign SIM policies
SIMs need an assigned SIM policy before they can use your private mobile network. You might want to assign a SIM policy to an existing SIM that doesn't already have one, or you might want to change the assigned SIM policy for an existing SIM. For information on configuring SIM policies, see Configure a SIM policy.
To assign a SIM policy to one or more SIMs:
Search for and select the Mobile Network resource representing the private mobile network containing your SIMs.
In the resource menu, select SIMs.
You'll see a list of provisioned SIMs in the private mobile network. For each SIM policy you want to assign to one or more SIMs, do the following:
Select the checkbox next to the name of each SIM to which you want to assign the SIM policy.
Select Assign SIM policy.
In Assign SIM policy on the right, select your chosen SIM policy from the SIM policy drop-down menu.
Select Assign SIM policy.
The Azure portal will now begin deploying the configuration change. When the deployment is complete, select Go to resource (if you have assigned a SIM policy to a single SIM) or Go to resource group (if you have assigned a SIM policy to multiple SIMs).
- If you assigned a SIM policy to a single SIM, you'll be taken to that SIM resource. Check the SIM policy field in the Management section to confirm that the correct SIM policy has been assigned successfully.
- If you assigned a SIM policy to multiple SIMs, you'll be taken to the resource group containing your private mobile network. Select the Mobile Network resource, and then select SIMs in the resource menu. Check the SIM policy column in the SIMs list to confirm the correct SIM policy has been assigned to your chosen SIMs.
Repeat this step for any other SIM policies you want to assign to SIMs.

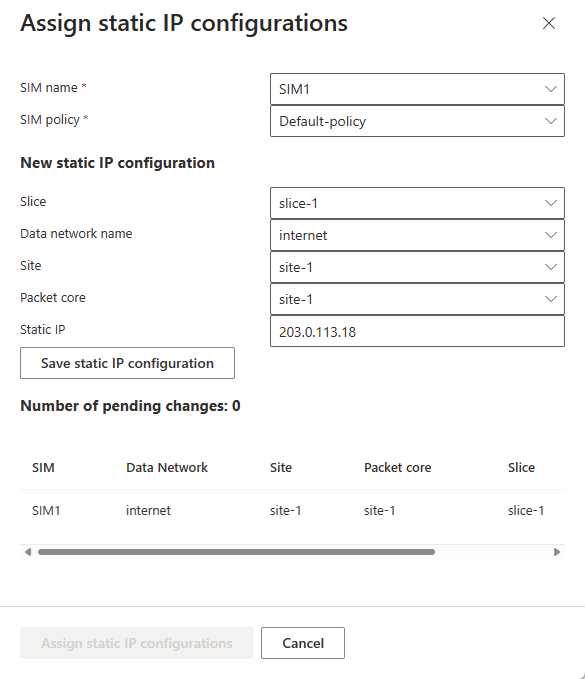
Assign static IP addresses
Static IP address allocation ensures that a UE receives the same IP address every time it connects to the private mobile network. This is useful when you want Internet of Things (IoT) applications to be able to consistently connect to the same device. For example, you can configure a video analysis application with the IP addresses of the cameras providing video streams. If these cameras have static IP addresses, you won't need to reconfigure the video analysis application with new IP addresses each time the cameras restart.
If you've configured static IP address allocation for your packet core instance(s), you can assign static IP addresses to the SIMs you've provisioned. If you have multiple data networks in your private mobile network, you can assign a different static IP address for each data network to the same SIM.
Each IP address must come from the pool you assigned for static IP address allocation when creating the relevant data network, as described in Collect data network values. For more information, see Allocate User Equipment (UE) IP address pools.
If you're assigning a static IP address to a SIM, you'll also need the following information.
- The SIM policy to assign to the SIM. You won't be able to set a static IP address for a SIM without also assigning a SIM policy.
- The name of the data network the SIM will use.
- The site and data network at which the SIM will use this static IP address.
To assign static IP addresses to SIMs:
Search for and select the Mobile Network resource representing the private mobile network containing your SIMs.
In the resource menu, select SIMs.
You'll see a list of provisioned SIMs in the private mobile network. Select each SIM to which you want to assign a static IP address, and then select Assign Static IPs.

In Assign static IP configurations on the right, run the following steps for each SIM in turn. If your private mobile network has multiple sites and you want to assign a different static IP address for each site to the same SIM, you'll need to repeat these steps on the same SIM for each IP address.
- Set SIM name your chosen SIM.
- Set SIM policy to the SIM policy you want to assign to this SIM.
- Set Slice to slice-1.
- Set Data network name to the name of the data network this SIM will use.
- Set Site to the site at which the SIM will use this static IP address.
- Set Static IP to your chosen IP address.
- Select Save static IP configuration. The SIM will then appear in the list under Number of pending changes.
Once you have assigned static IP addresses to all of your chosen SIMs, select Assign static IP configurations.
The Azure portal will now begin deploying the configuration change. When the deployment is complete, select Go to resource (if you have assigned a static IP address to a single SIM) or Go to resource group (if you have assigned static IP addresses to multiple SIMs).
- If you assigned a static IP address to a single SIM, you'll be taken to that SIM resource. Check the SIM policy field in the Management section and the list under the Static IP Configuration section to confirm that the correct SIM policy and static IP address have been assigned successfully.
- If you assigned static IP addresses to multiple SIMs, you'll be taken to the resource group containing your private mobile network. Select the Mobile Network resource, and then select SIMs in the resource menu. Check the SIM policy column in the SIMs list to confirm the correct SIM policy has been assigned to your chosen SIMs. You can then select an individual SIM and check the Static IP Configuration section to confirm that the correct static IP address has been assigned to that SIM.
Enable SUPI concealment
Delete SIMs
Deleting a SIM will remove it from your private mobile network.
- Search for and select the Mobile Network resource representing the private mobile network containing your SIMs.
- In the resource menu, select SIMs.
- Select the checkbox next to each SIM you want to delete.
- Select Delete.
- Select Delete to confirm you want to delete the SIM(s).
Next steps
If you need to add more SIMs, you can provision them using the Azure portal or an Azure Resource Manager template (ARM template).
משוב
בקרוב: במהלך 2024, נפתור בעיות GitHub כמנגנון המשוב לתוכן ונחליף אותו במערכת משוב חדשה. לקבלת מידע נוסף, ראה: https://aka.ms/ContentUserFeedback.
שלח והצג משוב עבור