Quickstart: Search for images by using Search Explorer in the Azure portal
Important
Image vectors are supported in stable API versions, but the wizard and vectorizers are in preview under Supplemental Terms of Use. By default, the wizard targets the 2024-05-01-Preview REST API.
This quickstart shows you how to get started with image search by using the Import and vectorize data wizard in the Azure portal. It also shows how to use Search Explorer to run image-based queries.
Sample data consists of image files in the azure-search-sample-data repo, but you can use different images and still follow the walkthrough.
Prerequisites
An Azure subscription. Create one for free.
An Azure AI services multiservice account to use for image vectorization and optical character recognition (OCR). The account must be in a region that provides Azure AI Vision multimodal embeddings.
Currently, eligible regions are: SwedenCentral, EastUS, NorthEurope, WestEurope, WestUS, SoutheastAsia, KoreaCentral, FranceCentral, AustraliaEast, WestUS2, SwitzerlandNorth, JapanEast. Check the documentation for an updated list.
Azure AI Search for indexing and queries. It can be on any tier, but it must be in the same region as Azure AI services.
The service tier determines how many blobs you can index. We used the Free tier to create this walkthrough and limited the content to 10 JPG files.
Azure Storage to store image files as blobs. Use Azure Blob Storage, a standard performance (general-purpose v2) account. Access tiers can be hot, cool, and cold.
Don't use Azure Data Lake Storage Gen2 (a storage account with a hierarchical namespace). This version of the wizard doesn't support Data Lake Storage Gen2.
All of the preceding resources must have public access enabled so that the portal nodes can access them. Otherwise, the wizard fails. After the wizard runs, you can enable firewalls and private endpoints on the integration components for security. For more information, see Secure connections in the import wizards.
If private endpoints are already present and you can't disable them, the alternative option is to run the respective end-to-end flow from a script or program on a virtual machine. The virtual machine must be on the same virtual network as the private endpoint. Here's a Python code sample for integrated vectorization. The same GitHub repo has samples in other programming languages.
A free search service supports role-based access control on connections to Azure AI Search, but it doesn't support managed identities on outbound connections to Azure Storage or Azure AI Vision. This level of support means you must use key-based authentication on connections between a free search service and other Azure services. For connections that are more secure:
- Use the Basic tier or higher.
- Configure a managed identity and role assignments to admit requests from Azure AI Search on other Azure services.
Check for space
If you're starting with the free service, you're limited to three indexes, three data sources, three skillsets, and three indexers. Make sure you have room for extra items before you begin. This quickstart creates one of each object.
Prepare sample data
Download the unsplash-signs image folder to a local folder, or find some images of your own. On a free search service, keep the image files under 20 to stay within the free quota for enrichment processing.
Sign in to the Azure portal with your Azure account, and go to your Azure Storage account.
On the left pane, under Data Storage, select Containers.
Create a new container and then upload the images.
Start the wizard
If your search service and Azure AI service are in the same supported region and tenant, and if your Azure Storage blob container is using the default configuration, you're ready to start the wizard.
Sign in to the Azure portal with your Azure account, and go to your Azure AI Search service.
On the Overview page, select Import and vectorize data.

Connect to your data
The next step is to connect to a data source that provides the images.
On the Set up your data connection page, select Azure Blob Storage.
Specify the Azure subscription.
For Azure Storage, select the account and container that provide the data. Use the default values for the remaining boxes.

Select Next.
Vectorize your text
If raw content includes text, or if the skillset produces text, the wizard calls a text-embedding model to generate vectors for that content. In this exercise, text will be produced from the OCR skill that you add in the next step.
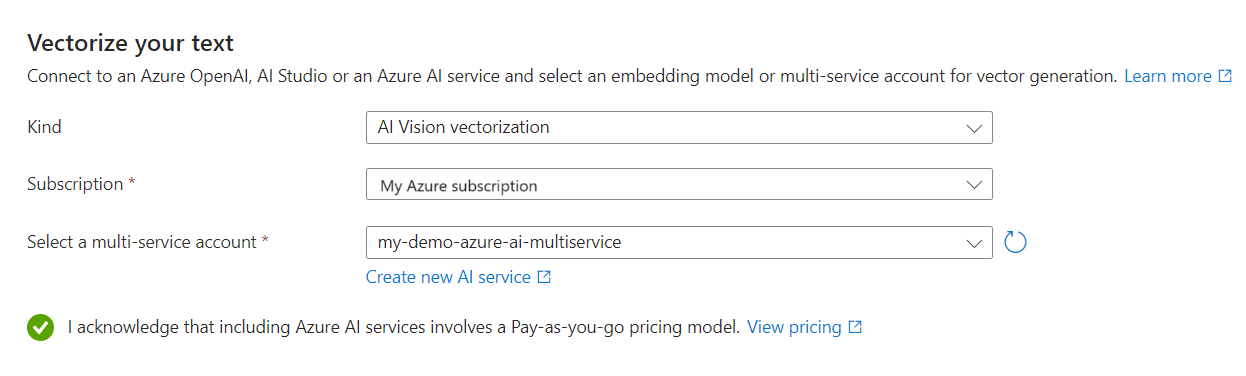
Azure AI Vision provides text embeddings, so use that resource for text vectorization.
On the Vectorize your text page, select AI Vision vectorization. If it's not available, make sure Azure AI Search and your Azure AI multiservice account are together in a region that supports AI Vision multimodal APIs.
Select Next.
Vectorize and enrich your images
Use Azure AI Vision to generate a vector representation of the image files.
In this step, you can also apply AI to extract text from images. The wizard uses OCR from Azure AI services to recognize text in image files.
Two more outputs appear in the index when OCR is added to the workflow:
- The
chunkfield is populated with an OCR-generated string of any text found in the image. - The
text_vectorfield is populated with an embedding that represents thechunkstring.
The inclusion of plain text in the chunk field is useful if you want to use relevance features that operate on strings, such as semantic ranking and scoring profiles.
On the Vectorize your images page, select the Vectorize images checkbox, and then select AI Vision vectorization.
Select Use same AI service selected for text vectorization.
In the enrichment section, select Extract text from images and Use same AI service selected for image vectorization.
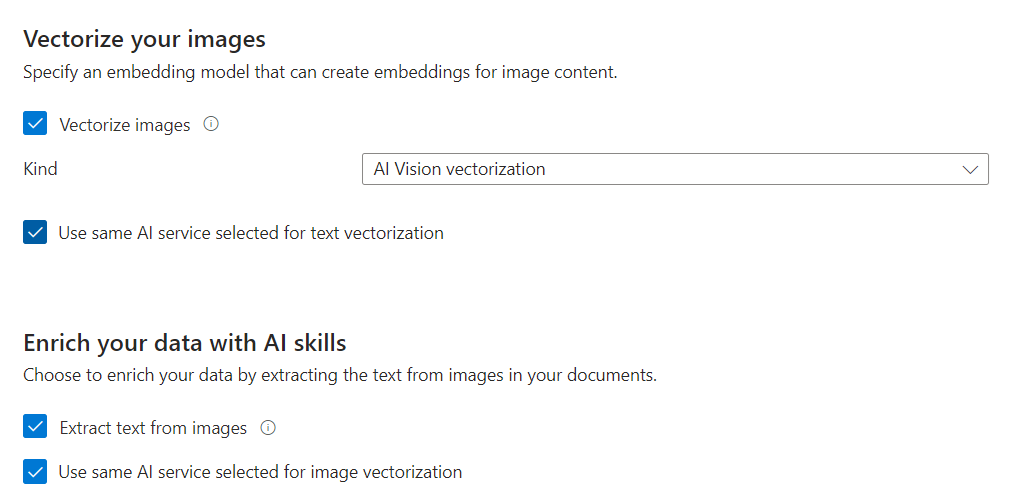
Select Next.
Schedule indexing
On the Advanced settings page, under Schedule indexing, specify a run schedule for the indexer. We recommend Once for this exercise. For data sources where the underlying data is volatile, you can schedule indexing to pick up the changes.

Select Next.
Finish the wizard
On the Review your configuration page, specify a prefix for the objects that the wizard will create. A common prefix helps you stay organized.
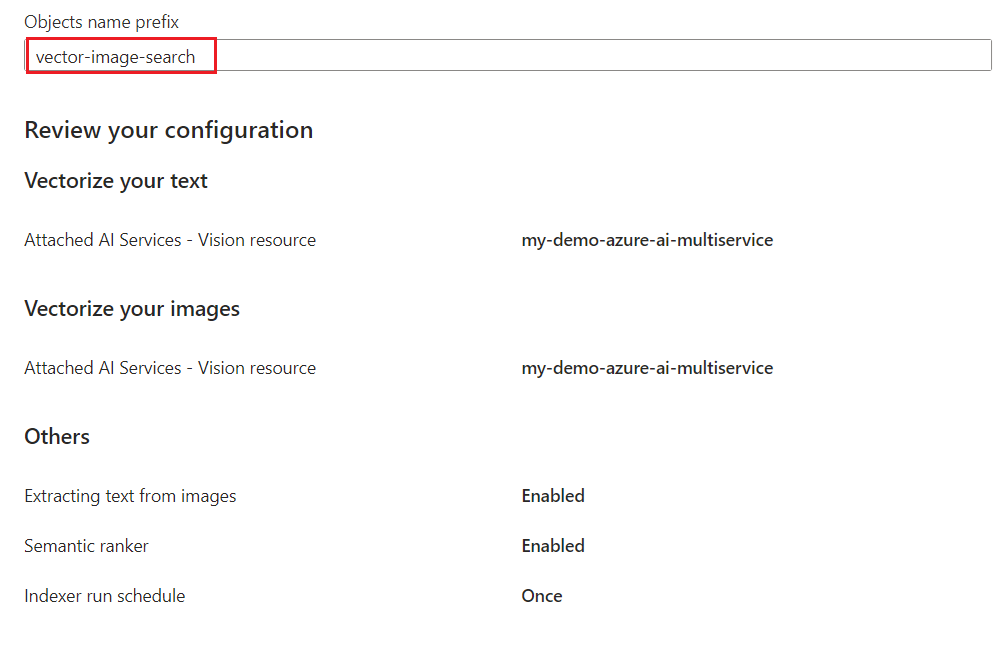
Select Create.
When the wizard completes the configuration, it creates the following objects:
An indexer that drives the indexing pipeline.
A data source connection to Blob Storage.
An index with vector fields, text fields, vectorizers, vector profiles, and vector algorithms. You can't modify the default index during the wizard workflow. Indexes conform to the 2024-05-01-preview REST API.
A skillset with the following five skills:
- The OCR skill recognizes text in image files.
- The Text Merge skill unifies the various outputs of OCR processing.
- The Text Split skill adds data chunking. This skill is built into the wizard workflow.
- The Azure AI Vision multimodal embeddings skill is used to vectorize text generated from OCR.
- The Azure AI Vision multimodal embeddings skill is called again to vectorize images.
Check results
Search Explorer accepts text, vectors, and images as query inputs. You can drag or select an image into the search area. Search Explorer vectorizes your image and sends the vector as a query input to the search engine. Image vectorization assumes that your index has a vectorizer definition, which Import and vectorize data creates based on your embedding model inputs.
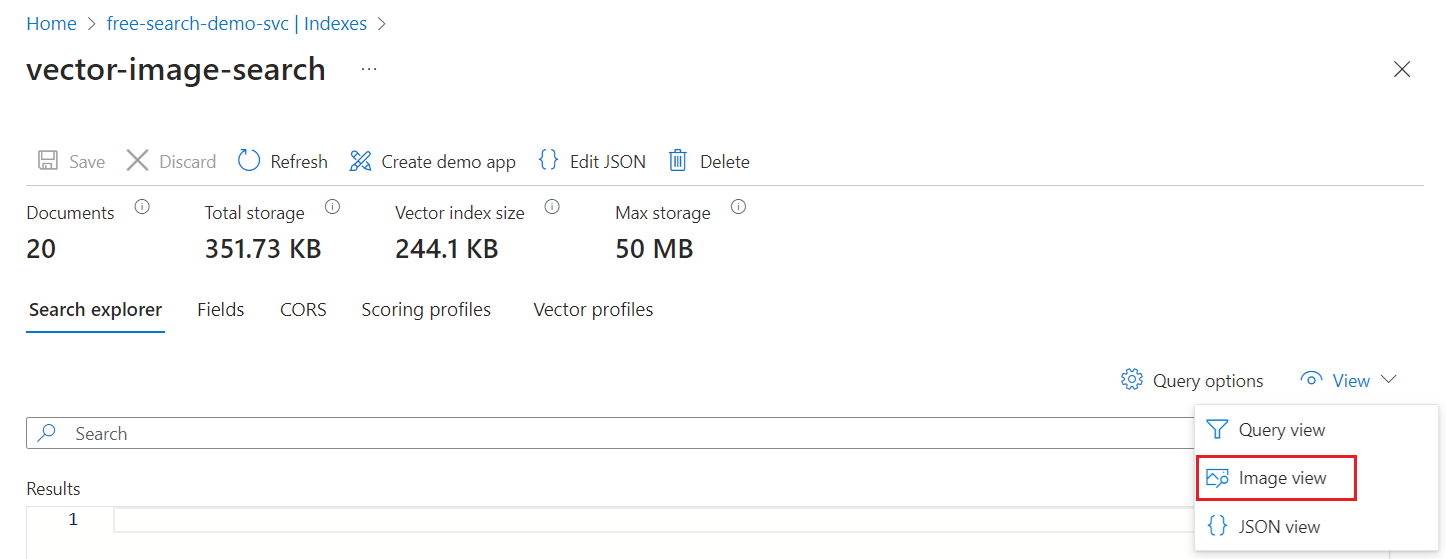
In the Azure portal, go to Search Management > Indexes, and then select the index that you created. Search explorer is the first tab.
On the View menu, select Image view.
Drag an image from the local folder that contains the sample image files. Or, open the file browser to select a local image file.
Select Search to run the query.
The top match should be the image that you searched for. Because a vector search matches on similar vectors, the search engine returns any document that's sufficiently similar to the query input, up to the
knumber of results. You can switch to JSON view for more advanced queries that include relevance tuning.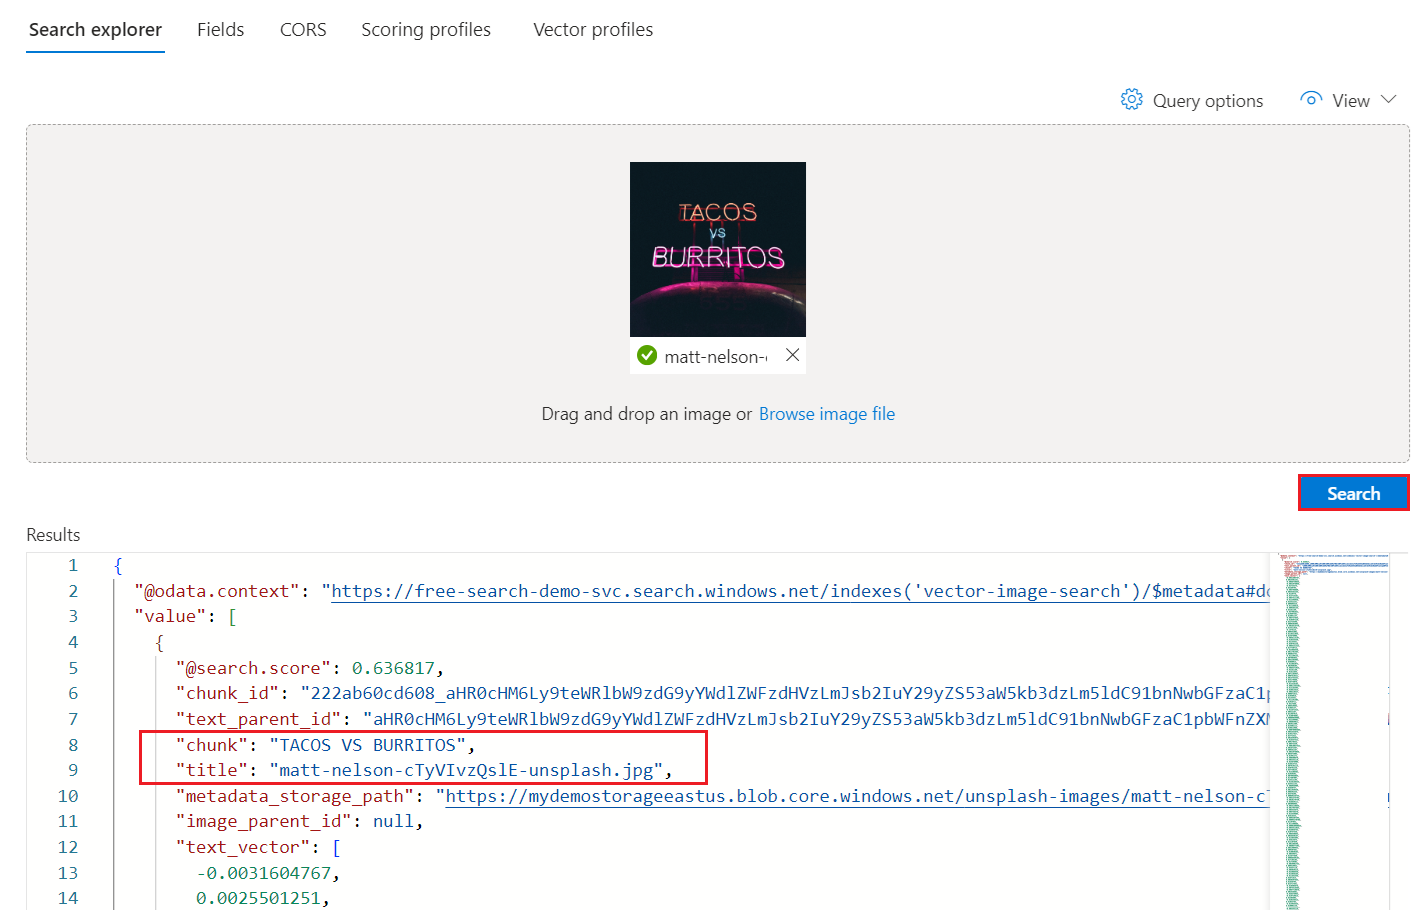
Try other query options to compare search outcomes:
- Hide vectors for more readable results (recommended).
- Select a vector field to query over. The default is text vectors, but you can specify the image vector to exclude text vectors from query execution.
Clean up
This demo uses billable Azure resources. If you no longer need the resources, delete them from your subscription to avoid charges.
Next step
This quickstart introduced you to the Import and vectorize data wizard that creates all of the necessary objects for image search. If you want to explore each step in detail, try an integrated vectorization sample.
משוב
בקרוב: במהלך 2024, נפתור בעיות GitHub כמנגנון המשוב לתוכן ונחליף אותו במערכת משוב חדשה. לקבלת מידע נוסף, ראה: https://aka.ms/ContentUserFeedback.
שלח והצג משוב עבור