Create a REST API for a token issuance start event in Azure Functions
This article describes how to create a REST API with a token issuance start event using Azure Functions in the Azure portal. You create an Azure Function app and an HTTP trigger function which can return extra claims for your token.
Prerequisites
- A basic understanding of the concepts covered in Custom authentication extensions overview.
- An Azure subscription with the ability to create Azure Functions. If you don't have an existing Azure account, sign up for a free trial or use your Visual Studio Subscription benefits when you create an account.
- A Microsoft Entra ID tenant. You can use either a customer or workforce tenant for this how-to guide.
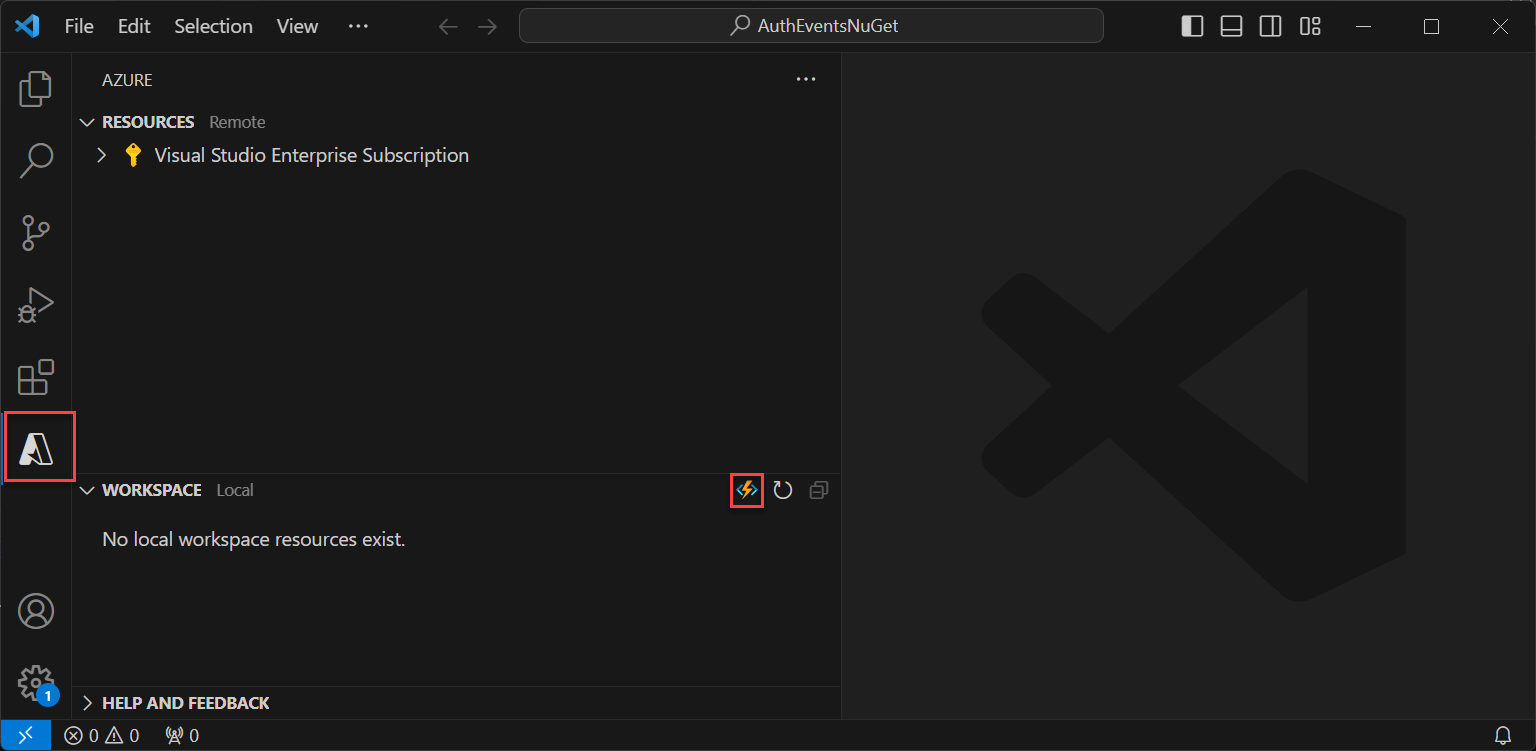
This article describes how to create a REST API for a token issuance start event using the Microsoft.Azure.WebJobs.Extensions.AuthenticationEvents NuGet library and set it up for authentication. You'll create an HTTP trigger function in Visual Studio or Visual Studio Code, configure it for authentication, and deploy it to the Azure portal, where it can be accessed through Azure Functions.
Prerequisites
- A basic understanding of the concepts covered in Custom authentication extensions overview.
- An Azure subscription with the ability to create Azure Functions. If you don't have an existing Azure account, sign up for a free trial or use your Visual Studio Subscription benefits when you create an account.
- A Microsoft Entra ID tenant. You can use either a customer or workforce tenant for this how-to guide.
- One of the following IDEs and configurations:
- Visual Studio with Azure Development workload for Visual Studio configured.
- Visual Studio Code, with the Azure Functions extension enabled.
Note
The Microsoft.Azure.WebJobs.Extensions.AuthenticationEvents NuGet library is currently in preview. Steps in this article are subject to change. For general availability implementation of implementing a token issuance start event, you can do so using the Azure portal.
Create the Azure Function app
In the Azure portal, create an Azure Function app and its associated resource, before continuing to create the HTTP trigger function.
Sign in to the Azure portal as at least an Application Administrator and Authentication Administrator.
From the Azure portal menu or the Home page, select Create a resource.
Search for and select Function App and select Create.
On the Basics page, create a function app using the settings as specified in the following table:
Setting Suggested value Description Subscription Your subscription The subscription under which the new function app will be created. Resource Group myResourceGroup Select and existing resource group, or name for the new one in which you'll create your function app. Function App name Globally unique name A name that identifies the new function app. Valid characters are a-z(case insensitive),0-9, and-.Deploy code or container image Code Option to publish code files or a Docker container. For this tutorial, select Code. Runtime stack .NET Your preferred programming language. For this tutorial, select .NET. Version 6 (LTS) In-process Version of the .NET runtime. In-process signifies that you can create and modify functions in the portal, which is recommended for this guide Region Preferred region Select a region that's near you or near other services that your functions can access. Operating System Windows The operating system is preselected for you based on your runtime stack selection. Plan type Consumption (Serverless) Hosting plan that defines how resources are allocated to your function app. Select Review + create to review the app configuration selections and then select Create. Deployment takes a few minutes.
Once deployed, select Go to resource to view your new function app.
Create an HTTP trigger function
After the Azure Function app is created, create an HTTP trigger function within the app. The HTTP trigger lets you invoke a function with an HTTP request and is referenced by your Microsoft Entra custom authentication extension.
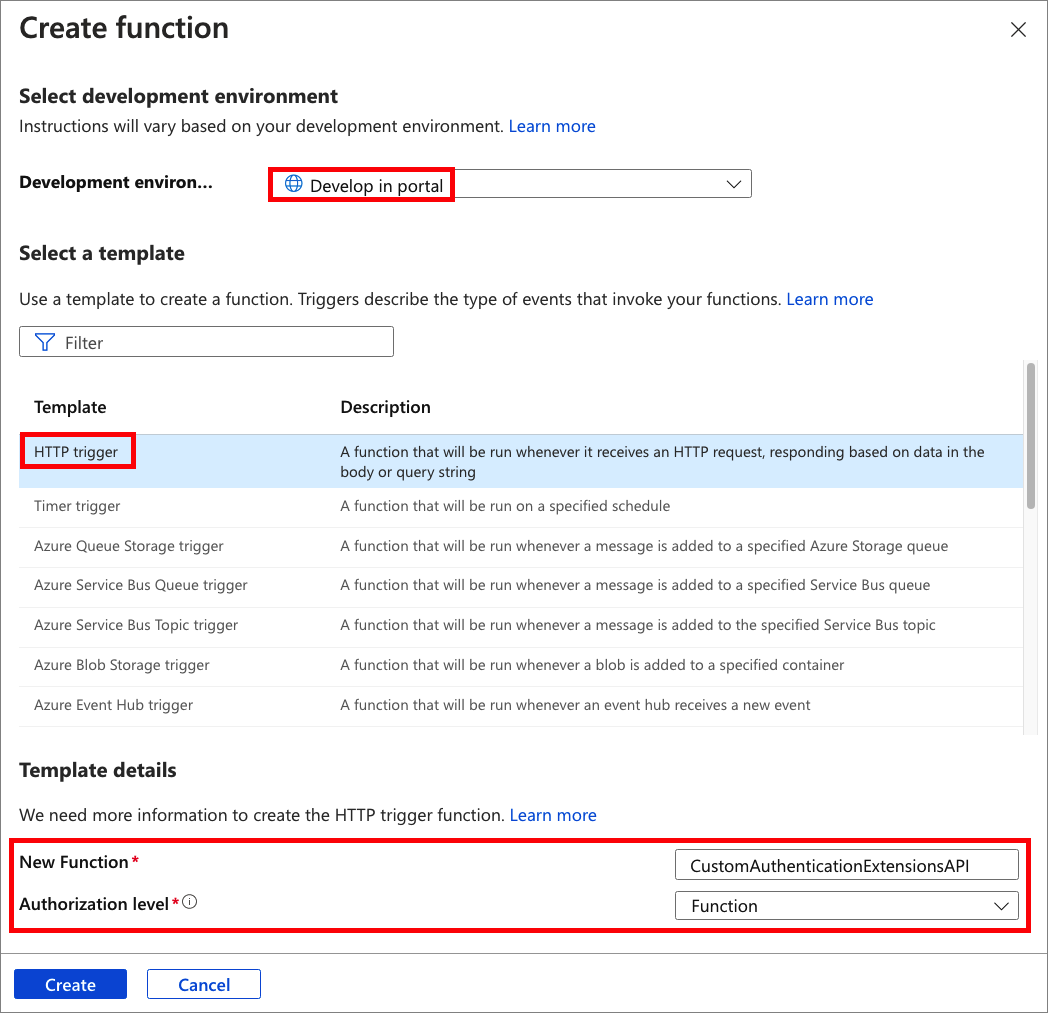
- Within the Overview page of your function app, select the Functions pane and select Create function under Create in Azure portal.
- In the Create Function window, leave the Development environment property as Develop in portal. Under Template, select HTTP trigger.
- Under Template details, enter CustomAuthenticationExtensionsAPI for the New Function property.
- For the Authorization level, select Function.
- Select Create.

Edit the function
The code reads the incoming JSON object and Microsoft Entra ID sends the JSON object to your API. In this example, it reads the correlation ID value. Then, the code returns a collection of customized claims, including the original CorrelationId, the ApiVersion of your Azure Function, a DateOfBirth and CustomRoles that is returned to Microsoft Entra ID.
From the menu, under Developer, select Code + Test.
Replace the entire code with the following snippet, then select Save.
#r "Newtonsoft.Json"
using System.Net;
using Microsoft.AspNetCore.Mvc;
using Microsoft.Extensions.Primitives;
using Newtonsoft.Json;
public static async Task<IActionResult> Run(HttpRequest req, ILogger log)
{
    log.LogInformation("C# HTTP trigger function processed a request.");
    string requestBody = await new StreamReader(req.Body).ReadToEndAsync();
    dynamic data = JsonConvert.DeserializeObject(requestBody);

    // Read the correlation ID from the Microsoft Entra request
    string correlationId = data?.data.authenticationContext.correlationId;

    // Claims to return to Microsoft Entra
    ResponseContent r = new ResponseContent();
    r.data.actions[0].claims.CorrelationId = correlationId;
    r.data.actions[0].claims.ApiVersion = "1.0.0";
    r.data.actions[0].claims.DateOfBirth = "01/01/2000";
    r.data.actions[0].claims.CustomRoles.Add("Writer");
    r.data.actions[0].claims.CustomRoles.Add("Editor");
    return new OkObjectResult(r);
}
public class ResponseContent{
    [JsonProperty("data")]
    public Data data { get; set; }
    public ResponseContent()
    {
        data = new Data();
    }
}
public class Data{
    [JsonProperty("@odata.type")]
    public string odatatype { get; set; }
    public List<Action> actions { get; set; }
    public Data()
    {
        odatatype = "microsoft.graph.onTokenIssuanceStartResponseData";
        actions = new List<Action>();
        actions.Add(new Action());
    }
}
public class Action{
    [JsonProperty("@odata.type")]
    public string odatatype { get; set; }
    public Claims claims { get; set; }
    public Action()
    {
        odatatype = "microsoft.graph.tokenIssuanceStart.provideClaimsForToken";
        claims = new Claims();
    }
}
public class Claims{
    [JsonProperty(NullValueHandling = NullValueHandling.Ignore)]
    public string CorrelationId { get; set; }
    [JsonProperty(NullValueHandling = NullValueHandling.Ignore)]
    public string DateOfBirth { get; set; }
    public string ApiVersion { get; set; }
    public List<string> CustomRoles { get; set; }
    public Claims()
    {
        CustomRoles = new List<string>();
    }
}
From the top menu, select Get Function Url, and copy the URL value. This function URL can be used when setting up a custom authentication extension.
Create and build the Azure Function app
In this step, you create an HTTP trigger function API using your IDE, install the required NuGet packages and copy in the sample code. You build the project and run the function to extract the local function URL.
Create the application
To create an Azure Function app, follow these steps:
- Open Visual Studio, and select Create a new project.
- Search for and select Azure Functions, then select Next.
- Give the project a name, such as AuthEventsTrigger. It's a good idea to match the solution name with the project name.
- Select a location for the project. Select Next.
- Select .NET 6.0 (Long Term Support) as the target framework.
- Select Http trigger as the Function type, and that Authorization level is set to Function. Select Create.
- In the Solution Explorer, rename the Function1.cs file to AuthEventsTrigger.cs, and accept the rename change suggestion.
Install NuGet packages and build the project
After creating the project, you'll need to install the required NuGet packages and build the project.
- In the top menu of Visual Studio, select Project, then Manage NuGet packages.
- Select the Browse tab, then search for and select Microsoft.Azure.WebJobs.Extensions.AuthenticationEvents in the right pane. Select Install.
- Apply and accept the changes in the popups that appear.
Add the sample code
The function API is the source of extra claims for your token. For the purposes of this article, we're hardcoding the values for the sample app. In production, you can fetch information about the user from external data store. Refer to the WebJobsAuthenticationEventsContext Class for existing properties.
In your AuthEventsTrigger.cs file, replace the entire contents of the file with the following code:
using System;
using Microsoft.Azure.WebJobs;
using Microsoft.Extensions.Logging;
using Microsoft.Azure.WebJobs.Extensions.AuthenticationEvents.TokenIssuanceStart;
using Microsoft.Azure.WebJobs.Extensions.AuthenticationEvents;

namespace AuthEventsTrigger
{
    public static class AuthEventsTrigger
    {
        [FunctionName("onTokenIssuanceStart")]
        public static WebJobsAuthenticationEventResponse Run(
            [WebJobsAuthenticationEventsTrigger] WebJobsTokenIssuanceStartRequest request, ILogger log)
        {
            try
            {
                // Checks if the request is successful and did the token validation pass
                if (request.RequestStatus == WebJobsAuthenticationEventsRequestStatusType.Successful)
                {
                    // Fetches information about the user from external data store
                    // Add new claims to the token's response
                    request.Response.Actions.Add(
                        new WebJobsProvideClaimsForToken(
                            new WebJobsAuthenticationEventsTokenClaim("dateOfBirth", "01/01/2000"),
                            new WebJobsAuthenticationEventsTokenClaim("customRoles", "Writer", "Editor"),
                            new WebJobsAuthenticationEventsTokenClaim("apiVersion", "1.0.0"),
                            new WebJobsAuthenticationEventsTokenClaim(
                                "correlationId",
                                request.Data.AuthenticationContext.CorrelationId.ToString())));
                }
                else
                {
                    // If the request fails, such as in token validation, output the failed request status,
                    // such as in token validation or response validation.
                    log.LogInformation(request.StatusMessage);
                }
                return request.Completed();
            }
            catch (Exception ex)
            {
                return request.Failed(ex);
            }
        }
    }
}
Build and run the project locally
The project has been created, and the sample code has been added. Using your IDE, we need to build and run the project locally to extract the local function URL.
- Navigate to Build in the top menu, and select Build Solution.
- Press F5 or select AuthEventsTrigger from the top menu to run the function.
- Copy the Function url from the terminal that popups up when running the function. This can be used when setting up a custom authentication extension.
Run the function locally (recommended)
It's a good idea to test the function locally before deploying it to Azure. We can use a dummy JSON body that imitates the request that Microsoft Entra ID sends to your REST API. Use your preferred API testing tool to call the function directly.
In your IDE, open local.settings.json and replace the code with the following JSON. We can set
"AuthenticationEvents__BypassTokenValidation"totruefor local testing purposes.{ "IsEncrypted": false, "Values": { "AzureWebJobsStorage": "", "AzureWebJobsSecretStorageType": "files", "FUNCTIONS_WORKER_RUNTIME": "dotnet", "AuthenticationEvents__BypassTokenValidation" : true } }Using your preferred API testing tool, create a new HTTP request and set the HTTP method to
POST.Use the following JSON body that imitates the request Microsoft Entra ID sends to your REST API.
{
    "type": "microsoft.graph.authenticationEvent.tokenIssuanceStart",
    "source": "/tenants/aaaabbbb-0000-cccc-1111-dddd2222eeee/applications/00001111-aaaa-2222-bbbb-3333cccc4444",
    "data": {
        "@odata.type": "microsoft.graph.onTokenIssuanceStartCalloutData",
        "tenantId": "aaaabbbb-0000-cccc-1111-dddd2222eeee",
        "authenticationEventListenerId": "11112222-bbbb-3333-cccc-4444dddd5555",
        "customAuthenticationExtensionId": "22223333-cccc-4444-dddd-5555eeee6666",
        "authenticationContext": {
            "correlationId": "aaaa0000-bb11-2222-33cc-444444dddddd",
            "client": {
                "ip": "127.0.0.1",
                "locale": "en-us",
                "market": "en-us"
            },
            "protocol": "OAUTH2.0",
            "clientServicePrincipal": {
                "id": "aaaaaaaa-0000-1111-2222-bbbbbbbbbbbb",
                "appId": "00001111-aaaa-2222-bbbb-3333cccc4444",
                "appDisplayName": "My Test application",
                "displayName": "My Test application"
            },
            "resourceServicePrincipal": {
                "id": "aaaaaaaa-0000-1111-2222-bbbbbbbbbbbb",
                "appId": "00001111-aaaa-2222-bbbb-3333cccc4444",
                "appDisplayName": "My Test application",
                "displayName": "My Test application"
            },
            "user": {
                "companyName": "Casey Jensen",
                "createdDateTime": "2023-08-16T00:00:00Z",
                "displayName": "Casey Jensen",
                "givenName": "Casey",
                "id": "00aa00aa-bb11-cc22-dd33-44ee44ee44ee",
                "mail": "casey@contoso.com",
                "onPremisesSamAccountName": "Casey Jensen",
                "onPremisesSecurityIdentifier": "<Enter Security Identifier>",
                "onPremisesUserPrincipalName": "Casey Jensen",
                "preferredLanguage": "en-us",
                "surname": "Jensen",
                "userPrincipalName": "casey@contoso.com",
                "userType": "Member"
            }
        }
    }
}
Select Send, and you should receive a JSON response similar to the following:
{
    "data": {
        "@odata.type": "microsoft.graph.onTokenIssuanceStartResponseData",
        "actions": [
            {
                "@odata.type": "microsoft.graph.tokenIssuanceStart.provideClaimsForToken",
                "claims": {
                    "customClaim1": "customClaimValue1",
                    "customClaim2": [
                        "customClaimString1",
                        "customClaimString2"
                    ]
                }
            }

        ]
    }
}
Deploy the function and publish to Azure
The function needs to be deployed to Azure using our IDE. Check that you're correctly signed in to your Azure account so the function can be published.
In the Solution Explorer, right-click on the project and select Publish.
In Target, select Azure, then select Next.
Select Azure Function App (Windows) for the Specific Target, select Azure Function App (Windows), then select Next.
In the Function instance, use the Subscription name dropdown to select the subscription under which the new function app will be created in.
Select where you want to publish the new function app, and select Create New.
On the Function App (Windows) page, use the function app settings as specified in the following table, then select Create.
Setting Suggested value Description Name Globally unique name A name that identifies the new function app. Valid characters are a-z(case insensitive),0-9, and-.Subscription Your subscription The subscription under which the new function app is created. Resource Group myResourceGroup Select an existing resource group, or name the new one in which you'll create your function app. Plan type Consumption (Serverless) Hosting plan that defines how resources are allocated to your function app. Location Preferred region Select a region that's near you or near other services that your functions can access. Azure Storage Your storage account An Azure storage account is required by the Functions runtime. Select New to configure a general-purpose storage account. Application Insights Default A feature of Azure Monitor. This is autoselected, select the one you wish to use or configure a new one. Wait a few moments for your function app to be deployed. Once the window closes, select Finish.
A new Publish pane opens. At the top, select Publish. Wait a few minutes for your function app to be deployed and show up in the Azure portal.
Configure authentication for your Azure Function
There are three ways to set up authentication for your Azure Function:
- Set up authentication in the Azure portal using environment variables (recommended)
- Set up authentication in your code using
WebJobsAuthenticationEventsTriggerAttribute - Azure App service authentication and authorization
By default, the code has been set up for authentication in the Azure portal using environment variables. Use the tabs below to select your preferred method of implementing environment variables, or alternatively, refer to the built-in Azure App service authentication and authorization. For setting up environment variables, use the following values:
| Name | Value |
|---|---|
| AuthenticationEvents__AudienceAppId | Custom authentication extension app ID which is set up in Configure a custom claim provider for a token issuance event |
| AuthenticationEvents__AuthorityUrl | • Workforce tenant https://login.microsoftonline.com/<tenantID> • External tenant https://<mydomain>.ciamlogin.com/<tenantID> |
| AuthenticationEvents__AuthorizedPartyAppId | 99045fe1-7639-4a75-9d4a-577b6ca3810f or another authorized party |
Set up authentication in the Azure portal using environment variables
- Sign in to the Azure portal as at least an Application Administrator or Authentication Administrator.
- Navigate to the function app you created, and under Settings, select Configuration.
- Under Application settings, select New application setting and add the environment variables from the table and their associated values.
- Select Save to save the application settings.
Next step
משוב
בקרוב: במהלך 2024, נפתור בעיות GitHub כמנגנון המשוב לתוכן ונחליף אותו במערכת משוב חדשה. לקבלת מידע נוסף, ראה: https://aka.ms/ContentUserFeedback.
שלח והצג משוב עבור