הערה
גישה לעמוד זה דורשת אישור. אתה יכול לנסות להיכנס או לשנות תיקיות.
גישה לעמוד זה דורשת אישור. אתה יכול לנסות לשנות מדריכים.
The Fabric Data Engineering VS Code extension supports a pro-developer experience for exploring Microsoft Fabric lakehouses, and authoring Fabric notebooks and Spark job definitions.
In this article, you learn more about the extension, including how to get started with the necessary prerequisites.
Visual Studio Code (VS Code) is a one of the most popular lightweight source code editors; it runs on your desktop and is available for Windows, macOS, and Linux. By installing the Fabric Data Engineering VS Code extension, you can author, run, and debug your notebook and Spark job definition locally in VS Code. You can also post the code to the remote Spark compute in your Fabric workspace to run or debug. The extension also allows you to browse your lakehouse data, including tables and raw files, in VS Code.
Prerequisites
Prerequisites for the VS Code extension:
- Install Visual Studio Code.
- Install the Jupyter extension for VS Code from the Visual Studio Code Marketplace.
Install the extension and prepare your environment
Search for Fabric Data Engineering VS Code in the VS Code extension marketplace and install the extension.
After the extension installation completes, restart VS Code. VS Code lists the icon for the extension at the activity bar.
Access the command palette
You can access many of the extension's features through the VS Code command palette. To open the command palette:
- On Windows/Linux: Press Ctrl+Shift+P
- On macOS: Press Cmd+Shift+P
Alternatively, you can access it from the menu by selecting View > Command Palette.
Once the command palette opens, start typing the command name (for example, "Fabric Data Engineering") to filter and find the commands the extension provides.
Local working directory
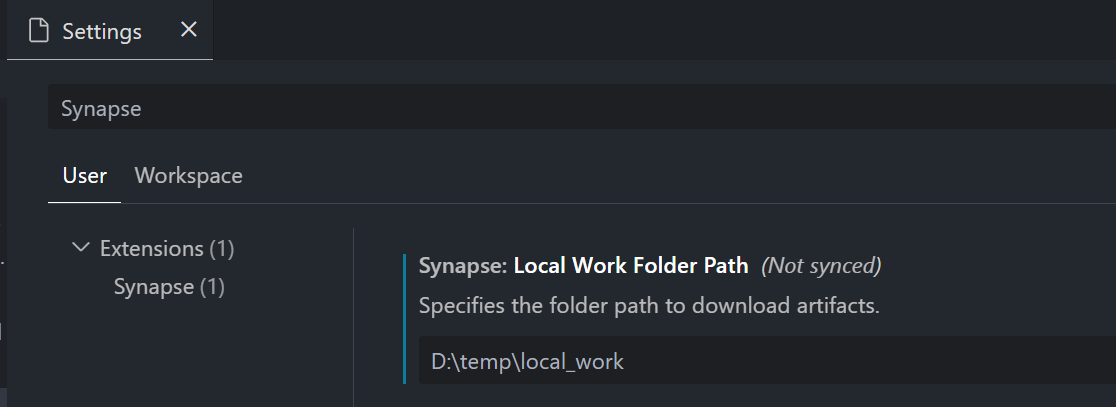
To edit a notebook, you must have a local copy of the notebook content. The local working directory of the extension serves as the local root folder for all downloaded notebooks, even notebooks from different workspaces. By invoking the command Fabric Data Engineering: Set Local Work Folder, you can specify a folder as the local working directory for the extension.
To validate the setup, open the extension settings and check the details there:
Sign in and out of your account
From the VS Code command palette, enter the
Fabric Data Engineering: Sign Incommand to sign in to the extension. A separate browser sign-in page appears.Enter your username and password.
After you successfully sign in, the VS Code status bar displays your username to indicate that you're signed in.
To sign out of the extension, enter the command
Fabric Data Engineering: Sign Out.
Choose a workspace to work with
To select a Fabric workspace:
You must have a workspace created. If you don't have one, you can create one in the Fabric portal. For more information, see Create a workspace.
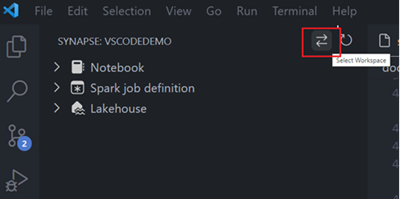
Once you have a workspace, choose it by selecting the Select Workspace option. A list appears of all workspaces that you have access to; select the one you want from the list.
Current Limitations
- The extension doesn't support shell commands that start with "!".
Related content
Now you have a basic understanding of how to install and set up the Fabric Data Engineering VS Code extension. The next articles explain how to develop your notebooks and Spark job definitions locally in VS Code.
- To get started with notebooks, see Create and manage Microsoft Fabric notebooks in Visual Studio Code.
- To get started with Spark job definitions, see Create and manage Apache Spark job definitions in Visual Studio Code.


