הערה
הגישה לדף זה מחייבת הרשאה. באפשרותך לנסות להיכנס או לשנות מדריכי כתובות.
הגישה לדף זה מחייבת הרשאה. באפשרותך לנסות לשנות מדריכי כתובות.
Note
This feature is currently in public preview. This preview is provided without a service-level agreement, and isn't recommended for production workloads. Certain features might not be supported or might have constrained capabilities. For more information, see Supplemental Terms of Use for Microsoft Azure Previews.
In this tutorial step, you create a graph model and load data from OneLake. A graph model is the foundation for building your graph and defines the structure of your nodes and edges.
This step assumes you already loaded the sample data into a lakehouse within your workspace.
Create a graph model
In Microsoft Fabric, select the workspace where you want to create the graph model (for example, My workspace).
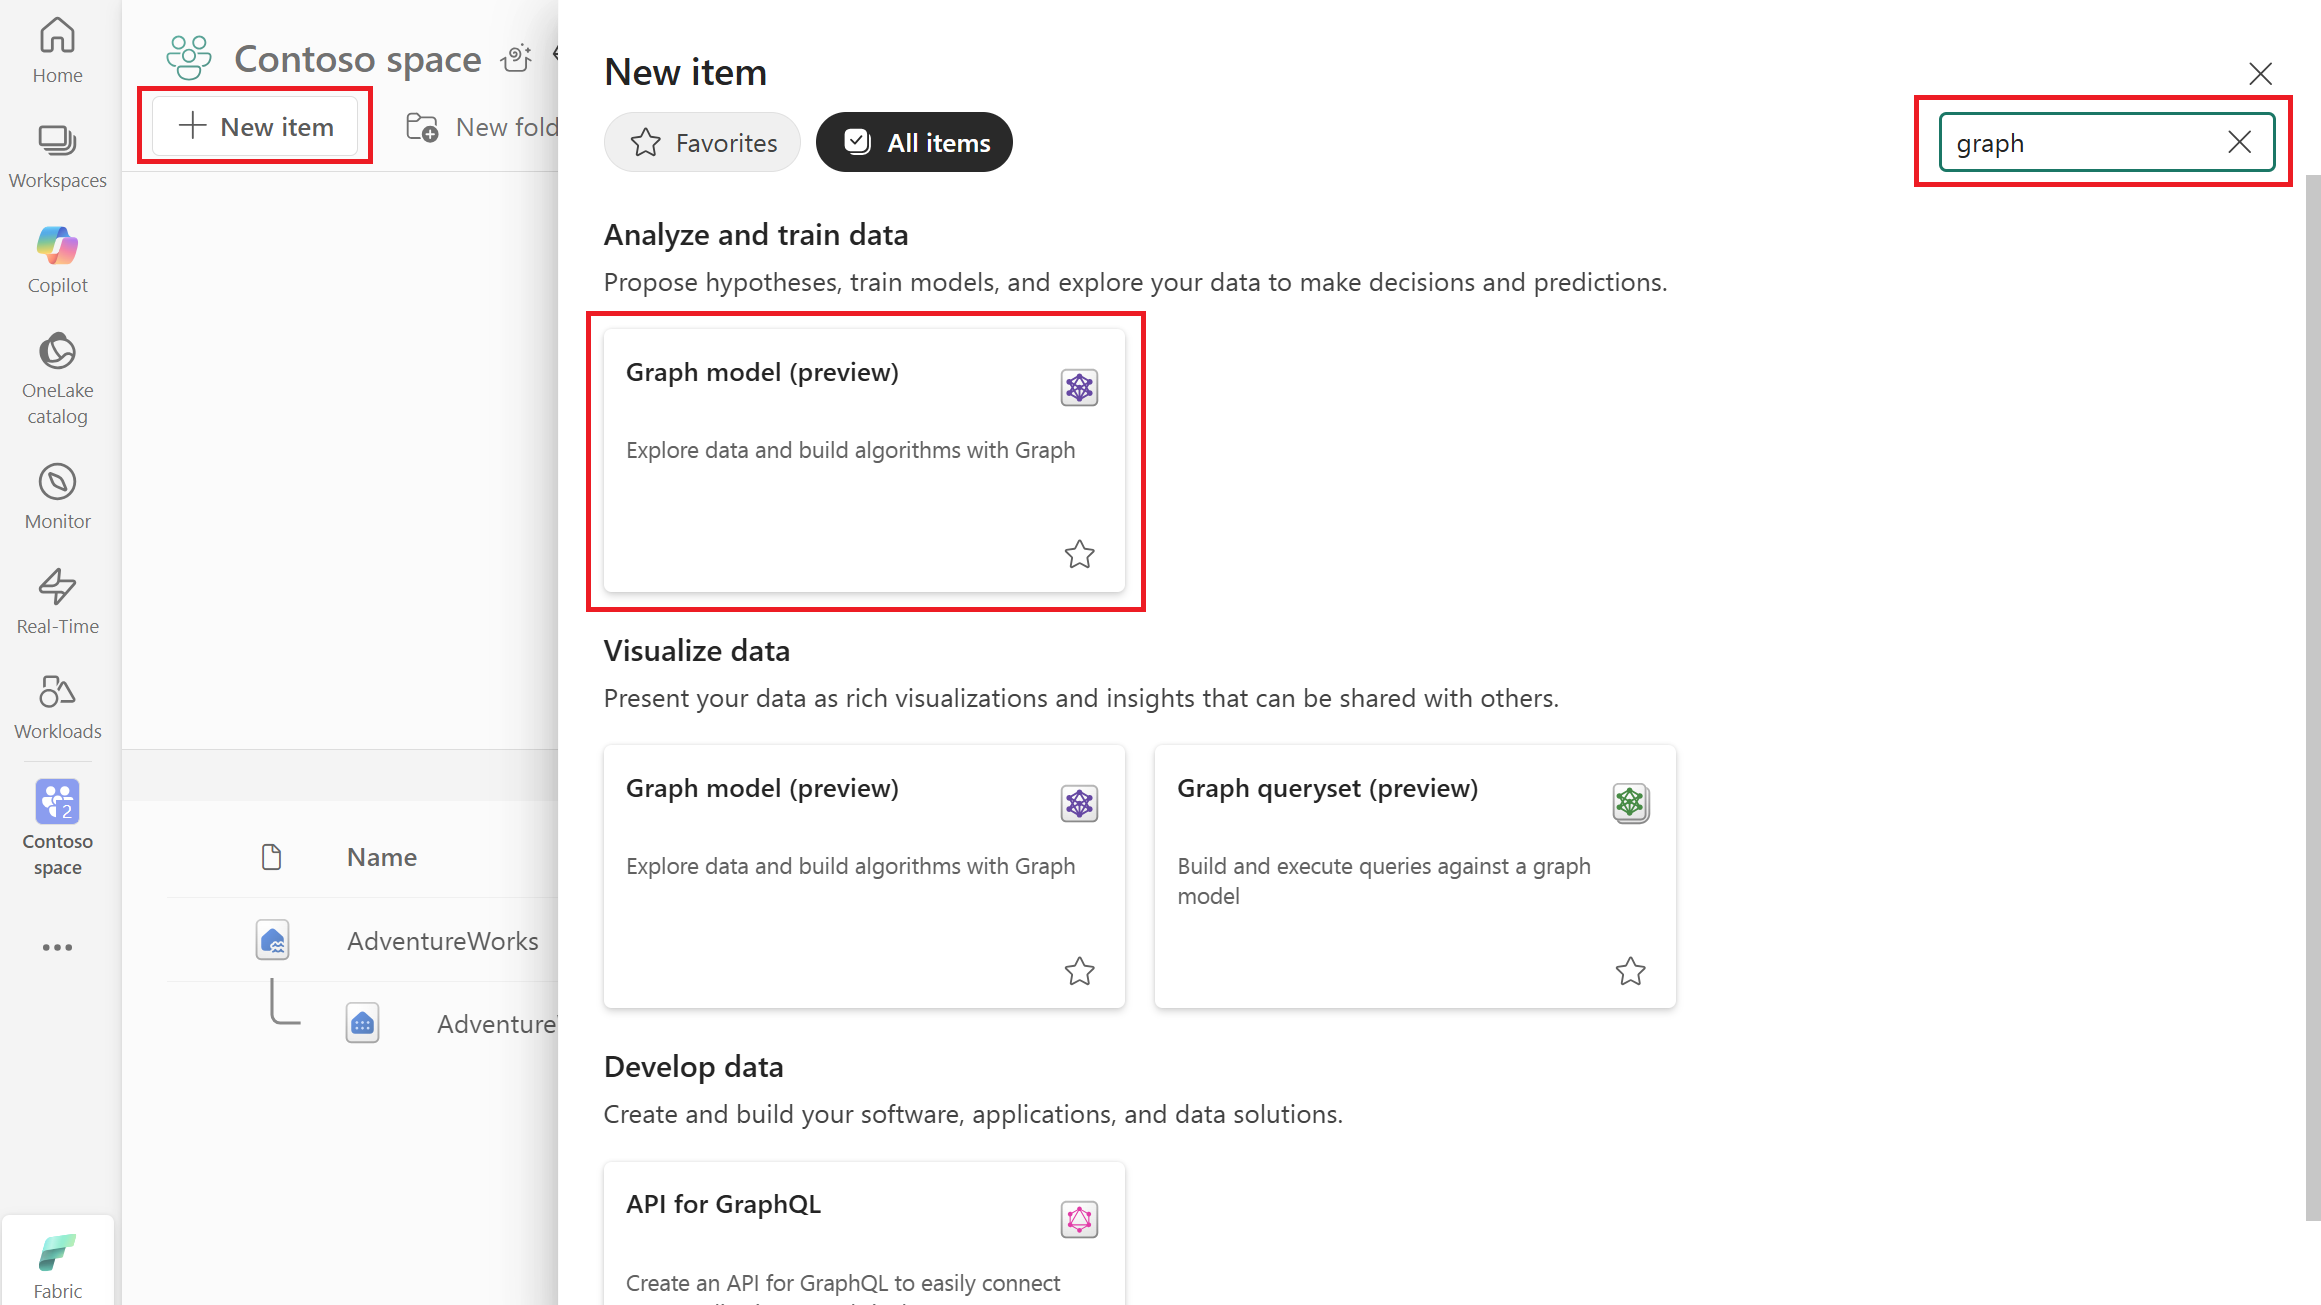
Select + New item.
Select Analyze and train data > Graph model (preview).
Tip
Alternatively, enter "graph" in the search box and press Enter to search for graph items.
Enter a name for your graph model, such as
AdventureWorksGraph, and select Create.

After creating the graph model, you're taken to the graph view where you can see Save, Get data, Add node, and Add edge buttons.
Load data into the graph
To load data into your graph from OneLake, follow these steps:
In your graph model, select Get data.
In the OneLake catalog dialog, select your lakehouse (for example, AdventureWorksLakehouse), and then select Add.
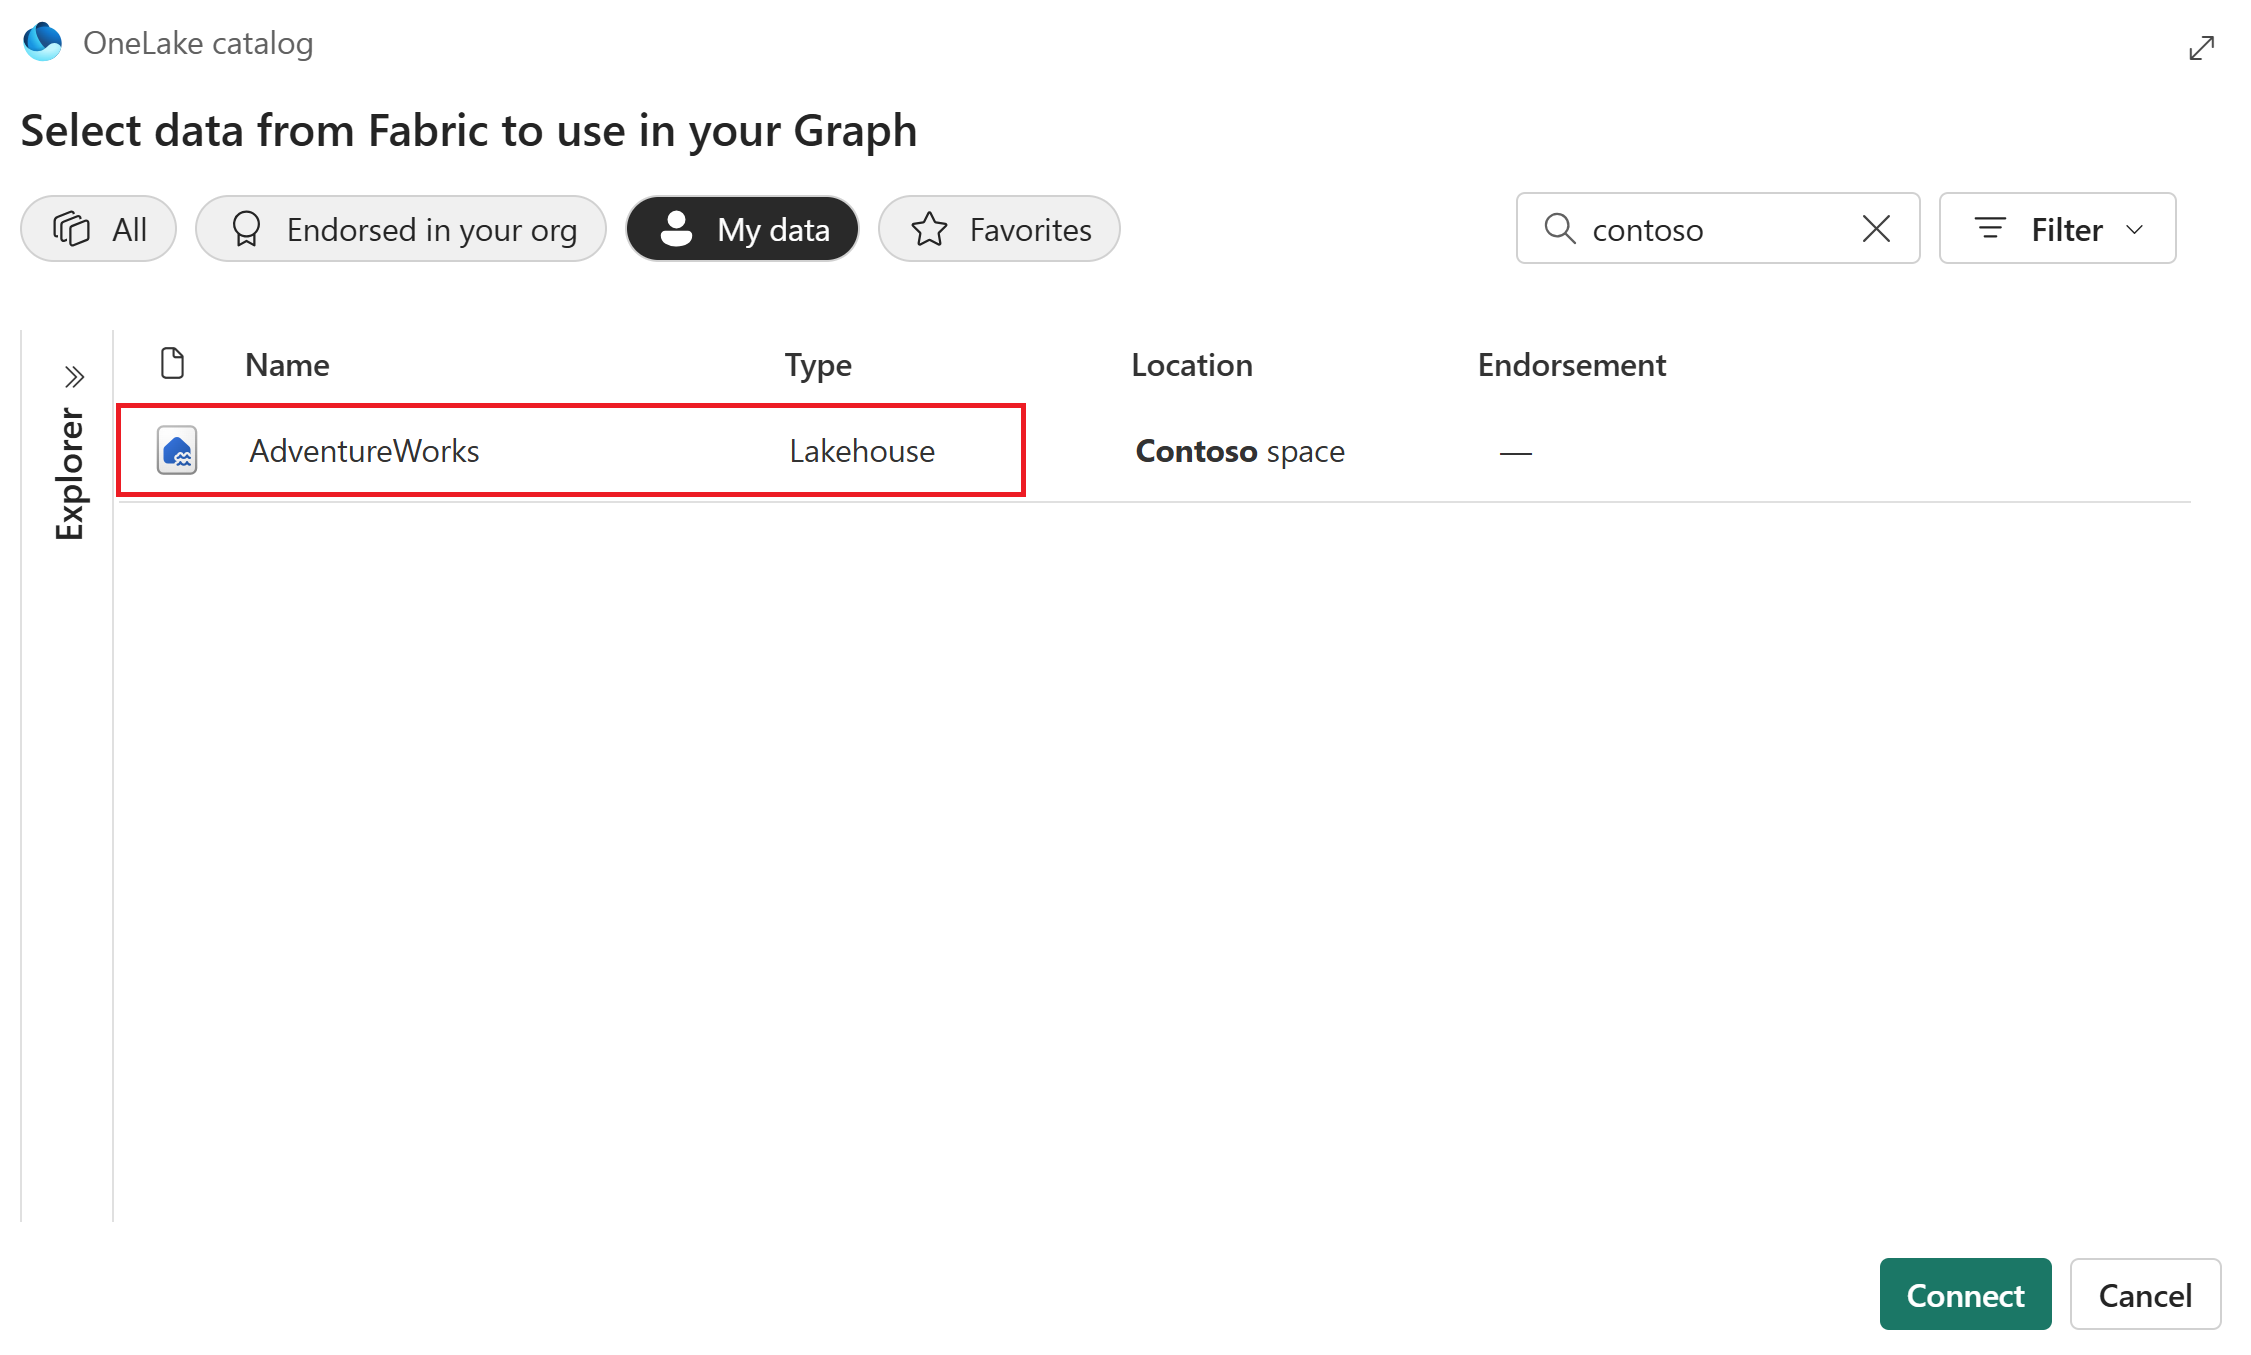
In the Choose data pane, select your lakehouse (for example, AdventureWorksLakehouse) to automatically select all tables under it.
Select Load.

You should now see the data available for use in your graph.
