הערה
הגישה לדף זה מחייבת הרשאה. באפשרותך לנסות להיכנס או לשנות מדריכי כתובות.
הגישה לדף זה מחייבת הרשאה. באפשרותך לנסות לשנות מדריכי כתובות.
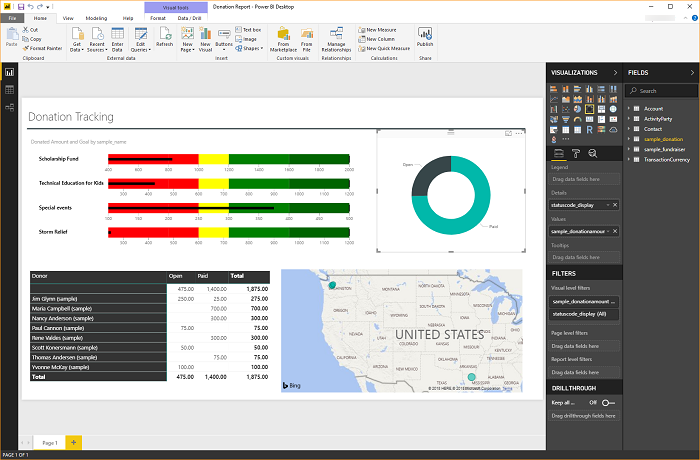
Microsoft Dataverse allows you to connect directly to your data using Power BI Desktop to create reports and publish them to Power BI. From Power BI, reports can be used in dashboards, shared to other users, and accessed cross platform on Power BI mobile apps.
Prerequisites
To use Power BI with Dataverse, you need the following items:
- Download and install Power BI Desktop, which is a free application that runs on your local computer. You can download Power BI desktop here.
- A Power Platform environment with the following privileges:
- To access data in a table, you must have read privileges to the table.
- To modify a table in Power Apps (make.powerapps.com), you must have a security role that includes maker privileges, such as system customizer or environment maker.
- You must have the appropriate Power BI license to build and share Power BI reports.
- To use the Dataverse connector, the Enable TDS endpoint setting must be enabled in your environment. More information: Manage feature settings
Note
Most proxy servers don’t handle the Tabular Data Stream (TDS) protocol data used by the Dataverse connector for Power BI.
Connect to Dataverse using a connector
- Open Power BI Desktop. Select Get data from other sources.
- In the Get Data list, select Dataverse, and then select Connect.
- If you're prompted, select or enter your user credentials, and then select Connect.
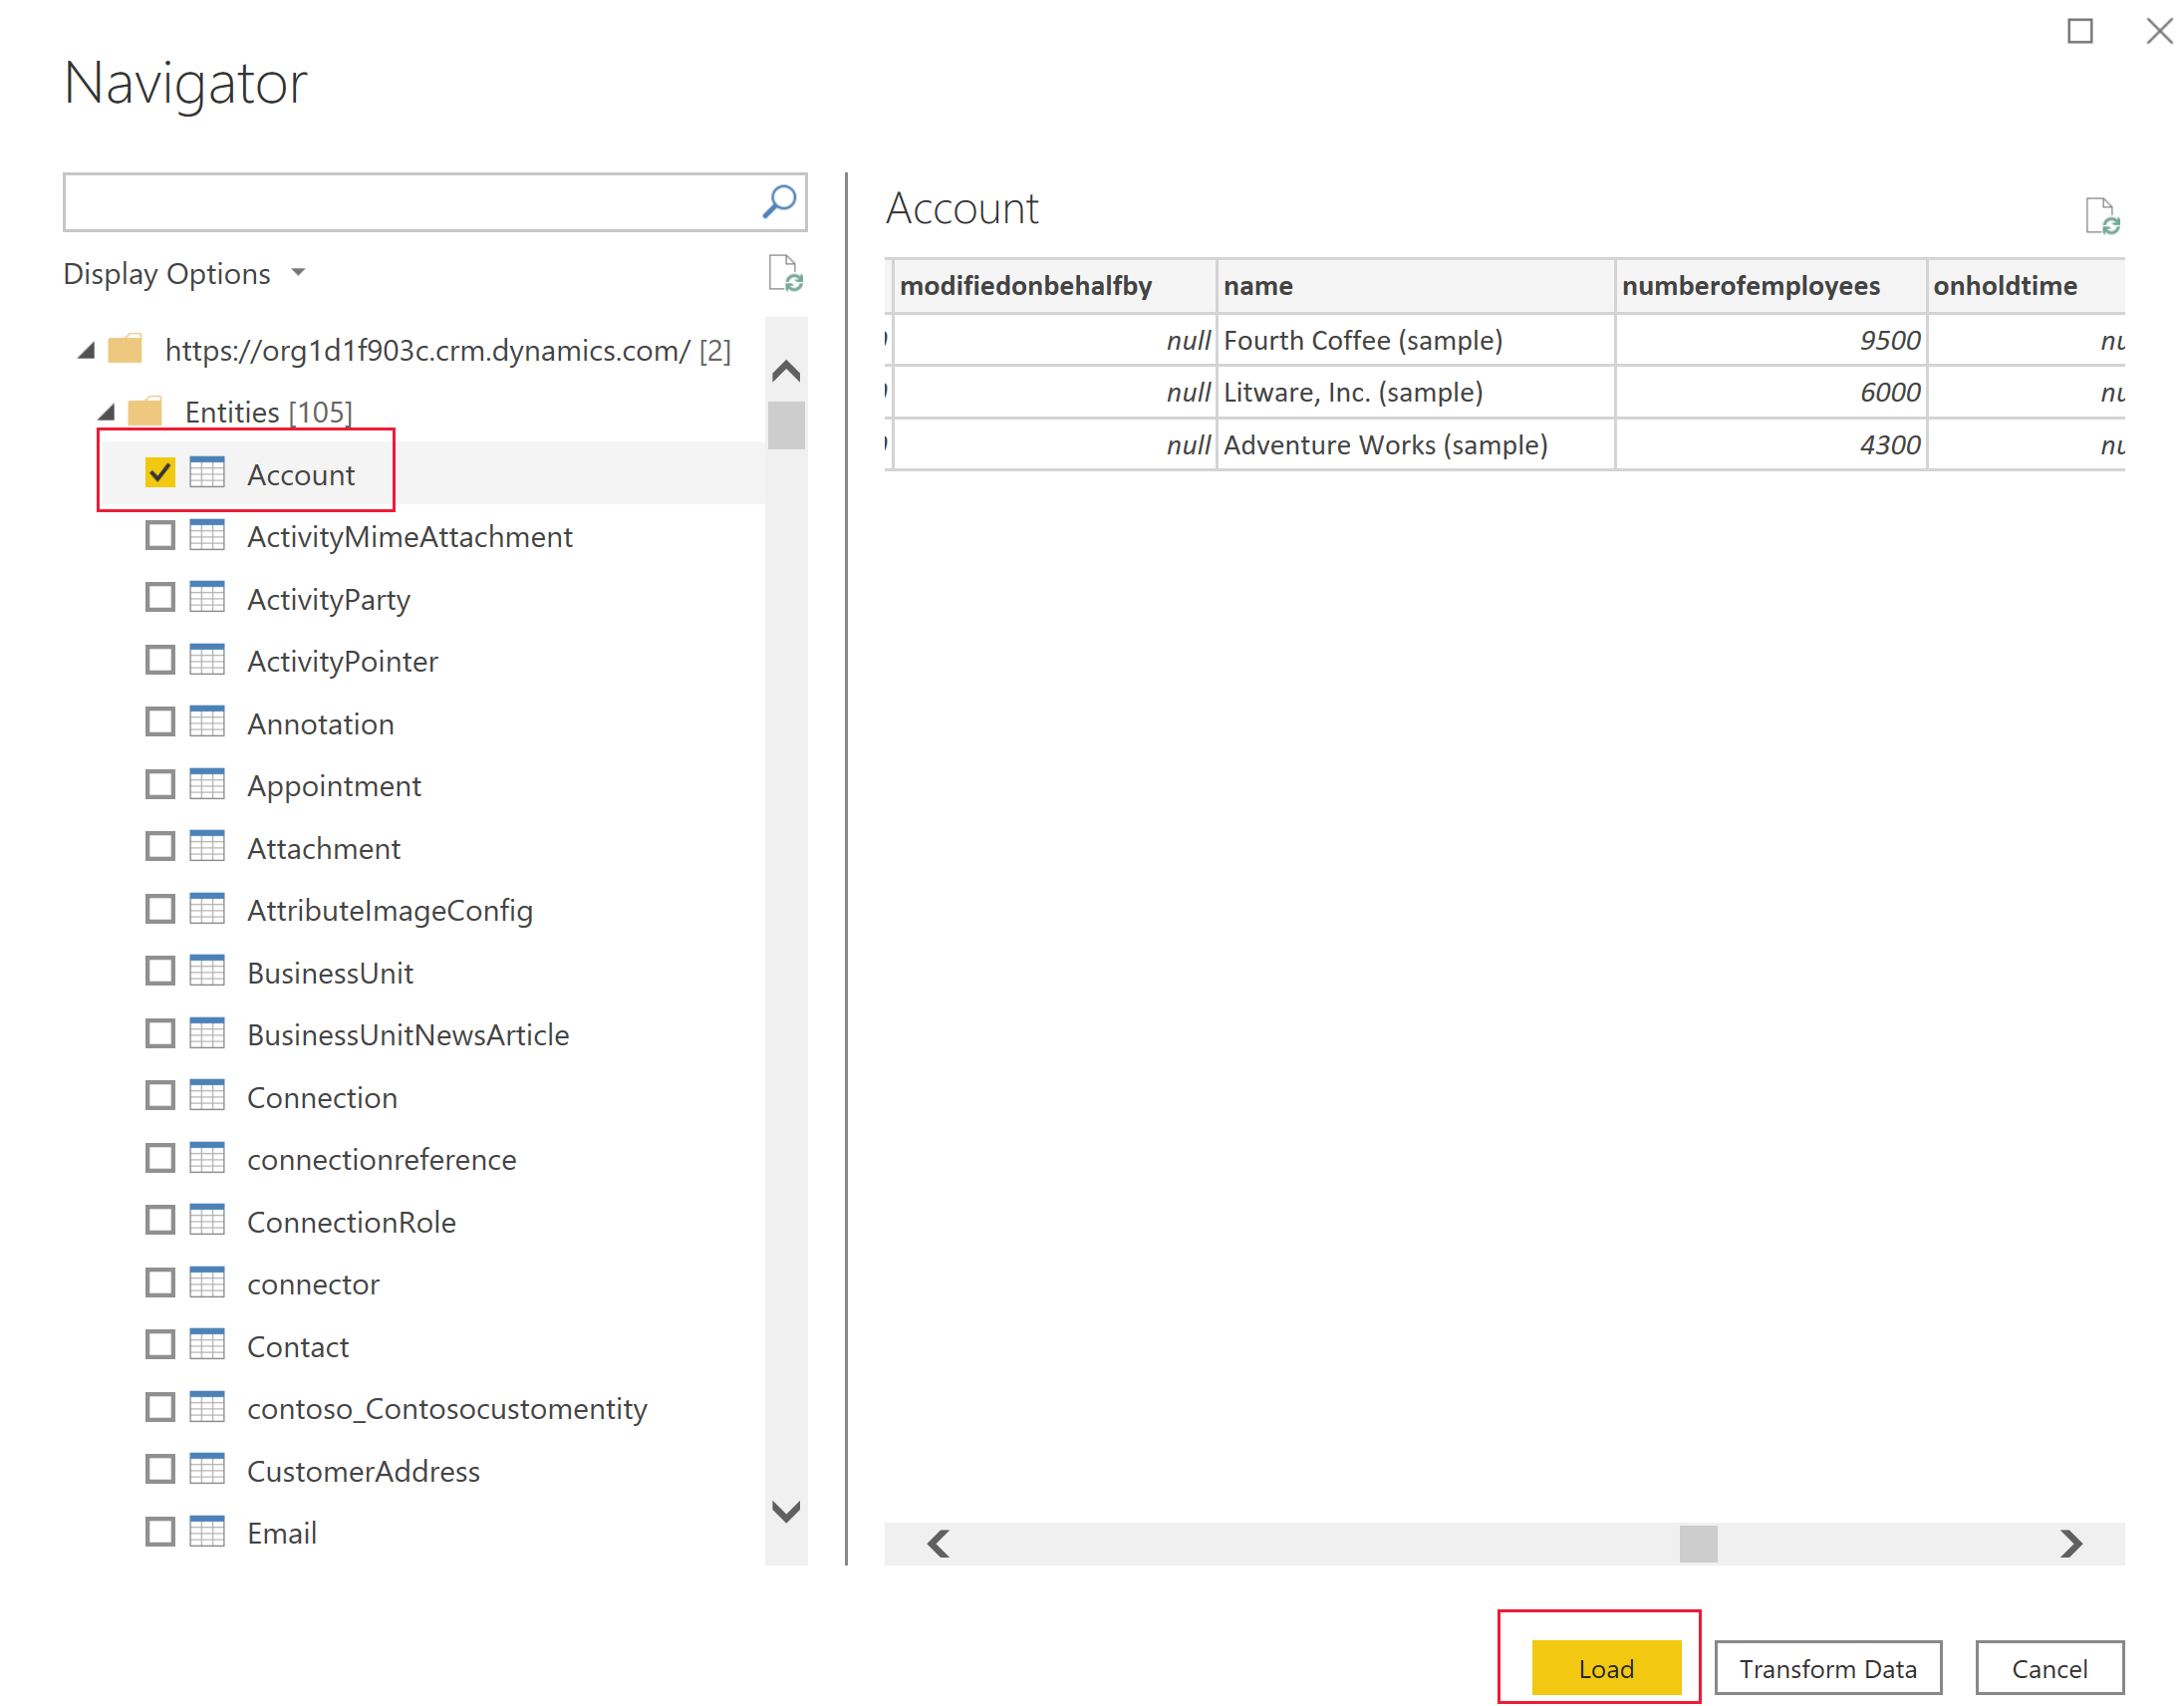
- The list of Power Platform environments with Dataverse appears. In the list of environments, expand the environment you want, select the tables you want, and then select Load.
- Select from the following Data Connectivity mode options:
- Import: We recommend that you import data to Power BI wherever possible. With this mode, data is cached in the Power BI service and imported on a scheduled interval.
- DirectQuery: Connects directly to the data in Dataverse. Use this mode for real-time data retrieval. This mode can also more strictly enforce the Dataverse security model. More information: DirectQuery model guidance in Power BI Desktop.
- Select OK. You might be prompted to sign in using the same credentials you use to connect to Power Apps and Dataverse. Select Connect.
Important
To use the Dataverse connector, TCP ports 1433 and/or 5558 need to be open to connect. If only port 5558 is enabled, you must append that port number to the environment URL, such as yourenvironmentid.crm.dynamics.com,5558.
Build reports using Dataverse tables
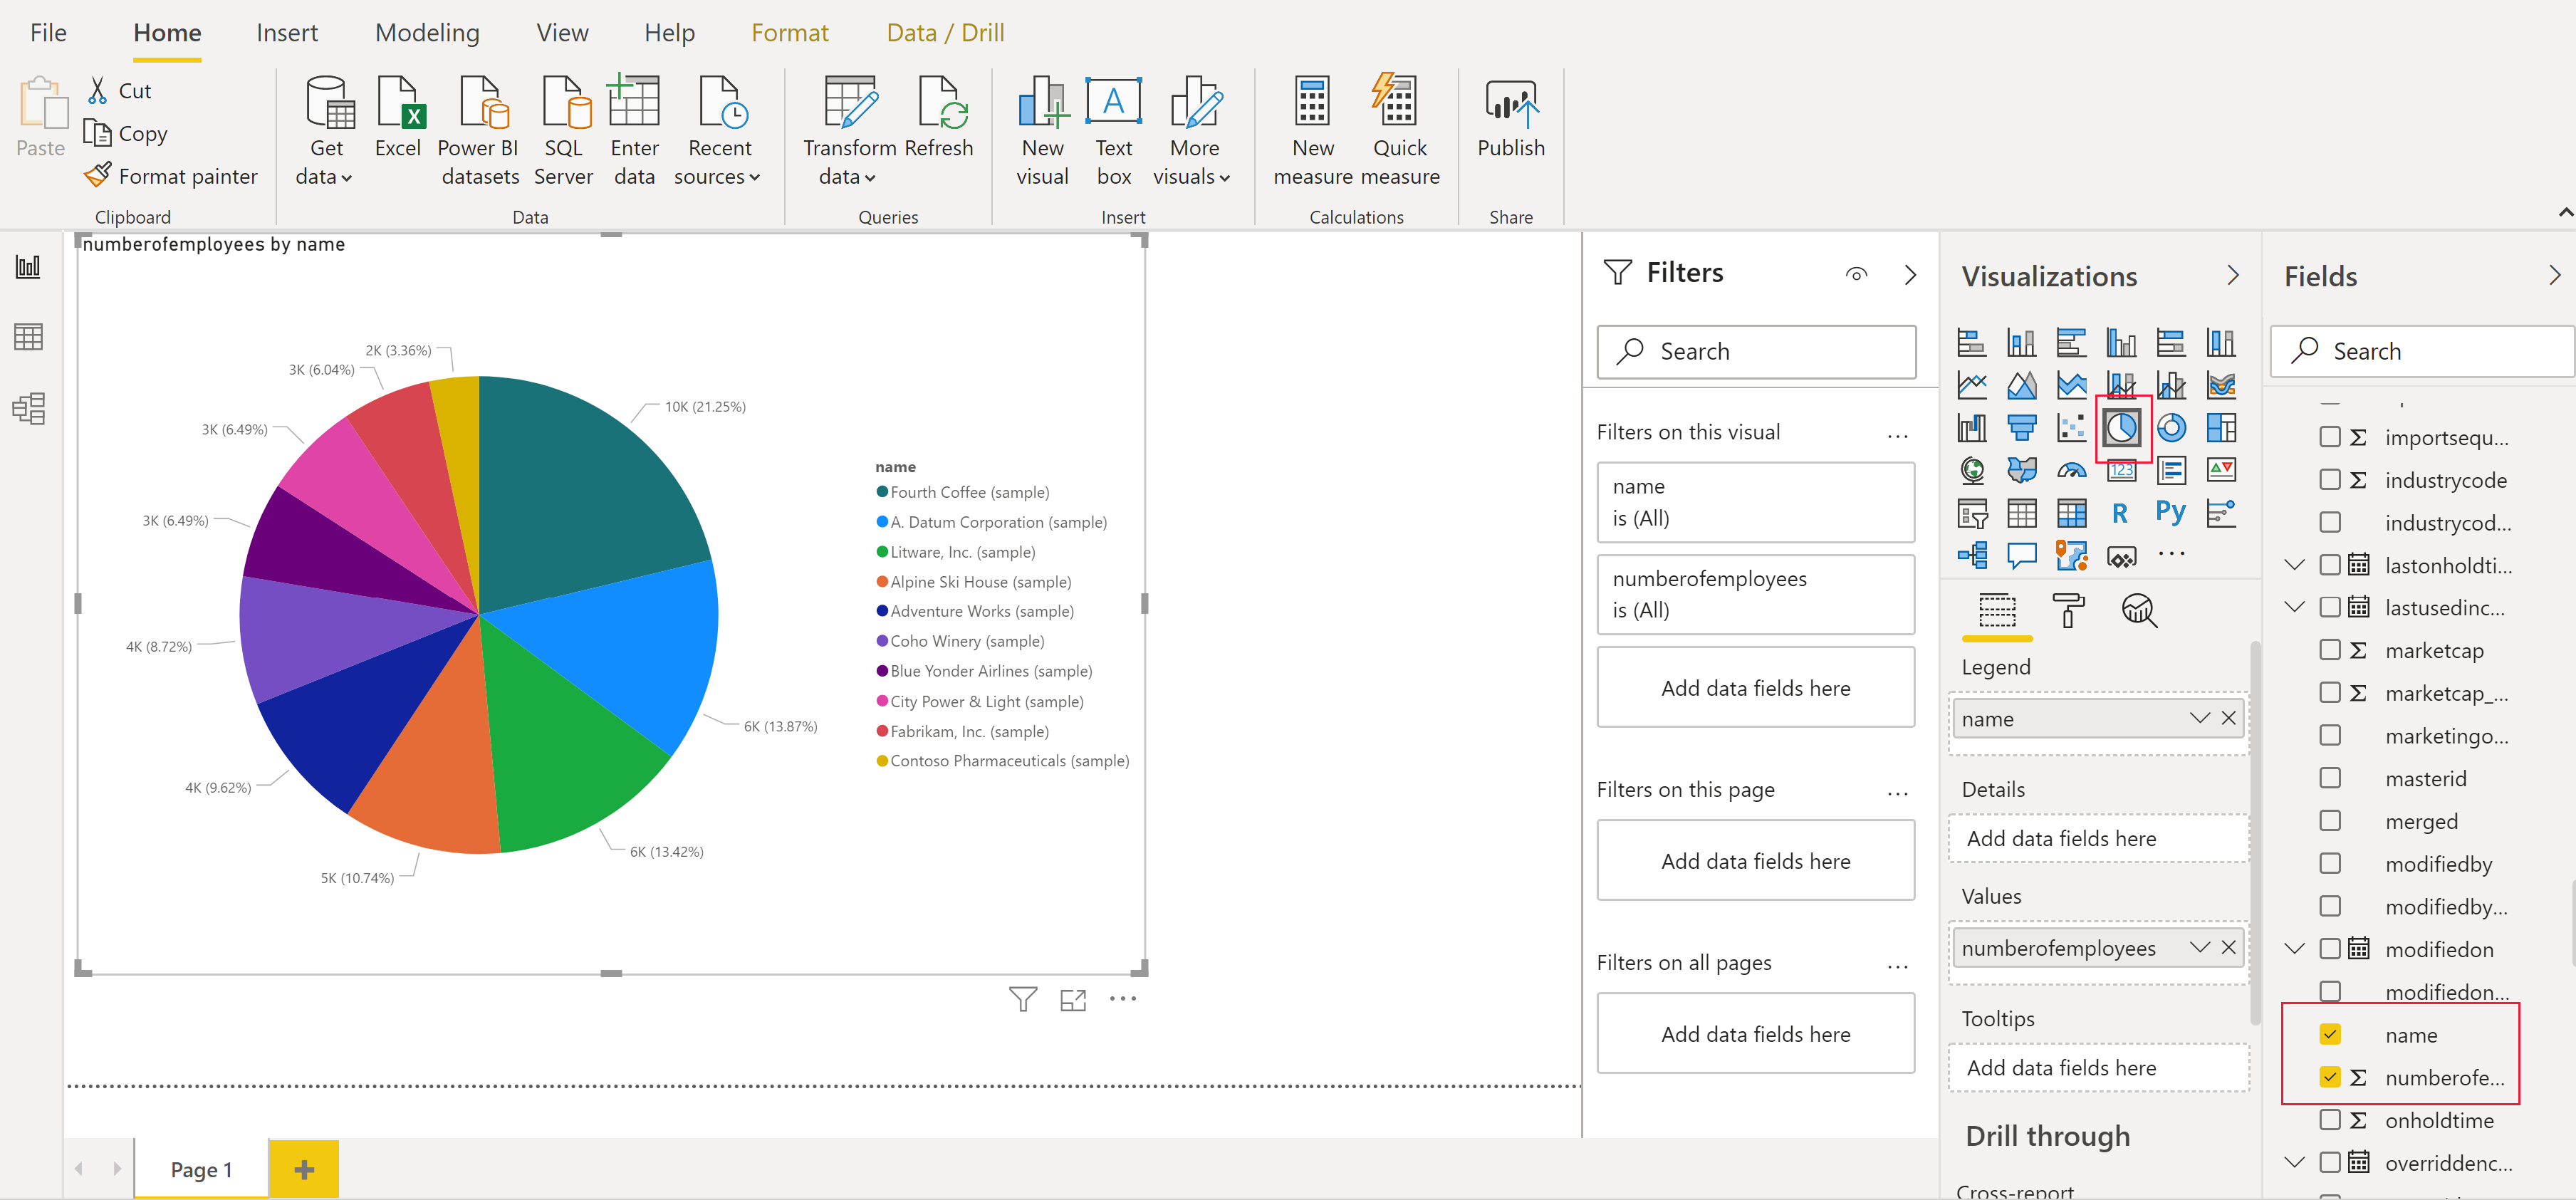
After loading the tables by using a connector, you can begin building reports, or repeat the previous steps to add additional tables. For example, in the Columns pane, select the name column and then select the numberofemployees column. In the Visualizations pane, select Pie chart. These selections add a new visualization to your report canvas.
Special column types
Choice columns
Choice columns are used in tables to provide a drop-down list of items to a user to make a single selection in apps and flows. When using the Dataverse connector, choice columns are presented as two columns to show both the unique value, and the display item value.
For example, if you had a choice column on your table called approvalstatus, you would see two columns in Power BI:
approvalstatus- This column shows a unique integer value for each item in your choice.approvalstatuscan help when you apply filters so the filters won't be impacted when you make future changes to the display name.approvalstatusname- This column shows the friendly display name of the item and is most commonly used when presenting the option in a table or chart.approvalstatusapprovalstatusname1 Submitted 2 In Review 3 Approved 4 Rejected
Performance impact and choice name columns
When retrieving the label name for a choice column, Dataverse makes a join with the internal stringmap table (where localized labels are stored). This is executed for each label/name column. Note that, this join and doing filters against the label name column, rather than the value column, can significantly impact report query performance.
Choices columns
Choices are similar to choice columns with the difference being that users can select multiple items from the list. Choices aren't currently fully supported with the Dataverse connector. When you use the Dataverse connector with choices columns, you only receive the integer values, which are comma separated. The item label name columns aren't returned. For more information about the Dataverse data types not supported with the Dataverse connector, see Supported operations and data types.
Lookups
Lookup columns use a many-to-one (N:1) table relationship between the table you’re working with and the target row type defined for the lookup. Lookups are presented in Power BI Desktop as two columns, lookupid and lookupid-name.
Navigating relationships
Relationships in Dataverse require you to create a relationship within Power BI desktop between the two tables using a GUID column, this is a system-generated unique identifier that ensures relationships are created for the create rows where ambiguity or duplication might exist with other columns. You can read more about managing relationships in Power BI desktop here.
While some relationships might be automatically created, you can still review and ensure the correct relationships are established when creating your report:
- The lookup column on the table contains the GUID of the row in the related table.
- The related table has a column in the format "[tableName]ID" that contains the GUID, for example
AccountidorMyCustomtableid - Using the Power BI desktop Manage Relationships feature, you would create a new relationship between your lookup column, and the ID column on the related table.
Find your environment URL
Open Power Apps, select the environment you're going to connect to, select Settings in the top-right corner, and then select Session details.
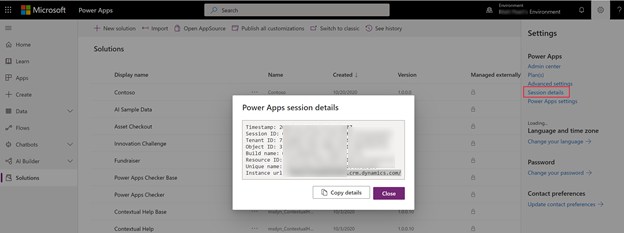
In the Power Apps session details dialog box, select Copy Details.
Paste the session details somewhere such as Notepad so that you can copy only the Instance url. The instance URL is the unique URL for your environment. The URL is in the format:
https://yourenvironmentid.crm.dynamics.com/. Keep this somewhere handy so you can use it when creating your Power BI reports.
Troubleshooting
Error message: Return records size can't exceed 83886080
This error can occur with the Dataverse connector when you run or design a report with a result set greater than 80 MB. TDS has a result set size limit of 80 MB.
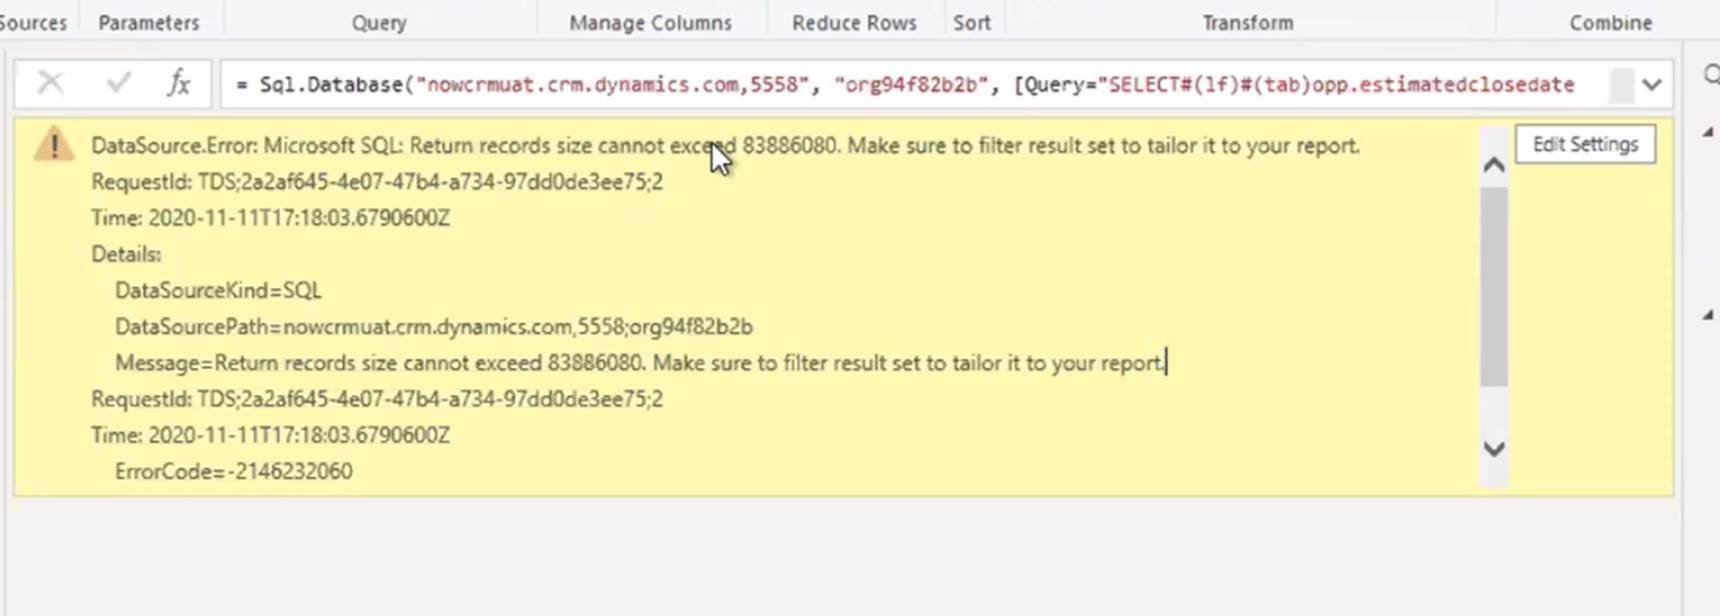 To work around this limit, optimize the query adding filters and dropping columns so that the query returns less data.
Workaround for very large number of lookups or choice columns
If the error message occurs in Power BI when you try to connect to a table with a very large number of lookups or choice columns, the following manual workaround might allow you to connect to the table. The account, contact, and opportunity table might encounter this issue when they're extensively customized with additional lookups or choice columns.
Manually connect to the table in a Power BI report:
In Power BI desktop with the report loaded, select Transform Data to load Power Query.
Select New Source > Blank Query.
Name your query.
Select Advanced Editor on the Home tab of Power BI Desktop.
Replace the query text with this query text.
let
    Source = CommonDataService.Database("<myenvironment.crmX>.dynamics.com"),
    dbo_contact = Source{[Schema="dbo",Item="contact"]}[Data],
    #"selectedcolumns" = Table.SelectColumns(dbo_contact,{"fullname", "emailaddress1"})
in
    #"selectedcolumns"
Replace myenvironment.crmX in the query text with your environment domain value, such as contoso.crm4.
Select Done.
Select Choose columns to add any additional needed columns.
Select Close and Apply to save model changes.
When prompted, select Direct Query for the new query.
The query can now be used in the report.
Error message: Unable to connect (provider Named Pipes Provider, error: 40 – Could not open a connection to SQL Server)
When this error message occurs, the connector fails to connect to the TDS endpoint. This can occur when the URL used with the connector includes https:// and/or the ending /.
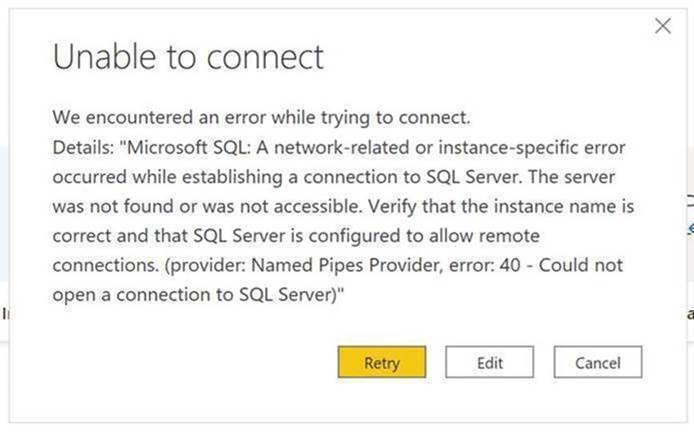 Remove the https:// and ending forward slash so that the URL is in the form orgname.crm.dynamics.com.
Troubleshooting connection issues
For information about troubleshooting connection issues when using the TDS endpoint, see Troubleshooting connection problems.
