הערה
גישה לעמוד זה דורשת אישור. אתה יכול לנסות להיכנס או לשנות תיקיות.
גישה לעמוד זה דורשת אישור. אתה יכול לנסות לשנות מדריכים.
This article guides you through creating and editing modern commands using the command designer and Power Fx.
Open the app designer
Either Create a new model-driven app using modern app designer or Open an existing model-driven app using app designer.
Create a new model-driven app using modern app designer
Sign into Power Apps .
On the left navigation pane, select Solutions. If the item isn’t in the side panel pane, select …More and then select the item you want.
Open or create a solution to contain the new model-driven app.
Select New > App > Model-driven app.
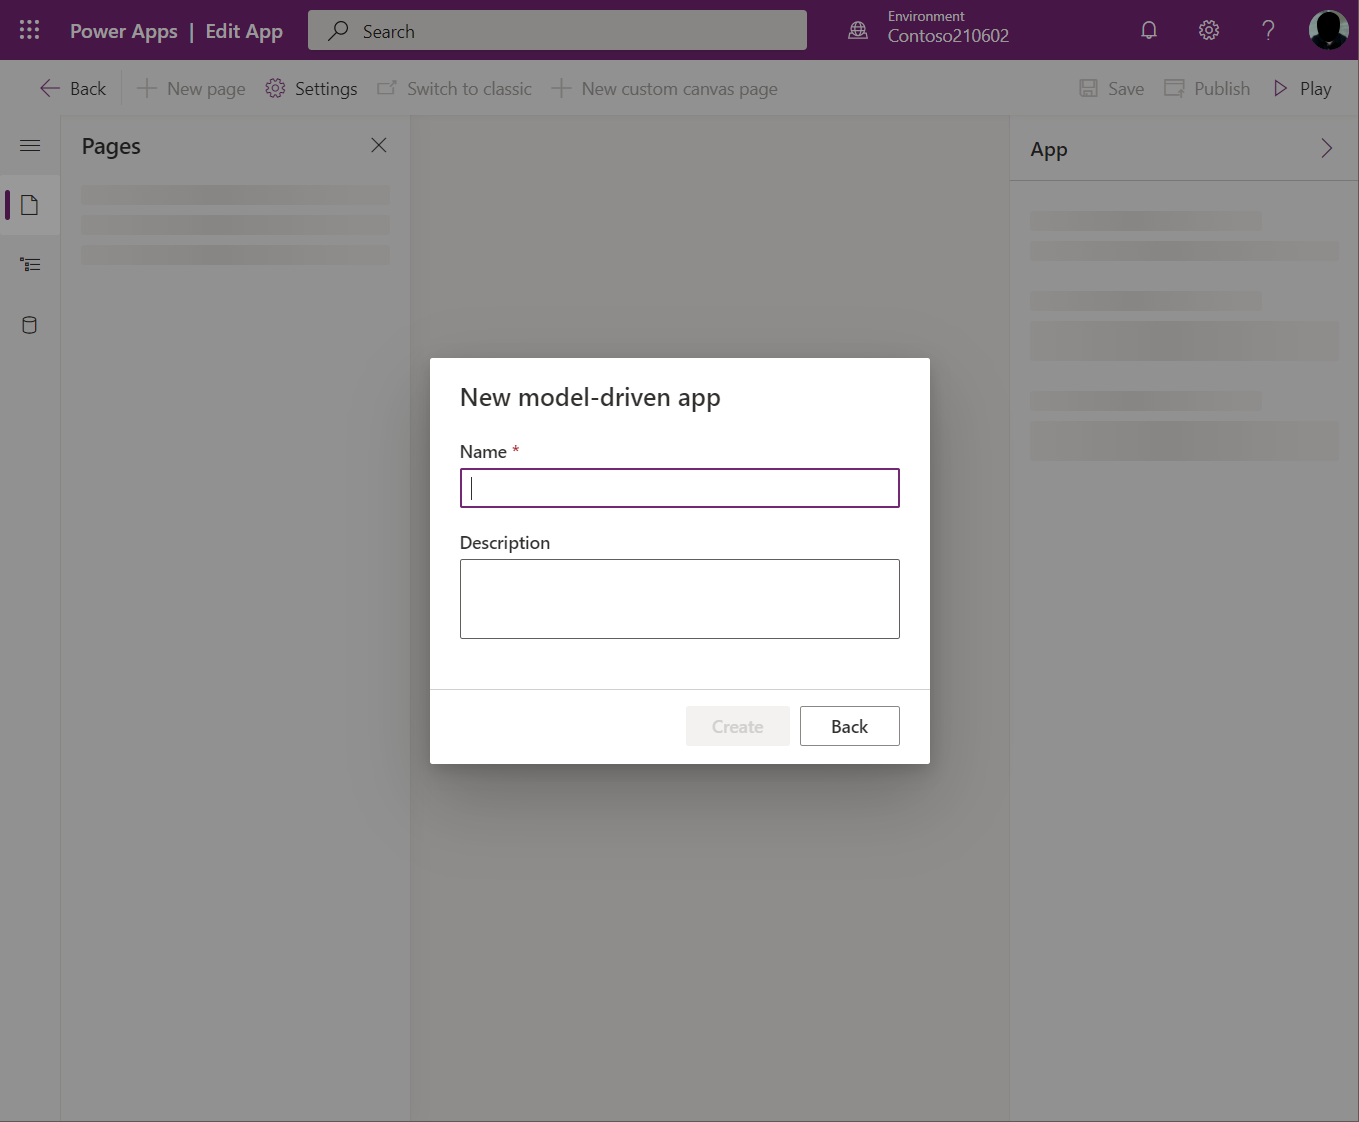
Enter a Name for your app, and then select Create. More information: Build your first model-driven app

Open an existing model-driven app using app designer
- Sign into Power Apps
- On the left navigation pane, select Solutions. If the item isn’t in the side panel pane, select …More and then select the item you want.
- Open the solution containing the existing model-driven app.
- Select the model-driven app, and then select ... > Edit to open the modern app designer.
Create or edit modern commands
Once you are in the app designer, use the command designer to customize your command bars.
Note
- Currently, the command designer can only be accessed through the modern app designer or within solutions for existing commands.
- Currently, classic commands can't be edited within the command designer.
Edit the command bar
Open the command designer to edit a command bar
Next to any table view from the Pages area in the app designer, select ..., and then select Edit command bar.

Select the location of the command bar you want, such as main grid (view) or main form, and then select Edit. More information: Command bar locations

Create a new command
Unlike classic commands, modern commands are only displayed within the app you're editing. This prevents unwanted command transferring to other apps as well as better runtime performance.
The first time command designer is opened for an app, a prompt to either use JavaScript only or Power Fx is displayed. Selecting Power Fx also allows you to use JavaScript if desired. Selecting Power Fx in the dialog creates a command component library to store Power Fx formulas.
Open the command designer to edit a command bar, and then select New > Command.

On the right pane, enter or select from the following options:
Label (optional). Enter a label that displays on the command button.
Icon. Select an icon for the command button. You can choose from any system icons or web resource SVG files. To upload your own icon, choose Web resource then upload an SVG format file. Then, select Save and Publish the web resource. For more information about how to create a web resource for the icon image you want, go to Create or edit model-driven app web resources to extend an app.
Action. Select from the following:
- Run formula. Enter the Power Fx formula to run the command action. More information: Use Power Fx for actions and visibility
- JavaScript. Provide the JavaScript library and command to run the command action. More information: Use JavaScript for actions
Visibility. Select whether to Show the command button or to Show on condition from formula.
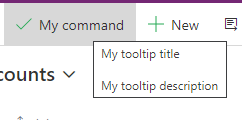
Tooltip title. Optionally, enter a tooltip title. The title appears to the user when they hover their mouse over the command.
Tooltip description. Optionally, enter a tooltip description. The description appears for the user below the tooltip title when they hover their mouse over the command.

Accessibility text. Optionally, enter the text that will be read by screen readers.
Order number. The order the command displays in at runtime in relation to other commands within the same command bar.
Drag and drop the command to the desired location. You can arrange modern commands among classic commands.
Select Save and Publish to make the command available to app users.
Select Play to run the app and test your changes.
Note
Publishing Power Fx formulas can take a few minutes to publish the command component library. This background operation might still be in-progress after command designer has completed the request and unlocks the designer.
Use Power Fx for actions and visibility
You can use Power Fx for both actions (what happens when the command button is selected) as well as visibility (logic to control when the button is visible). Power Fx isn't supported in classic commands.
Notice the model-driven app command has a formula bar experience that is similar to canvas apps. For working with Dataverse data you can use Power Fx formulas just as you would in canvas apps. More information: Using Power Fx with commands
Note
- Dataverse is currently the only data source supported with commands in model-driven apps.
- You can't currently add additional tables as data sources directly from the command designer. However, you can open the command component library in canvas studio and add additional tables as data sources and then use them within the command designer.
- Not all functions available within canvas apps are supported currently for model-driven app commands. Additionally, we've introduced some new functions specific to model-driven app commands.
- For more limitations with modern commands, go to Modern commanding known limitations.
Use JavaScript for actions
JavaScript is supported with both classic and modern commands. However, it's simpler to create commands and associate your JavaScript using the modern command designer.
For the Action select Run JavaScript.
Select Add library or select another one from the list. The list is populated with any libraries in use by the current command bar.

Select Add and search for existing JavaScript web resources or you can add your own.

Enter the Function name. For example, select the
Main_system_library.jslibrary then call this function:XrmCore.Commands.Open.opennewrecord.Add parameters to pass to your function. For more information about the available parameters, go to Grid values.

Note
The use of calling multiple JavaScript libraries or calling multiple functions from a single command isn't supported.