Export and email a Power BI report with Power Automate
With Power Automate, you can automate exporting and distributing Power BI reports in different formats and scenarios. In this article, you create your own flow from scratch. Use the Export to File for Power BI Reports action to automatically distribute a Power BI report via email.
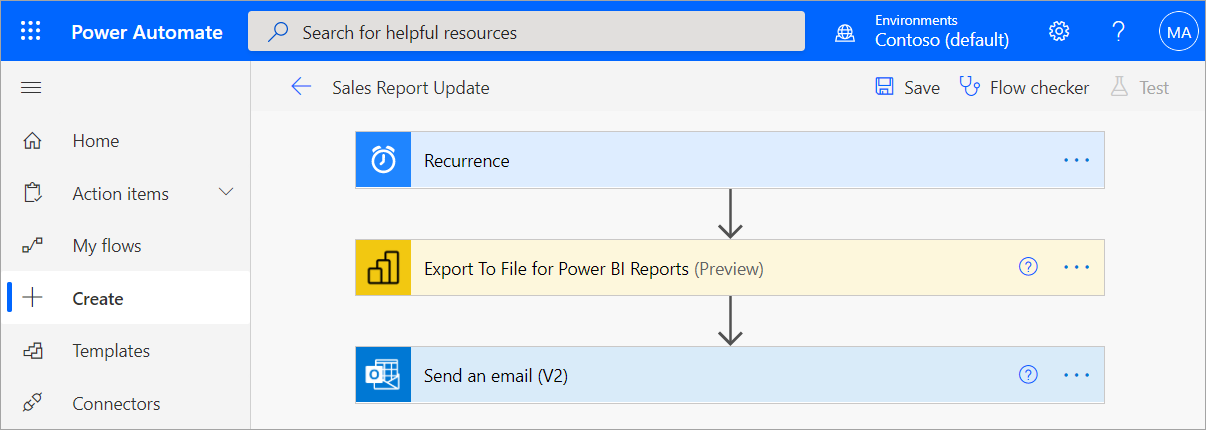
Power Automate is a no-code way to interact with the Export To File API in the user interface. See Export to File for Power BI Reports to start interacting with the API directly.
Prerequisites
To follow along, make sure you have the following prerequisites:
- At least one workspace in your Power BI tenant backed by a reserved capacity. This capacity can be any of the A1/EM1 - A6/P3 SKUs. Read more about reserved capacities in Power BI Premium.
- Access to the standard connectors in Power Automate which come with any Office 365 subscription.
Create a flow from scratch
In this task, you create a simple flow from scratch. The flow exports a Power BI report as a PDF, and attaches it to an email that is sent on a weekly basis.
Sign in to Power Automate.
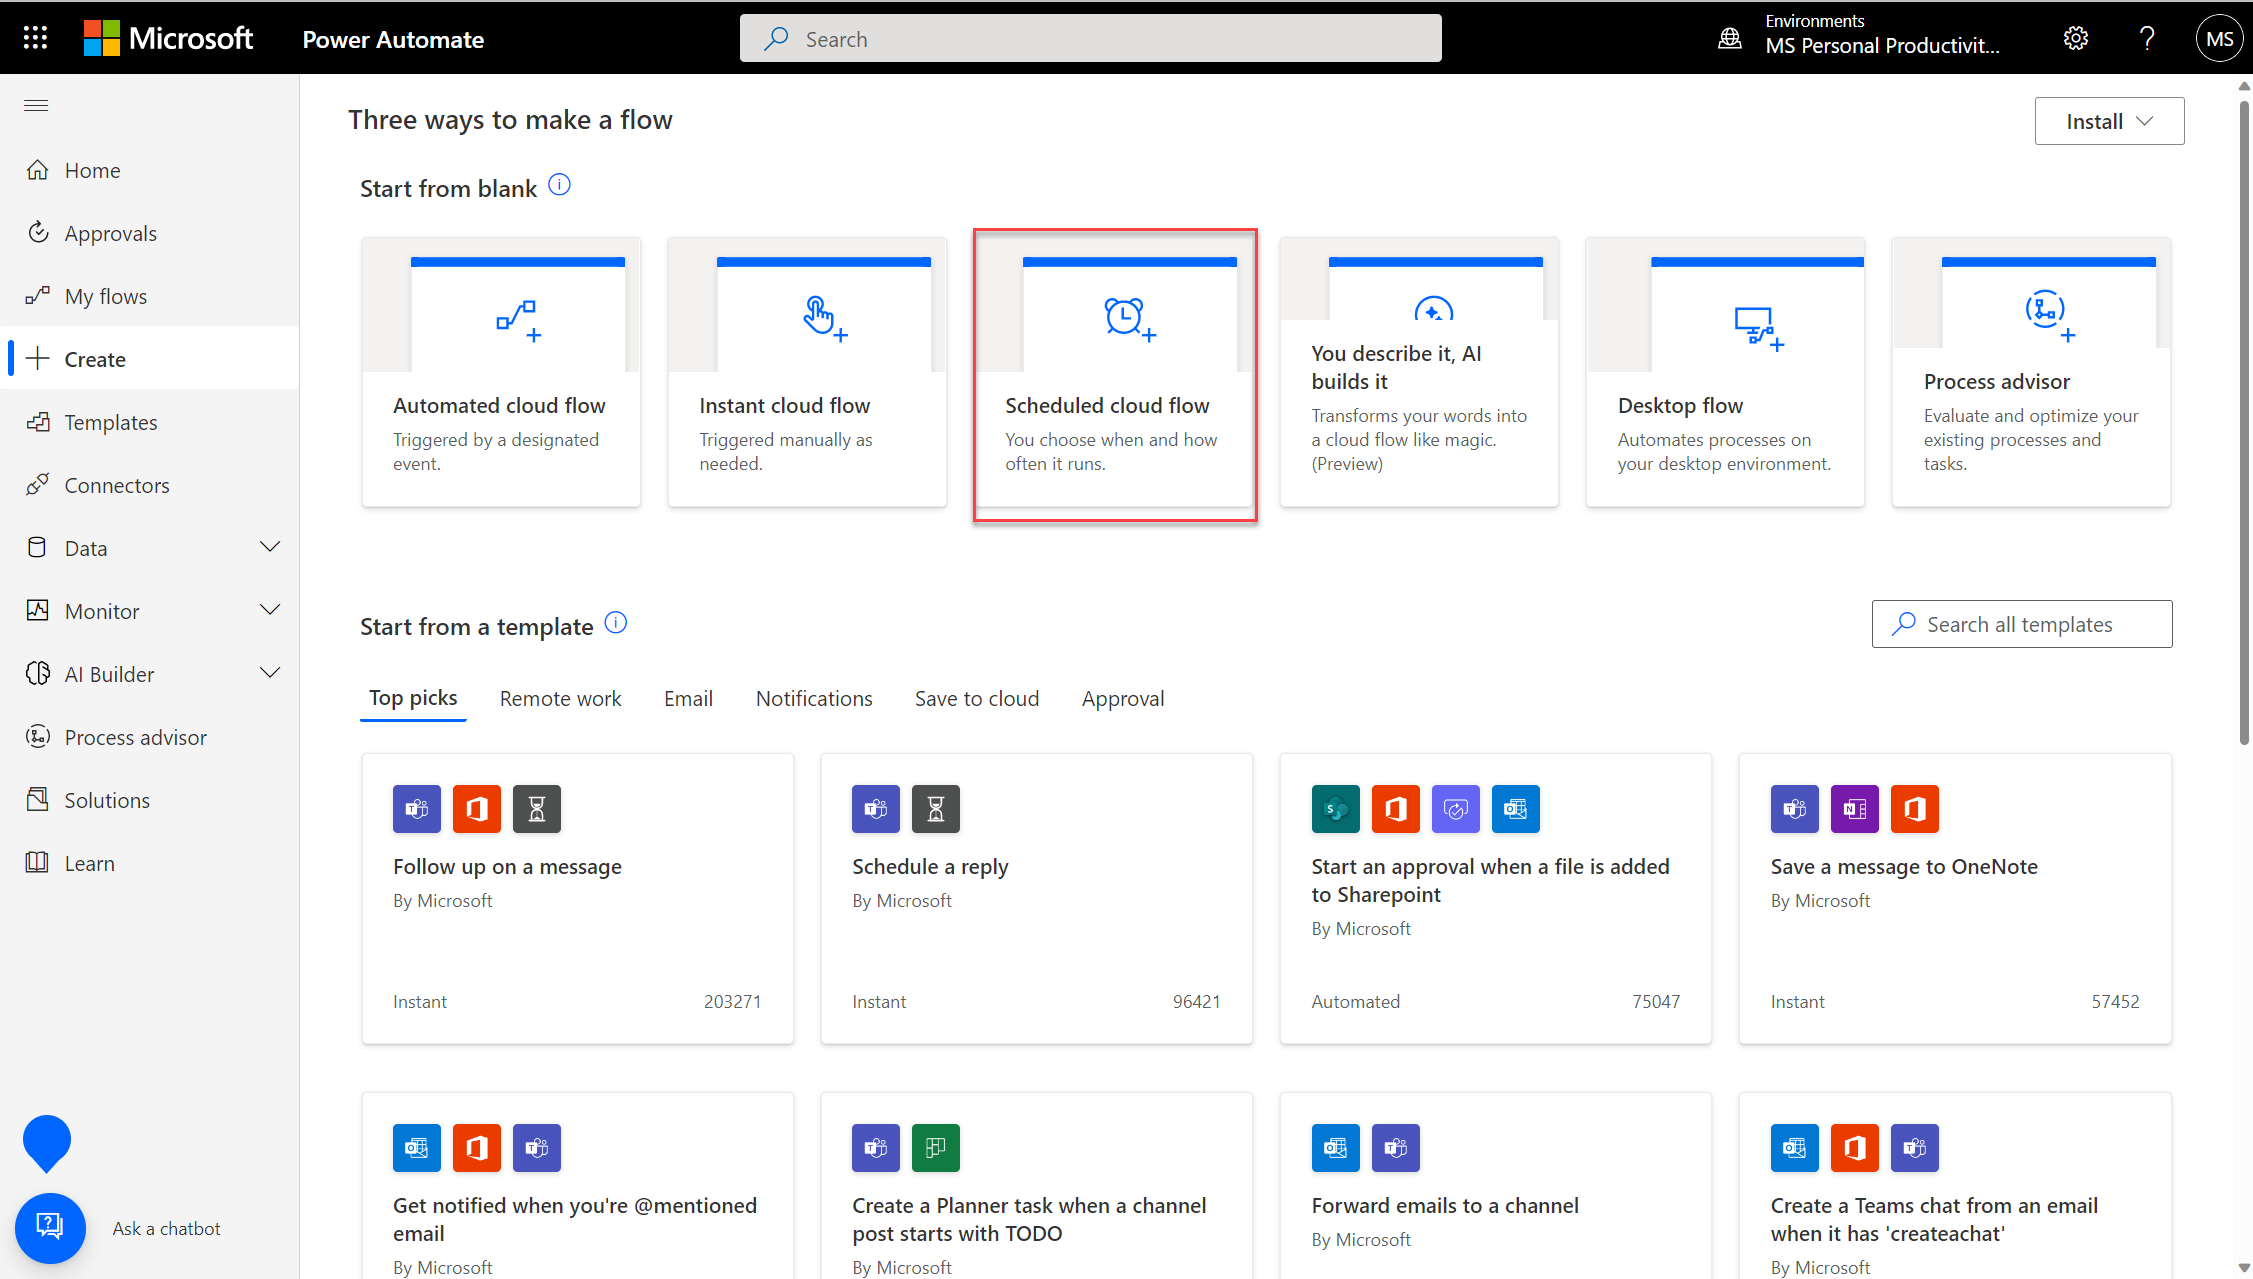
Select Create > Scheduled cloud flow.
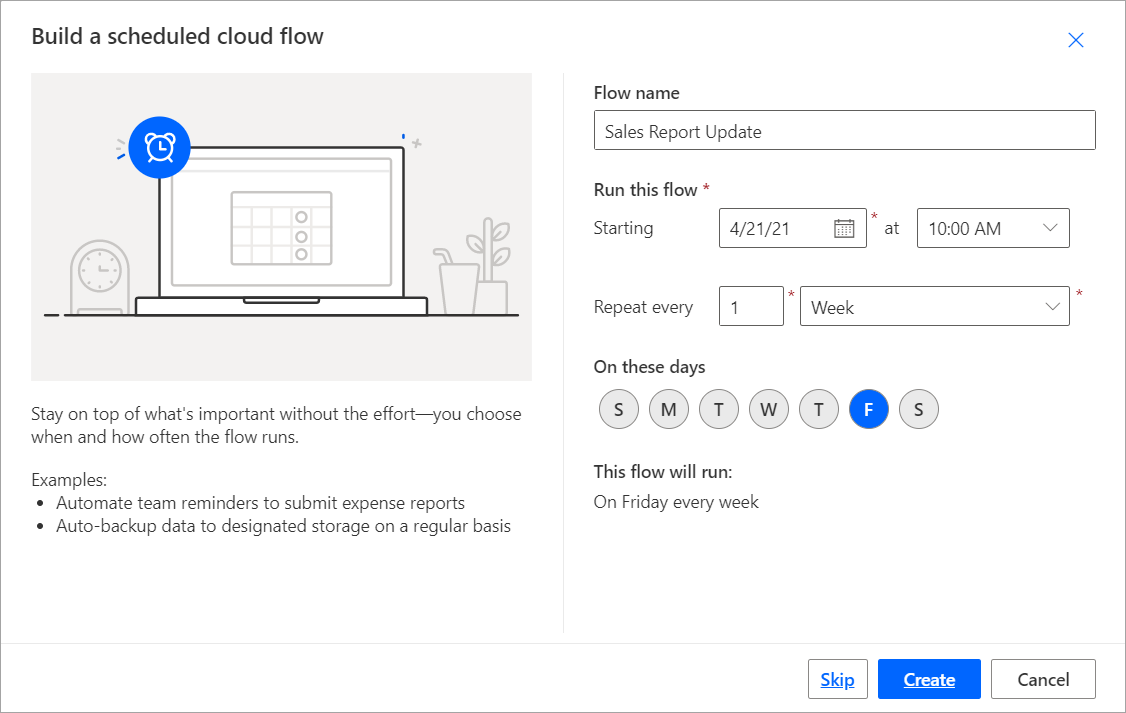
In Build a scheduled flow, give your flow a name.
In Run this flow, select the starting date and time for your flow and the repetition frequency.
In On these days, select which days you want your flow to run, and select Create.
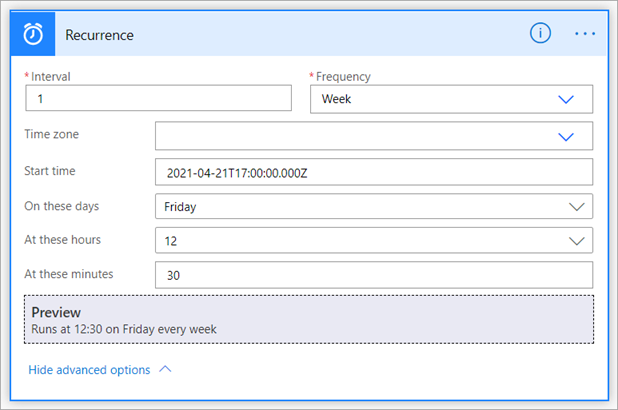
In Recurrence, select Edit > Show advanced options. Enter a value in At these hours and At these minutes to set a specific time for your flow to run.
Select New Step.
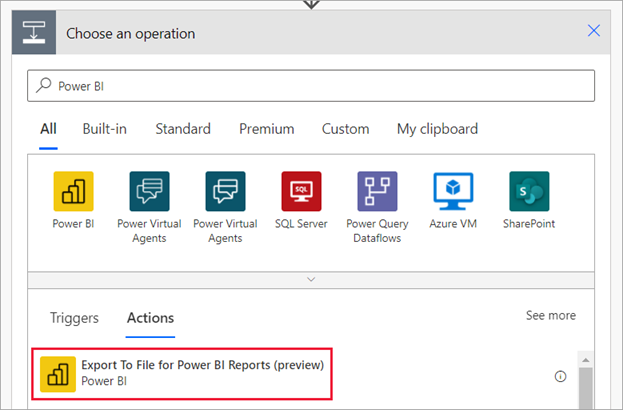
In Choose an operation, search for Power BI and select Export To File for Power BI Reports.
In Export to File for Power BI Reports, select a Workspace and Report from the dropdowns.
Select the desired Export Format for your Power BI report.

Note
If you export multiple pages to PNG format, a series of .png files, each file representing one report page, will be compressed into a .zip file which will be attached to your email.
Optionally, indicate specific pages to export in the Pages pageName -1 field. The page name parameter is different from the display page name. To find the page name, navigate to the page in the Power BI service, and copy the last portion of the URL as shown in the example.
https://app.powerbi.com/groups/workspaceGuid/reports/reportGuid/xxxxxxxxxxSomething like this:
https://app.powerbi.com/groups/338cd931-b957-4ba6-a5fa-b0113dab53aa/reports/85ac7583-3bb2-4c2c-a1fa-5a4a875ba88c/ReportSection?ctid=72f988bf-86f1-41af-91ab-2d7cd011db47&experience=power-biOptionally, indicate a specific bookmark to display in the Bookmark Name field. You can find the bookmark name in the report URL after bookmarkGuid=, as shown in the example. Only report bookmarks are supported, not personal bookmarks. You can specify other parameters for the Power BI report. Find detailed descriptions of these parameters in the Export to File for Power BI Reports.
https://app.powerbi.com/groups/workspaceGuid/reports/reportGuid/ReportSection?bookmarkGuid=xxxxxxxxxxSelect New Step.
In Choose an operation, search for Outlook and select Send an email (V2).
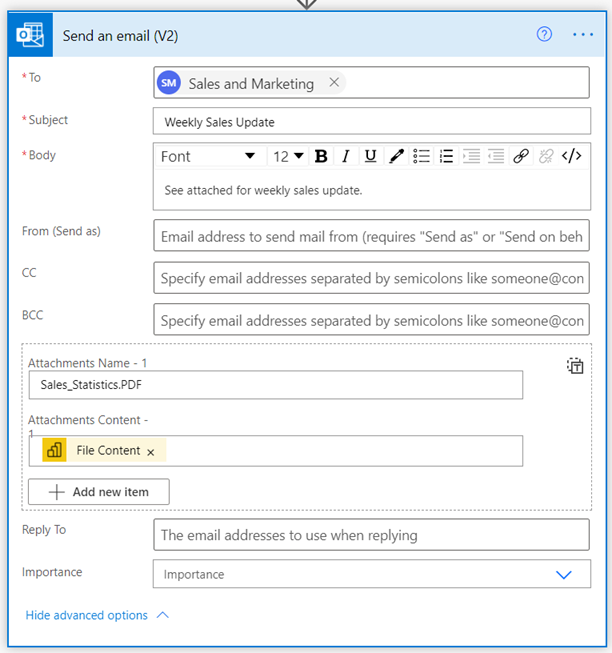
In Send an email (V2), complete the To, Subject, and Body fields for your email.
Select Show advanced options. In Attachments Name – 1, enter a name for your attachment. Add a file extension to the file name (for example, .PDF) that matches your desired Export Format.
In Attachment Content, select File Content to attach your exported Power BI report.
When you're done, select Next step or Save. Power Automate creates and evaluates the flow, and lets you know if it finds errors.
If there are errors, select Edit flow to fix them. Otherwise, select the Back arrow to view the flow details and run the new flow. When you run the flow, Power Automate exports a Power BI report in the specified format and sends it as an email attachment as scheduled.
Row-level security in Power Automate
Optionally, if you want to send the report based on row-level security (RLS), you need to add the following details:

Identities Username - 1 = The effective username reflected by a token for applying RLS rules. For an on-premises model, username can be composed of alpha-numerical characters, or any of the following characters:
'.', '-', '_', '!', '#', '^', '~', '\', and '@'. For cloud models, username can be composed of all ASCII characters. Also, username can be up to 256 characters, and can't contain spaces.Identities Semantic model - 1 = You can get this value by going to the settings of the semantic model, and then copying the semantic model ID from the address bar, as shown in this example and in the following image:
https://app.powerbi.com/groups/me/settings/datasets/xxxxxxxx-xxxx-xxxx-xxxx-xxxxxxxxxxxx
Identities Roles Item - 1 = RLS name defined in the report
