Application Icons in Xamarin.iOS
The following topics will be covered in detail:
- Application, Spotlight and Settings Icons - The different types of icons required for an iOS app.
- Managing Icons with Asset Catalogs - Managing application icons using Asset Catalogs.
- iTunes Artwork - Supplying the required iTunes Artwork for the Ad-Hoc method of delivering your application.
Application, Spotlight, and Settings Icons
In the same way that a Xamarin.iOS app can use image assets for UI controls and as document icons, image assets can be used to provide Application Icons. The following screenshots from an iPad illustrates the three uses of icons in iOS:
Application Icon - Every iOS app must define an application icon. This is the icon that the user will tap from the iOS home screen to launch the app. Additionally, this icon is used by Game Center, if applicable. Example:
Spotlight Icon - Whenever the user enters the name of an app in a Spotlight Search, this icon is displayed. Example:
Settings Icon - If the user enters the Settings app on their iOS device, this icon will be displayed at the end of the Settings list for the app. Example:
The following image asset sizes and resolutions will be needed to support all of the icon types required by an Xamarin.iOS app targeting iOS 5 through iOS 9 (or greater):
iPhone Icon Sizes
iPhone: iOS 9 & 10 (iPhone 6 & 7 Plus)
Icon 3x Application Icon 180x180 Spotlight 120x120 Settings 87x87 iPhone: iOS 7 & 8
Icon 1x 2x Application Icon 60x601 120x120 Spotlight 40x402 80x80 Settings - - iPhone: iOS 5 & 6
Icon 1x 2x Application Icon 57x57 114x114 Spotlight 29x29 58x58 Settings 29x293, 4 58x583, 4
iPad Icon Sizes
iPad: iOS 9 & 10
Icon 2x (iPad Pro) Application Icon 167x1676 Spotlight 120x1206 Settings 58x585 iPad: iOS 7 & 8
Icon 1x 2x Application Icon 76x76 152x152 Spotlight 40x40 80x80 Settings - - iPad: iOS 5 & 6
Icon 1x 2x Application Icon 72x72 144x144 Spotlight 50x50 100x100 Settings 29x293, 5 58x583, 5
- Both Visual Studio for Mac and Xcode no longer support setting 1x image for iOS 7.
- Setting a 1x image for iOS 7 is not supported when using Asset Catalogs.
- iOS 7 & 8 use the same image sizes as iOS 5 & 6.
- Uses the same images and sizes as the Spotlight Icon.
- Uses the same size icons as the iPhone.
- Only supported with Asset Catalog Image Sets.
For more information about icons, please see Apple's Icon and Image Sizes documentation.
Managing Icons with Asset Catalogs
For icons, a special AppIcon image set can be added to the Assets.xcassets file in the app's project. All version of the image required to support all resolutions are included in the xcasset and grouped together. A special editor in Visual Studio for Mac allows the developer to include and setup these images graphically.
To use an Asset Catalog, follow these steps:
Double-click the
Info.plistfile in the Solution Explorer to open it for editing.Scroll down to the iPhone Icons section.
Click the Migrate to Asset Catalog button:

From the Solution Explorer, double-click the
Assets.xcassetsfile to open it for editing:
Select
AppIconfrom the list of assets to display theIcon Editor:
Either click on given icon type and select an image file for the required type/size or drag in an image from a folder and drop it on the desired size.
Click the Open button to include the image in the project and set it in the xcasset.
Repeat for all images required.
This is the preferred method of including and managing image assets that will be used to provide Application, Spotlight and Settings icons for an app.
iTunes Artwork
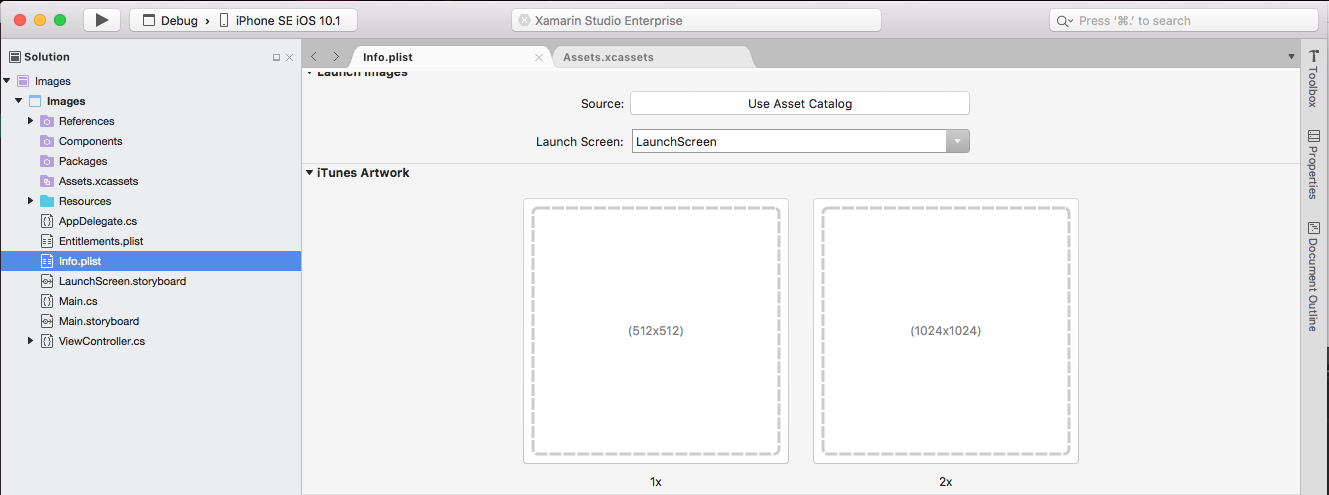
If using the Ad-Hoc method of delivering the app (either for corporate users or for beta testing on real devices), the developer also needs to include a 512x512 and a 1024x1024 image that will be used to represent the app in iTunes.
To specify the iTunes Artwork, do the following:
Double-click the
Info.plistfile in the Solution Explorer to open it for editing.Scroll to the iTunes Artwork section of the editor:

For any missing image, click on the thumbnail in the editor, select the image file for the desired iTunes artwork from the Open File dialog box and click the OK button.
Repeat this step until all needed images have been specified for the app.