הערה
הגישה לדף זה מחייבת הרשאה. באפשרותך לנסות להיכנס או לשנות מדריכי כתובות.
הגישה לדף זה מחייבת הרשאה. באפשרותך לנסות לשנות מדריכי כתובות.

Xamarin.Forms has preview support for the Windows Presentation Foundation (WPF), on .NET Framework and on .NET Core 3. This article demonstrates how to add a WPF project that targets .NET Framework, to a Xamarin.Forms solution.
Important
Xamarin.Forms support for WPF is provided by the community. For more information, see Xamarin.Forms Platform Support.
Before you start, create a new Xamarin.Forms solution in Visual Studio 2019, or use an existing Xamarin.Forms solution.
Add a WPF application
Follow these instructions to add a WPF application that will run on the Windows 7, 8, and 10 desktops:
In Visual Studio 2019, right-click on the solution name in the Solution Explorer and choose Add > New Project....
In the Add a new project window, select C# in the Languages drop down, select Windows in the Platforms drop down, and select Desktop in the Project type drop down. In the list of project types, choose WPF App (.NET Framework):

Press the Next button.
Note
Xamarin.Forms 4.7 includes support for WPF apps that run on .NET Core 3.
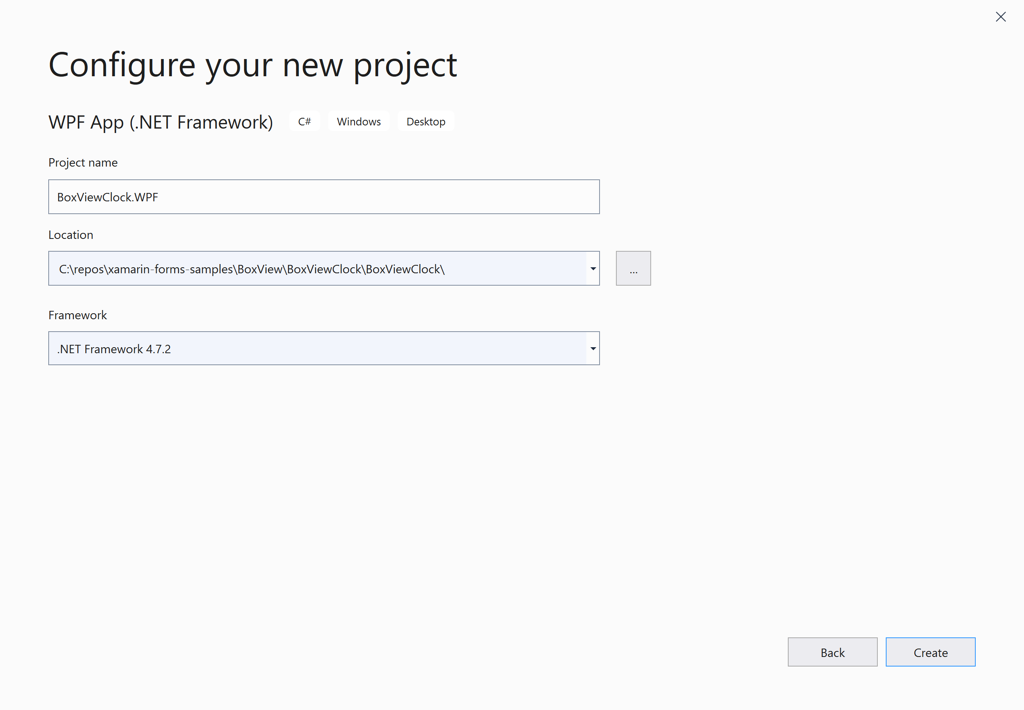
In the Configure your new project window, type a name for the project with a WPF extension, for example, BoxViewClock.WPF. Click the Browse button, select the BoxViewClock folder, and press Select Folder to put the WPF project in the same directory as the other projects in the solution:

Press the Create button to create the project.
In the Solution Explorer, right click the new BoxViewClock.WPF project and select Manage NuGet Packages.... Select the Browse tab, and search for Xamarin.Forms.Platform.WPF:

Select the package and click the Install button.
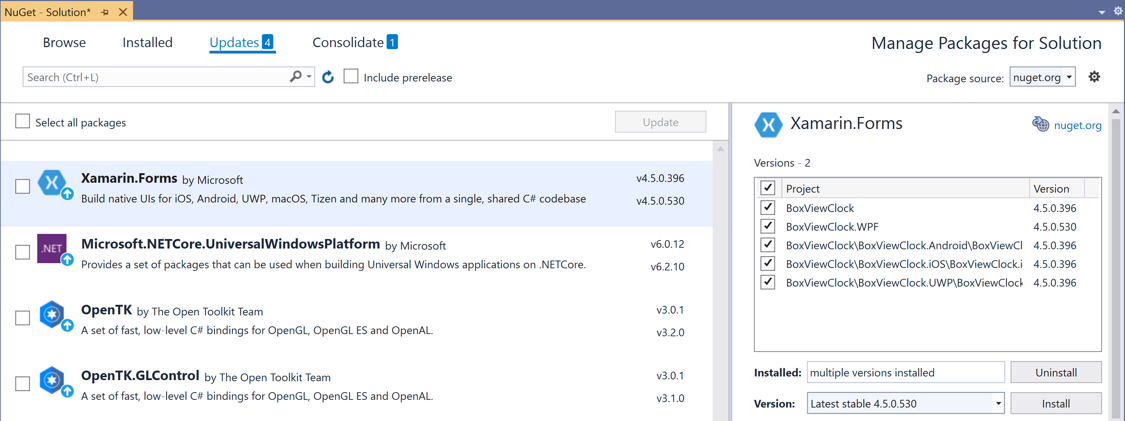
Right click the solution name in the Solution Explorer and select Manage NuGet Packages for Solution.... Select the Updates tab and then select the Xamarin.Forms package. Select all the projects and update them to the same Xamarin.Forms version:

In the WPF project, right-click on References and select Add Reference.... In the Reference Manager dialog, select Projects at the left, and check the checkbox adjacent to the BoxViewClock project:

Press the OK button.
Edit the MainWindow.xaml file of the WPF project. In the
Windowtag, add an XML namespace declaration for the Xamarin.Forms.Platform.WPF assembly and namespace:xmlns:wpf="clr-namespace:Xamarin.Forms.Platform.WPF;assembly=Xamarin.Forms.Platform.WPF"Now change the
Windowtag towpf:FormsApplicationPage. Change theTitlesetting to the name of your application, for example, BoxViewClock. The completed XAML file should look like this:<wpf:FormsApplicationPage x:Class="BoxViewClock.WPF.MainWindow" xmlns="http://schemas.microsoft.com/winfx/2006/xaml/presentation" xmlns:x="http://schemas.microsoft.com/winfx/2006/xaml" xmlns:d="http://schemas.microsoft.com/expression/blend/2008" xmlns:mc="http://schemas.openxmlformats.org/markup-compatibility/2006" xmlns:local="clr-namespace:BoxViewClock.WPF" xmlns:wpf="clr-namespace:Xamarin.Forms.Platform.WPF;assembly=Xamarin.Forms.Platform.WPF" mc:Ignorable="d" Title="BoxViewClock" Height="450" Width="800"> <Grid> </Grid> </wpf:FormsApplicationPage>Edit the MainWindow.xaml.cs file of the WPF project. Add two new
usingdirectives:using Xamarin.Forms; using Xamarin.Forms.Platform.WPF;Change the base class of
MainWindowfromWindowtoFormsApplicationPage. Following theInitializeComponentcall, add the following two statements:Forms.Init(); LoadApplication(new BoxViewClock.App());Except for comments and unused
usingdirectives, the complete MainWindows.xaml.cs file should look like this:using Xamarin.Forms; using Xamarin.Forms.Platform.WPF; namespace BoxViewClock.WPF { public partial class MainWindow : FormsApplicationPage { public MainWindow() { InitializeComponent(); Forms.Init(); LoadApplication(new BoxViewClock.App()); } } }Right-click the WPF project in the Solution Explorer and select Set as Startup Project. Press F5 to run the program with the Visual Studio debugger on the Windows desktop:

Platform specifics
You can determine what platform your Xamarin.Forms application is running on from either code or XAML. This allows you to change program characteristics when it's running on WPF. In code, compare the value of Device.RuntimePlatform with the Device.WPF constant (which equals the string "WPF"). If there's a match, the application is running on WPF.
In XAML, you can use the OnPlatform tag to select a property value specific to the platform:
<Button.TextColor>
    <OnPlatform x:TypeArguments="Color">
        <On Platform="iOS" Value="White" />
        <On Platform="macOS" Value="White" />
        <On Platform="Android" Value="Black" />
        <On Platform="WPF" Value="Blue" />
    </OnPlatform>
</Button.TextColor>
Window size
You can adjust the initial size of the window in the WPF MainWindow.xaml file:
Title="BoxViewClock" Height="450" Width="800"
Issues
This is a preview, so you should expect that not everything is production ready. Not all NuGet packages for Xamarin.Forms are ready for WPF, and some features might not be fully working.
Related video
Xamarin.Forms 3.0 WPF support video