नोट
इस पेज तक पहुँच के लिए प्रमाणन की आवश्यकता होती है. आप साइन इन करने या निर्देशिकाओं को बदलने का प्रयास कर सकते हैं.
इस पेज तक पहुँच के लिए प्रमाणन की आवश्यकता होती है. आप निर्देशिकाओं को बदलने का प्रयास कर सकते हैं.
Important
Lakebase Autoscaling is the latest version of Lakebase, with autoscaling compute, scale-to-zero, branching, and instant restore. For supported regions, see Region availability. If you are a Lakebase Provisioned user, see Lakebase Provisioned.
By the end of this guide, you'll have a running Postgres database with sample data, connected to Unity Catalog, with data flowing between Lakebase and the Databricks lakehouse.
Steps: ① Create a project → ② Connect → ③ Create a table → ④ Register in Unity Catalog → ⑤ Serve data
Step 1: Create your first project
Open the Lakebase App from the apps switcher.

Select Autoscaling to access the Lakebase Autoscaling UI.
Click New project. Give your project a name and select your Postgres version. Your project is created with a single production branch, a default databricks_postgres database, and compute resources configured for the branch.
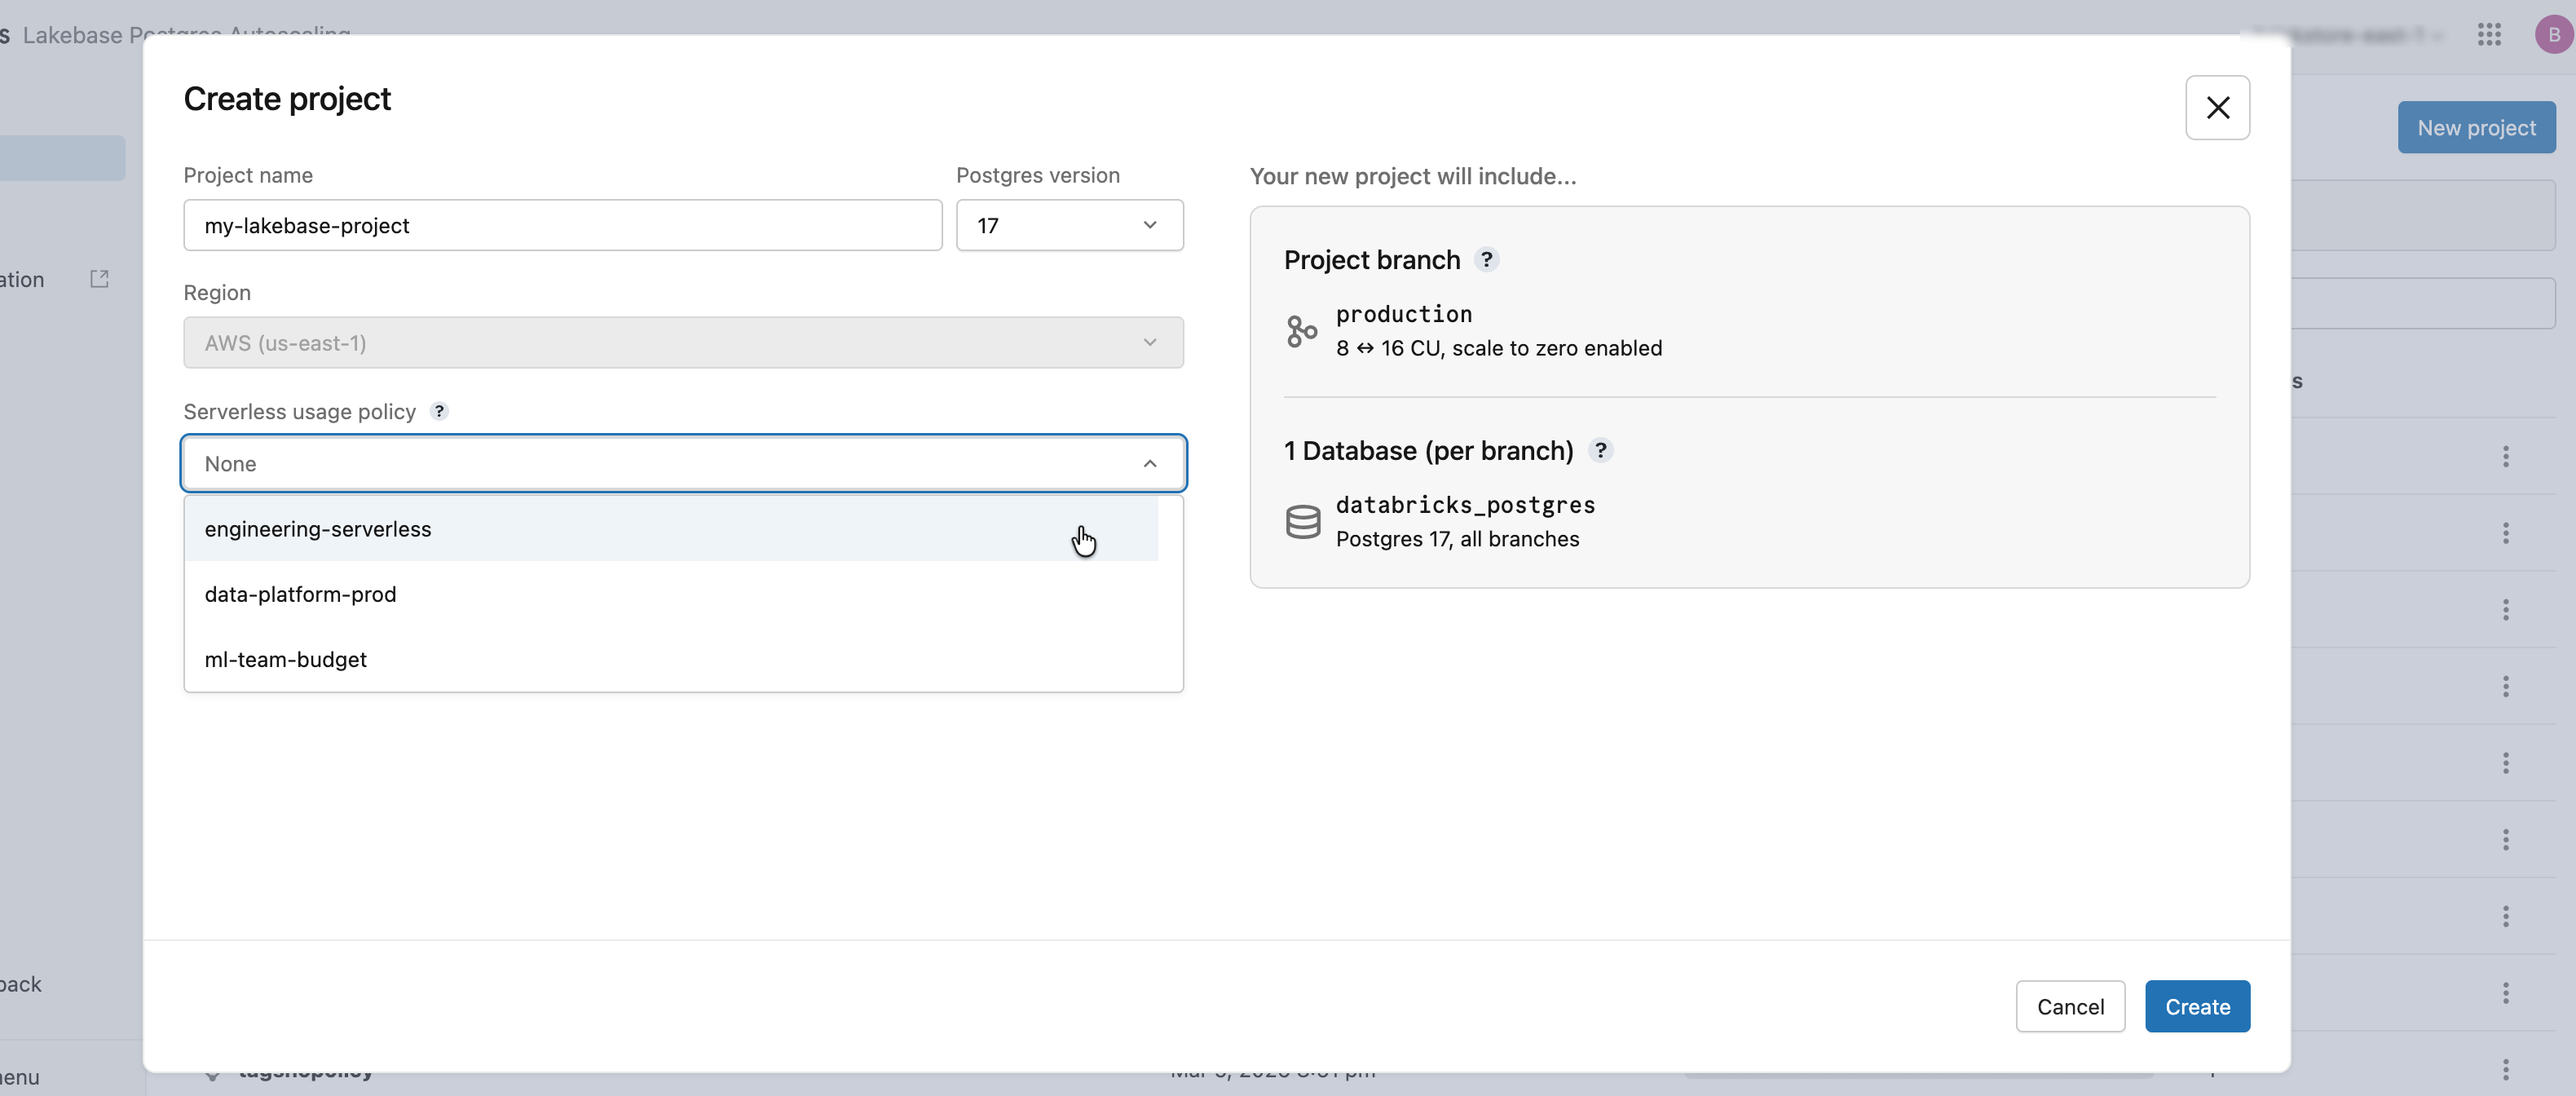
It may take a few moments for your compute to activate. The compute for the production branch is always on by default (scale-to-zero is disabled), but you can configure this setting if needed.
The region for your project is automatically set to your workspace region.
Learn more: Create a project | Autoscaling | Scale to zero
Step 2: Connect to your database
From your project, select the production branch and click Connect. Connection strings work with any standard Postgres client (psql, pgAdmin, DBeaver, or application frameworks).
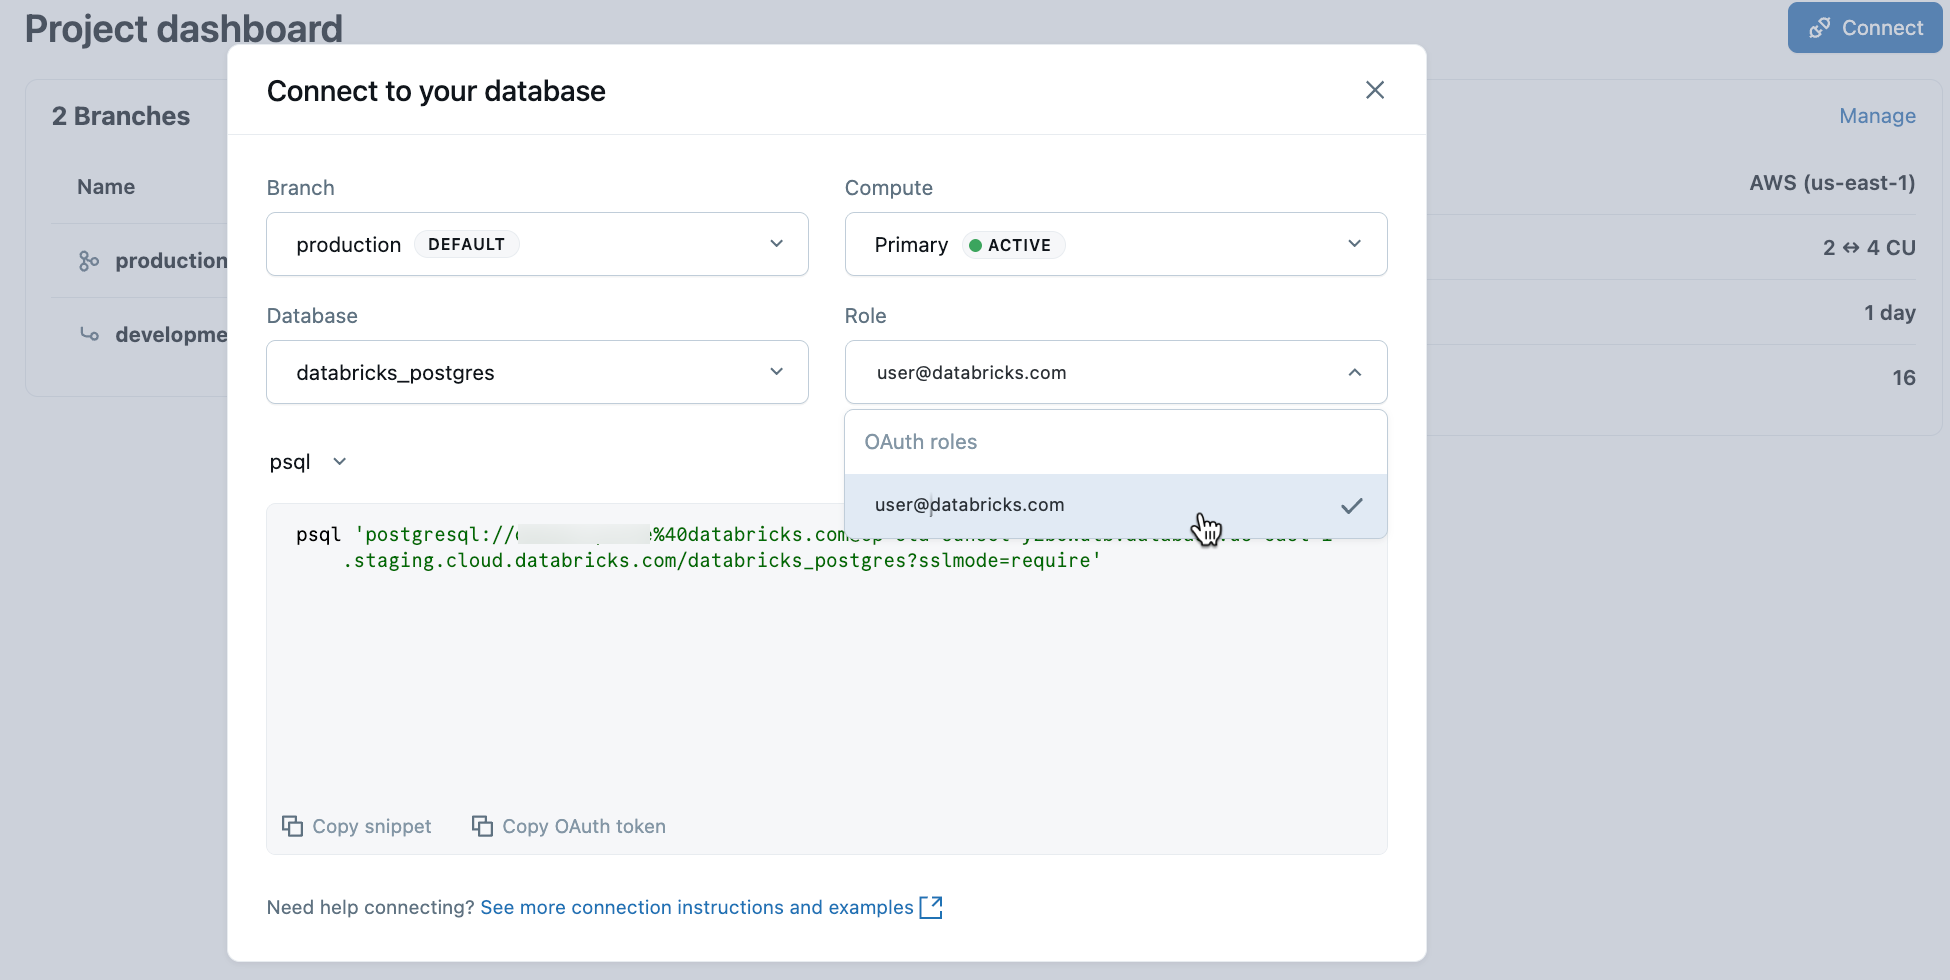
To connect with your Databricks identity, copy the psql snippet from the connection dialog and paste the OAuth token when prompted:
psql 'postgresql://your-email@databricks.com@ep-abc-123.databricks.com/databricks_postgres?sslmode=require'
Learn more: Connection quickstart | psql | pgAdmin | Postgres clients
Step 3: Create your first table
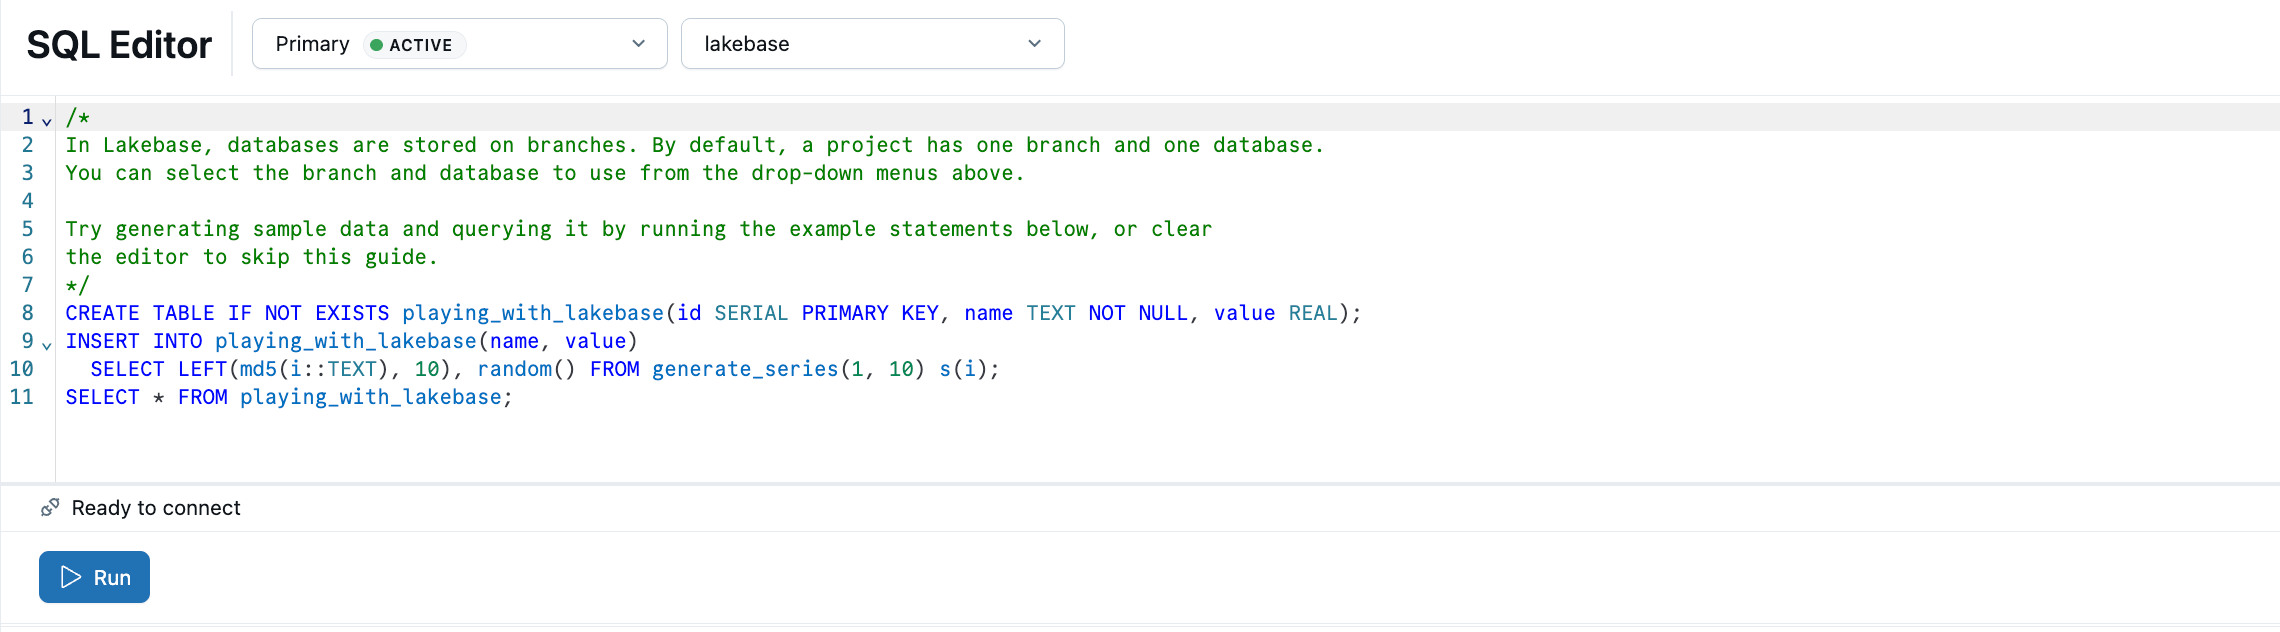
The Lakebase SQL Editor comes preloaded with sample SQL. From your project, select the production branch, open the SQL Editor, and run the provided statements to create a playing_with_lakebase table and insert sample data.
Learn more: SQL Editor | Tables Editor | Postgres clients
Step 4: Register in Unity Catalog
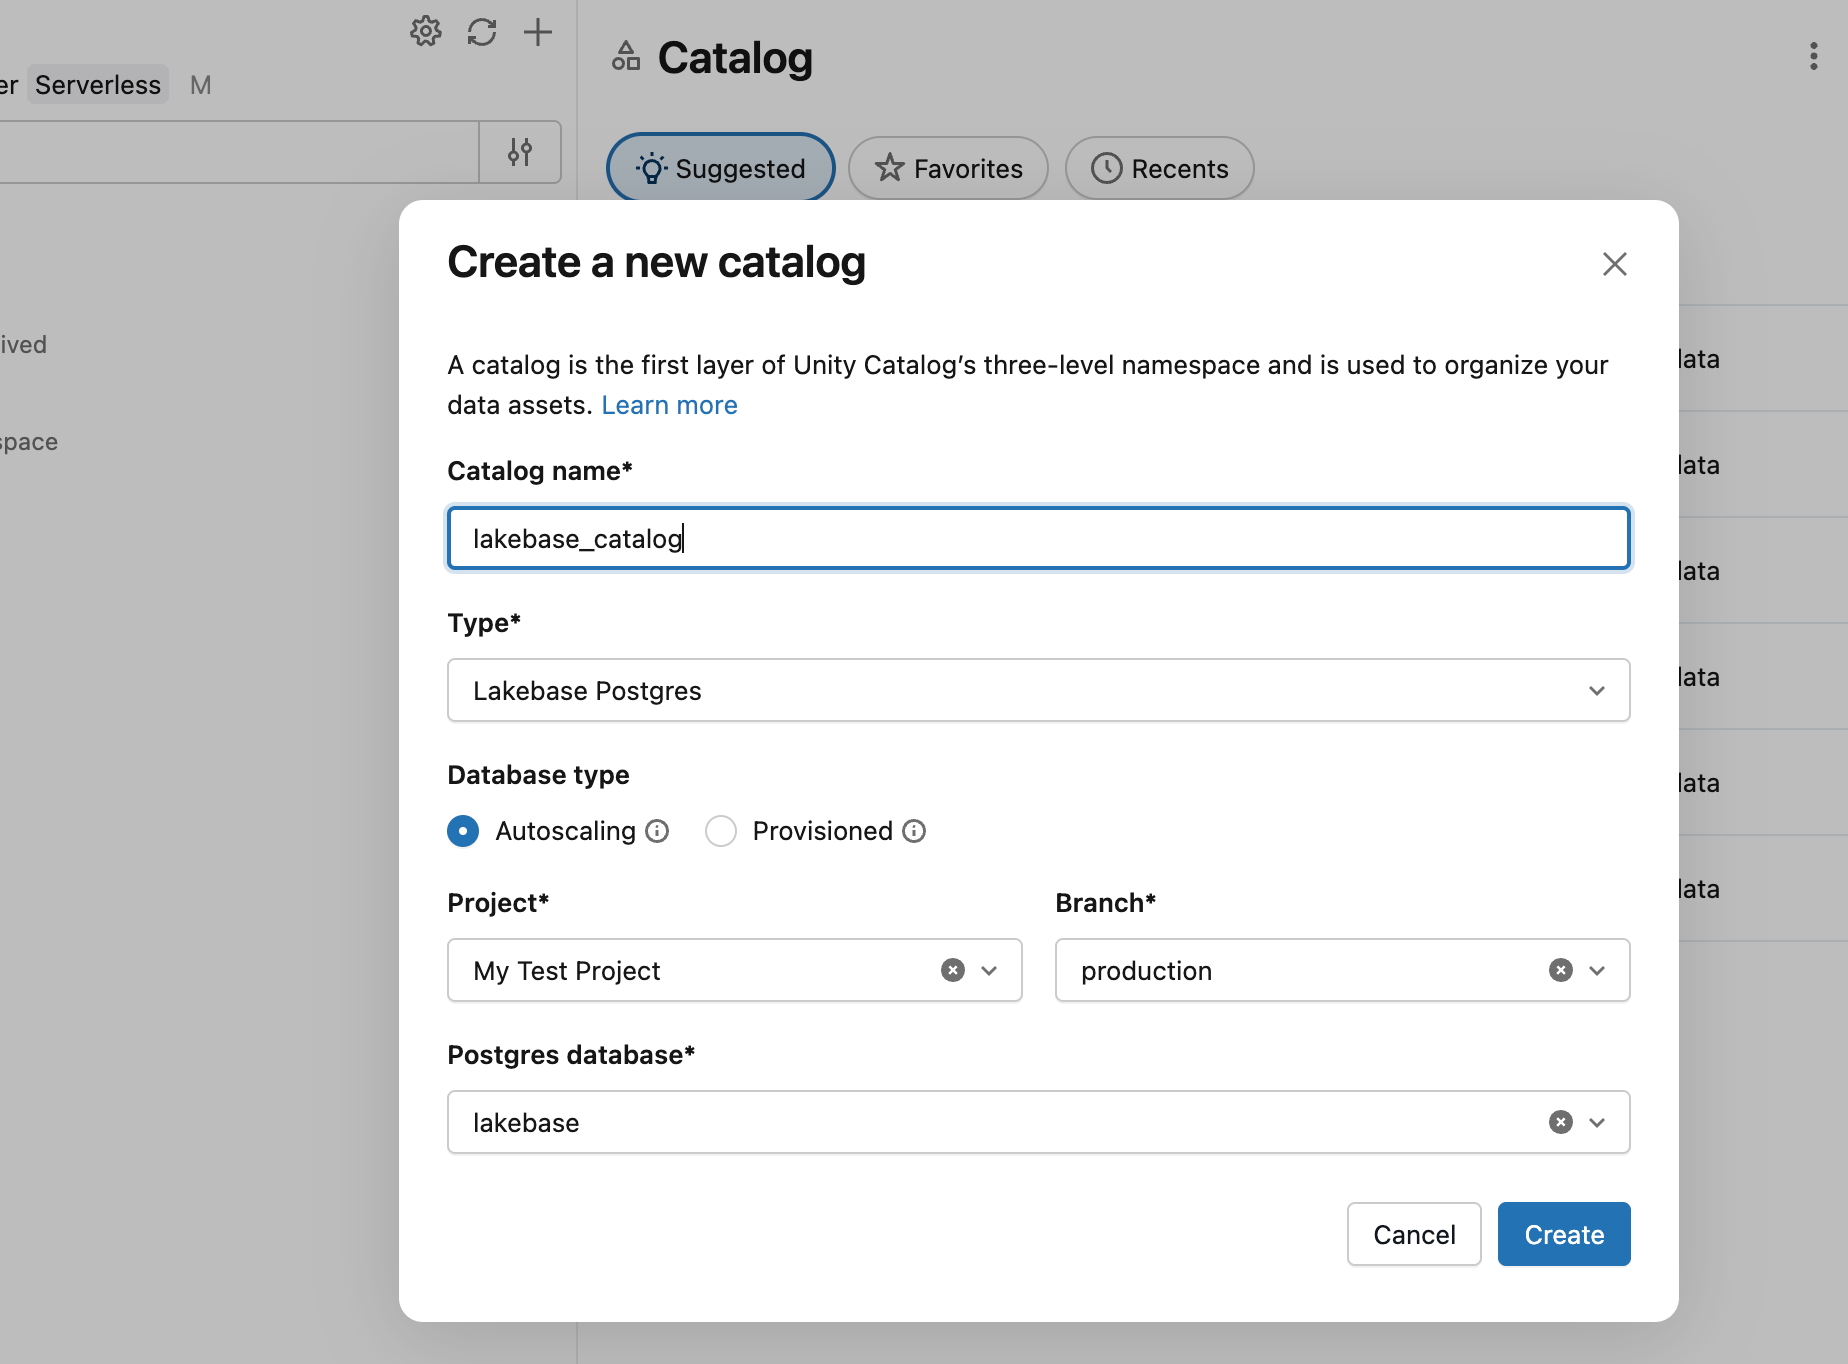
Your Lakebase database is running, but it's invisible to the rest of the Databricks platform until you register it in Unity Catalog. Once registered, you can query Lakebase tables from Databricks SQL, join operational data with lakehouse analytics, and apply unified governance.
In Catalog Explorer, create a new catalog with Lakebase Autoscaling as the type, pointing at your project's production branch and databricks_postgres database.
You can now query from a SQL warehouse:
SELECT * FROM lakebase_catalog.public.playing_with_lakebase;
Learn more: Register in Unity Catalog
Step 5: Serve lakehouse data in your app
Synced tables bring analytical data from Unity Catalog into your Lakebase database so applications can query it with low-latency transactional reads. Create a sample Unity Catalog table, then sync it to Lakebase.
In a SQL warehouse or notebook, create a source table:
CREATE TABLE main.default.user_segments AS
SELECT * FROM VALUES
  (1001, 'premium', 2500.00, 'high'),
  (1002, 'standard', 450.00, 'medium'),
  (1003, 'premium', 3200.00, 'high'),
  (1004, 'basic', 120.00, 'low')
AS segments(user_id, tier, lifetime_value, engagement);
Now sync this table into Lakebase. In Catalog Explorer, create a synced table from user_segments with Snapshot mode, targeting your project's databricks_postgres database. Snapshot mode copies the data once. For continuous updates, use Triggered or Continuous mode.
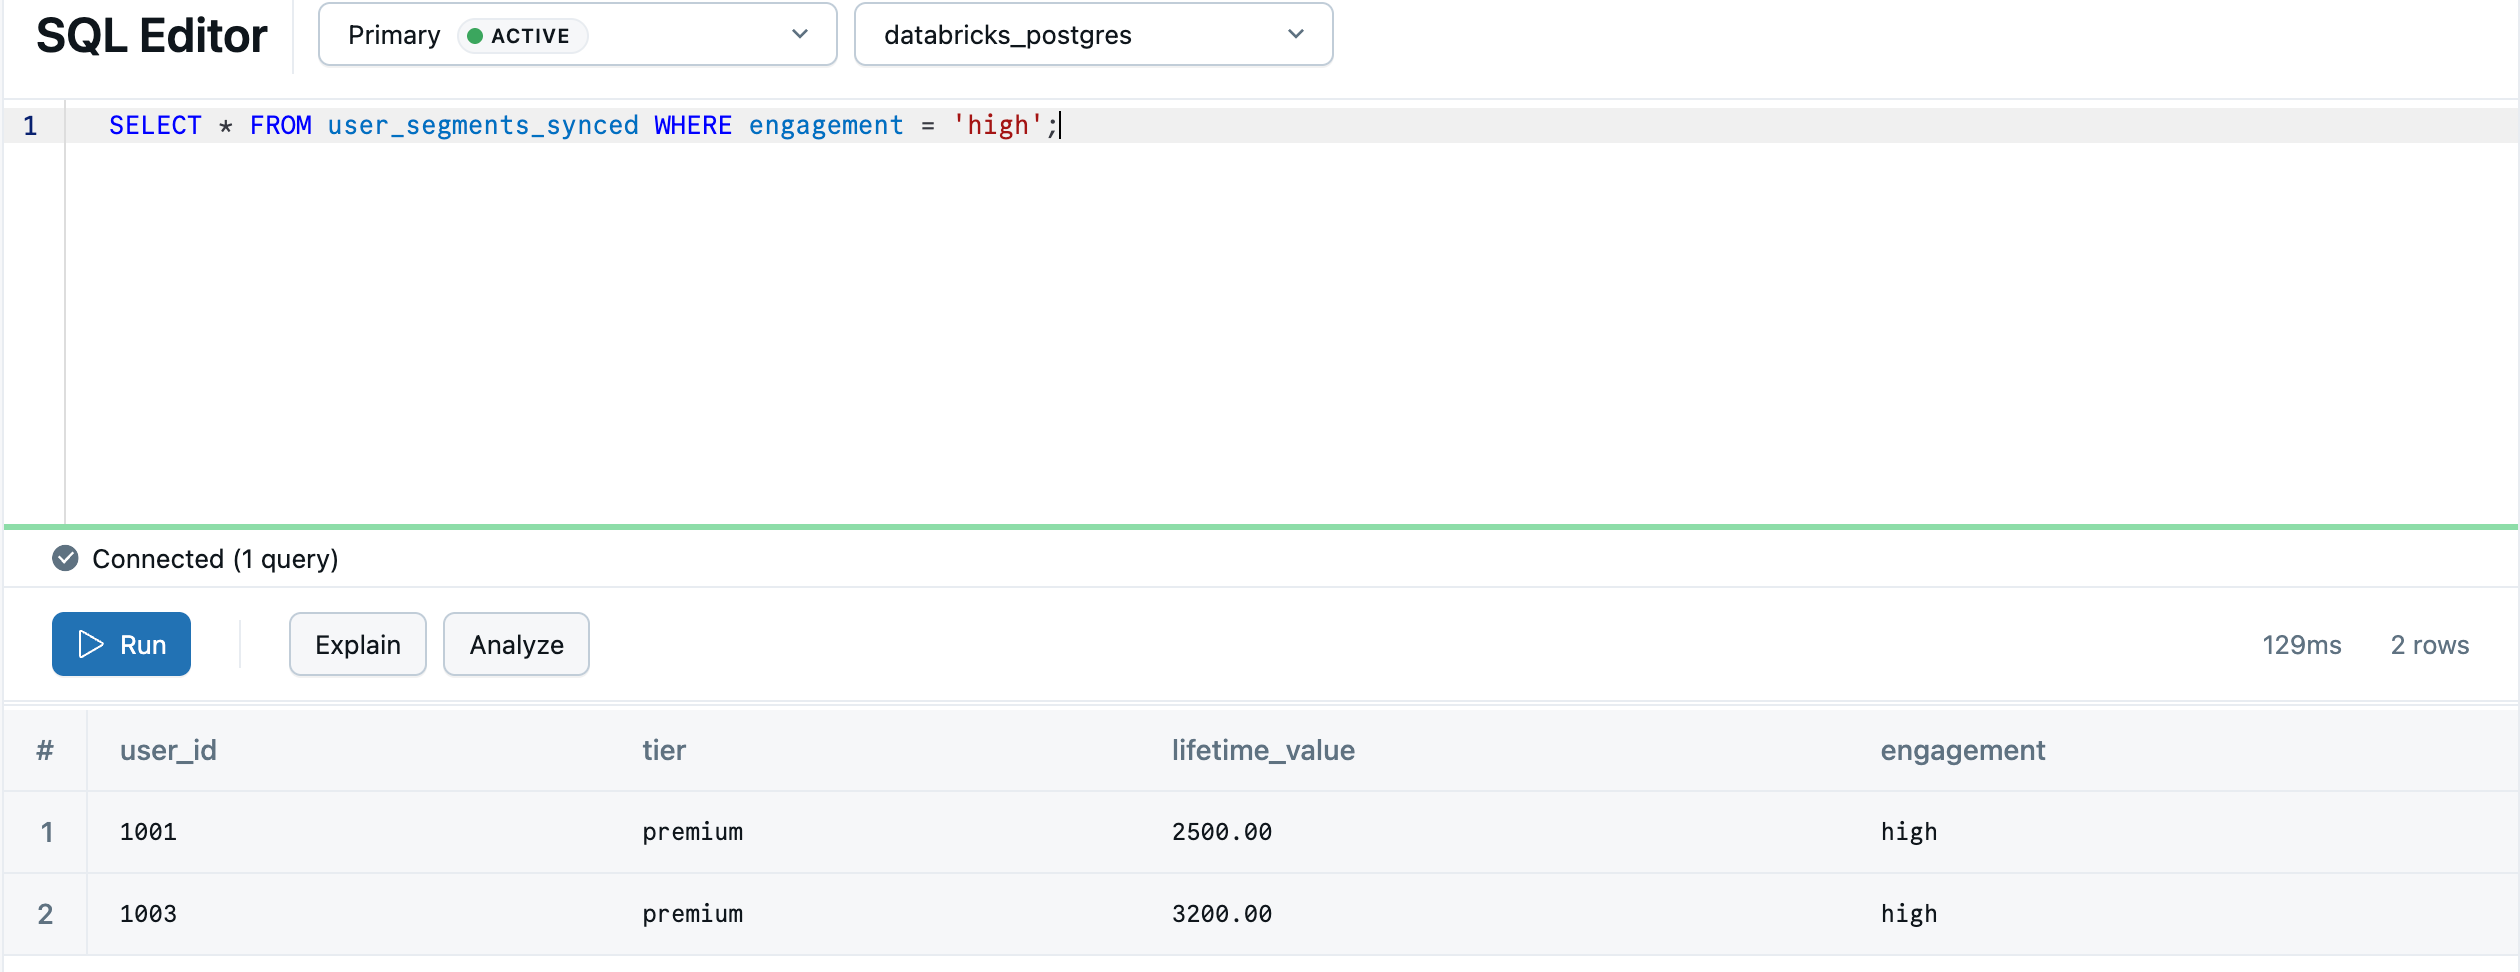
Once the sync completes, the data is available in Lakebase as default.user_segments_synced. Query it in the Lakebase SQL Editor:
SELECT * FROM "default".user_segments_synced WHERE engagement = 'high';
Note
default must be quoted because it is a PostgreSQL reserved keyword. The synced table schema inherits the Unity Catalog schema name, so if your schema is named default, you must always quote it in queries. Quotes around other identifiers are optional.
Your lakehouse analytics are now ready to serve from your transactional database.
Learn more: Synced tables | Sync modes | Data type mapping
Next steps
- Build an app: Databricks Apps tutorial | External apps
- Develop with branches: Branch-based development tutorial
- Set up your team: Grant project and database access
- Explore the platform: Core concepts | Projects overview | All tutorials