Create an external tenant
Applies to:  Workforce tenants
  External tenants (learn more)
Microsoft Entra External ID offers a customer identity access management (CIAM) solution that lets you create secure, customized sign-in experiences for your apps and services. With these built-in CIAM features, Microsoft Entra External ID can serve as the identity provider and access management service for your customer scenarios. You'll need to create an external tenant in the Microsoft Entra admin center to get started. Once the external tenant is created, you can access it in both the Microsoft Entra admin center and the Azure portal.
In this article, you learn how to:
- Create an external tenant
- Switch to the directory containing your external tenant
- Find your external tenant name and ID in the Microsoft Entra admin center
Prerequisites
- An Azure subscription. If you don't have one, create a free account before you begin.
- An Azure account that's been assigned at least the Tenant Creator role scoped to the subscription or to a resource group within the subscription.
Create a new external tenant
Sign in to your organization's Microsoft Entra admin center as at least a Tenant Creator.
Browse to Identity > Overview > Manage tenants.
Select Create.

Select Customer, and then Continue.
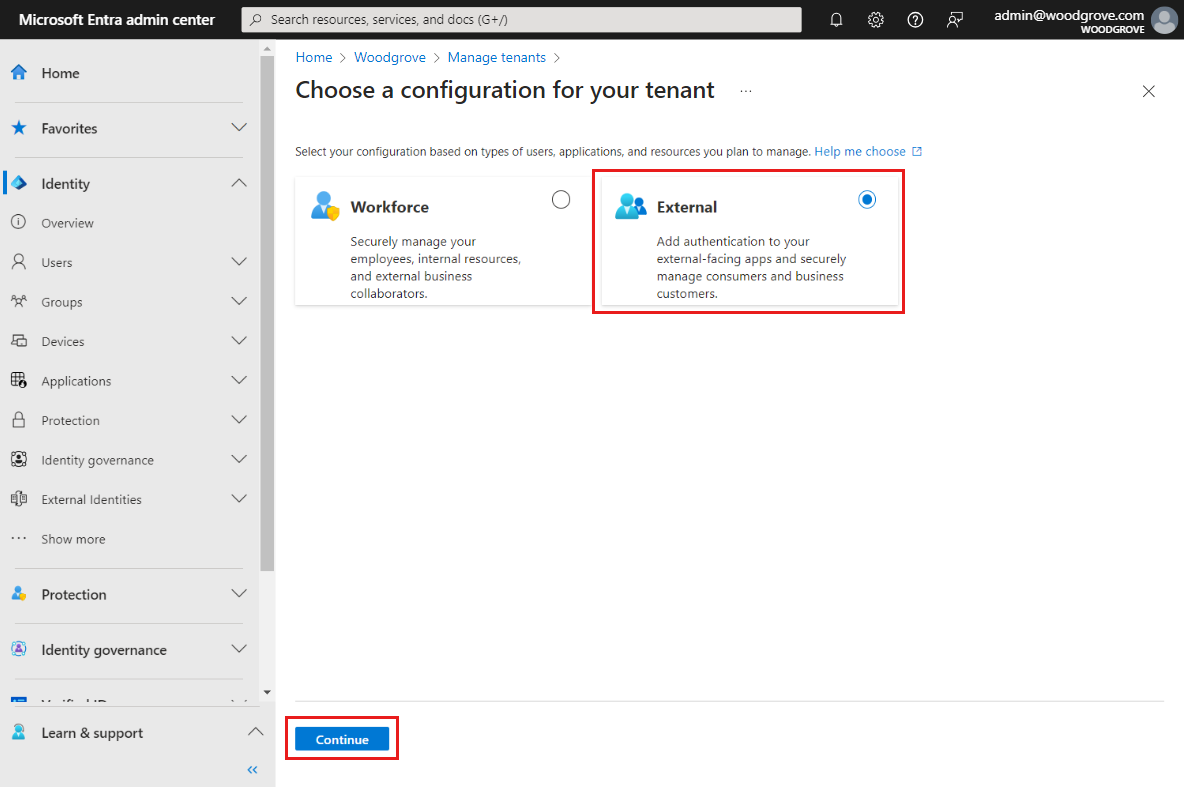
If you're creating an external tenant for the first time, you have the option to create a trial tenant that doesn't require an Azure subscription. Otherwise, use the Azure Subscription option to continue to the next step.
If you choose the 30-day free trial, an Azure subscription isn't required.
If you choose Use Azure Subscription option, then the admin center displays the tenant creation page. On the Basics tab, in the Create a tenant for customers page, enter the following information:
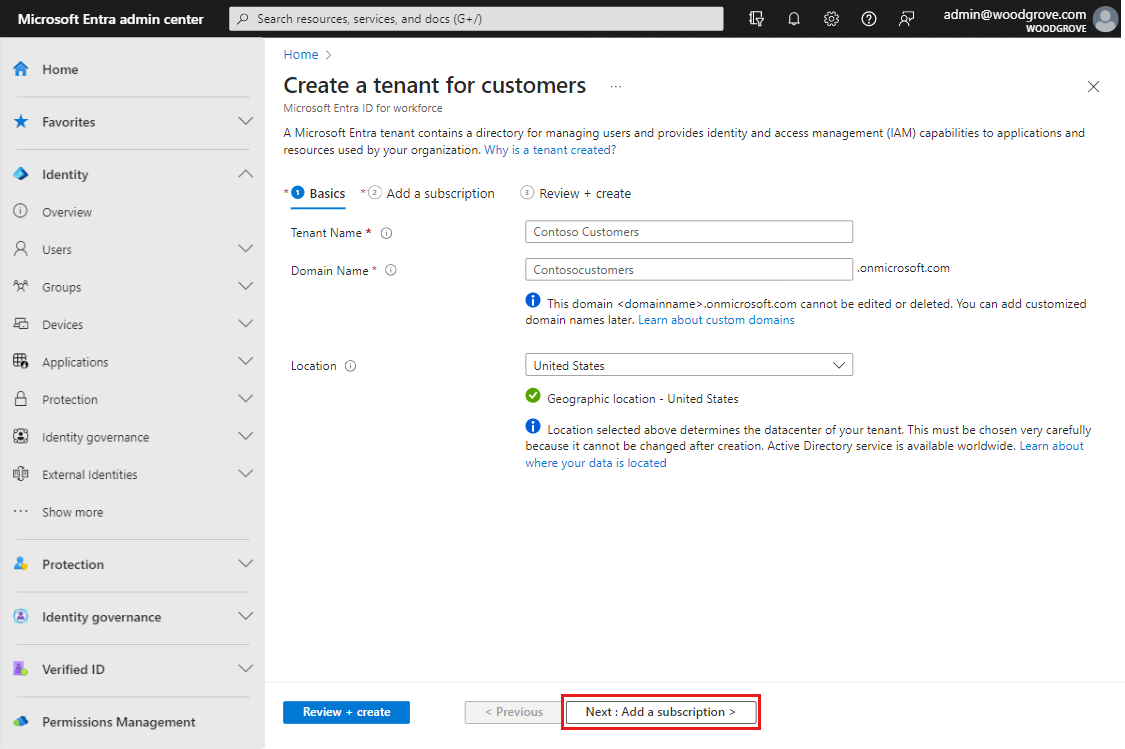
Type your desired Tenant Name (for example Contoso Customers).
Type your desired Domain Name (for example Contosocustomers).
Select your desired Location. This selection can't be changed later.
Select Next: Add a subscription.
On the Add a subscription tab, enter the following information:
Next to Subscription, select your subscription from the menu.
Next to Resource group, select a resource group from the menu. If there are no available resource groups, select Create new, type a Name, and then select OK.
If Resource group location appears, select the geographic location of the resource group from the menu.
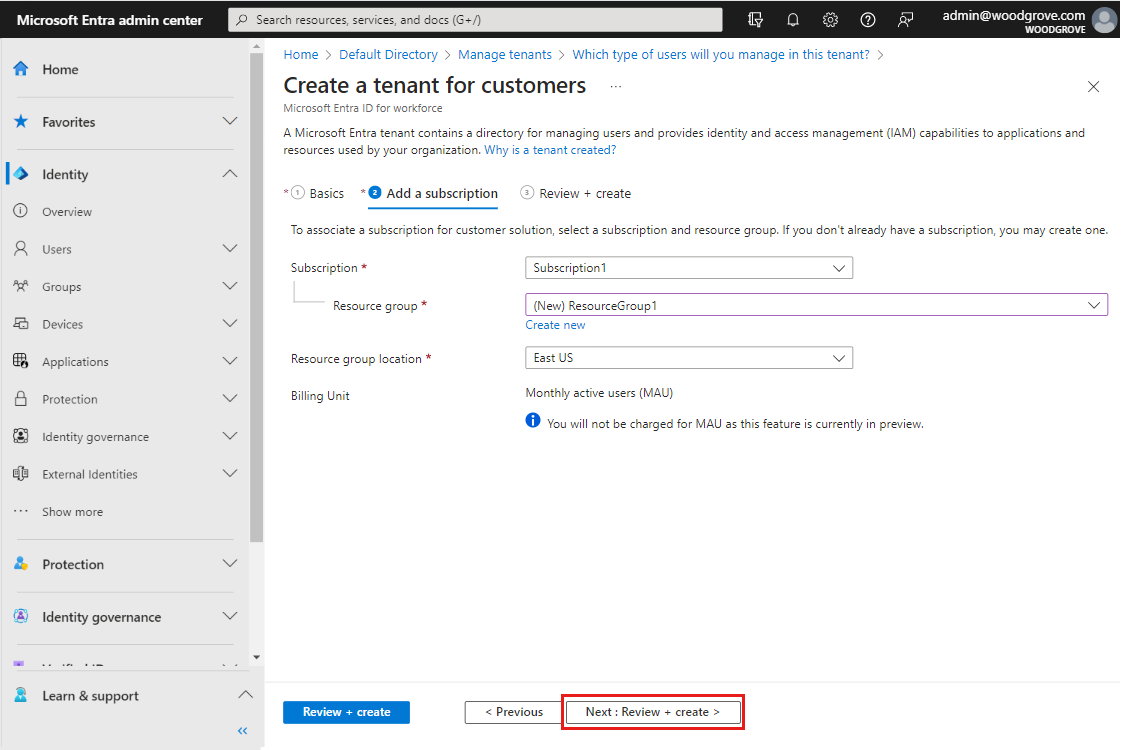
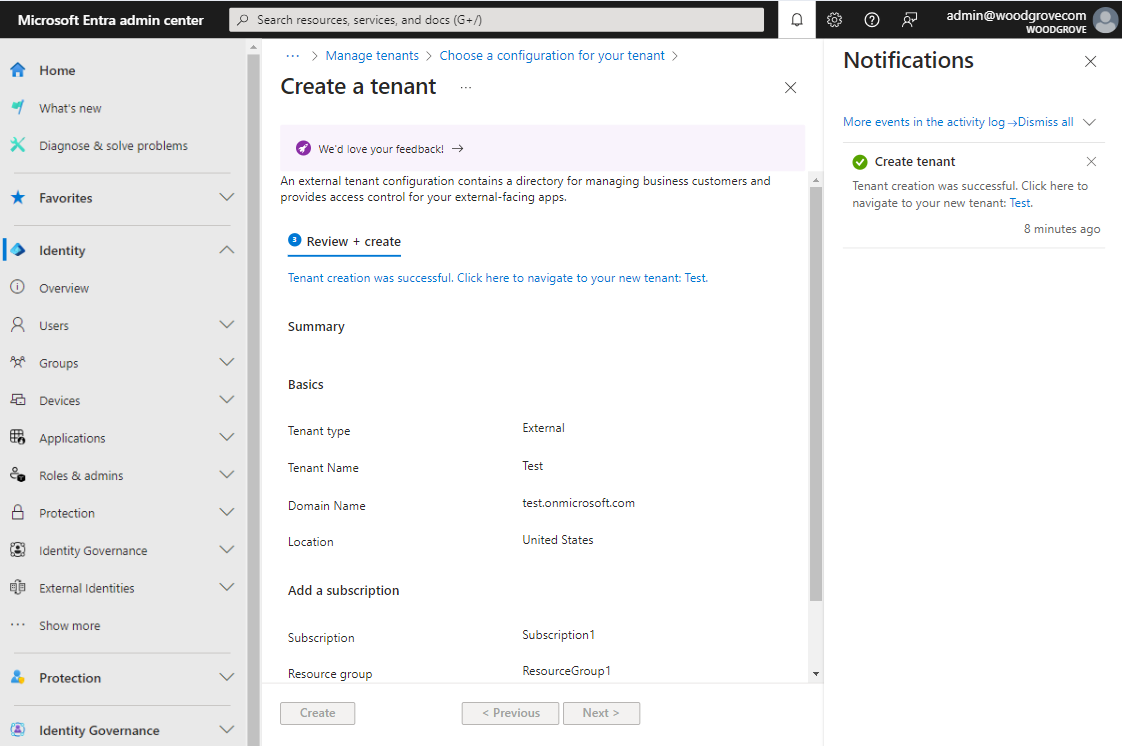
Select Next: Review + Create. If the information that you entered is correct, select Create. The tenant creation process can take up to 30 minutes. You can monitor the progress of the tenant creation process in the Notifications pane. Once the external tenant is created, you can access it in both the Microsoft Entra admin center and the Azure portal.
Note
You can also use the Microsoft Entra External ID extension for Visual Studio Code to set up a trial or paid external tenant directly within Visual Studio Code (learn more).
Get the external tenant details
If you're not sure which directory contains your external tenant, you can find the tenant name and ID both in the Microsoft Entra admin center and in the Azure portal.
If you have access to multiple tenants, select the Settings icon
 in the top menu to switch to the external tenant from the Directories + subscriptions menu.
On the Portal settings | Directories + subscriptions page, find your external tenant in the Directory name list, and then select Switch. This step brings you to the tenant's home page.
Select Tenant overview under Quick navigation. You can find the tenant Name, Tenant ID and Primary domain under the Overview tab.
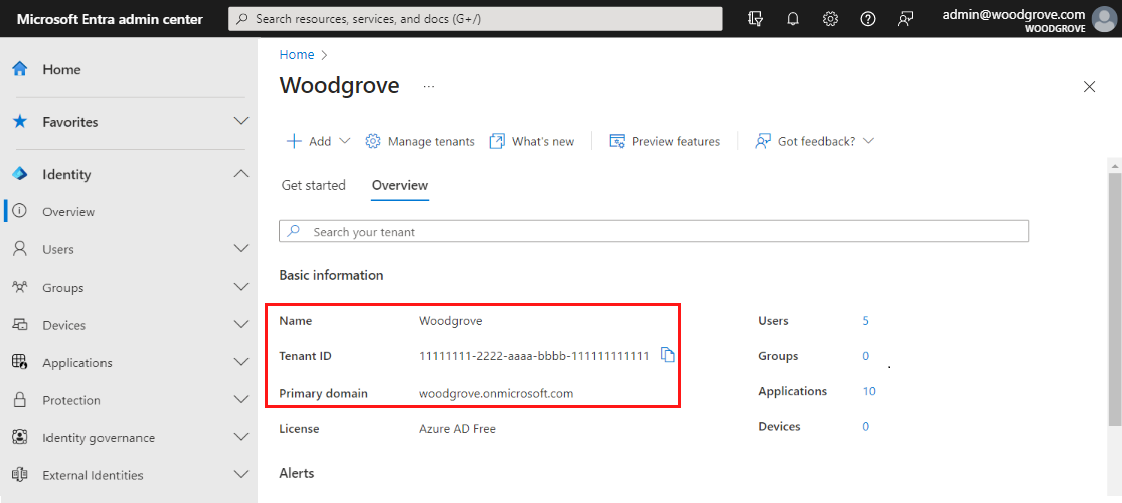
You can find the same details if you go to Microsoft Entra ID in the Azure portal. On the Microsoft Entra ID page, you can find the tenant Name, Tenant ID and Primary domain under Overview > Basic information.