Provisioning with the web services connector
The following documentation provides information about the generic web services connector. Microsoft Entra ID Governance supports provisioning accounts into various applications such as SAP ECC, Oracle eBusiness Suite, and line of business applications that expose REST or SOAP APIs. Customers that have previously deployed MIM to connect to these applications can easily switch to using the lightweight Microsoft Entra provisioning agent, while reusing the same web services connector built for MIM.
Capabilities supported
- Create users in your application.
- Remove users in your application when they don't need access anymore.
- Keep user attributes synchronized between Microsoft Entra ID and your application.
- Discover the schema for your application.
The web services connector implements the following functions:
SOAP Discovery: Allows the administrator to enter the WSDL path exposed by the target web service. Discovery produces a tree structure of the application's hosted web services with their inner endpoints or operations along with the operation’s Meta data description. There's no limit to the number of discovery operations that can be done (step by step). The discovered operations are used later to configure the flow of operations that implement the connector’s operations against the data-source (as Import/Export).
REST Discovery: Allows the administrator to enter REST service details, including Service Endpoint, Resource Path, Method and Parameter details. The REST services information will be stored in the
discovery.xmlfile of thewsconfigproject. They'll be used later by the administrator to configure the Rest Web Service activity in the workflow.Schema configuration: Allows the administrator to configure the schema. The schema configuration will include a listing of Object Types and attributes for a specific application. The administrator may choose the attributes that will be part of the schema.
Operation Flow configuration: Workflow designer UI for configuring the implementation of import and export operations per object type through exposed web service operations functions, including the assignment of parameters from the user being provisioned to web service functions.
Prerequisites for provisioning
On-premises prerequisites
The computer that runs the provisioning agent should have:
- Connectivity to application's REST or SOAP endpoints, as well as with outbound connectivity to login.microsoftonline.com, other Microsoft Online Services and Azure domains. An example is a Windows Server 2016 virtual machine hosted in Azure IaaS or behind a proxy.
- At least 3 GB of RAM, to host a provisioning agent.
- .NET Framework 4.7.2
- A Windows Server 2016 or a later version.
Prior to configuring provisioning, ensure that you:
- Expose the necessary SOAP or REST APIs in your application to create, update and delete users.
Cloud requirements
A Microsoft Entra tenant with Microsoft Entra ID P1 or Premium P2 (or EMS E3 or E5).
Using this feature requires Microsoft Entra ID P1 licenses. To find the right license for your requirements, see Compare generally available features of Microsoft Entra ID.
The Hybrid Identity Administrator role for configuring the provisioning agent and the Application Administrator or Cloud Application Administrator roles for configuring provisioning in the Azure portal.
The Microsoft Entra users to be provisioned to your application must already be populated with any attributes that will be required by your application.
Install and configure the Microsoft Entra Connect Provisioning Agent
- Sign in to the Azure portal.
- Go to Enterprise applications and select New application.
- Search for the On-premises ECMA app application, give the app a name, and select Create to add it to your tenant.
- From the menu, navigate to the Provisioning page of your application.
- Select Get started.
- On the Provisioning page, change the mode to Automatic.

Under On-premises Connectivity, select Download and install, and select Accept terms & download.
Leave the portal and run the provisioning agent installer, agree to the terms of service, and select Install.
Wait for the Microsoft Entra provisioning agent configuration wizard and then select Next.
In the Select Extension step, select On-premises application provisioning and then select Next.
The provisioning agent will use the operating system's web browser to display a popup window for you to authenticate to Microsoft Entra ID, and potentially also your organization's identity provider. If you are using Internet Explorer as the browser on Windows Server, then you may need to add Microsoft web sites to your browser's trusted site list to allow JavaScript to run correctly.
Provide credentials for a Microsoft Entra administrator when you're prompted to authorize. The user is required to have the Hybrid Identity Administrator or Global Administrator role.
Select Confirm to confirm the setting. Once installation is successful, you can select Exit, and also close the Provisioning Agent Package installer.
Configure the On-premises ECMA app
In the portal, on the On-Premises Connectivity section, select the agent that you deployed and select Assign Agent(s).
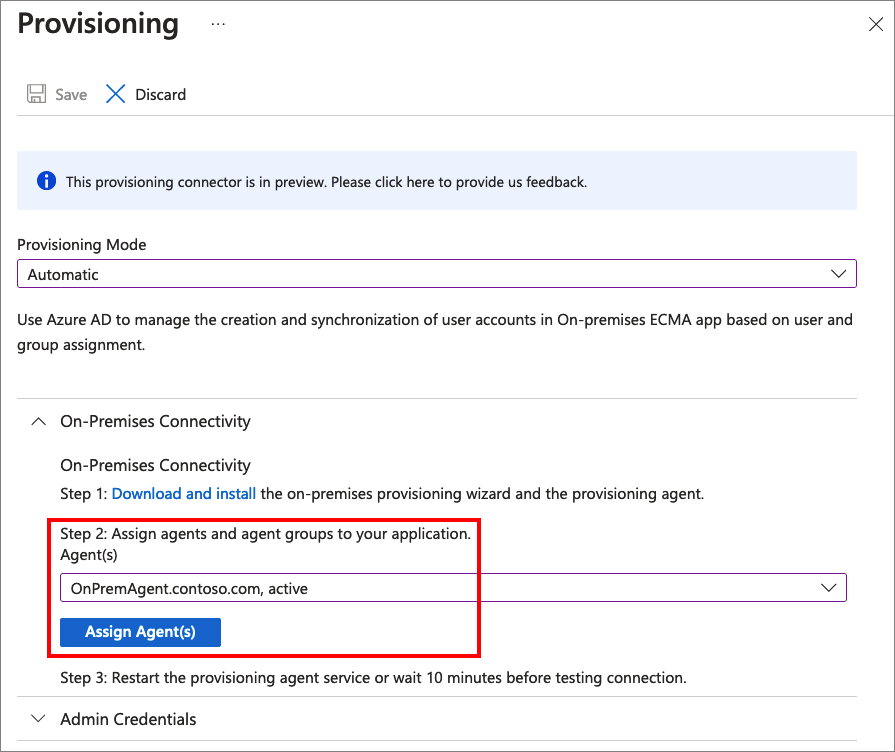
Keep this browser window open, as you complete the next step of configuration using the configuration wizard.
Configure the Microsoft Entra ECMA Connector Host certificate
On the Windows Server where the provisioning agent is installed, right click the Microsoft ECMA2Host Configuration Wizard from the start menu, and run as administrator. Running as a Windows administrator is necessary for the wizard to create the necessary Windows event logs.
After the ECMA Connector Host Configuration starts, if it's the first time you have run the wizard, it will ask you to create a certificate. Leave the default port 8585 and select Generate certificate to generate a certificate. The autogenerated certificate will be self-signed as part of the trusted root. The certificate SAN matches the host name.
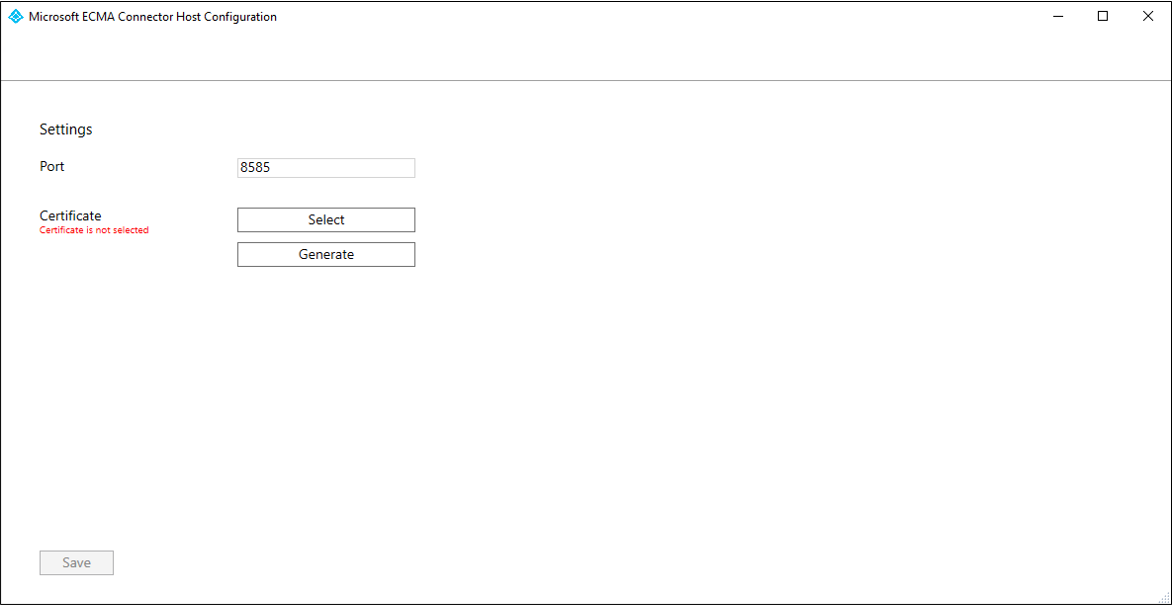
Select Save.

Create a web services connector template
Before creating the web services connector configuration, you will need to create a web services connector template and customize the template to meet the needs of your specific environment. Make sure that the ServiceName, EndpointName, and the OperationName are correct.
You can find example templates and guidance on how to integrate with popular applications such as SAP ECC 7.0 and Oracle eBusiness Suite in the connectors download package. You can learn how to create a new project for your data source in the Web Service Configuration Tool using the workflow guide for SOAP.
For more information on how to configure a template to connect to your own application's REST or SOAP API, see the Overview of the generic Web Service connector in the MIM documentation library.
Configure the generic web services connector
In this section, you will create the connector configuration for your application.
Connect the provisioning agent to your application
To connect the Microsoft Entra provisioning agent with your application, follow these steps:
Copy your web service connector template
.wsconfigfile into theC:\Program Files\Microsoft ECMA2Host\Service\ECMAfolder.Generate a secret token that will be used for authenticating Microsoft Entra ID to the connector. It should be 12 characters minimum and unique for each application.
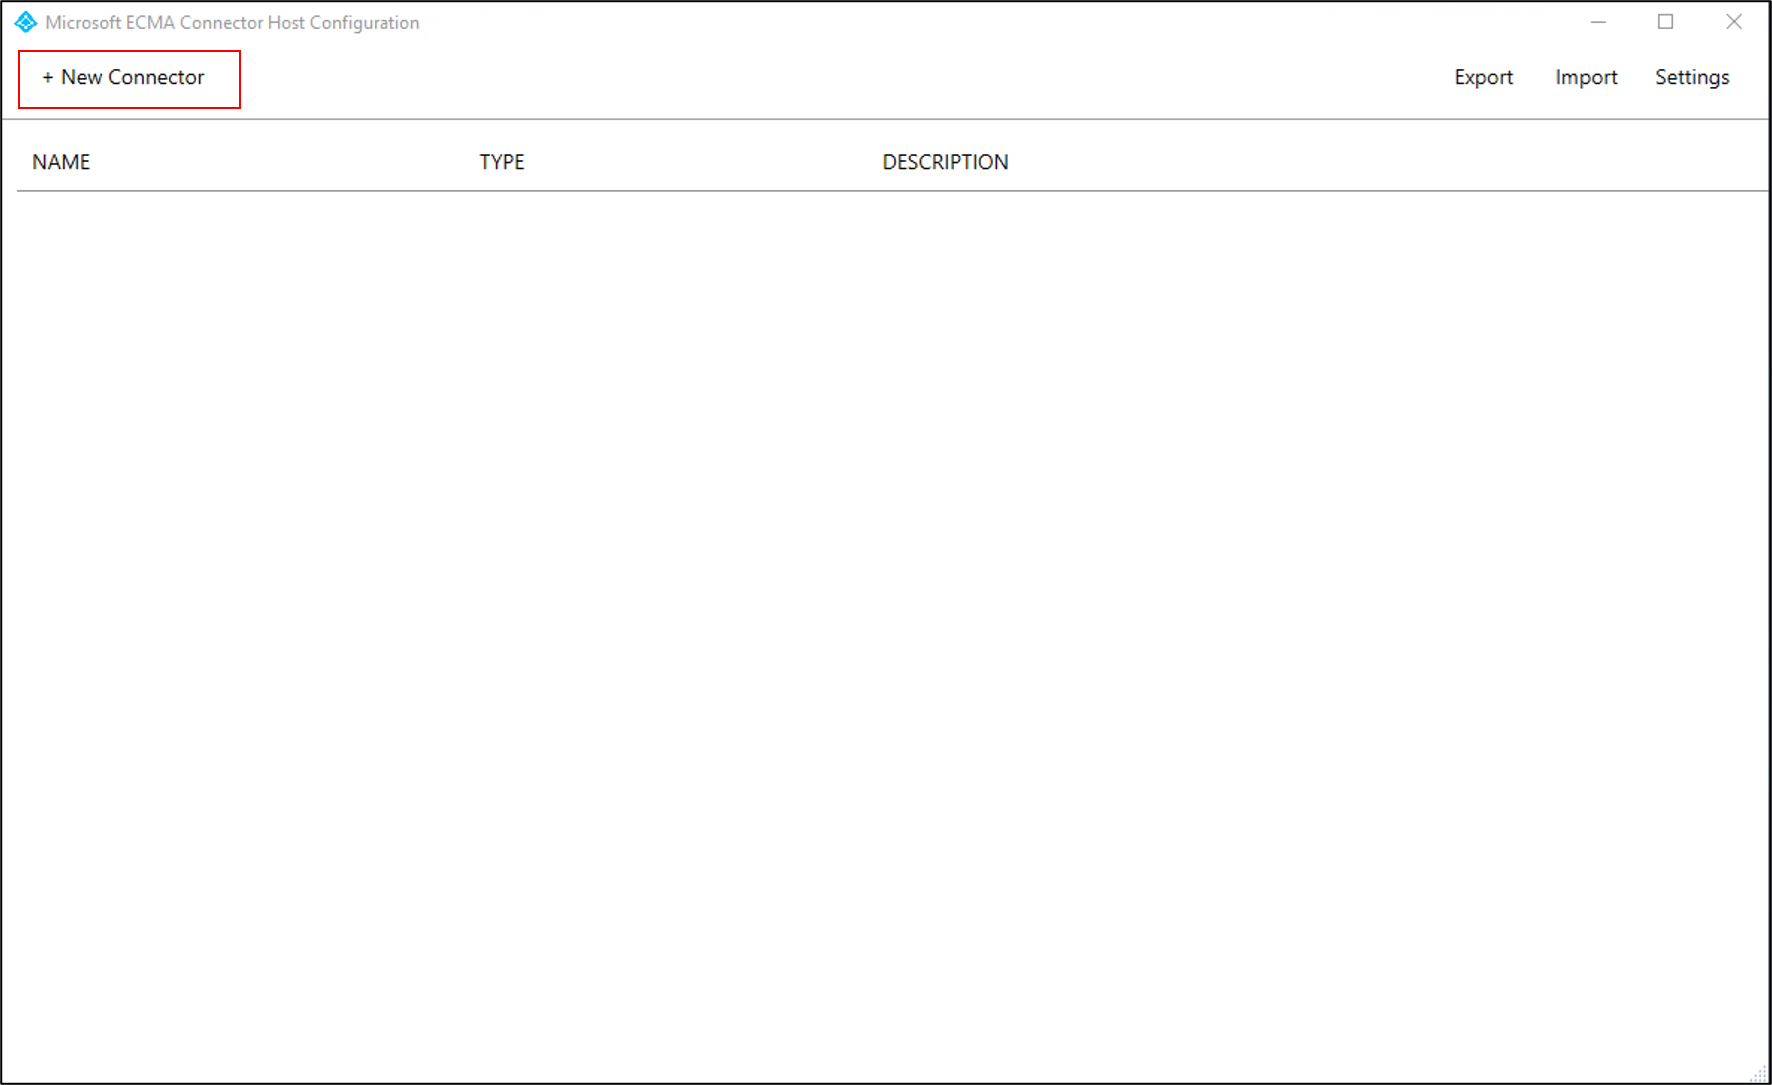
If you haven't already done so, launch the Microsoft ECMA2Host Configuration Wizard from the Windows Start menu.
Select New Connector.
On the Properties page, fill in the boxes with the values specified in the table that follows the image and select Next.
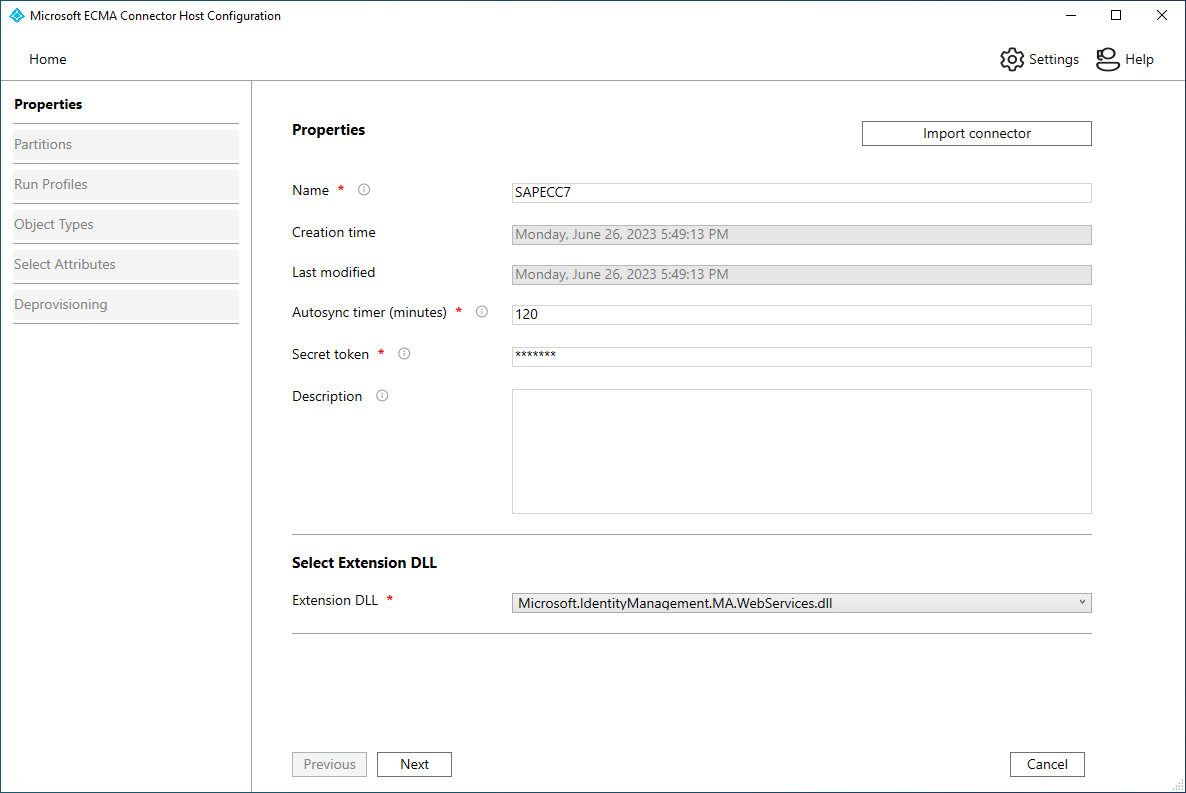
Property Value Name The name you chose for the connector, which should be unique across all connectors in your environment. Autosync timer (minutes) 120 Secret Token Enter the secret token you generated for this connector. The key should be 12 characters minimum. Extension DLL For the web services connector, select Microsoft.IdentityManagement.MA.WebServices.dll. On the Connectivity page, fill in the boxes with the values specified in the table that follows the image and select Next.
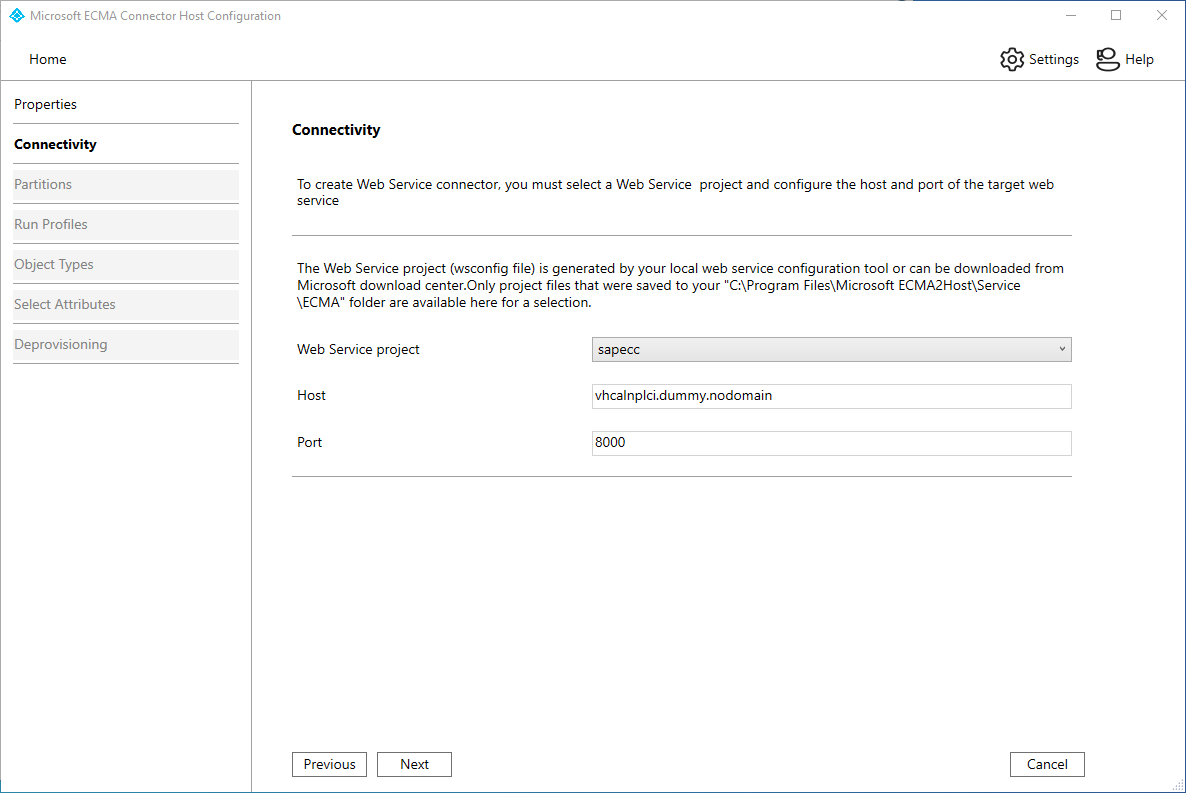
Property Description Web Service Project Your web services template name. Host Your application's SOAP endpoint host name, e.g. vhcalnplci.dummy.nodomain Port Your application's SOAP endpoint port, e.g. 8000 On the Capabilities page, fill in the boxes with the values specified in the table below and select Next.
Property Value Distinguished Name Style Generic Export Type ObjectReplace Data Normalization None Object Confirmation Normal Enable Import Checked Enabled Delta Import Unchecked Enable Export Checked Enable Full Export Unchecked Enable Export Password in the First Pass Checked No Reference Values in First Export Pass Unchecked Enable Object Rename Unchecked Delete-Add as Replace Unchecked


Note
If your web services connector template is opened for editing in the Web Service Configuration Tool, you will get an error.
On the Global page, fill in the boxes, and select Next.
On the Partitions page, select Next.
On the Run Profiles page, keep the Export checkbox selected. Select the Full import checkbox and select Next. The Export run profile will be used when the ECMA Connector host needs to send changes from Microsoft Entra ID to your application to insert, update and delete records. The Full Import run profile will be used when the ECMA Connector host service starts, to read in the current content of your application.
Property Value Export Run profile that will export data to your application This run profile is required. Full import Run profile that will import all data from your application. Delta import Run profile that will import only changes from your application since the last full or delta import. On the Object Types page, fill in the boxes and select Next. Use the table that follows the image for guidance on the individual boxes.
Anchor : The values of this attribute should be unique for each object in the target system. The Microsoft Entra provisioning service will query the ECMA connector host by using this attribute after the initial cycle. This value is defined in the web services connector template.
DN : The Autogenerated option should be selected in most cases. If it isn't selected, ensure that the DN attribute is mapped to an attribute in Microsoft Entra ID that stores the DN in this format: CN = anchorValue, Object = objectType. For more information on anchors and the DN, see About anchor attributes and distinguished names.
Property Value Target object User Anchor userName DN userName Autogenerated Checked
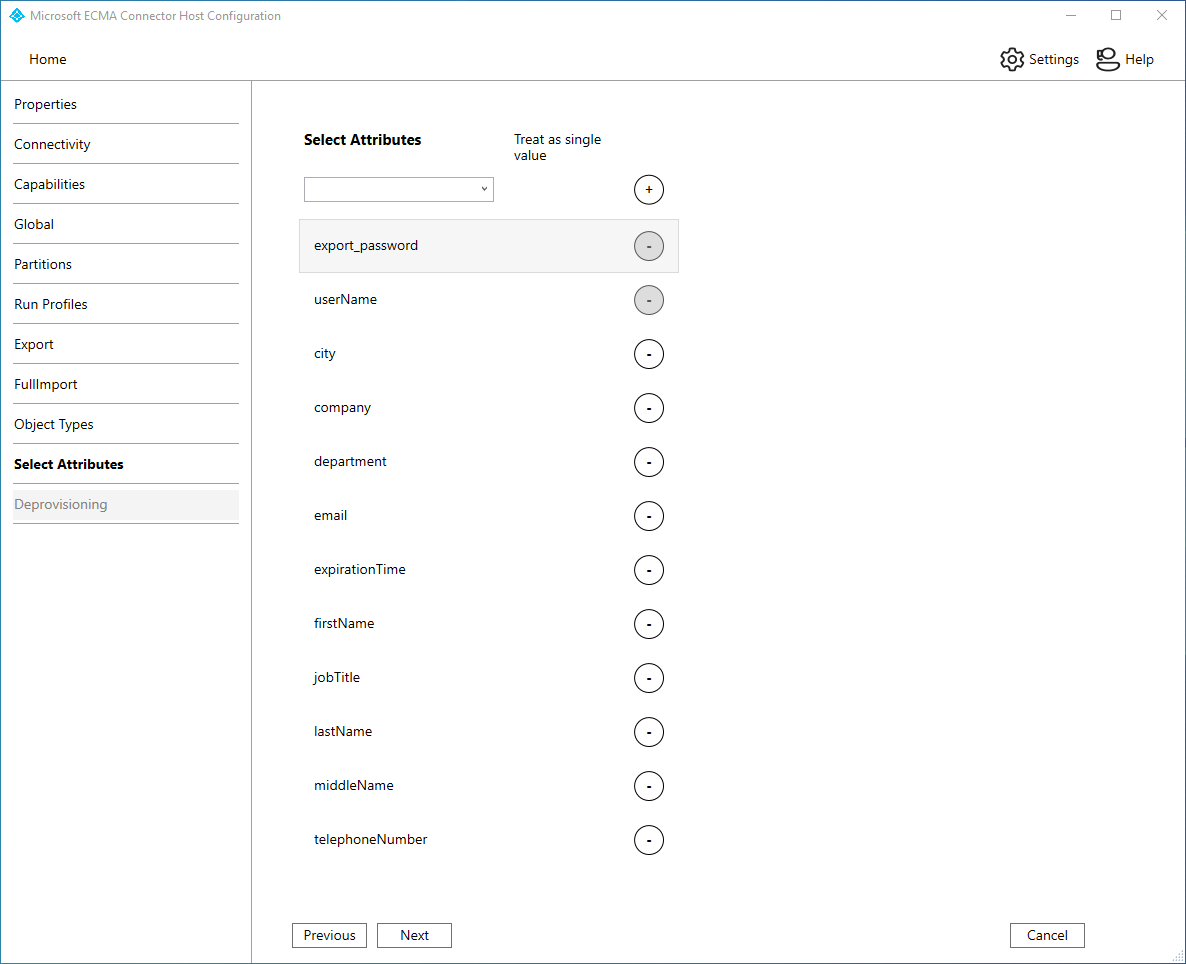
The ECMA connector host discovers the attributes supported by your application. You can then choose which of the discovered attributes you want to expose to Microsoft Entra ID. These attributes can then be configured in the Azure portal for provisioning. On the Select Attributes page, add all the attributes in the dropdown list one at a time. The Attribute dropdown list shows any attribute that was discovered in your application and wasn't chosen on the previous Select Attributes page. Once all the relevant attributes have been added, select Next.
On the Deprovisioning page, under Disable flow, select Delete. The attributes selected on the previous page won't be available to select on the Deprovisioning page. Select Finish.

Note
If you use the Set attribute value be aware that only boolean values are allowed.
On the Deprovisioning page, under Disable flow, select None if you will control user account status with a property such as expirationTime. Under Delete flow, select None if you do not want to delete users from your application or Delete if you do. Select Finish.
Ensure the ECMA2Host service is running
On the server running the Microsoft Entra ECMA Connector Host, select Start.
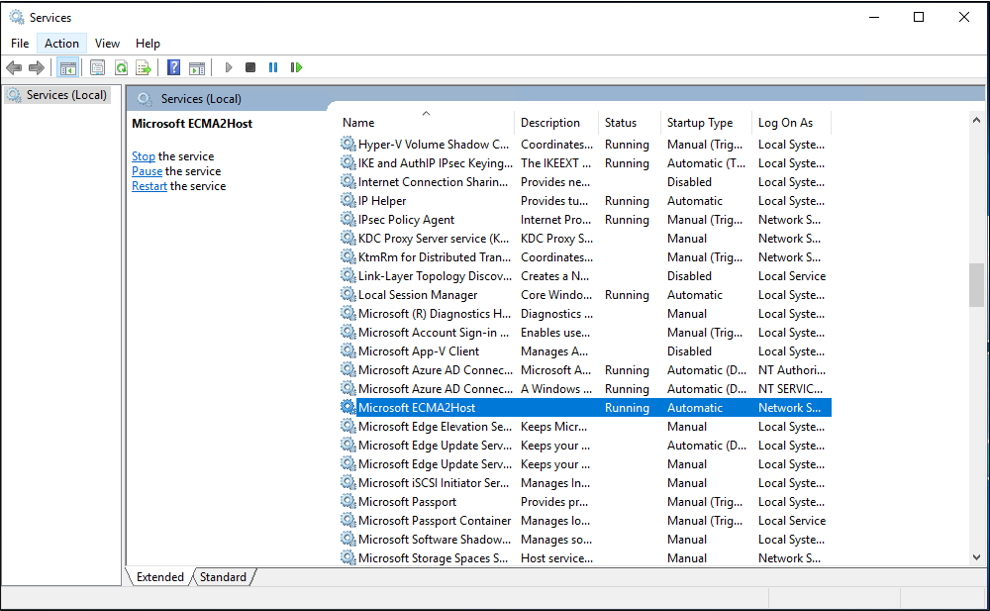
Enter run and enter services.msc in the box.
In the Services list, ensure that Microsoft ECMA2Host is present and running. If not, select Start.
If you have recently started the service, and have many user objects in your application, then wait several minutes for the connector to establish a connection with your application and perform the initial full import.

Configure the application connection in the Azure portal
Return to the web browser window where you were configuring the application provisioning.
Note
If the window had timed out, then you will need to re-select the agent.
- Sign in to the Azure portal.
- Go to Enterprise applications and the On-premises ECMA app application.
- Select Provisioning.
- Select Get started and then change the mode to Automatic, on the On-Premises Connectivity section, select the agent that you deployed and select Assign Agent(s). Otherwise go to Edit Provisioning.
Under the Admin credentials section, enter the following URL. Replace the
{connectorName}portion with the name of the connector on the ECMA connector host. The connector name is case sensitive and should be the same case as was configured in the wizard. You can also replacelocalhostwith your machine hostname.Property Value Tenant URL https://localhost:8585/ecma2host_APP1/scimEnter the Secret Token value that you defined when you created the connector.
Note
If you just assigned the agent to the application, please wait 10 minutes for the registration to complete. The connectivity test won't work until the registration completes. Forcing the agent registration to complete by restarting the provisioning agent on your server can speed up the registration process. Go to your server, search for services in the Windows search bar, identify the Microsoft Entra Connect Provisioning Agent Service, right-click the service, and restart.
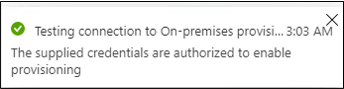
Select Test Connection, and wait one minute.
After the connection test is successful and indicates that the supplied credentials are authorized to enable provisioning, select Save.
Configure attribute mappings
Now you will map attributes between the representation of the user in Microsoft Entra ID and the representation of the user in your application.
You'll use the Azure portal to configure the mapping between the Microsoft Entra user's attributes and the attributes that you previously selected in the ECMA Host configuration wizard.
Ensure that the Microsoft Entra schema includes the attributes that are required by your application. If it requires users to have an attribute, and that attribute is not already part of your Microsoft Entra schema for a user, then you will need to use the directory extension feature to add that attribute as an extension.
In the Microsoft Entra admin center, under Enterprise applications, select the On-premises ECMA app application, and then the Provisioning page.
Select Edit provisioning, and wait 10 seconds.
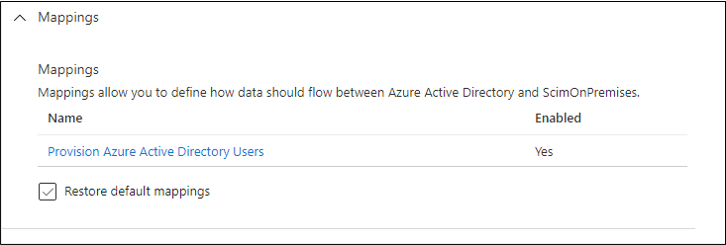
Expand Mappings and select Provision Microsoft Entra users. If this is the first time you've configured the attribute mappings for this application, there will be only one mapping present, for a placeholder.
To confirm that the schema of your application is available in Microsoft Entra ID, select the Show advanced options checkbox and select Edit attribute list for ScimOnPremises. Ensure that all the attributes selected in the configuration wizard are listed. If not, then wait several minutes for the schema to refresh, and then reload the page. Once you see the attributes listed, then cancel from this page to return to the mappings list.
Now, click on the userPrincipalName PLACEHOLDER mapping. This mapping is added by default when you first configure on-premises provisioning.

Change the value to match the following:
| Mapping type | Source attribute | Target attribute |
|---|---|---|
| Direct | userPrincipalName | urn:ietf:params:scim:schemas:extension:ECMA2Host:2.0:User:userName |
Now select Add New Mapping, and repeat the next step for each mapping.
Specify the source and target attributes for each of the attributes your application requires. For example,
Microsoft Entra Attribute ScimOnPremises Attribute Matching precedence Apply this mapping ToUpper(Word([userPrincipalName], 1, "@"), ) urn:ietf:params:scim:schemas:extension:ECMA2Host:2.0:User:userName 1 Only during object creation Redact("Pass@w0rd1") urn:ietf:params:scim:schemas:extension:ECMA2Host:2.0:User:export_password Only during object creation city urn:ietf:params:scim:schemas:extension:ECMA2Host:2.0:User:city Always companyName urn:ietf:params:scim:schemas:extension:ECMA2Host:2.0:User:company Always department urn:ietf:params:scim:schemas:extension:ECMA2Host:2.0:User:department Always mail urn:ietf:params:scim:schemas:extension:ECMA2Host:2.0:User:email Always Switch([IsSoftDeleted], , "False", "9999-12-31", "True", "1990-01-01") urn:ietf:params:scim:schemas:extension:ECMA2Host:2.0:User:expirationTime Always givenName urn:ietf:params:scim:schemas:extension:ECMA2Host:2.0:User:firstName Always surname urn:ietf:params:scim:schemas:extension:ECMA2Host:2.0:User:lastName Always telephoneNumber urn:ietf:params:scim:schemas:extension:ECMA2Host:2.0:User:telephoneNumber Always jobTitle urn:ietf:params:scim:schemas:extension:ECMA2Host:2.0:User:jobTitle Always Once all of the mappings have been added, select Save.
Assign users to the application
Now that you have the Microsoft Entra ECMA Connector Host talking with Microsoft Entra ID, and the attribute mapping configured, you can move on to configuring who's in scope for provisioning.
Important
If you were signed in using a Hybrid Identity Administrator role, you need to sign-out and sign-in with an account that has the Application Administrator, Cloud Application Administrator or Global Administrator role, for this section. The Hybrid Identity Administrator role does not have permissions to assign users to applications.
If there are existing users in your application, then you should create application role assignments for those existing users. To learn more about how to create application role assignments in bulk, see governing an application's existing users in Microsoft Entra ID.
Otherwise, if there are no current users of the application, then select a test user from Microsoft Entra who will be provisioned to the application.
Ensure that the user you will select has all the properties that will be mapped to the required attributes of your application.
In the Azure portal, select Enterprise applications.
Select the On-premises ECMA app application.
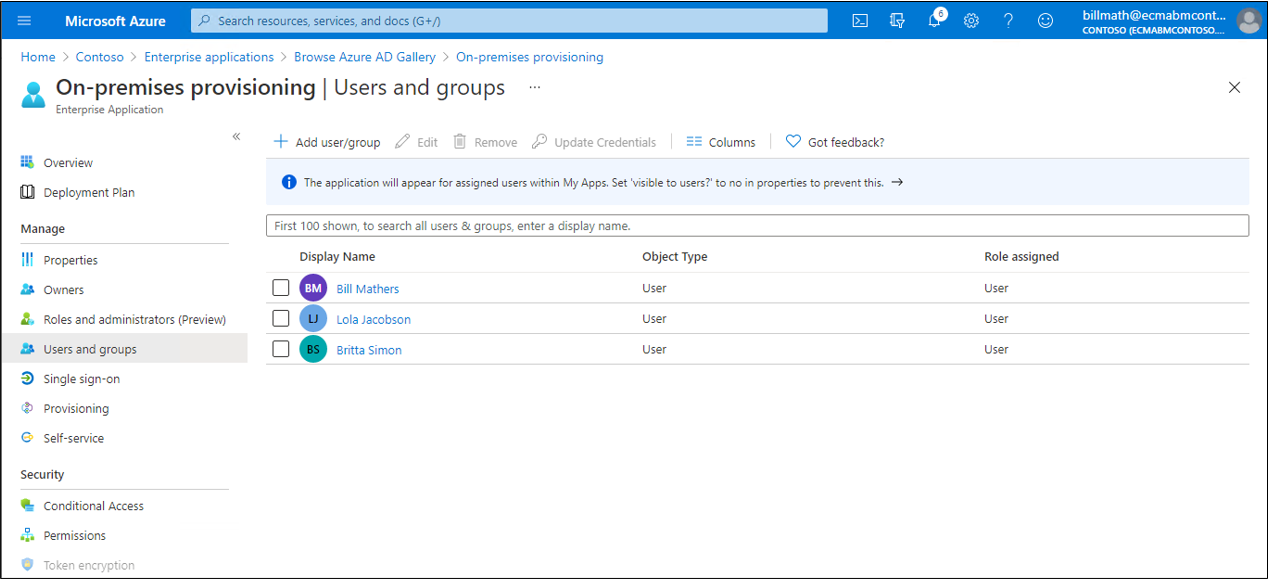
On the left, under Manage, select Users and groups.
Select Add user/group.

Under Users, select None Selected.
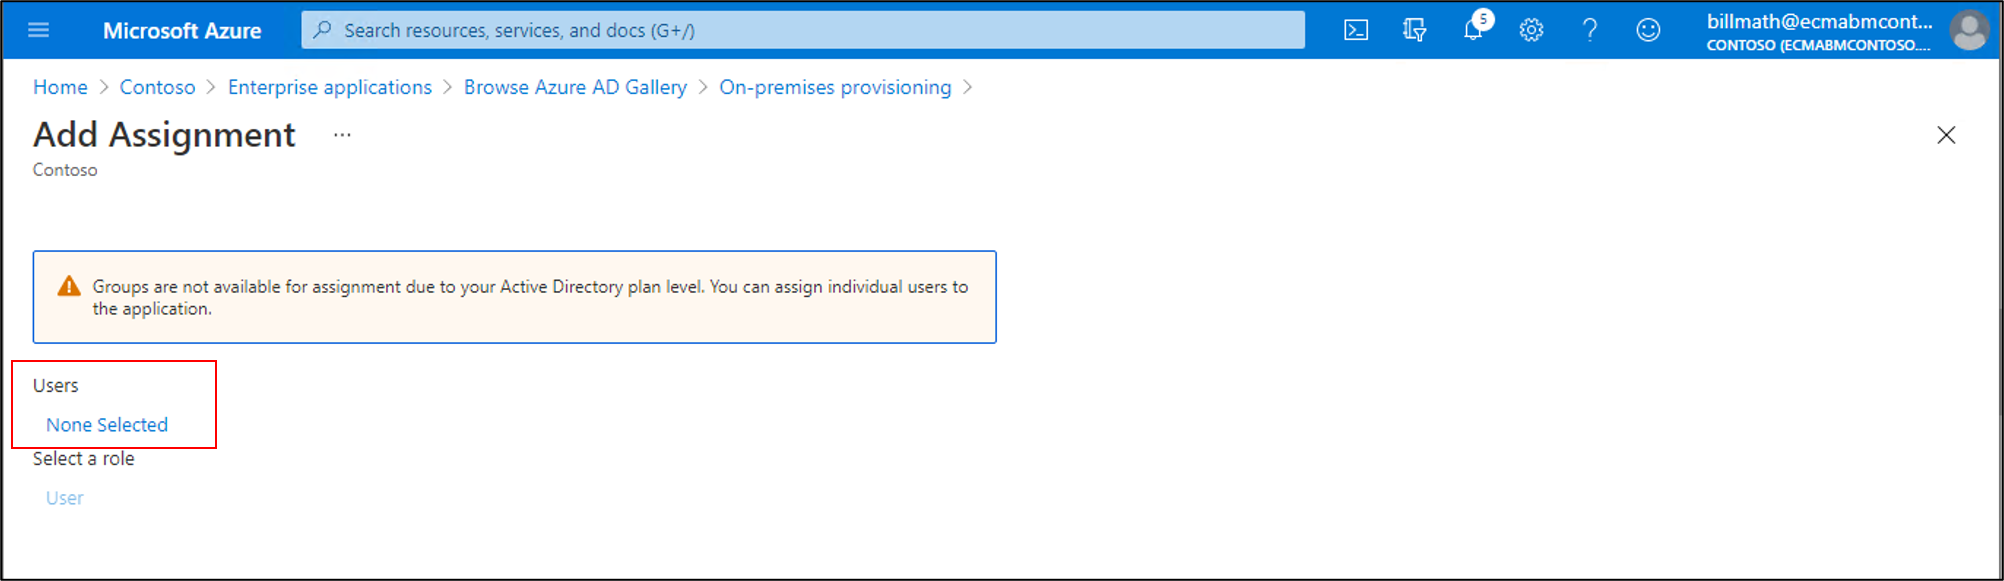
Select users from the right and select the Select button.
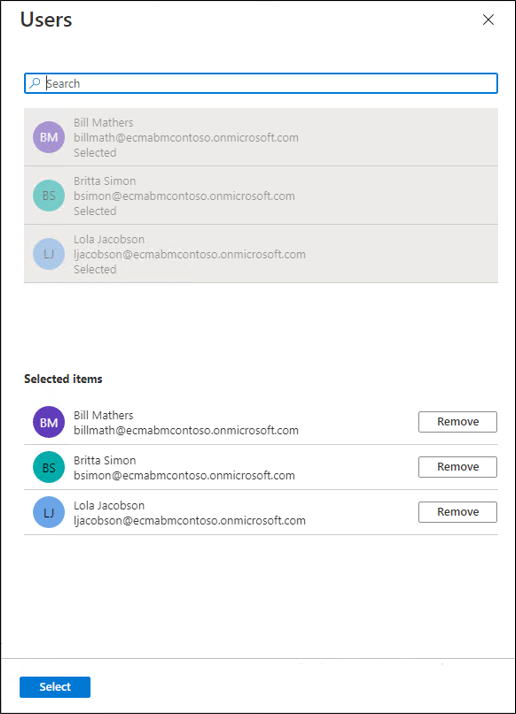
Now select Assign.


Test provisioning
Now that your attributes are mapped and users are assigned, you can test on-demand provisioning with one of your users.
In the Azure portal, select Enterprise applications.
Select the On-premises ECMA app application.
On the left, select Provisioning.
Select Provision on demand.
Search for one of your test users, and select Provision.
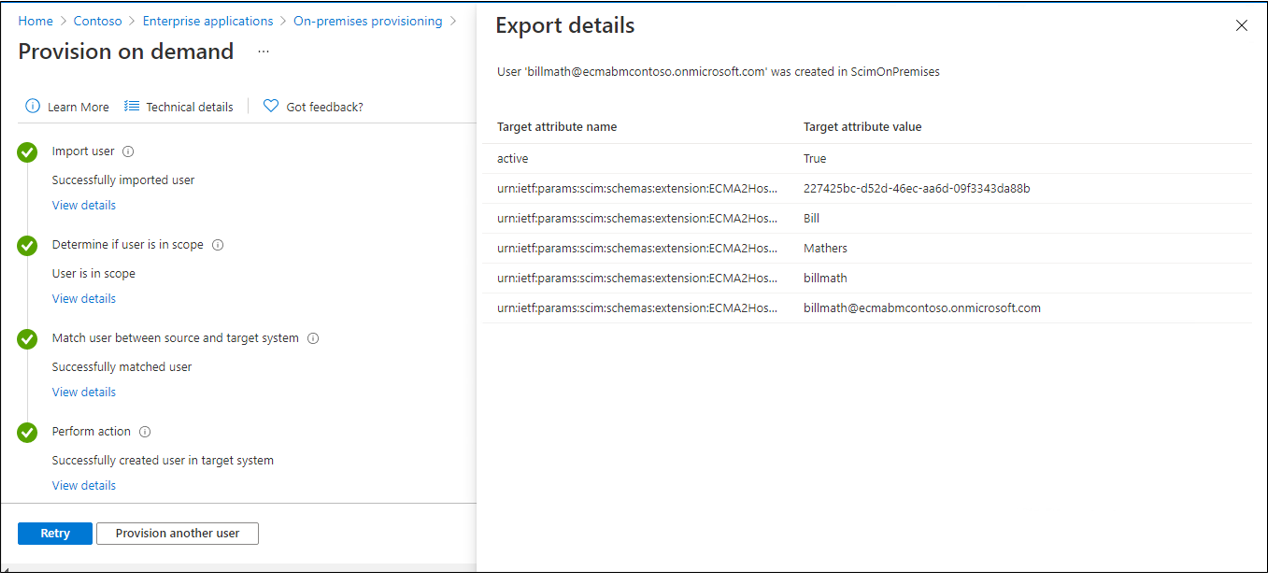
After several seconds, then the message Successfully created user in target system will appear, with a list of the user attributes.
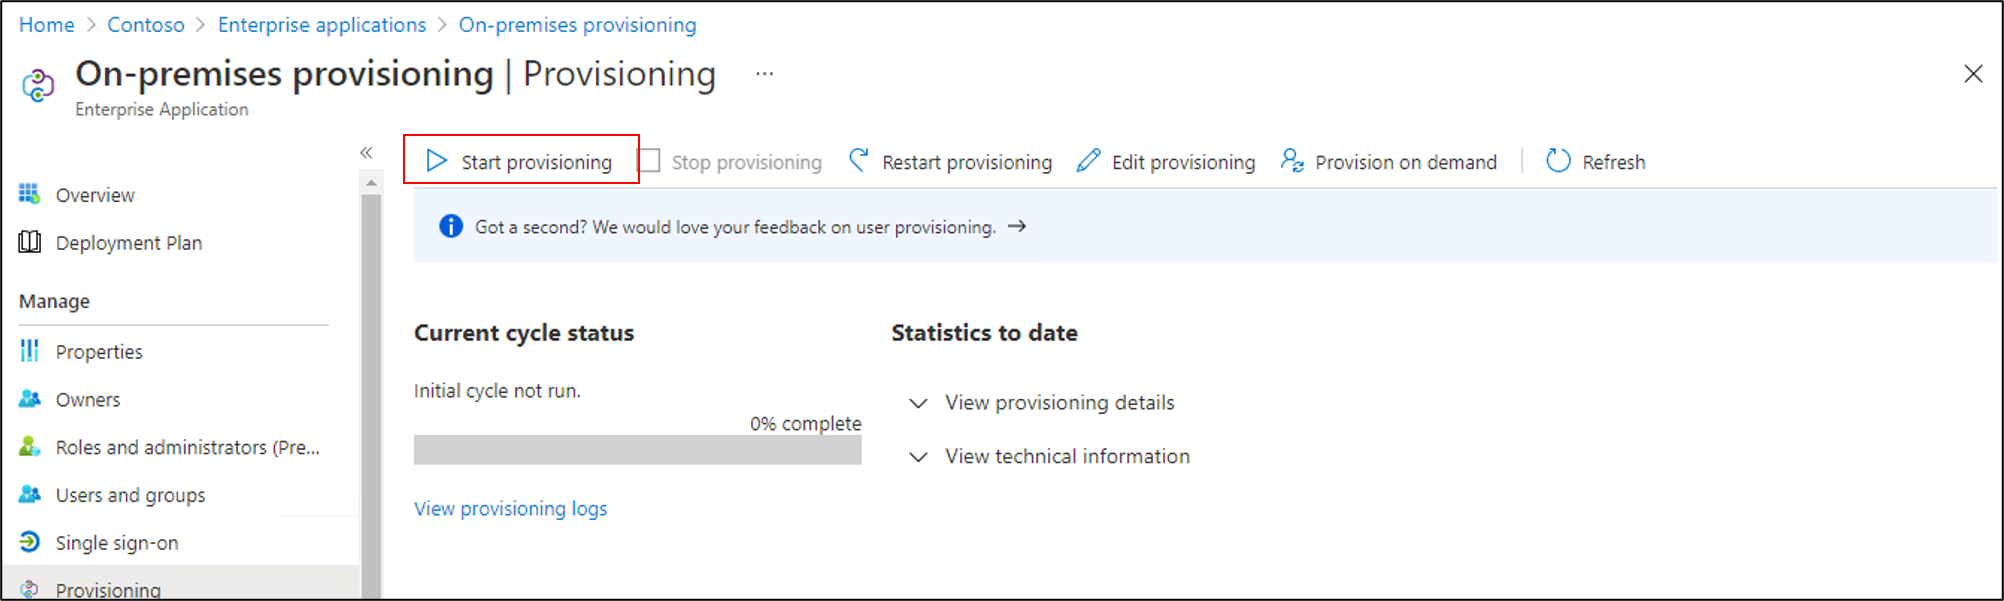
Start provisioning users
After on-demand provisioning is successful, return to the provisioning configuration page. Ensure that the scope is set to only assigned users and groups, turn provisioning On, and select Save.
Wait up to 40 minutes for the provisioning service to start. After the provisioning job has been completed, as described in the next section, if you're done testing, you can change the provisioning status to Off, and select Save. This action stops the provisioning service from running in the future.

Troubleshooting provisioning errors
If an error is shown, then select View provisioning logs. Look in the log for a row in which the Status is Failure, and select on that row.
For more information, change to the Troubleshooting & Recommendations tab.
Next steps
Povratne informacije
Stiže uskoro: Tijekom 2024. postupno ćemo ukinuti servis Problemi sa servisom GitHub kao mehanizam za povratne informacije za sadržaj i zamijeniti ga novim sustavom za povratne informacije. Dodatne informacije potražite u članku: https://aka.ms/ContentUserFeedback.
Pošaljite i pogledajte povratne informacije za