Migrate QnA Maker to Azure OpenAI on your data
QnA Maker was designed to be a cloud-based Natural Language Processing (NLP) service that allowed users to create a natural conversational layer over their data. This service is being retired, having been replaced by custom question answering. AI runtimes however, are evolving due to the development of Large Language Models (LLMs), such as GPT-35-Turbo and GPT-4 offered by Azure OpenAI, which can address many chat-based use cases. Use this article to learn how to migrate your existing QnA Maker projects to Azure OpenAI.
Prerequisites
- A QnA Maker project.
- An existing Azure OpenAI resource. If you don't already have an Azure OpenAI resource, then create one and deploy a model.
- Be sure that you are assigned at least the Cognitive Services OpenAI Contributor role for the Azure OpenAI resource.
Migrate to Azure OpenAI
Log into the Azure portal and navigate to an existing QnA Maker project. Then select it to open the Overview section.
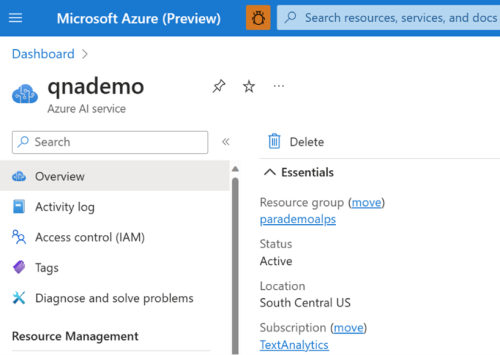
Verify that the QnA Maker project you've selected is the one you want to migrate, including its Azure subscription and resource group.
Go to the associated resource group and filter the resources by search service to find the associated Cognitive Search service.

Select the search service and open its Overview section. Note down the details, such as the Azure Search resource name, subscription, and location. You will need this information when you migrate to Azure OpenAI.

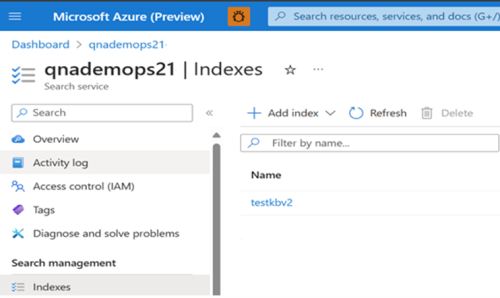
Navigate to the Search management > Indexes section on the left menu and note the index that you want to migrate to Azure OpenAI.
Go to Azure OpenAI Studio and select Bring your own data.

You can also select Chat playground and then select Add your data.

In the pane that appears, select Azure Cognitive Search under Select or add data source. This will update the screen with Data field mapping options depending on your data source. Select the subscription, Azure AI Search service and Azure AI Search Index associated with your QnA maker project. Select the acknowledgment that connecting it will incur usage on your account. Then select Next.

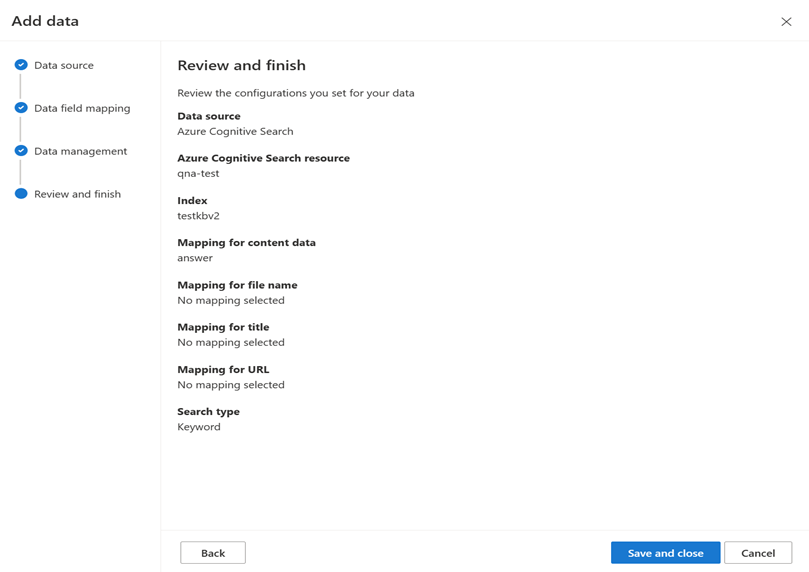
On the Index data field mapping screen, select answer for Content data field. The other fields such as File name, Title and URL are optional depending on the nature of your data source.

Select Next. Select a search type from the dropdown menu. You can choose Keyword or Semantic. semantic” search requires an existing semantic search configuration, which may or may not be available for your project.

Review the information you provided, and select Save and close.
Your data source has now been added. Select your model's deployment name under the Configuration > Deployment tab on the menu to the right.


You can now start exploring Azure OpenAI capabilities with a no-code approach through the chat playground. It's simply a text box where you can submit a prompt to generate a completion. From this page, you can quickly iterate and experiment with the capabilities. You can also launch a web app to chat with the model over the web.