Webhooks
Azure DevOps Services | Azure DevOps Server 2022 - Azure DevOps Server 2019
This article describes webhooks and how to set them up for your Azure DevOps project. Webhooks provide a way to send a JSON representation of an Azure DevOps event to any service that has a public endpoint.
Note
Azure DevOps doesn't charge for setting up service hooks or integrating with external services. Refer to the specific service's site for pricing related to their services.
Prerequisites
You need the following prerequisites to manage webhooks for an Azure DevOps organization:
Owner or Project Collection Administrator role in the organization.
A project in the organization, and a service with a public HTTP or HTTPS endpoint that you want to send Azure DevOps events to.
Important
It's recommended to use only HTTPS endpoints. HTTP has the potential to send private data, including authentication headers, unencrypted in the event payload. You must use HTTPS for basic authentication on a webhook.
Send JSON representation to a service
In your Azure DevOps project, go to Project settings > Service hooks at
https://<organization-name>/<project-name>/_settings/serviceHooks.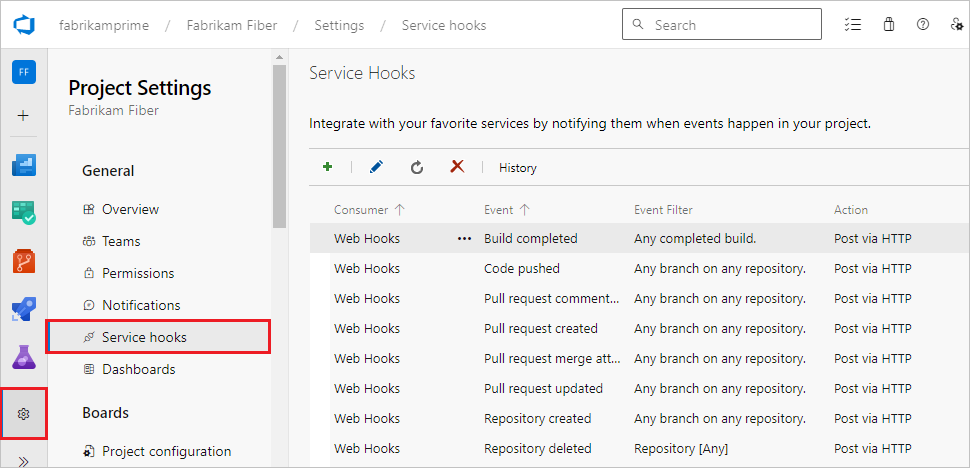
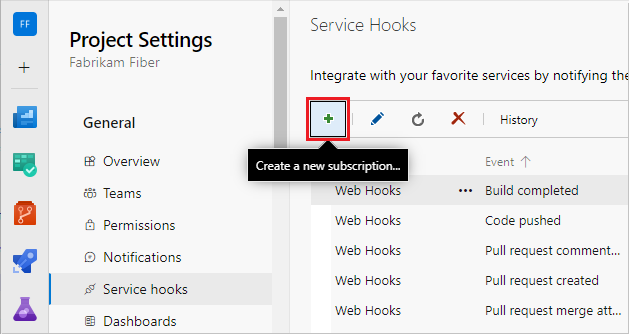
On the Service Hooks page, select the + icon or Create subscription.
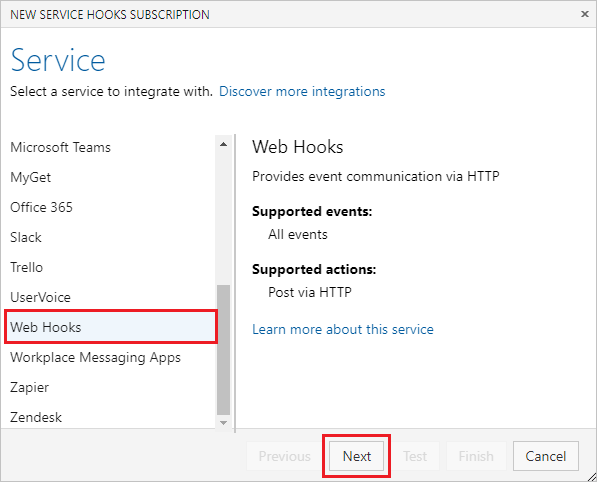
On the Service screen, select Web Hooks and then select Next.
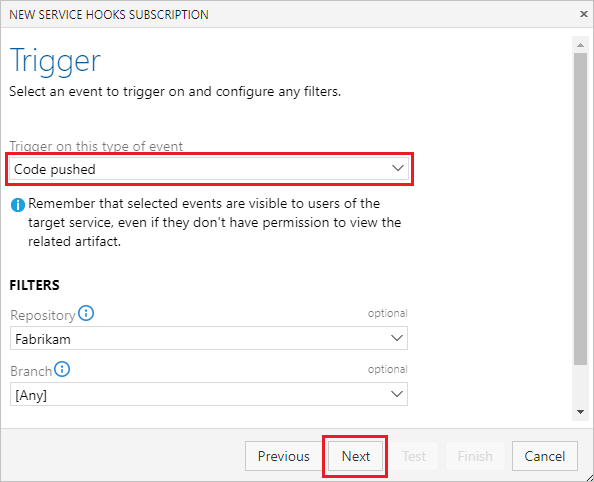
On the Trigger screen, select and configure the Azure DevOps event you want to trigger the webhook on, and then select Next. For more information about the JSON payloads posted by the Azure DevOps consumer, see Service hooks events.
On the Action screen, configure the target URL and what to do when the event occurs. For more information about what to enter in Resource details to send, Messages to send, and Detailed messages to send, see Resource details to send.
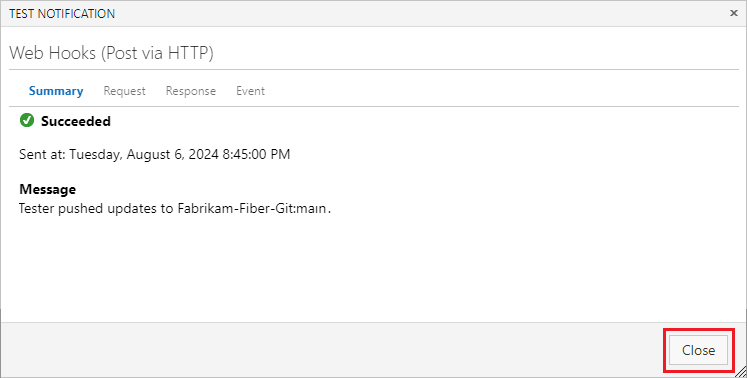
Select Test to test the service hook subscription.
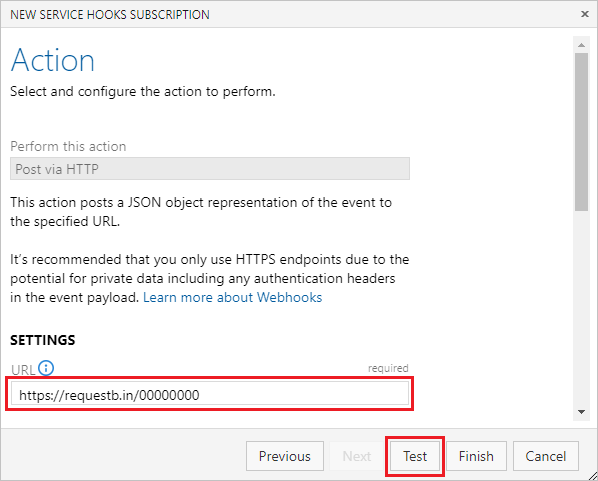
When the test completes successfully, close the notification screen, and then select Finish on the Action screen.
Now the webhook is set up. Go to the target service to view the JSON representation.

Tip
You can also create a webhook programmatically. For more information, see Create a service hook subscription programmatically.
Resource details to send
The Resource details to send, Messages to send, and Detailed messages to send settings in the Action pane control the size of the JSON payload to send. Resource details to send controls how much of the resource to send. The default is All, but you can also choose to send Minimal, which sends only key fields like URL and ID, or None.
None and Minimal are useful in scenarios where the caller doesn't need much or any information about the resource, because it relies on the message or detailed message itself. None and Minimal are also useful for security reasons. The caller must call back into Azure DevOps Services and go through normal security and permission checks to get more details about the resource.
The following sample JSON shows minimal details about the resource:
   {
       "eventType": "git.push",
       ...
       "messages": {
           "text": "...",
           "html": "...",
           "markdown": "..."
       },
       "detailedMessage": {
           "text": "...",
           "html": "...",
           "markdown": "..."
       },
       "resource": {
           "id": "...",
           "url": "https://...",
           "name": "...",
           "field1:": "..."
       }
   }