Tutorial: Use TLS/SSL certificates to secure a web server
Applies to: ✔️ Linux VMs
To secure web servers, a Transport Layer Security (TLS), previously known as Secure Sockets Layer (SSL), certificate can be used to encrypt web traffic. These TLS/SSL certificates can be stored in Azure Key Vault, and allow secure deployments of certificates to Linux virtual machines (VMs) in Azure. In this tutorial you learn how to:
- Create an Azure Key Vault
- Generate or upload a certificate to the Key Vault
- Create a VM and install the NGINX web server
- Inject the certificate into the VM and configure NGINX with a TLS binding
This tutorial uses the CLI within the Azure Cloud Shell, which is constantly updated to the latest version. To open the Cloud Shell, select Try it from the top of any code block.
If you choose to install and use the CLI locally, this tutorial requires that you're running the Azure CLI version 2.0.30 or later. Run az --version to find the version. If you need to install or upgrade, see Install Azure CLI.
Overview
Azure Key Vault safeguards cryptographic keys and secrets, such as certificates or passwords. Key Vault helps streamline the certificate management process and enables you to maintain control of keys that access those certificates. You can create a self-signed certificate inside Key Vault, or upload an existing, trusted certificate that you already own.
Rather than using a custom VM image that includes certificates baked-in, you inject certificates into a running VM. This process ensures that the most up-to-date certificates are installed on a web server during deployment. If you renew or replace a certificate, you don't also have to create a new custom VM image. The latest certificates are automatically injected as you create more VMs. During the whole process, the certificates never leave the Azure platform or are exposed in a script, command-line history, or template.
Create an Azure Key Vault
Before you can create a Key Vault and certificates, create a resource group with az group create. The following example creates a resource group named myResourceGroupSecureWeb in the eastus location:
az group create --name myResourceGroupSecureWeb --location eastus
Next, create a Key Vault with az keyvault create and enable it for use when you deploy a VM. Each Key Vault requires a unique name, and should be all lowercase. Replace <mykeyvault> in the following example with your own unique Key Vault name:
keyvault_name=<mykeyvault>
az keyvault create \
    --resource-group myResourceGroupSecureWeb \
    --name $keyvault_name \
    --enabled-for-deployment
Generate a certificate and store in Key Vault
For production use, you should import a valid certificate signed by trusted provider with az keyvault certificate import. For this tutorial, the following example shows how you can generate a self-signed certificate with az keyvault certificate create that uses the default certificate policy:
az keyvault certificate create \
    --vault-name $keyvault_name \
    --name mycert \
    --policy "$(az keyvault certificate get-default-policy)"
Prepare a certificate for use with a VM
To use the certificate during the VM create process, obtain the ID of your certificate with az keyvault secret list-versions. Convert the certificate with az vm secret format. The following example assigns the output of these commands to variables for ease of use in the next steps:
secret=$(az keyvault secret list-versions \
          --vault-name $keyvault_name \
          --name mycert \
          --query "[?attributes.enabled].id" --output tsv)
vm_secret=$(az vm secret format --secrets "$secret" -g myResourceGroupSecureWeb --keyvault $keyvault_name)
Create a cloud-init config to secure NGINX
Cloud-init is a widely used approach to customize a Linux VM as it boots for the first time. You can use cloud-init to install packages and write files, or to configure users and security. As cloud-init runs during the initial boot process, there are no extra steps or required agents to apply your configuration.
When you create a VM, certificates and keys are stored in the protected /var/lib/waagent/ directory. To automate adding the certificate to the VM and configuring the web server, use cloud-init. In this example, you install and configure the NGINX web server. You can use the same process to install and configure Apache.
Create a file named cloud-init-web-server.txt and paste the following configuration:
#cloud-config
package_upgrade: true
packages:
  - nginx
write_files:
  - owner: www-data:www-data
  - path: /etc/nginx/sites-available/default
    content: |
      server {
        listen 443 ssl;
        ssl_certificate /etc/nginx/ssl/mycert.cert;
        ssl_certificate_key /etc/nginx/ssl/mycert.prv;
      }
runcmd:
  - secretsname=$(find /var/lib/waagent/ -name "*.prv" | cut -c -57)
  - mkdir /etc/nginx/ssl
  - cp $secretsname.crt /etc/nginx/ssl/mycert.cert
  - cp $secretsname.prv /etc/nginx/ssl/mycert.prv
  - service nginx restart
Create a secure VM
Now create a VM with az vm create. The certificate data is injected from Key Vault with the --secrets parameter. You pass in the cloud-init config with the --custom-data parameter:
az vm create \
    --resource-group myResourceGroupSecureWeb \
    --name myVM \
    --image Ubuntu2204 \
    --admin-username azureuser \
    --generate-ssh-keys \
    --custom-data cloud-init-web-server.txt \
    --secrets "$vm_secret"
It takes a few minutes for the VM to be created, the packages to install, and the app to start. When the VM has been created, take note of the publicIpAddress displayed by the Azure CLI. This address is used to access your site in a web browser.
To allow secure web traffic to reach your VM, open port 443 from the Internet with az vm open-port:
az vm open-port \
    --resource-group myResourceGroupSecureWeb \
    --name myVM \
    --port 443
Test the secure web app
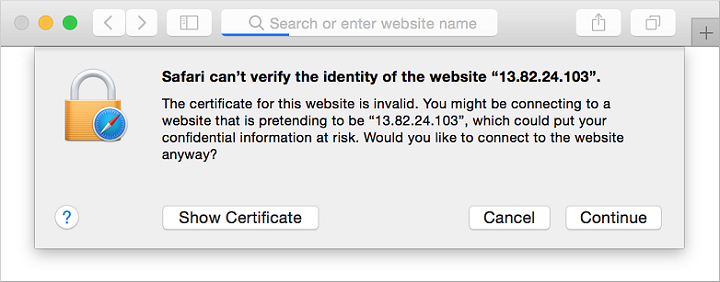
Now you can open a web browser and enter https://<publicIpAddress> in the address bar. Provide your own public IP address from the VM create process. Accept the security warning if you used a self-signed certificate:

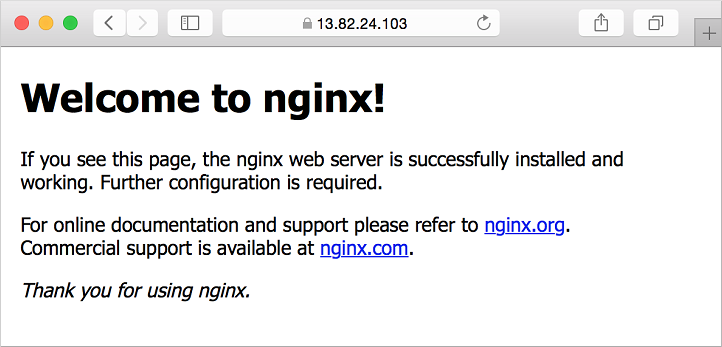
Your secured NGINX site is then displayed as in the following example:

Next steps
In this tutorial, you secured an NGINX web server with a TLS/SSL certificate stored in Azure Key Vault. You learned how to:
- Create an Azure Key Vault
- Generate or upload a certificate to the Key Vault
- Create a VM and install the NGINX web server
- Inject the certificate into the VM and configure NGINX with a TLS binding
Follow this link to see pre-built virtual machine script samples.