Copilot Studio supports single sign-on (SSO). SSO allows copilots on your website to sign customers in if they're already signed in to the page or app where the copilot is deployed.
For example, the copilot is hosted on the corporate intranet or in an app that the user is already signed in to.
There are four main steps to configuring SSO for Copilot Studio:
Create an app registration in Microsoft Entra ID for your custom canvas.
Define a custom scope for your copilot.
Configure authentication in Copilot Studio to enable SSO.
Configure your custom canvas HTML code to enable SSO.
1 If you also have the Teams channel enabled, you need to follow the configuration instructions on the Configure single sign-on with Microsoft Entra ID for copilots in Microsoft Teams documentation. Failing to configure the Teams SSO settings as instructed on that page causes your users to always fail authentication when using the Teams channel.
Follow the instructions to create an authentication app registration again, to create a second app registration, which serves as your canvas app registration.
Add the canvas app registration ID to the authentication app registration.
Add token exchange URL
To update the Microsoft Entra ID authentication settings in Copilot Studio, you need to add the token exchange URL to allow your app and Copilot Studio to share information.
In the Azure portal on your authentication app registration blade, go to Expose an API.
Under Scopes, select the Copy to clipboard icon.
In Copilot Studio, in the navigation menu under Settings, select Security, and then select the Authentication tile.
For Token exchange URL (required for SSO), paste the scope you copied earlier.
Select Save.
Configure your canvas app registration
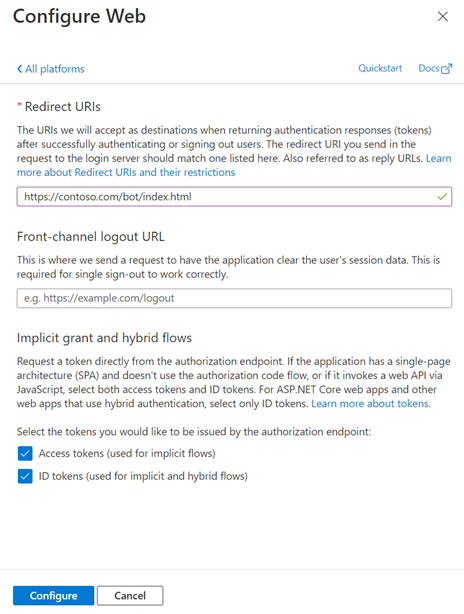
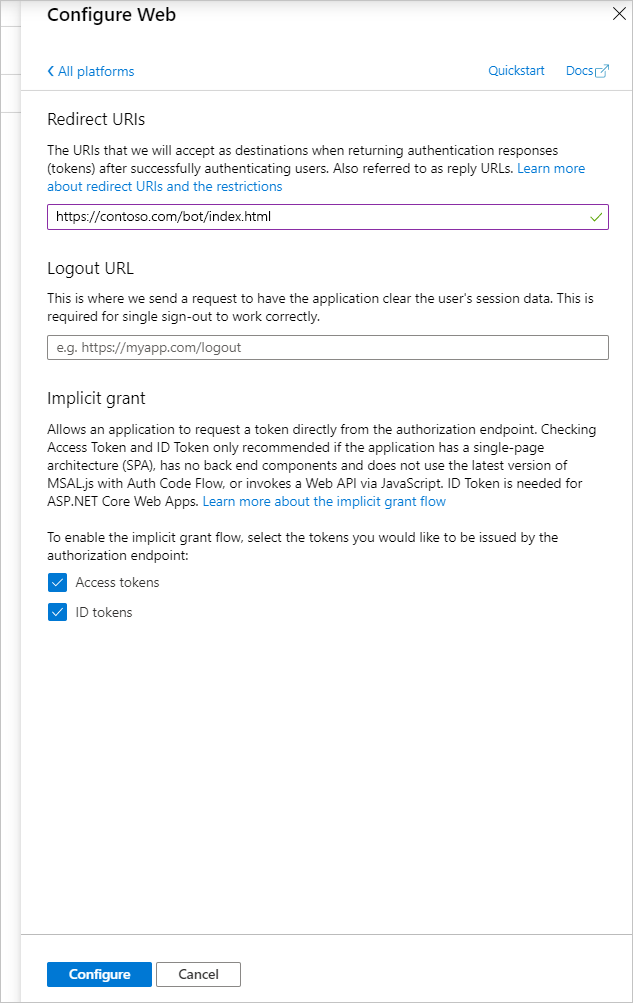
After you create your canvas app registration, go to Authentication, and then select Add a platform.
Under Platform configurations, select Add a platform, and then select Web.
Under Redirect URIs, enter the URL for your web page; for example, http://contoso.com/index.html.
In the Implicit grant and hybrid flows section, turn on both Access tokens (used for implicit flows) and ID tokens (used for implicit and hybrid flows).
Select Configure.
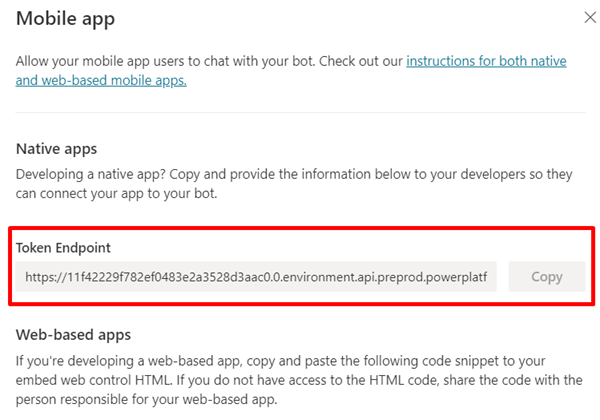
Find your copilot's token endpoint URL
In Copilot Studio, open your copilot and then select Channels.
Select Mobile app.
Under Token Endpoint, select Copy.
Configure SSO in your web page
Use the code provided in the Copilot Studio GitHub repo to create a web page for the redirect URL. Copy the code from the GitHub repo and modify it using the following instructions.
Note
The code in the GitHub repo requires that the user select a login button or login from a different site. To enable automatic login, add the following code to the beginning of aysnc function main():
    (async function main() {
        if (clientApplication.getAccount() == null) {
           await clientApplication.loginPopup(requestObj).then(onSignin).catch(function (error) {console.log(error) });
        }
        // Add your BOT ID below
        var theURL =
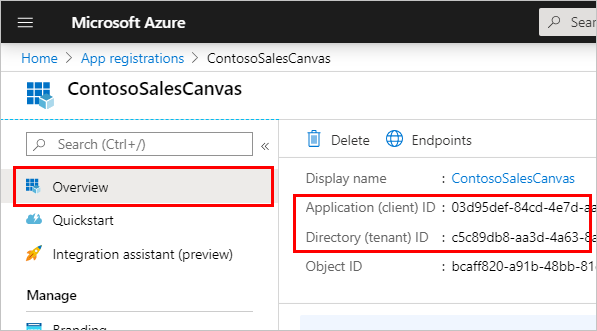
Go to the Overview page in Azure portal and copy the Application (client) ID and Directory (tenant) ID from your canvas app registration.
To configure the Microsoft Authentication Library (MSAL):
Assign clientId to your Application (client) ID.
Assign authority to https://login.microsoftonline.com/ and add your Directory (tenant) ID to the end.
For example:
var clientApplication;
    (function (){
    var msalConfig = {
        auth: {
            clientId: '00001111-aaaa-2222-bbbb-3333cccc4444',
            authority: 'https://login.microsoftonline.com/7ef988bf-xxxx-51af-01ab-2d7fd011db47'
        },
Set the theURL variable to the token endpoint URL you copied earlier. For example:
(async function main() {

    var theURL = "https://<token endpoint URL>"
Edit the value of userId to include a custom prefix. For example:
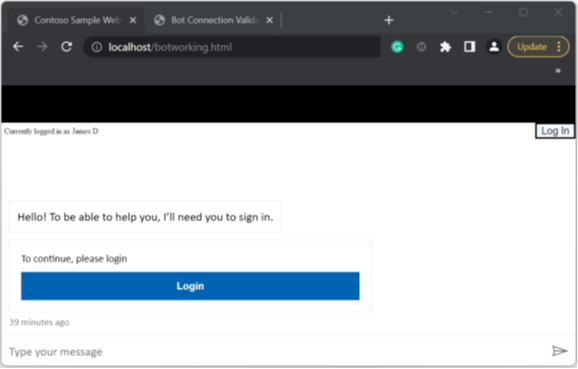
If your browser blocks popups or you are using an incognito or private browsing window, you're prompted to log in. Otherwise, the log in completes using a validation code.
A new browser tab opens.
Switch to the new tab and copy the validation code.
Switch back to the tab with your copilot, and paste the validation code into the copilot conversation.
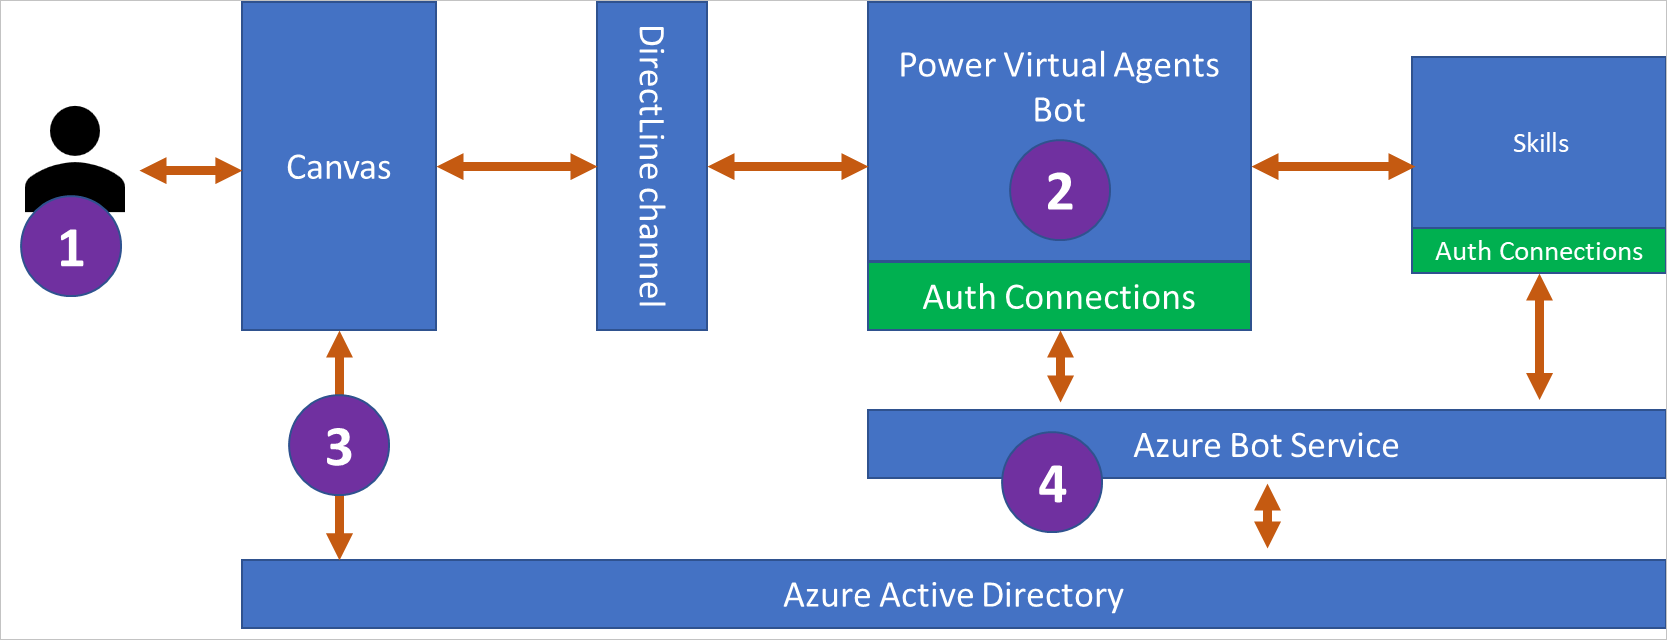
Copilot Studio sends a login prompt to allow the user to sign in with their configured identity provider.
The copilot's custom canvas intercepts the sign-in prompt and requests an on-behalf-of (OBO) token from Microsoft Entra ID. The canvas sends the token to the copilot.
On receipt of the OBO token, the copilot exchanges the OBO token for an "access token" and fills in the AuthToken variable using the access token's value. The IsLoggedIn variable is also set at this time.
Create an app registration in Microsoft Entra ID for your custom canvas
To enable SSO, you need two separate app registrations:
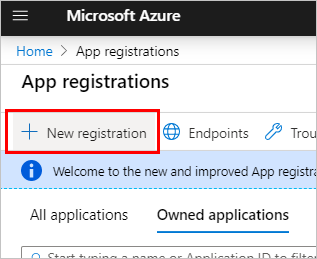
Go to App registrations, either by selecting the icon or searching in the top search bar.
Select New registration.
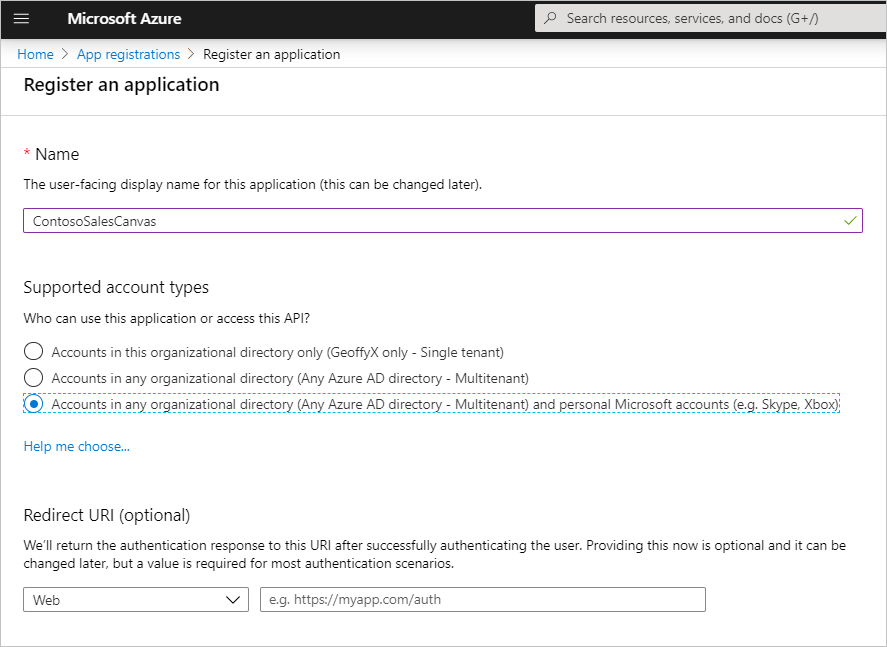
Enter a name for the registration. It can be helpful to use the name of the copilot whose canvas you're registering and include "canvas" to help separate it from the app registration for authentication.
For example, if your copilot is called "Contoso sales help," you might name the app registration as "ContosoSalesCanvas" or something similar.
Under Supported account types, select Accounts in any organizational tenant (Any Microsoft Entra ID directory - Multitenant) and personal Microsoft accounts (e.g. Skype, Xbox).
Leave the Redirect URI section blank for now, as you enter that information in the next steps. Select Register.
After the registration is completed, it opens to the Overview page. Go to Manifest. Confirm that accessTokenAcceptedVersion is set to 2. If it isn't, change it to 2 and then select Save.
Add the redirect URL
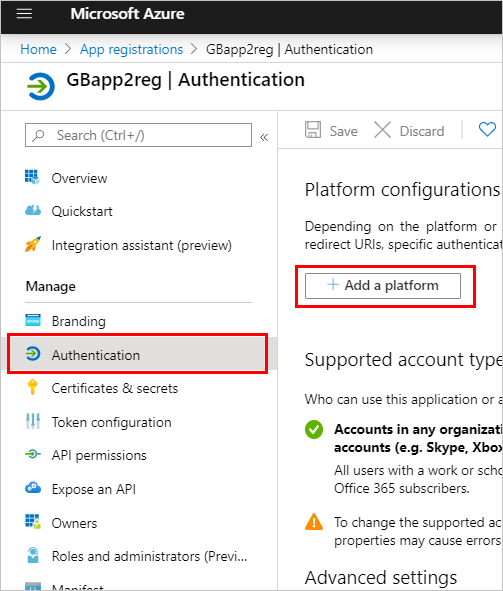
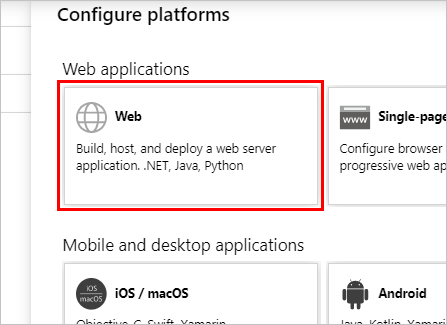
With the registration open, go to Authentication and then select Add a platform.
On the Configure platforms blade, select Web.
Under Redirect URIs, add the full URL to the page where your chat canvas is hosted. Under the Implicit grant section, select the Id Tokens and Access Tokens checkboxes.
Select Configure to confirm your changes.
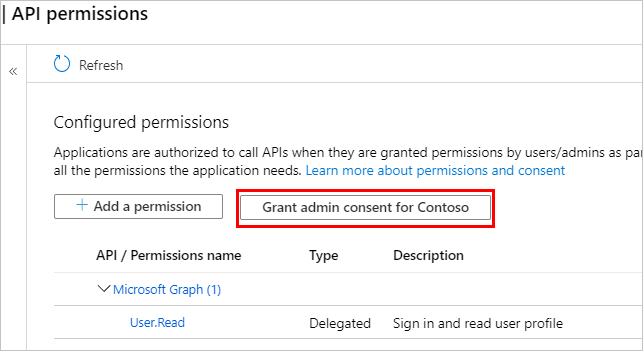
Go to API Permissions. Select Grant admin consent for <your tenant name> and then Yes.
Important
To avoid users from having to consent to each application, a Global Administrator, Application Administrator, or a Cloud Application Administrator must grant tenant-wide consent to your app registrations.
Define a custom scope for your copilot
Define a custom scope by exposing an API for the canvas app registration within the authentication app registration. Scopes allow you to determine user and admin roles and access rights.
This step creates a trust relationship between the authentication app registration for authentication and the app registration for your custom canvas.
Go to API Permissions and ensure that the correct permissions are added for your copilot. Select Grant admin consent for <your tenant name> and then Yes.
Important
To avoid users from having to consent to each application, a Global Administrator, Application Administrator, or a Cloud Application Administrator must grant tenant-wide consent to your app registrations.
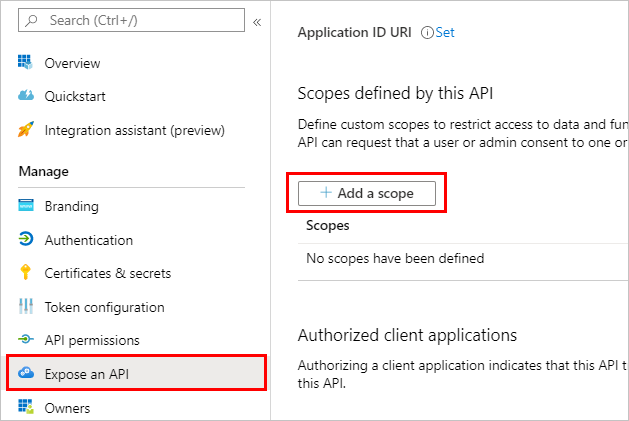
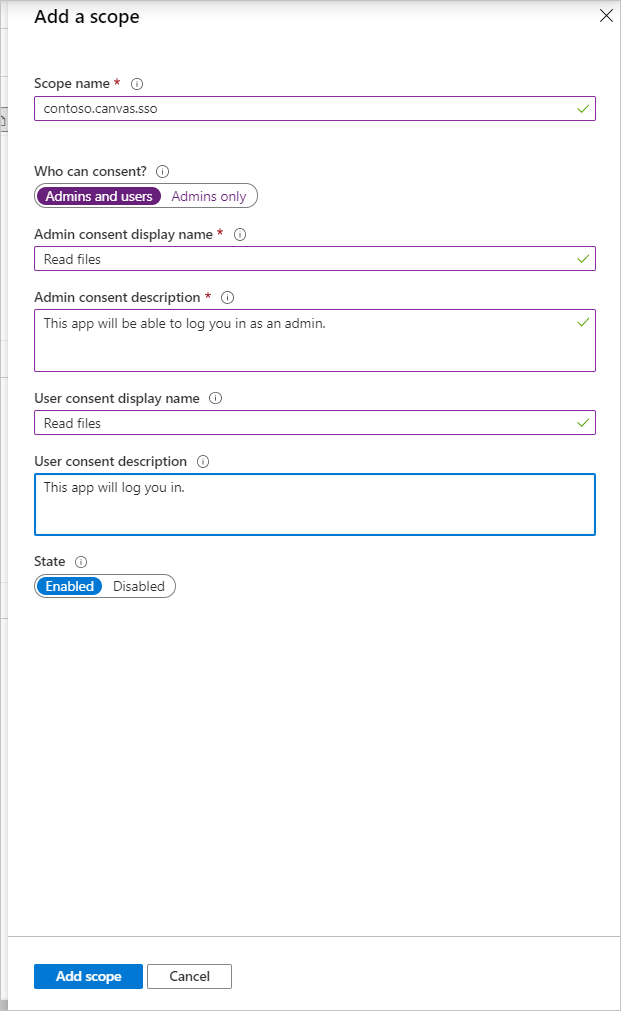
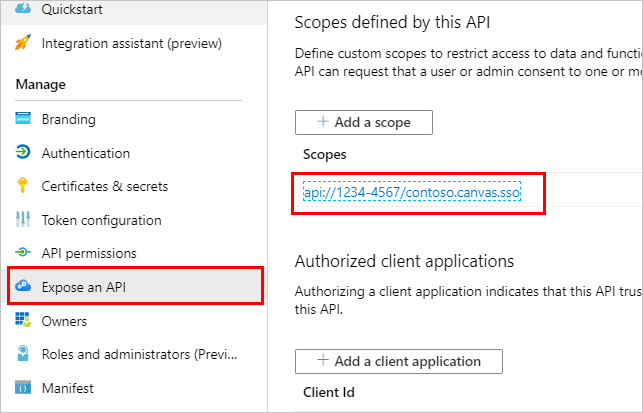
Go to Expose an API and select Add a scope.
Enter a name for the scope, along with the display information that should be shown to users when they come to the SSO screen. Select Add scope.
Select Add a client application.
Enter the Application (client) ID from the Overview page for the canvas app registration into the Client ID field. Select the checkbox for the listed scope that you created.
Select Add application.
Configure authentication in Copilot Studio to enable SSO
The Token Exchange URL in the Copilot Studio authentication configuration page is used to exchange the OBO token for the requested access token through the bot framework.
Copilot Studio calls into Microsoft Entra ID to perform the actual exchange.
Sign in to Copilot Studio.
Confirm you've selected the copilot you want to enable authentication for by selecting the copilot icon on the top menu and choosing the correct copilot.
In the navigation menu, under Settings, select Security. Then select the Authentication card.
Enter the full scope URI from the Expose an API blade for the copilot's authentication app registration in the Token exchange URL field. The URI is in the format of api://1234-4567/scope.name.
Select Save and then publish the copilot content.
Configure your custom canvas HTML code to enable SSO
Update the custom canvas page where the copilot is located to intercept the login card request and exchange the OBO token.
Configure the Microsoft Authentication Library (MSAL) by adding the following code into a <script> tag in your <head> section.
Update clientId with the Application (client) ID for the canvas app registration. Replace <Directory ID> with the Directory (tenant) ID. You get these IDs from the Overview page for the canvas app registration.
<head>
 <script>
   var clientApplication;
     (function () {
       var msalConfig = {
           auth: {
             clientId: '<Client ID [CanvasClientId]>',
             authority: 'https://login.microsoftonline.com/<Directory ID>'
           },
           cache: {
             cacheLocation: 'localStorage',
             storeAuthStateInCookie: false
           }
       };
       if (!clientApplication) {
         clientApplication = new Msal.UserAgentApplication(msalConfig);
       }
     } ());
 </script>
</head>
Insert the following <script> in the <body> section. This script calls a method to retrieve the resourceUrl and exchange your current token for a token requested by the OAuth prompt.
<script>
function getOAuthCardResourceUri(activity) {
  if (activity &&
       activity.attachments &&
       activity.attachments[0] &&
       activity.attachments[0].contentType === 'application/vnd.microsoft.card.oauth' &&
       activity.attachments[0].content.tokenExchangeResource) {
         // asking for token exchange with Microsoft Entra ID
         return activity.attachments[0].content.tokenExchangeResource.uri;
   }
}

function exchangeTokenAsync(resourceUri) {
  let user = clientApplication.getAccount();
   if (user) {
     let requestObj = {
       scopes: [resourceUri]
     };
     return clientApplication.acquireTokenSilent(requestObj)
       .then(function (tokenResponse) {
         return tokenResponse.accessToken;
         })
         .catch(function (error) {
           console.log(error);
         });
         }
         else {
         return Promise.resolve(null);
   }
}
</script>
Insert the following <script> in the <body> section. Within the main method, this code adds a conditional to your store, with your copilot's unique identifier. It also generates a unique ID as your userId variable.
Update <COPILOT ID> with your copilot's ID. You can see your copilot's ID by going to the Channels tab for the copilot you're using, and selecting Mobile app on the Copilot Studio portal.
<script>
    (async function main() {

        // Add your COPILOT ID below
        var BOT_ID = "<BOT ID>";
        var theURL = "https://powerva.microsoft.com/api/botmanagement/v1/directline/directlinetoken?botId=" + BOT_ID;

        const {
            token
        } = await fetchJSON(theURL);

        var directline = await fetchJSON(regionalChannelSettingsURL).then(res=> res.channelUrlsById.directline);

        const directLine = window.WebChat.createDirectLine({
            domain: `${directline}v3/directline`,
            token
        });

        var userID = clientApplication.account?.accountIdentifier != null ?
            ("Your-customized-prefix-max-20-characters" + clientApplication.account.accountIdentifier).substr(0, 64) :
            (Math.random().toString() + Date.now().toString()).substr(0, 64); // Make sure this will not exceed 64 characters
        const store = WebChat.createStore({}, ({
            dispatch
        }) => next => action => {
            const {
                type
            } = action;
            if (action.type === 'DIRECT_LINE/CONNECT_FULFILLED') {
                dispatch({
                    type: 'WEB_CHAT/SEND_EVENT',
                    payload: {
                        name: 'startConversation',
                        type: 'event',
                        value: {
                            text: "hello"
                        }
                    }
                });
                return next(action);
            }
            if (action.type === 'DIRECT_LINE/INCOMING_ACTIVITY') {
                const activity = action.payload.activity;
                let resourceUri;
                if (activity.from && activity.from.role === 'bot' &&
                    (resourceUri = getOAuthCardResourceUri(activity))) {
                    exchangeTokenAsync(resourceUri).then(function(token) {
                        if (token) {
                            directLine.postActivity({
                                type: 'invoke',
                                name: 'signin/tokenExchange',
                                value: {
                                    id: activity.attachments[0].content.tokenExchangeResource.id,
                                    connectionName: activity.attachments[0].content.connectionName,
                                    token,
                                },
                                "from": {
                                    id: userID,
                                    name: clientApplication.account.name,
                                    role: "user"
                                }
                            }).subscribe(
                                id => {
                                    if (id === 'retry') {
                                        // copilot was not able to handle the invoke, so display the oauthCard
                                        return next(action);
                                    }
                                    // else: tokenexchange successful and we do not display the oauthCard
                                },
                                error => {
                                    // an error occurred to display the oauthCard
                                    return next(action);
                                }
                            );
                            return;
                        } else
                            return next(action);
                    });
                } else
                    return next(action);
            } else
                return next(action);
        });

        const styleOptions = {

            // Add styleOptions to customize Web Chat canvas
            hideUploadButton: true
        };

        window.WebChat.renderWebChat({
                directLine: directLine,
                store,
                userID: userID,
                styleOptions
            },
            document.getElementById('webchat')
        );
    })().catch(err => console.error("An error occurred: " + err));
</script>
Full sample code
For more information, you can find the full sample code, with the MSAL and store conditional scripts already included at our GitHub repo.