Accessibility on iOS
This page describes how to use the iOS Accessibility APIs to build apps according to the accessibility checklist. Refer to the Android accessibility and OS X accessibility pages for other platform APIs.
Describing UI Elements
iOS provides the AccessibilityLabel and AccessibilityHint properties
for developers to add descriptive text which can be used by the VoiceOver
screen reader to make the controls more accessible. Controls can also be
tagged with one or more traits that provide additional context in
accessible modes.
Some controls may not need to be accessible (for example, a label on a
text input or an image that is purely decorative) – the
IsAccessibilityElement is provided to disable accessibility in those cases.
UI Designer
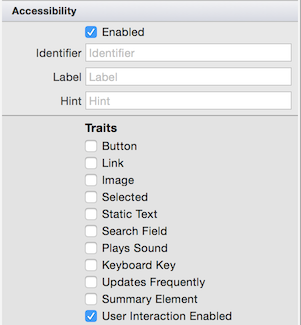
The Properties Pad contains an accessibility section that allows these settings to be edited when a control is selected in the iOS UI Designer:

C#
These properties can also be set directly in code:
usernameInput.AccessibilityLabel = "Search";
usernameInput.Hint = "Press Enter after typing to search employee list";
someLabel.IsAccessibilityElement = false;
displayOnlyText.AccessibilityTraits = UIAccessibilityTrait.Header | UIAccessibilityTrait.Selected;
What is AccessibilityIdentifier?
The AccessibilityIdentifier is used to set a unique key that can
be used to refer to user interface elements via the UIAutomation API.
The value of AccessibilityIdentifier is never spoken or displayed
to the user.
PostNotification
The UIAccessibility.PostNotification method allows events to be raised
to the user outside of direct interaction (for example, when they interact
with a specific control).
Announcement
An announcement can be sent from code to inform the user that some state has changed (such as a background operation has completed). This could be accompanied by a visual indication in the user interface:
UIAccessibility.PostNotification (
  UIAccessibilityPostNotification.Announcement,
    new NSString(@"Item was saved"));
LayoutChanged
The LayoutChanged announcement is used when the screen layout:
UIAccessibility.PostNotification (
  UIAccessibilityPostNotification.LayoutChanged,
    someControl);  // someControl gets focus
Accessibility and Localization
Accessibility properties like the label and hint can be localized just like other text in the user interface.
MainStoryboard.strings
If the user interface is laid out in a storyboard, you can
provide translations for accessibility properties in the same
way as other properties. In the example below, a UITextField
has a Localization ID of Pqa-aa-ury and two accessibility
properties being set in Spanish:
/* Accessibility */
"Pqa-aa-ury.accessibilityLabel" = "Notas input";
"Pqa-aa-ury.accessibilityHint" = "escriba más información";
This file would be placed in the es.lproj directory for Spanish content.
Localizable.strings
Alternatively, the translations can be added to the Localizable.strings file in the localized content directory (eg. es.lproj for Spanish):
/* Accessibility */
"Notes" = "Notas input";
"Provide more information" = "escriba más información";
These translations can be used in C# via the LocalizedString method:
notesText.AccessibilityLabel = NSBundle.MainBundle.LocalizedString ("Notes", "");
notesText.AccessibilityHint = NSBundle.MainBundle.LocalizedString ("Provide more information", "");
Refer to the iOS localization guide for more details on localizing content.
Testing Accessibility
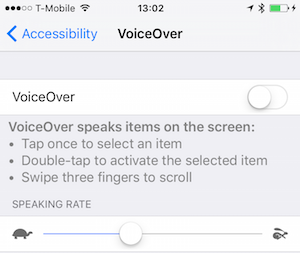
VoiceOver is enabled in the Settings app by navigating to General > Accessibility > VoiceOver:

The Accessibility screen also provides settings for zoom, text size, color & contrast options, speech settings, and other configuration options.
Follow these VoiceOver instructions to test accessibility on iOS devices.
Simulator Testing
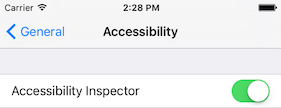
When testing in the simulator, the Accessibility Inspector is available to help verify accessibility properties and events are correctly configured. Turn on the inspector in the Settings app by navigating to General > Accessibility > Accessibility Inspector:

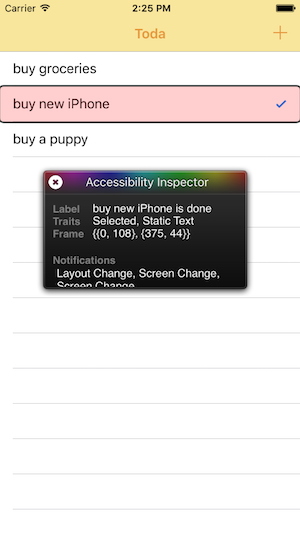
Once enabled, the inspector window hovers over the iOS screen at all times. Here is an example of the output when a table view row is selected – notice the Label contains a sentence that gives the content of the row and also that it is "done" (ie. the tick is visible):

While the inspector is visible, use the "X" icon at the top-left to temporarily show and hide the overlay and enable/disable accessibility settings.