Tutorial: Create a recommendation app with .NET MAUI and ChatGPT
In this tutorial, you'll learn how to create a .NET MAUI app for Windows in Visual Studio that calls OpenAI's ChatGPT APIs to provide recommendations based on a location entered by the user. The app will have a simple UI that allows the user to enter a location and get recommendations for restaurants, hotels, and attractions.
In this tutorial, you learn how to:
- Create a simple user interface for your .NET MAUI app
- Reference and bootstrap the OpenAI .NET API library
- Use an API key to link your app to an OpenAI API account
- Make calls to the OpenAI chat APIs to get recommendations
Prerequisites
- An OpenAI account
- An OpenAI API key
- The .NET MAUI installation requirements
- If you are new to .NET MAUI on Windows, you should start with the Build your first .NET MAUI app for Windows tutorial.
Set your environment variable
In order to use the OpenAI SDK, you'll need to set an environment variable with your API key. In this example, we'll use the OPENAI_API_KEY environment variable. Once you have your API key from the OpenAI developer dashboard, you can set the environment variable from the command line as follows:
setx OPENAI_API_KEY <your-api-key>
Note that this method works for development on Windows, but you'll want to use a more secure method for production apps and for mobile support. For example, you can store your API key in a secure key vault that a remote service can access on behalf of your app. See Best practices for OpenAI key safety for more information.
Create a new .NET MAUI project with the required UI elements
We're going to start by creating a new .NET MAUI project in Visual Studio. We'll use the .NET MAUI App template and add some UI elements to the MainPage to provide users with some recommendations based on a provided location. The UI will have buttons to get recommendations for restaurants, hotels, and attractions.
In Visual Studio, create a new .NET MAUI App project named ChatGptRecommendationApp.
Run the new project to make sure the app builds and runs successfully.
Open MainPage.xaml from the Solution Explorer.
Replace the contents of the
VerticalStackLayoutwith the following XAML markup:<Label Text="Local AI recommendations" SemanticProperties.HeadingLevel="Level1" FontSize="32" HorizontalOptions="Center" /> <Entry x:Name="LocationEntry" Placeholder="Enter your location" SemanticProperties.Hint="Enter the location for recommendations" HorizontalOptions="Center"/> <Button x:Name="RestaurantBtn" Text="Get restaurant recommendations" SemanticProperties.Hint="Gets restaurant recommendations when you click" Clicked="OnRestaurantClicked" HorizontalOptions="Center" /> <Button x:Name="HotelBtn" Text="Get hotel recommendations" SemanticProperties.Hint="Gets hotel recommendations when you click" Clicked="OnHotelClicked" HorizontalOptions="Center" /> <Button x:Name="AttractionBtn" Text="Get attraction recommendations" SemanticProperties.Hint="Gets attraction recommendations when you click" Clicked="OnAttractionClicked" HorizontalOptions="Center" /> <Label x:Name="SmallLabel" Text="Click a button for recommendations!" SemanticProperties.HeadingLevel="Level2" FontSize="18" HorizontalOptions="Center" />In order to build the project, you will need to add
Clickedevent handlers for each of the buttons. Add the following code to the MainPage.xaml.cs file and remove the existing event handler:private async void OnRestaurantClicked(object sender, EventArgs e) { } private async void OnHotelClicked(object sender, EventArgs e) { } private async void OnAttractionClicked(object sender, EventArgs e) { }
The event handlers are all marked as async because we will be making asynchronous calls to the OpenAI .NET API library. Now when you run the app, you should see the following UI:
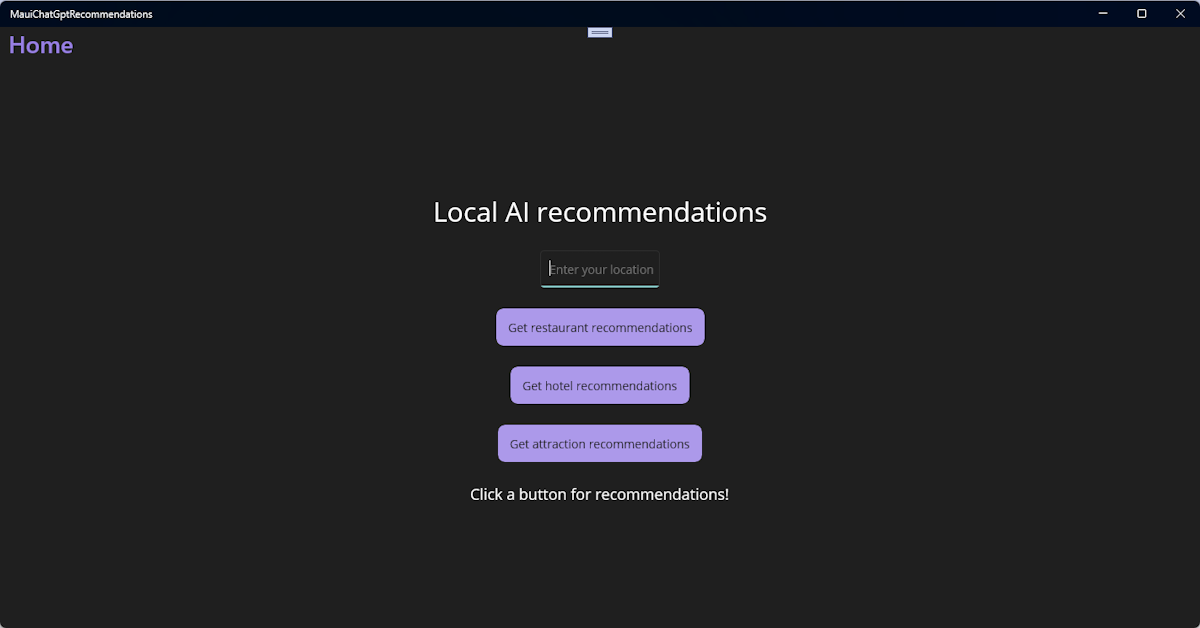
Users can enter their location in the Entry control and click one of the buttons to get recommendations for restaurants, hotels, or attractions. The Label control at the bottom of the UI will display the results.
Next, let's add the OpenAI library to the project and get it ready to make some API calls.
Reference and initialize the OpenAI library for .NET
To call OpenAI's ChatGPT APIs, we're going to use a pre-release version of the OpenAI library for .NET NuGet package. This library provides .NET applications with access to the OpenAI REST API. We'll add the library to our project and bootstrap it with our API key.
Open the Package Manager Console from the Tools menu in Visual Studio.
Install the OpenAI library by running the following command. The
IncludePrereleaseflag is required because the library is still in preview:Install-Package OpenAI -IncludePrereleaseThis should install a pre-release of version 2.0.0 or later to your project. You can also install a specific version of the library by specifying the version number in the command. For example, to install version 2.0.0-beta.4, you would run the following command:
Install-Package OpenAI -Version 2.0.0-beta.4Open MainPage.xaml.cs, the code-behind file for the MainPage. Add the following code to the top of the file to reference the OpenAI library and create a variable to hold your OpenAI client. Update the constructor to call the
MainPage_Loadedmethod when the page is loaded, and add theMainPage_Loadedmethod to get your OpenAI API key from the Windows registry and initialize the OpenAI client:private OpenAIClient _chatGptClient; public MainPage() { InitializeComponent(); this.Loaded += MainPage_Loaded; } private void MainPage_Loaded(object sender, EventArgs e) { var openAiKey = Environment.GetEnvironmentVariable("OPENAI_API_KEY"); _chatGptClient = new(openAiKey); }This will bootstrap the OpenAI library with your API key. You can create your API key on the OpenAI API settings page.
In order to compile the project, you will need to add the following
usingstatements to the top of the MainPage.xaml.cs file:using OpenAI; using OpenAI.Chat; using System.ClientModel;
Now we're ready to put it all together. In the next section, we'll add some code to the three event handlers to make calls to the OpenAI library and display the recommendation results.
Add ChatGPT API calls and test the app
It's time to add the code to our code-behind file that will use the OpenAI library for .NET to make calls to the OpenAI ChatGPT API. We'll add the code to the three event handlers we created earlier. The code will get the user's location from the Entry control and pass it to the API to get recommendations. Then we'll display the results in the Label control at the bottom of the UI.
Create an
asyncmethod namedGetRecommendationAsyncand call it from each of the event handlers:private async void OnRestaurantClicked(object sender, EventArgs e) { await GetRecommendationAsync("restaurant"); } private async void OnHotelClicked(object sender, EventArgs e) { await GetRecommendationAsync("hotel"); } private async void OnAttractionClicked(object sender, EventArgs e) { await GetRecommendationAsync("attraction"); } private async Task GetRecommendationAsync(string recommendationType) { if (string.IsNullOrWhiteSpace(LocationEntry.Text)) { await DisplayAlert("Empty location", "Please enter a location (city or postal code)", "OK"); return; } // The model passed to GetChatClient must match an available OpenAI // model in your account. var client = _chatGptClient.GetChatClient("gpt-3.5-turbo-16k"); string prompt = $"What is a recommended {recommendationType} near {LocationEntry.Text}"; AsyncResultCollection<StreamingChatCompletionUpdate> updates = client.CompleteChatStreamingAsync(prompt); StringWriter responseWriter = new(); await foreach (StreamingChatCompletionUpdate update in updates) { foreach (ChatMessageContentPart updatePart in update.ContentUpdate) { responseWriter.Write(updatePart.Text); } } var returnMessage = responseWriter.ToString(); SmallLabel.Text = returnMessage; }This code first checks to make sure the user has entered a location in the
Entrycontrol. If not, it displays an alert and returns. If the user has entered a location, it gets aChatClientinstance and calls theCompleteChatStreamingAsyncmethod on the that object to make a call to OpenAI. TheCompleteChatStreamingAsyncmethod takes aChatMessage[]parameter, which can be provided as a string, as we're doing in the example.The method returns a
AsyncResultCollection<StreamingChatCompletionUpdate>, which will stream responses from the API as they're generated. We iterate asynchronously over theupdatesand subsequently iterate over eachChatMessageContentPartin the response to build the response string. The response is then displayed in theSmallLabelcontrol at the bottom of the UI.Note
It's' a good idea to add error handling to the
GetRecommendationAsyncmethod to handle any exceptions that might be thrown by the API call. We've left that out of this example for simplicity.Run the app, enter a location, and test the recommendation buttons. You should see a response from the API in the
Labelcontrol at the bottom of the UI: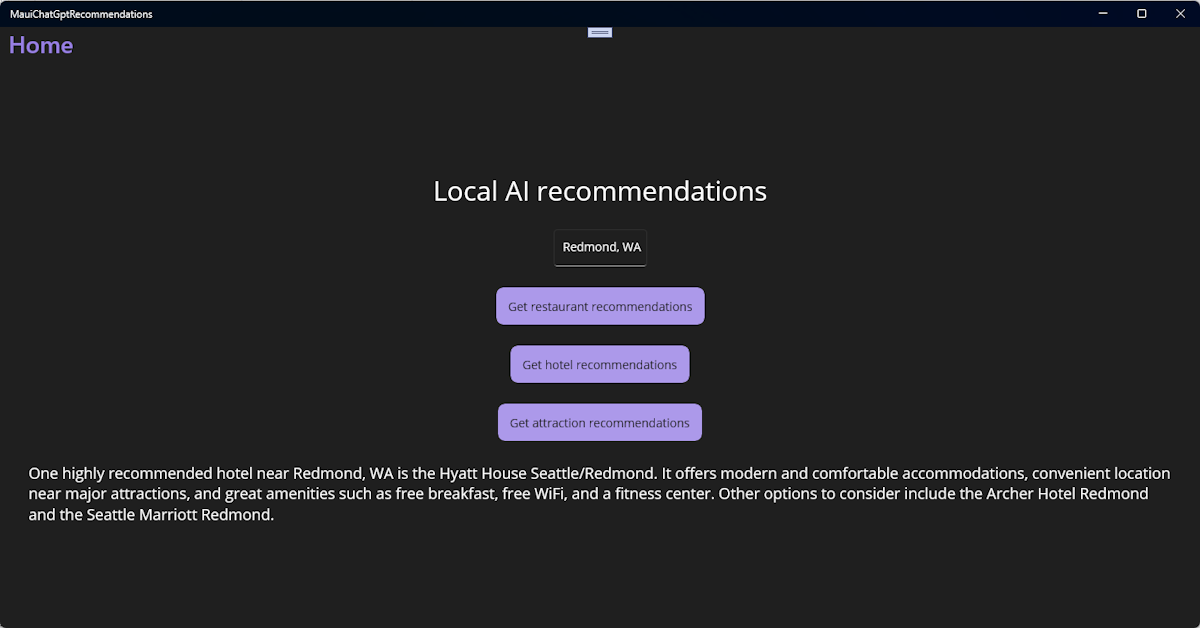
That's it! You've successfully created a Windows .NET MAUI app that uses the OpenAI ChatGPT API to provide recommendations for restaurants, hotels, and attractions. Try changing the prompts to see if you can improve the results. You can also try changing the model name passed to GetChatClient in GetRecommendationAsync to see if you get better results from a different model.
Important
Remember to keep an eye on your API usage after your trial period has expired. You can also set monthly spending limits on your OpenAI account to avoid unexpected charges.
Next steps
Advance to the next article to learn how to...