Gunakan GitHub Actions untuk mengotomatiskan alur kerja Anda dan menyebarkan ke Azure App Service dari GitHub.
Prasyarat
Menyiapkan penyebaran GitHub Actions saat membuat aplikasi
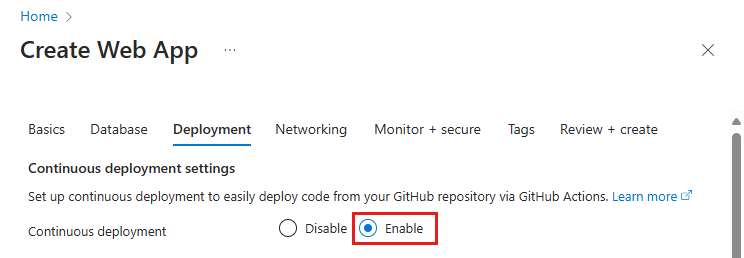
Penyebaran GitHub Actions diintegrasikan ke dalam proses Buat Aplikasi Web default.
Atur Penyebaran berkelanjutan ke Aktifkan di tab Penyebaran, dan konfigurasikan organisasi, repositori, dan cabang yang Anda pilih.
Saat Anda mengaktifkan penyebaran berkelanjutan, proses Buat Aplikasi Web secara otomatis memilih metode autentikasi berdasarkan pilihan autentikasi dasar dan mengonfigurasi aplikasi Anda dan repositori GitHub Yang sesuai:
Menyiapkan penyebaran GitHub Actions dari Pusat Penyebaran
Untuk aplikasi yang ada, Anda dapat dengan cepat memulai GitHub Actions dengan menggunakan Pusat Penyebaran di App Service. Metode turnkey ini menghasilkan file alur kerja GitHub Actions berdasarkan tumpukan aplikasi Anda dan menerapkannya ke repositori GitHub Anda.
Dengan menggunakan Pusat Penyebaran, Anda juga dapat dengan mudah mengonfigurasi autentikasi OpenID Connect yang lebih aman dengan identitas yang ditetapkan pengguna. Untuk informasi selengkapnya, lihat opsi identitas yang ditetapkan pengguna.
Jika akun Azure Anda memiliki izin yang diperlukan, Anda dapat membuat identitas yang ditetapkan pengguna. Sebagai alternatif, Anda dapat memilih identitas terkelola yang telah ada pada menu dropdown Identitas. Anda dapat bekerja dengan administrator Azure Anda untuk membuat identitas terkelola yang ditetapkan pengguna dengan peran Kontributor Situs Web.
Untuk informasi selengkapnya, lihat Penyebaran berkelanjutan ke Azure App Service.
Menyiapkan alur kerja GitHub Actions secara manual
Anda dapat menyebarkan alur kerja tanpa menggunakan Pusat Penyebaran. Lakukan tiga langkah berikut:
-
Hasilkan kredensial penyebaran.
-
Konfigurasikan rahasia GitHub.
-
Tambahkan file alur kerja ke repositori GitHub Anda.
Menghasilkan kredensial penyebaran
Kami menyarankan agar Anda menggunakan OpenID Connect untuk mengautentikasi dengan Azure App Service for GitHub Actions. Metode autentikasi ini menggunakan token berumur pendek. Menyiapkan OpenID Connect dengan GitHub Actions lebih kompleks tetapi menawarkan keamanan yang diperkuat.
Anda juga dapat mengautentikasi dengan identitas terkelola yang ditetapkan pengguna, perwakilan layanan, atau profil penerbitan.
Prosedur berikut menjelaskan langkah-langkah untuk membuat aplikasi Microsoft Entra, perwakilan layanan, dan kredensial federasi menggunakan pernyataan Azure CLI. Untuk mempelajari cara membuat aplikasi Microsoft Entra, perwakilan layanan, dan kredensial federasi di portal Microsoft Azure, lihat Menyambungkan GitHub dan Azure.
Jika Anda tidak memiliki aplikasi yang sudah ada, daftarkan aplikasi Microsoft Entra baru dan perwakilan layanan yang dapat mengakses sumber daya. Buat aplikasi Microsoft Entra.
az ad app create --display-name myApp
Perintah ini mengembalikan output JSON dengan appId yang merupakan client-id Anda. Simpan nilai untuk digunakan sebagai AZURE_CLIENT_ID GitHub rahasia di kemudian hari.
Anda menggunakan objectId nilai saat membuat kredensial federasi dengan Graph API dan mereferensikannya sebagai APPLICATION-OBJECT-ID.
Buat prinsipal layanan.
$appID Ganti dengan appId dari output JSON Anda.
Perintah ini menghasilkan output JSON dengan yang berbeda objectId untuk digunakan pada langkah berikutnya.
objectId yang baru adalah assignee-object-id.
Salin appOwnerTenantId untuk digunakan nanti sebagai rahasia GitHub untuk AZURE_TENANT_ID.
az ad sp create --id $appId
Membuat penetapan peran baru berdasarkan langganan dan objek. Secara default, penetapan peran terkait dengan langganan default Anda. Ganti $subscriptionId dengan ID langganan Anda, $resourceGroupName dengan nama grup sumber daya Anda, $webappName dengan nama aplikasi web Anda, dan $assigneeObjectId dengan yang dihasilkan id. Pelajari cara mengelola langganan Azure dengan Azure CLI.
az role assignment create --role "Website Contributor" --subscription $subscriptionId --assignee-object-id $assigneeObjectId --scope /subscriptions/$subscriptionId/resourceGroups/$resourceGroupName/providers/Microsoft.Web/sites/$webappName --assignee-principal-type ServicePrincipal
Jalankan perintah berikut untuk membuat kredensial identitas federasi baru untuk aplikasi Microsoft Entra Anda.
Ganti APPLICATION-OBJECT-ID dengan appId yang Anda buat selama pembuatan aplikasi untuk aplikasi Direktori Aktif Anda.
Tetapkan nilai untuk CREDENTIAL-NAME untuk referensi nanti.
Atur subject. GitHub mendefinisikan nilainya tergantung pada alur kerja Anda:
- Untuk pekerjaan di lingkungan GitHub Actions Anda, gunakan:
repo:< Organization/Repository >:environment:< Name >
- Untuk pekerjaan yang tidak terkait dengan lingkungan, sertakan jalur ref untuk cabang/tag berdasarkan jalur ref yang digunakan untuk memicu alur kerja:
repo:< Organization/Repository >:ref:< ref path>. Misalnya, repo:n-username/ node_express:ref:refs/heads/my-branch atau repo:n-username/ node_express:ref:refs/tags/my-tag.
- Untuk alur kerja yang dipicu oleh peristiwa permintaan pull, gunakan:
repo:< Organization/Repository >:pull_request.
az ad app federated-credential create --id <APPLICATION-OBJECT-ID> --parameters credential.json
("credential.json" contains the following content)
{
    "name": "<CREDENTIAL-NAME>",
    "issuer": "https://token.actions.githubusercontent.com",
    "subject": "repo:organization/repository:ref:refs/heads/main",
    "description": "Testing",
    "audiences": [
        "api://AzureADTokenExchange"
    ]
}
Catatan
Untuk menggunakan profil penerbitan, Anda harus mengaktifkan autentikasi dasar.
Profil publikasi adalah kredensial tingkat aplikasi. Siapkan profil penerbitan Anda sebagai rahasia GitHub.
Buka App Service di portal Microsoft Azure.
Pada halaman Gambaran Umum, pilih Unduh profil publikasi.
Simpan file yang diunduh. Gunakan konten file untuk membuat rahasia GitHub.
Catatan
Mulai Oktober 2020, aplikasi web Linux memerlukan pengaturan aplikasi WEBSITE_WEBDEPLOY_USE_SCM yang harus diatur ke truesebelum mengunduh profil publikasi.
Anda dapat membuat perwakilan layanan dengan perintah az ad sp create-for-rbac di Azure CLI. Jalankan perintah ini dengan menggunakan Azure Cloud Shell di portal Microsoft Azure atau dengan memilih Buka Cloud Shell.
az ad sp create-for-rbac --name "myApp" --role "Website Contributor" \
                            --scopes /subscriptions/<subscription-id>/resourceGroups/<group-name>/providers/Microsoft.Web/sites/<app-name> \
                            --json-auth
Dalam contoh sebelumnya, ganti tempat penampung dengan ID langganan, nama grup sumber daya, dan nama aplikasi Anda. Output adalah objek JSON dengan kredensial penetapan peran yang menyediakan akses ke aplikasi App Service Anda. Output akan terlihat mirip dengan cuplikan JSON berikut. Salin objek JSON ini untuk nanti.
  {
    "clientId": "<GUID>",
    "clientSecret": "<GUID>",
    "subscriptionId": "<GUID>",
    "tenantId": "<GUID>",
    (...)
  }
Penting
Kami menyarankan agar Anda memberikan akses minimum. Cakupan dalam contoh sebelumnya terbatas pada aplikasi App Service tertentu dan bukan seluruh grup sumber daya.
Anda perlu memberikan ID Klien, ID Penyewa, dan ID Langganan aplikasi Anda ke tindakan tersebut Azure/login . Nilai ini bisa disediakan secara langsung di alur kerja atau bisa disimpan di rahasia GitHub dan direferensikan dalam alur kerja Anda. Menyimpan nilai sebagai GitHub rahasia adalah opsi yang lebih aman.
Buka repositori GitHub Anda dan buka Pengaturan>Keamanan>Rahasia dan variabel>Tindakan>Rahasia repositori baru.
Membuat rahasia untuk AZURE_CLIENT_ID, AZURE_TENANT_ID, dan AZURE_SUBSCRIPTION_ID. Gunakan nilai-nilai ini dari aplikasi Active Directory Anda untuk rahasia GitHub Anda.
| Rahasia GitHub |
Aplikasi Direktori Aktif |
AZURE_CLIENT_ID |
Aplikasi (ID klien) |
AZURE_TENANT_ID |
ID direktori (penyewa) |
AZURE_SUBSCRIPTION_ID |
ID Langganan |
Pilih Tambahkan rahasia untuk menyimpan setiap rahasia.
Di GitHub, telusuri ke repositori Anda. Pilih Pengaturan>Keamanan>Rahasia dan variabel>Tindakan>Rahasia Repositori Baru.
Untuk menggunakan kredensial tingkat aplikasi yang Anda buat di bagian sebelumnya, tempelkan konten dari file profil publikasi yang diunduh ke bidang nilai rahasia. Beri nama rahasia AZURE_WEBAPP_PUBLISH_PROFILE.
Saat Anda mengonfigurasi file alur kerja GitHub nanti, gunakan AZURE_WEBAPP_PUBLISH_PROFILE di tindakan Sebarkan Azure Web App . Contohnya:
- uses: azure/webapps-deploy@v2
  with:
    publish-profile: ${{ secrets.AZURE_WEBAPP_PUBLISH_PROFILE }}
Di GitHub, telusuri ke repositori Anda. Pilih Pengaturan>Keamanan>Rahasia dan variabel>Tindakan>Rahasia Repositori Baru.
Untuk menggunakan kredensial tingkat pengguna yang Anda buat di bagian sebelumnya, tempelkan seluruh output JSON dari perintah Azure CLI ke bidang nilai rahasia. Beri nama rahasia AZURE_CREDENTIALS.
Saat Anda mengonfigurasi file alur kerja GitHub kemudian, gunakan rahasia untuk input dari creds ke Azure/login. Contohnya:
- uses: azure/login@v2
  with:
    creds: ${{ secrets.AZURE_CREDENTIALS }}
Menambahkan file alur kerja ke repositori GitHub Anda
File YAML (.yml) pada jalur /.github/workflows/ di repositori GitHub Anda mendefinisikan alur kerja. Definisi ini berisi berbagai langkah dan parameter yang membentuk alur kerja.
Minimal, file alur kerja memiliki langkah-langkah berbeda berikut:
- Autentikasi dengan App Service dengan menggunakan rahasia GitHub yang Anda buat.
- Buat aplikasi web.
- Menyebarkan aplikasi web.
Untuk menyebarkan kode Anda ke aplikasi App Service, gunakan tindakan .azure/webapps-deploy@v3 Tindakan ini memerlukan nama aplikasi web Anda di app-name dan, tergantung pada stack bahasa Anda, jalur *.zip, *.war, *.jar, atau folder untuk disebarkan di package. Untuk daftar lengkap kemungkinan input untuk tindakan azure/webapps-deploy@v3, lihat action.yml.
Contoh berikut memperlihatkan bagian alur kerja yang membangun aplikasi web dalam berbagai dukungan bahasa.
Untuk menyebarkan dengan OpenID Connect menggunakan identitas terkelola yang Anda konfigurasikan, gunakan tindakan azure/login@v2 dengan kunci client-id, tenant-id, dan subscription-id. Referensikan rahasia GitHub yang Anda buat sebelumnya.
name: .NET Core

on: [push]

permissions:
      id-token: write
      contents: read

env:
  AZURE_WEBAPP_NAME: my-app    # Set this to your application's name
  AZURE_WEBAPP_PACKAGE_PATH: '.'      # Set this to the path to your web app project, defaults to the repository root
  DOTNET_VERSION: '6.0.x'           # Set this to the dot net version to use

jobs:
  build:
    runs-on: ubuntu-latest

    steps:
      # Check out the repo
      - uses: actions/checkout@main
      - uses: azure/login@v2
        with:
          client-id: ${{ secrets.AZURE_CLIENT_ID }}
          tenant-id: ${{ secrets.AZURE_TENANT_ID }}
          subscription-id: ${{ secrets.AZURE_SUBSCRIPTION_ID }}


      # Setup .NET Core SDK
      - name: Setup .NET Core
        uses: actions/setup-dotnet@v3
        with:
          dotnet-version: ${{ env.DOTNET_VERSION }}

      # Run dotnet build and publish
      - name: dotnet build and publish
        run: |
          dotnet restore
          dotnet build --configuration Release
          dotnet publish -c Release --property:PublishDir='${{ env.AZURE_WEBAPP_PACKAGE_PATH }}/myapp'

      # Deploy to Azure Web apps
      - name: 'Run Azure webapp deploy action using publish profile credentials'
        uses: azure/webapps-deploy@v3
        with:
          app-name: ${{ env.AZURE_WEBAPP_NAME }} # Replace with your app name
          package: '${{ env.AZURE_WEBAPP_PACKAGE_PATH }}/myapp'

      - name: logout
        run: |
          az logout
Buat dan sebarkan aplikasi ASP.NET model-view-controller (MVC) ke Azure dengan menggunakan perwakilan layanan Azure. Contoh ini menggunakan rahasia GitHub untuk nilai-nilai client-id, tenant-id, dan subscription-id. Anda juga dapat meneruskan nilai-nilai ini ke dalam tindakan masuk secara langsung.
name: Deploy ASP.NET MVC App deploy to Azure Web App

on: [push]

permissions:
      id-token: write
      contents: read

env:
  AZURE_WEBAPP_NAME: my-app    # Set this to your application's name
  AZURE_WEBAPP_PACKAGE_PATH: '.'      # Set this to the path to your web app project, defaults to the repository root
  NUGET_VERSION: '5.3.x'           # Set this to the dot net version to use

jobs:
  build-and-deploy:
    runs-on: windows-latest
    steps:

    # Check out the repo
    - uses: actions/checkout@main

    - uses: azure/login@v2
      with:
        client-id: ${{ secrets.AZURE_CLIENT_ID }}
        tenant-id: ${{ secrets.AZURE_TENANT_ID }}
        subscription-id: ${{ secrets.AZURE_SUBSCRIPTION_ID }}

    - name: Install Nuget
      uses: nuget/setup-nuget@v1
      with:
        nuget-version: ${{ env.NUGET_VERSION}}
    - name: NuGet to restore dependencies as well as project-specific tools that are specified in the project file
      run: nuget restore

    - name: Add msbuild to PATH
      uses: microsoft/setup-msbuild@v1.0.2

    - name: Run MSBuild
      run: msbuild .\SampleWebApplication.sln

    - name: 'Run Azure webapp deploy action using publish profile credentials'
      uses: azure/webapps-deploy@v3
      with:
        app-name: ${{ env.AZURE_WEBAPP_NAME }} # Replace with your app name
        package: '${{ env.AZURE_WEBAPP_PACKAGE_PATH }}/SampleWebApplication/'

    # Azure logout
    - name: logout
      run: |
        az logout
Buat dan sebarkan aplikasi Java Spring Boot ke Azure dengan menggunakan perwakilan layanan Azure. Contoh ini menggunakan rahasia GitHub untuk nilai-nilai client-id, tenant-id, dan subscription-id. Anda juga dapat meneruskan nilai-nilai ini ke dalam tindakan masuk secara langsung.
name: Java CI with Maven

on: [push]

permissions:
      id-token: write
      contents: read

jobs:
  build:

    runs-on: ubuntu-latest

    steps:
    - uses: actions/checkout@v4
    - uses: azure/login@v2
      with:
        client-id: ${{ secrets.AZURE_CLIENT_ID }}
        tenant-id: ${{ secrets.AZURE_TENANT_ID }}
        subscription-id: ${{ secrets.AZURE_SUBSCRIPTION_ID }}
    - name: Set up JDK 1.8
      uses: actions/setup-java@v3
      with:
        java-version: 1.8
    - name: Build with Maven
      run: mvn -B package --file pom.xml
      working-directory: complete
    - name: Azure WebApp
      uses: Azure/webapps-deploy@v3
      with:
        app-name: my-app-name
        package: my/target/*.jar

    # Azure logout
    - name: logout
      run: |
        az logout
name: Build and deploy WAR app to Azure Web App using OpenID Connect

env:
  JAVA_VERSION: '11'                  # Set this to the Java version to use
  DISTRIBUTION: microsoft             # Set this to the Java distribution
  AZURE_WEBAPP_NAME: sampleapp        # Set this to the name of your web app

on: [push]

permissions:
  id-token: write
  contents: read

jobs:
  build:
    runs-on: ubuntu-latest

    steps:
      - uses: actions/checkout@v4

      - name: Set up Java version
        uses: actions/setup-java@v3.0.0
        with:
          java-version: ${{ env.JAVA_VERSION }}
          distribution: ${{ env.DISTRIBUTION }}
          cache: 'maven'

      - name: Build with Maven
        run: mvn clean install

      - name: Login to Azure
        uses: azure/login@v2
        with:
          client-id: ${{ secrets.AZURE_CLIENT_ID }}
          tenant-id: ${{ secrets.AZURE_TENANT_ID }}
          subscription-id: ${{ secrets.AZURE_SUBSCRIPTION_ID }}

      - name: Deploy to Azure Web App
        id: deploy-to-webapp
        uses: azure/webapps-deploy@v3
        with:
          app-name: ${{ env.AZURE_WEBAPP_NAME }}
          package: '*.war'
Berikut adalah contoh lengkap yang menggunakan berbagai pekerjaan untuk membangun dan menyebarkan.
Penting
Jika Anda menyebarkan aplikasi Node.js dengan TypeScript atau bahasa terkompilasi lainnya menggunakan azure/webapps-deploy@v3, buat aplikasi Anda terlebih dahulu di GitHub Actions lalu sebarkan folder output yang dikompilasi (seperti dist/ atau build/). Jika Anda ingin menggunakan otomatisasi build App Service, setel SCM_DO_BUILD_DURING_DEPLOYMENT pengaturan aplikasi ke true.
name: JavaScript CI

on: [push]

permissions:
      id-token: write
      contents: read

name: Node.js

env:
  AZURE_WEBAPP_NAME: my-app   # Set this to your application's name
  AZURE_WEBAPP_PACKAGE_PATH: 'my-app-path'      # Set this to the path to your web app project, defaults to the repository root
  NODE_VERSION: '24.x'                # Set this to the node version to use

jobs:
  build-and-deploy:
    runs-on: ubuntu-latest
    steps:
    # Check out the repo
    - name: 'Checkout GitHub Action'
      uses: actions/checkout@main

    - uses: azure/login@v2
      with:
        client-id: ${{ secrets.AZURE_CLIENT_ID }}
        tenant-id: ${{ secrets.AZURE_TENANT_ID }}
        subscription-id: ${{ secrets.AZURE_SUBSCRIPTION_ID }}

    - name: Setup Node ${{ env.NODE_VERSION }}
      uses: actions/setup-node@v4
      with:
        node-version: ${{ env.NODE_VERSION }}

    - name: 'npm install, build, and test'
      run: |
        npm install
        npm run build --if-present
        npm run test --if-present
      working-directory:  my-app-path

    # Deploy web app by using Azure credentials
    - uses: azure/webapps-deploy@v3
      with:
        app-name: ${{ env.AZURE_WEBAPP_NAME }}
        package: ${{ env.AZURE_WEBAPP_PACKAGE_PATH }}

    # Azure logout
    - name: logout
      run: |
        az logout
name: Python application

on:
  [push]

permissions:
      id-token: write
      contents: read

env:
  AZURE_WEBAPP_NAME: my-app # Set this to your application's name
  AZURE_WEBAPP_PACKAGE_PATH: '.' # Set this to the path to your web app project, defaults to the repository root

jobs:
  build:
    runs-on: ubuntu-latest
    steps:
    - uses: actions/checkout@v4

    - uses: azure/login@v2
      with:
        client-id: ${{ secrets.AZURE_CLIENT_ID }}
        tenant-id: ${{ secrets.AZURE_TENANT_ID }}
        subscription-id: ${{ secrets.AZURE_SUBSCRIPTION_ID }}

    - name: Set up Python 3.x
      uses: actions/setup-python@v4
      with:
        python-version: 3.x
    - name: Install dependencies
      run: |
        python -m pip install --upgrade pip
        pip install -r requirements.txt
    - name: Deploy web App using GH Action azure/webapps-deploy
      uses: azure/webapps-deploy@v3
      with:
        app-name: ${{ env.AZURE_WEBAPP_NAME }}
        package: ${{ env.AZURE_WEBAPP_PACKAGE_PATH }}
    - name: logout
      run: |
        az logout
Input publish-profile harus mereferensikan AZURE_WEBAPP_PUBLISH_PROFILE rahasia GitHub yang Anda buat sebelumnya.
name: .NET Core CI

on: [push]

env:
  AZURE_WEBAPP_NAME: my-app-name    # Set this to your application's name
  AZURE_WEBAPP_PACKAGE_PATH: '.'      # Set this to the path to your web app project, defaults to the repository root
  DOTNET_VERSION: '6.0.x'           # Set this to the dot net version to use

jobs:
  build:
    runs-on: ubuntu-latest

    steps:
      # Check out the repo
      - uses: actions/checkout@main

      # Setup .NET Core SDK
      - name: Setup .NET Core
        uses: actions/setup-dotnet@v3
        with:
          dotnet-version: ${{ env.DOTNET_VERSION }}

      # Run dotnet build and publish
      - name: dotnet build and publish
        run: |
          dotnet restore
          dotnet build --configuration Release
          dotnet publish -c Release --property:PublishDir='${{ env.AZURE_WEBAPP_PACKAGE_PATH }}/myapp'

      # Deploy to Azure Web apps
      - name: 'Run Azure webapp deploy action using publish profile credentials'
        uses: azure/webapps-deploy@v3
        with:
          app-name: ${{ env.AZURE_WEBAPP_NAME }} # Replace with your app name
          publish-profile: ${{ secrets.AZURE_WEBAPP_PUBLISH_PROFILE  }} # Define secret variable in repository settings as per action documentation
          package: '${{ env.AZURE_WEBAPP_PACKAGE_PATH }}/myapp'
Buat dan sebarkan aplikasi ASP.NET model-view-controller (MVC) yang menggunakan NuGet dan publish-profile untuk autentikasi.
name: Deploy ASP.NET MVC App deploy to Azure Web App

on: [push]

env:
  AZURE_WEBAPP_NAME: my-app    # Set this to your application's name
  AZURE_WEBAPP_PACKAGE_PATH: '.'      # Set this to the path to your web app project, defaults to the repository root
  NUGET_VERSION: '5.3.x'           # Set this to the dot net version to use

jobs:
  build-and-deploy:
    runs-on: windows-latest
    steps:

    - uses: actions/checkout@main

    - name: Install Nuget
      uses: nuget/setup-nuget@v1
      with:
        nuget-version: ${{ env.NUGET_VERSION}}
    - name: NuGet to restore dependencies as well as project-specific tools that are specified in the project file
      run: nuget restore

    - name: Add msbuild to PATH
      uses: microsoft/setup-msbuild@v1.0.2

    - name: Run MSBuild
      run: msbuild .\SampleWebApplication.sln

    - name: 'Run Azure webapp deploy action using publish profile credentials'
      uses: azure/webapps-deploy@v3
      with:
        app-name: ${{ env.AZURE_WEBAPP_NAME }} # Replace with your app name
        publish-profile: ${{ secrets.AZURE_WEBAPP_PUBLISH_PROFILE  }} # Define secret variable in repository settings as per action documentation
        package: '${{ env.AZURE_WEBAPP_PACKAGE_PATH }}/SampleWebApplication/'
Buat dan sebarkan aplikasi Java Spring Boot ke Azure dengan menggunakan profil penerbitan Azure. Input publish-profile mereferensikan rahasia AZURE_WEBAPP_PUBLISH_PROFILE yang Anda buat sebelumnya.
name: Java CI with Maven

on: [push]

jobs:
  build:

    runs-on: ubuntu-latest

    steps:
    - uses: actions/checkout@v4
    - name: Set up JDK 1.8
      uses: actions/setup-java@v3
      with:
        java-version: 1.8
    - name: Build with Maven
      run: mvn -B package --file pom.xml
      working-directory: my-app-path
    - name: Azure WebApp
      uses: Azure/webapps-deploy@v3
      with:
        app-name: my-app-name
        publish-profile: ${{ secrets.AZURE_WEBAPP_PUBLISH_PROFILE }}
        package: my/target/*.jar
Untuk menyebarkan war alih-alih jar, ubah nilai package.
    - name: Azure WebApp
      uses: Azure/webapps-deploy@v3
      with:
        app-name: my-app-name
        publish-profile: ${{ secrets.AZURE_WEBAPP_PUBLISH_PROFILE }}
        package: my/target/*.war
Buat dan sebarkan aplikasi Tomcat ke Azure dengan menggunakan profil penerbitan Azure. Input publish-profile mereferensikan rahasia AZURE_WEBAPP_PUBLISH_PROFILE yang Anda buat sebelumnya.
name: Build and deploy WAR app to Azure Web App using publish profile

env:
  JAVA_VERSION: '11'                  # Set this to the Java version to use
  DISTRIBUTION: microsoft             # Set this to the Java distribution
  AZURE_WEBAPP_NAME: sampleapp        # Set this to the name of your web app

on: [push]

permissions:
  id-token: write
  contents: read

jobs:
  build:
    runs-on: ubuntu-latest

    steps:
      - uses: actions/checkout@v4

      - name: Set up Java version
        uses: actions/setup-java@v3.0.0
        with:
          java-version: ${{ env.JAVA_VERSION }}
          distribution: ${{ env.DISTRIBUTION }}
          cache: 'maven'

      - name: Build with Maven
        run: mvn clean install

      - name: Deploy to Azure Web App
        id: deploy-to-webapp
        uses: azure/webapps-deploy@v3
        with:
          app-name: ${{ env.AZURE_WEBAPP_NAME }}
          publish-profile: ${{ secrets.AZURE_WEBAPP_PUBLISH_PROFILE }}
          package: '*.war'
Berikut adalah contoh lengkap yang menggunakan berbagai pekerjaan untuk membangun dan menyebarkan.
Penting
Jika Anda menyebarkan aplikasi Node.js dengan TypeScript atau bahasa terkompilasi lainnya menggunakan azure/webapps-deploy@v3, buat aplikasi Anda terlebih dahulu di GitHub Actions lalu sebarkan folder output yang dikompilasi (seperti dist/ atau build/). Jika sebaliknya Anda ingin menggunakan otomatisasi build App Service, atur SCM_DO_BUILD_DURING_DEPLOYMENT pengaturan aplikasi ke true.
Buat dan sebarkan aplikasi Node.js ke Azure dengan menggunakan profil publikasi aplikasi. Input publish-profile mereferensikan rahasia AZURE_WEBAPP_PUBLISH_PROFILE yang Anda buat sebelumnya.
# File: .github/workflows/workflow.yml
name: JavaScript CI

on: [push]

env:
  AZURE_WEBAPP_NAME: my-app-name   # Set this to your application's name
  AZURE_WEBAPP_PACKAGE_PATH: 'my-app-path'      # Set this to the path to your web app project, defaults to the repository root
  NODE_VERSION: '24.x'                # Set this to the node version to use

jobs:
  build-and-deploy:
    name: Build and Deploy
    runs-on: ubuntu-latest
    steps:
    - uses: actions/checkout@main
    - name: Use Node.js ${{ env.NODE_VERSION }}
      uses: actions/setup-node@v4
      with:
        node-version: ${{ env.NODE_VERSION }}
    - name: npm install, build, and test
      run: |
        # Build and test the project, then
        # deploy to Azure Web App.
        npm install
        npm run build --if-present
        npm run test --if-present
      working-directory: my-app-path
    - name: 'Deploy to Azure WebApp'
      uses: azure/webapps-deploy@v3
      with:
        app-name: ${{ env.AZURE_WEBAPP_NAME }}
        publish-profile: ${{ secrets.AZURE_WEBAPP_PUBLISH_PROFILE }}
        package: ${{ env.AZURE_WEBAPP_PACKAGE_PATH }}
Buat dan sebarkan aplikasi Python ke Azure dengan menggunakan profil publikasi aplikasi. Perhatikan bagaimana input publish-profile mereferensikan rahasia AZURE_WEBAPP_PUBLISH_PROFILE yang Anda buat sebelumnya.
name: Python CI

on:
  [push]

env:
  AZURE_WEBAPP_NAME: my-web-app # Set this to your application's name
  AZURE_WEBAPP_PACKAGE_PATH: '.' # Set this to the path to your web app project, defaults to the repository root

jobs:
  build:
    runs-on: ubuntu-latest
    steps:
    - uses: actions/checkout@v4
    - name: Set up Python 3.x
      uses: actions/setup-python@v4
      with:
        python-version: 3.x
    - name: Install dependencies
      run: |
        python -m pip install --upgrade pip
        pip install -r requirements.txt
    - name: Building web app
      uses: azure/appservice-build@v2
    - name: Deploy web App using GH Action azure/webapps-deploy
      uses: azure/webapps-deploy@v3
      with:
        app-name: ${{ env.AZURE_WEBAPP_NAME }}
        publish-profile: ${{ secrets.AZURE_WEBAPP_PUBLISH_PROFILE }}
        package: ${{ env.AZURE_WEBAPP_PACKAGE_PATH }}
Untuk mendeploy dengan service principal yang Anda konfigurasi, gunakan tindakan azure/login@v2 dengan kunci creds dan mengacu pada rahasia AZURE_CREDENTIALS yang Anda buat sebelumnya.
name: .NET Core

on: [push]

env:
  AZURE_WEBAPP_NAME: my-app    # Set this to your application's name
  AZURE_WEBAPP_PACKAGE_PATH: '.'      # Set this to the path to your web app project, defaults to the repository root
  DOTNET_VERSION: '6.0.x'           # Set this to the dot net version to use

jobs:
  build:
    runs-on: ubuntu-latest

    steps:
      # Check out the repo
      - uses: actions/checkout@main
      - uses: azure/login@v2
        with:
          creds: ${{ secrets.AZURE_CREDENTIALS }}


      # Set up .NET Core SDK
      - name: Setup .NET Core
        uses: actions/setup-dotnet@v3
        with:
          dotnet-version: ${{ env.DOTNET_VERSION }}

      # Run dotnet build and publish
      - name: dotnet build and publish
        run: |
          dotnet restore
          dotnet build --configuration Release
          dotnet publish -c Release --property:PublishDir='${{ env.AZURE_WEBAPP_PACKAGE_PATH }}/myapp'

      # Deploy to Azure Web apps
      - name: 'Run Azure webapp deploy action using Azure Credentials'
        uses: azure/webapps-deploy@v3
        with:
          app-name: ${{ env.AZURE_WEBAPP_NAME }} # Replace with your app name
          package: '${{ env.AZURE_WEBAPP_PACKAGE_PATH }}/myapp'

      - name: logout
        run: |
          az logout
Buat dan sebarkan aplikasi ASP.NET model-view-controller (MVC) ke Azure dengan menggunakan perwakilan layanan Azure. Input creds mereferensikan rahasia AZURE_CREDENTIALS yang Anda buat sebelumnya.
name: Deploy ASP.NET MVC App deploy to Azure Web App

on: [push]

env:
  AZURE_WEBAPP_NAME: my-app    # Set this to your application's name
  AZURE_WEBAPP_PACKAGE_PATH: '.'      # Set this to the path to your web app project, defaults to the repository root
  NUGET_VERSION: '5.3.x'           # Set this to the dot net version to use

jobs:
  build-and-deploy:
    runs-on: windows-latest
    steps:

    # Check out the repo
    - uses: actions/checkout@main

    - uses: azure/login@v2
      with:
        creds: ${{ secrets.AZURE_CREDENTIALS }}

    - name: Install Nuget
      uses: nuget/setup-nuget@v1
      with:
        nuget-version: ${{ env.NUGET_VERSION}}
    - name: NuGet to restore dependencies as well as project-specific tools that are specified in the project file
      run: nuget restore

    - name: Add msbuild to PATH
      uses: microsoft/setup-msbuild@v1.0.2

    - name: Run MSBuild
      run: msbuild .\SampleWebApplication.sln

    - name: 'Run Azure webapp deploy action using Azure Credentials'
      uses: azure/webapps-deploy@v3
      with:
        app-name: ${{ env.AZURE_WEBAPP_NAME }} # Replace with your app name
        package: '${{ env.AZURE_WEBAPP_PACKAGE_PATH }}/SampleWebApplication/'

    # Azure logout
    - name: logout
      run: |
        az logout
Buat dan sebarkan aplikasi Java Spring Boot ke Azure dengan menggunakan perwakilan layanan Azure. Input creds mereferensikan rahasia AZURE_CREDENTIALS yang Anda buat sebelumnya.
name: Java CI with Maven

on: [push]

jobs:
  build:

    runs-on: ubuntu-latest

    steps:
    - uses: actions/checkout@v4
    - uses: azure/login@v2
      with:
        creds: ${{ secrets.AZURE_CREDENTIALS }}
    - name: Set up JDK 1.8
      uses: actions/setup-java@v3
      with:
        java-version: 1.8
    - name: Build with Maven
      run: mvn -B package --file pom.xml
      working-directory: complete
    - name: Azure WebApp
      uses: Azure/webapps-deploy@v3
      with:
        app-name: my-app-name
        package: my/target/*.jar

    # Azure logout
    - name: logout
      run: |
        az logout
Buat dan sebarkan aplikasi Tomcat ke Azure dengan menggunakan perwakilan layanan Azure. Input creds mereferensikan rahasia AZURE_CREDENTIALS yang Anda buat sebelumnya.
name: Build and deploy WAR app to Azure Web App using Service Principal Connect

env:
  JAVA_VERSION: '11'                  # Set this to the Java version to use
  DISTRIBUTION: microsoft             # Set this to the Java distribution
  AZURE_WEBAPP_NAME: sampleapp        # Set this to the name of your web app

on: [push]

permissions:
  contents: read

jobs:
  build:
    runs-on: ubuntu-latest

    steps:
      - uses: actions/checkout@v4

      - name: Set up Java version
        uses: actions/setup-java@v3.0.0
        with:
          java-version: ${{ env.JAVA_VERSION }}
          distribution: ${{ env.DISTRIBUTION }}
          cache: 'maven'

      - name: Build with Maven
        run: mvn clean install

      - name: Login to Azure
        uses: azure/login@v2
        with:
          creds: ${{ secrets.AZURE_CREDENTIALS }}

      - name: Deploy to Azure Web App
        id: deploy-to-webapp
        uses: azure/webapps-deploy@v3
        with:
          app-name: ${{ env.AZURE_WEBAPP_NAME }}
          package: '*.war'
Berikut adalah contoh lengkap yang menggunakan berbagai pekerjaan untuk membangun dan menyebarkan.
Penting
Jika Anda menyebarkan aplikasi Node.js dengan TypeScript atau bahasa terkompilasi lainnya menggunakan azure/webapps-deploy@v3, buat aplikasi Anda terlebih dahulu di GitHub Actions lalu sebarkan folder output yang dikompilasi (seperti dist/ atau build/). Apabila Anda berniat menggunakan otomatisasi build App Service, atur SCM_DO_BUILD_DURING_DEPLOYMENT pengaturan aplikasi ke true.
Buat dan sebarkan aplikasi Node.js ke Azure dengan menggunakan perwakilan layanan Azure. Input creds mereferensikan rahasia AZURE_CREDENTIALS yang Anda buat sebelumnya.
name: JavaScript CI

on: [push]

name: Node.js

env:
  AZURE_WEBAPP_NAME: my-app   # Set this to your application's name
  AZURE_WEBAPP_PACKAGE_PATH: 'my-app-path'      # Set this to the path to your web app project, defaults to the repository root
  NODE_VERSION: '24.x'                # Set this to the node version to use

jobs:
  build-and-deploy:
    runs-on: ubuntu-latest
    steps:
    # Check out the repo
    - name: 'Checkout GitHub Action'
      uses: actions/checkout@main

    - uses: azure/login@v2
      with:
        creds: ${{ secrets.AZURE_CREDENTIALS }}

    - name: Setup Node ${{ env.NODE_VERSION }}
      uses: actions/setup-node@v4
      with:
        node-version: ${{ env.NODE_VERSION }}

    - name: 'npm install, build, and test'
      run: |
        npm install
        npm run build --if-present
        npm run test --if-present
      working-directory:  my-app-path

    # Deploy web app using Azure credentials
    - uses: azure/webapps-deploy@v3
      with:
        app-name: ${{ env.AZURE_WEBAPP_NAME }}
        package: ${{ env.AZURE_WEBAPP_PACKAGE_PATH }}

    # Azure logout
    - name: logout
      run: |
        az logout
Buat dan sebarkan aplikasi Python ke Azure dengan menggunakan perwakilan layanan Azure. Input creds mereferensikan rahasia AZURE_CREDENTIALS yang Anda buat sebelumnya.
name: Python application

on:
  [push]

env:
  AZURE_WEBAPP_NAME: my-app # Set this to your application's name
  AZURE_WEBAPP_PACKAGE_PATH: '.' # Set this to the path to your web app project, defaults to the repository root

jobs:
  build:
    runs-on: ubuntu-latest
    steps:
    - uses: actions/checkout@v4

    - uses: azure/login@v2
      with:
        creds: ${{ secrets.AZURE_CREDENTIALS }}

    - name: Set up Python 3.x
      uses: actions/setup-python@v4
      with:
        python-version: 3.x
    - name: Install dependencies
      run: |
        python -m pip install --upgrade pip
        pip install -r requirements.txt
    - name: Deploy web App using GH Action azure/webapps-deploy
      uses: azure/webapps-deploy@v3
      with:
        app-name: ${{ env.AZURE_WEBAPP_NAME }}
        package: ${{ env.AZURE_WEBAPP_PACKAGE_PATH }}
    - name: logout
      run: |
        az logout
Tanya jawab umum
Bagaimana cara menyebarkan file WAR melalui plugin Maven?
Jika Anda mengonfigurasi proyek Java Tomcat dengan plugin Maven, Anda juga dapat menyebarkan ke Azure App Service melalui plugin ini. Jika Anda menggunakan tindakan GitHub Azure CLI, tindakan tersebut menggunakan kredensial Azure Anda.
    - name: Azure CLI script file
      uses: azure/cli@v2
      with:
        inlineScript: |
          mvn package azure-webapp:deploy
Untuk informasi selengkapnya tentang cara menggunakan dan mengonfigurasi plugin Maven, lihat Wiki plugin Maven untuk Azure App Service.
Bagaimana cara menyebarkan file WAR melalui Azure CLI?
Jika Anda lebih suka menggunakan Azure CLI untuk disebarkan ke App Service, Anda dapat menggunakan GitHub Action untuk Azure CLI.
- name: Azure CLI script
  uses: azure/cli@v2
  with:
    inlineScript: |
      az webapp deploy --src-path '${{ github.workspace }}/target/yourpackage.war' --name ${{ env.AZURE_WEBAPP_NAME }} --resource-group ${{ env.RESOURCE_GROUP }}  --async true --type war
Untuk informasi selengkapnya tentang cara menggunakan dan mengonfigurasi tindakan GitHub untuk Azure CLI, lihat tindakan GitHub Azure CLI.
Untuk informasi selengkapnya tentang az webapp deploy perintah, termasuk cara menggunakannya dan detail parameter, lihat az webapp deploy dokumentasi.
Bagaimana cara mengimplementasikan file startup?
Gunakan GitHub Action untuk Azure CLI. Contohnya:
- name: Deploy startup script
  uses: azure/cli@v2
  with:
    inlineScript: |
      az webapp deploy --src-path ${{ github.workspace }}/src/main/azure/createPasswordlessDataSource.sh --name ${{ env.AZURE_WEBAPP_NAME }} --resource-group ${{ env.RESOURCE_GROUP }} --type startup --track-status false
Bagaimana cara menyebarkan ke kontainer?
Dengan tindakan Azure Web Deploy , Anda dapat mengotomatiskan alur kerja anda untuk menyebarkan kontainer kustom ke App Service dengan menggunakan GitHub Actions. Untuk informasi selengkapnya, lihat Menyebarkan ke kontainer.
Bagaimana cara menyebarkan ke slot penyebaran?
Anda dapat menyebarkan ke slot penyebaran alih-alih slot produksi dengan parameter slot-name dalam aksi azure/webapps-deploy@v3. Untuk menyebarkan ke slot, tambahkan slot-name parameter ke langkah penyebaran di alur kerja Anda:
- name: Deploy to Azure Web App
  uses: azure/webapps-deploy@v3
  with:
    app-name: 'my-app-name'
    slot-name: 'staging'  # Deploy to the 'staging' slot instead of production
    package: './output'
Catatan
Saat Anda menggunakan OpenID Connect atau autentikasi prinsipal layanan, pastikan bahwa identitas memiliki peran Kontributor Situs Web baik pada aplikasi maupun slot penyebaran. Untuk autentikasi profil publikasi, unduh profil publikasi untuk slot tertentu dari portal Azure (Slot>Slot Penyebaran> pilih slot >unduh profil publikasi).
Bagaimana cara memperbarui konfigurasi Tomcat setelah penyebaran?
Jika Anda ingin memperbarui salah satu pengaturan aplikasi web setelah penyebaran, Anda dapat menggunakan tindakan pengaturan App Service .
    - uses: azure/appservice-settings@v1
      with:
        app-name: 'my-app'
        slot-name: 'staging'  # Optional and needed only if the settings have to be configured on the specific deployment slot
        app-settings-json: '[{ "name": "CATALINA_OPTS", "value": "-Dfoo=bar" }]'
        connection-strings-json: '${{ secrets.CONNECTION_STRINGS }}'
        general-settings-json: '{"alwaysOn": "false", "webSocketsEnabled": "true"}' #'General configuration settings as Key Value pairs'
      id: settings
Untuk informasi selengkapnya tentang cara menggunakan dan mengonfigurasi tindakan ini, lihat repositori pengaturan App Service .
Konten terkait
Lihat referensi berikut tentang Tindakan dan alur kerja Azure GitHub: