How to Create End-to-End ReactJs NodeJs Express Web Application using SQLdb having Azure AD Authentication using Git for Continuous Deployment
This blog is to ensure that if you have not worked before with the SERN technology stack with Azure Active Directory Authentication on Continuous Deployment using Git, it will guide you to be able to deploy one end-to-end Azure web application with SQL as the database, ReactJs doing the client-side rendering as our front-end, APIs coded in NodeJs and Express Web Framework wiring up the APIs and our entire middleware with the SQL database.
Create React App
Assuming you have node already installed on your system, to start creating a reactjs application for client-side rendering, go to command prompt and type the following command:
npm install -g create-react-app [g is for global install of the npm package]create-react-app newreactjsclientproject
Node is required in the system only to use npm to install all the packages & their dependencies (you'll find them in a folder by the name of node_modules). You may now start writing code in newreactjsclientproject.
 my-app
├── README.md
├── node_modules [folder: containing all the npm package dependencies]
├── package.json [all the package dependencies go here*]
├── .gitignore
├── public [folder: will be containing the production build of your final application]
│   └── favicon.ico [just the icon image in the browser tab - not important unless you plan to go live ]
│   └── index.html [main static page - very important but no editing really required (except for title tag)]
│   └── manifest.json [metadata about your application - not important unless you plan to go live]
└── src [folder: all the source code for your application goes here - ever hot and happening folder]
    └── App.css [all the css for your application]
    └── App.js [the startup page of your application]
    └── App.test.js
    └── index.css [not important - unless you want to set font family etc]
    └── index.js [actual startup page of your app; will inform the app that App.js is the startup page**]
    └── logo.svg
    └── registerServiceWorker.js [not to be touched unless you want a slow running app - in production, a service worker gets registered to serve the assets from local cache***]

*The react start script, react build script is also mentioned here in scripts json ;  node and npm versions can be mentioned here in engines json; the proxy is also to be mentioned here  (IMP)  - it is the url to the location where the server will be found running

**This will also make a note of the container where your application will be held. This container will be denoted by the id of the div tag within body of your index.html

***This lets the app load faster on subsequent visit to live site, gives your site offline capabilities - It is a new concept of Progressive Web Apps. Moving forward this is going to eliminate the need of app store and will ensure that your web app is reliably fast even on a network as slow as 2G.
After generating your react project, to run the react application on a localhost port, use the below command:
npm start
This will start your application on https://localhost:3000. Port number can vary and depends on the availability of the port.
Note: The best thing about reactjs is that we can edit at runtime and see the changes getting reloaded on the running localhost by itself, i.e., without refreshing the page or hitting F5.
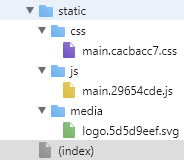
After your app has started, just notice the static folder by hitting key F12 to get the developer tools in your browser.
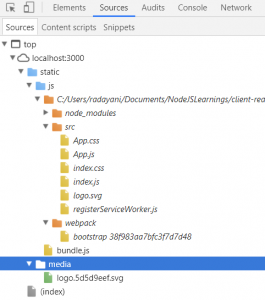
These static folder contents have appeared here as production build assets of your react application. When making an e2e application with NodeJs, you'll need to create a production build beforehand, by yourself. For that, you can simply do this command in your command prompt:
npm run build
When you run this command, the production build static assets will land up in the build folder.
You just need to copy the contents of this build folder from our React application to the public folder of our Express Node application (which we'll create below). When we come to server side application using Express, we'll visit this point again and discuss more for further clarity.
When you create a react application using the Create React App, as of today, it installs:
[we don't need to do any development with any of the following. create-react-app takes care of that for us. It is just for informational purpose.]
- webpack - correctly bundles React in production mode and optimizes the build for the best performance. The build is minified and the filenames include the hashes. By default, it also includes a service worker so that your app loads from the local cache on future visits.
- babel - transpiles JSX (react language) script written in ES6 (ECMAScript 6) into javascript
- eslint - identifies and reports patterns found in javascript code (as far as my needs, it seemed like resharper which reports unused variables and methods and packages)
- etc..
Material-UI With ReactJs
Before modifying the App.js to be able to call server API, install material-ui npm package:
npm install --save material-ui
To be able to listen onTouchTap event on any material-ui component, edit your index.js to add the below 2 statements exactly after imports:
 import injectTapEventPlugin from 'react-tap-event-plugin';
injectTapEventPlugin();
Modify the App.js file to look like following:
 import React, { Component } from 'react';
import logo from './logo.svg';
import './App.css';
import RaisedButton from 'material-ui/RaisedButton';
import MuiThemeProvider from 'material-ui/styles/MuiThemeProvider';
import getMuiTheme from 'material-ui/styles/getMuiTheme';
import { cyan700 } from 'material-ui/styles/colors';
const muiTheme = getMuiTheme({
 palette: {
 textColor: cyan700,
 },
 appBar: {
 height: 50,
 },
});

class App extends Component {
 constructor(props) {
 super(props);
 this.state = { users: [] }
}

 handleOpen() {
  fetch('/api/users', {
   method: 'GET',
   headers: {
    'Content-Type': 'application/json',
    'Accept': 'application/json',
   }
  }).then(res => res.json())
    .then(users => this.setState({ users }));
 }

 render() {
  return (
  <div className="App">
    <div className="App-header">
      <img src={logo} className="App-logo" alt="logo" />
      <h2>Welcome to React</h2>
    </div>
     <MuiThemeProvider muiTheme={muiTheme}><br>      <RaisedButton label="Call API" onTouchTap={this.handleOpen.bind(this)} /><br>    </MuiThemeProvider><br>    <br /><br /><br>    {this.state.users.length !== 0 ? "api called! check response of call to users in Network Tab in F12" : "api not yet called"}
  </div>
  );
 }
}

export default App;
Create an Express App
to start creating an express application for server-side work, go to command prompt and type the following command:
 npm install express-generator -g
express newnodeserverexpressproject
This third command will quickly create an application skeleton. You may now start writing your APIs and other middleware code in newnodeserverexpressproject .
├── app.js  [this is the main file of the server - all the apis and api routes and middleware code goes here]
├── bin
│   └── www  [this is the startup file. It tells the port the server will listen on and the main file name]
├── package.json [all the package dependencies go here*]
├── public  [folder: all static files from the react app are to be copied here from react app's build folder]
│   ├── images
│   ├── javascripts
│   └── stylesheets
│       └── style.css
├── routes [below 2 are default api routes set in the express app generated temeplate]
│   ├── index.js
│   └── users.js
└── views [in case server side rendering is to be done, then only these views are needed**]
    ├── error.pug
    ├── index.pug
    └── layout.pug

*The node start script, node build script go in scripts json

**If server-side rendering not needed, views can be ignored, and you'll see plain text output while calling apis]
Before starting express node application, you first need to install npm package dependencies locally into this express app. It will create a node_modules folder for express app as well.
npm install [Note that node_modules folder in express/react app can be removed at any time and recreated using npm install - it identifies all the dependencies by itself]
To start running the application, use below command. And, the express app on localhost would start like the following screenshot shows:
node ./bin/www
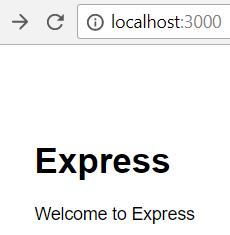
Now your server is running on localhost on some available port (you can notice it in your browser).
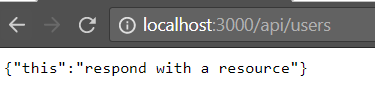
If you want to see the api run on the server, add /api/users to the url:
- For development on localhost with both api server and react's webpack server, the react client should know the server location, hence, one tiny change would be needed in the react app's package.json
"proxy": "https://localhost:3000/" [assuming 3000 is the port on which server is listening]
This proxy would tell the react app to look for the API calls at the aforementioned URL.
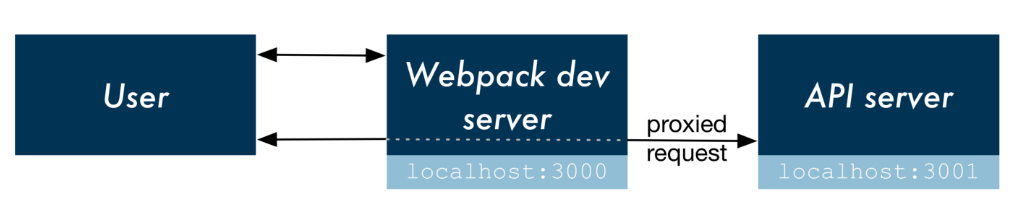
Note: proxy in package.json of react app would be used only for local development, i.e., when the API server is still in development and not yet published. (Refer - below image taken from here)
To keep the server running and to reflect the changes made in the code on the running server without havint to restart the server, install nodemon package:
npm install --save nodemon
After this, instead of calling node ./bin/www, call the following command:
nodemon ./bin/www
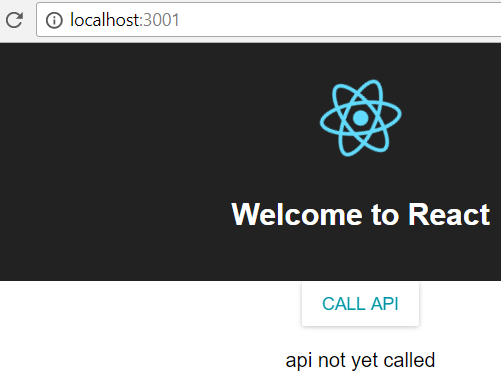
Let the express node server running. Run the react client from a separate command window by doing an npm start. It will give a prompt that port 3000 is already being used (yes! because we are using it for node server as shown above). Agree to start react webpack dev server on a different port. It fires up the react app which looks like this:
When we click on the "Call API" button, the output from browser as well as from the network tools looks like this:
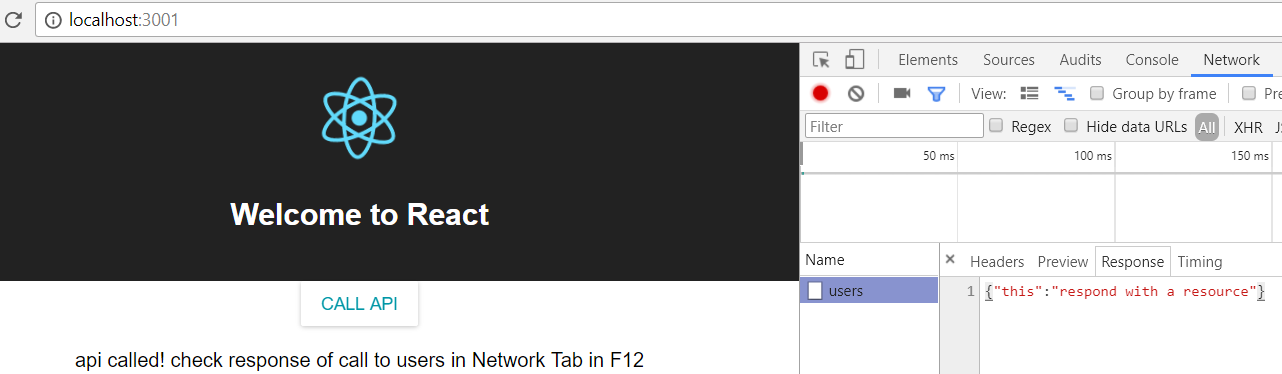
This proves that the react app webpack server running at port 3001 makes the proxy call to api (express node) server which was already running on port 3000.
- For a published app, we've to copy the production build contents of react app from above react directory into the public folder of express app. Check in those changes for continuous deployment (below). The express app will start referring to the static files in its public folder and proxy would be ignored there.
Continuous Deployment using Github on Azure Web App
Add a .gitignore file to the express directory in your system. Its contents should be like this for your express node app:
 # See https://help.github.com/ignore-files/ for more about ignoring files.

# dependencies
/node_modules

# testing
/coverage

# production
/build

# misc
.DS_Store
.env.local
.env.development.local
.env.test.local
.env.production.local

npm-debug.log*
yarn-debug.log*
yarn-error.log*
This will tell node to ignore node_modules while checking in the code. Create a repository in github. Follow the steps as given in github on creating a new repo, as below:
 echo "# z" >> README.md
git init
git add README.md
git commit -m "first commit"
git remote add origin https://github.com/myaccount/repo.git
git push -u origin master
At this point, you have added a readme file to your repo, concluding that your repo is up and running. Now add all your express files along with the production build of react which you copied to its public folder:
 git add . [This will stage all the changes in your local]
git commit -m "express node server app and prod build of react client"
git push -u origin master
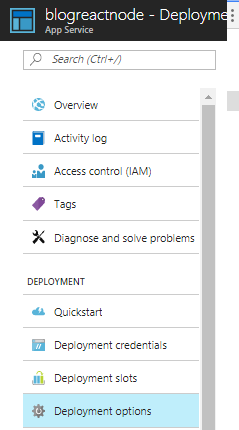
Now, go to you Azure Web App. From the Menu options in the left, select Deployment Options.
If no github account is configured already, it will ask you to configure one:
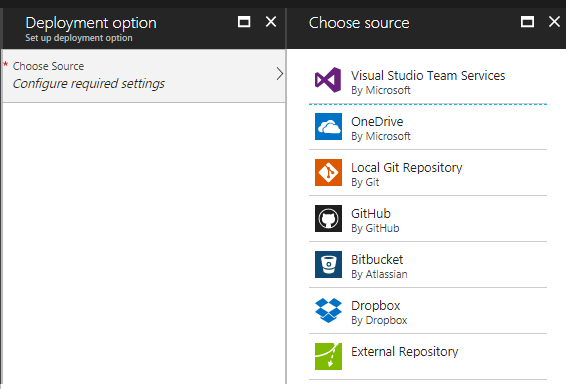
Select source and your repository in that source which you want to configure for continuous deployment. And hit Ok. You'll see your github commits syncing here. If not, hit Sync to start syncing.
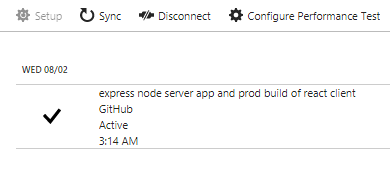
You have successfully configured your continuous deployment. This point onwards, whatever commits land up in github will be synced to your web app as well and update it simulataneously.
After your app has started, just notice that a static folder is there, by hitting key F12 to get the developer tools in your browser.
If you switch to any api from the url of the published webapp, say,
https://blogreactnode.azurewebsites.net/api/users
Then the source contents (as can be observed from f12 dev tools) change by itself in published app.
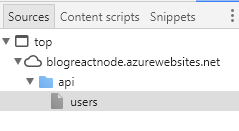
Hence, we don't need proxy here like we did during local development.
Addendum as on 20th Sept, 2017:
How to Check Logs in Azure App When Website Doesn't Work as Expected
In Azure App, Go to Log Stream under Monitoring button, in the Menu on left.
In case the logs are turned off by default, go to Diagnostic Logs right above Log Stream and turn on the necessary logs and select appropriate logging level. Log Stream would look like below when ready:

When the Logs give 500 TypeError
Lately, it happened for me that even a new Express App didn't get deployed correctly. From Stack Overflow, got the hint to check the node version on the App Service and whether the one on your local machine is even supported on Azure App Service.
To check the version on the App Service with the help of this MSDN blog:
-
- Go to Kudu from the left menu
- In the Command Prompt window below in Debug Console, go to D:\Program Files (x86)\nodejs to check the list of available versions. It will give a hint as to whether Azure Service supports the node version you had worked on in your local machine.
- To let the Azure Infra know about which version you'd support, put the below code into the package.json of the Express Application.
 "engines": {
  "node" : "5.9.1",
  "npm" : "3.7.3"
}