Catatan
Akses ke halaman ini memerlukan otorisasi. Anda dapat mencoba masuk atau mengubah direktori.
Akses ke halaman ini memerlukan otorisasi. Anda dapat mencoba mengubah direktori.
Mulai dengan Azure Load Balancer dengan menggunakan Azure PowerShell untuk membuat penyeimbang beban publik dan dua mesin virtual. Selain itu, Anda menyebarkan sumber daya lain termasuk Azure Bastion, NAT Gateway, jaringan virtual, dan subnet yang diperlukan.

Prasyarat
Akun Azure dengan langganan aktif. Membuat akun secara gratis
Azure PowerShell diiinstal secara lokal atau Azure Cloud Shell
Jika Anda memilih untuk memasang dan menggunakan PowerShell secara lokal, artikel ini memerlukan modul Azure PowerShell versi 5.4.1 atau versi yang lebih baru. Jalankan Get-Module -ListAvailable Az untuk menemukan versi terinstal. Jika Anda perlu peningkatan, lihat Instal modul Azure PowerShell. Jika Anda menjalankan PowerShell secara lokal, Anda juga harus menjalankan Connect-AzAccount untuk membuat koneksi dengan Azure.
Buat grup sumber daya
Grup sumber daya Azure adalah kontainer logis tempat sumber daya Azure disebarkan dan dikelola.
Membuat grup sumber daya menggunakan New-AzResourceGroup:
$rg = @{
    Name = 'CreatePubLBQS-rg'
    Location = 'westus2'
}
New-AzResourceGroup @rg
Membuat alamat IP publik
Gunakan New-AzPublicIpAddress untuk membuat alamat IP publik.
$publicip = @{
    Name = 'myPublicIP'
    ResourceGroupName = $rg.name
    Location = 'westus2'
    Sku = 'Standard'
    AllocationMethod = 'static'
    Zone = 1,2,3
}
New-AzPublicIpAddress @publicip
Untuk membuat alamat IP publik zonal di zona 1, gunakan perintah berikut:
$publicip = @{
    Name = 'myPublicIP'
    ResourceGroupName = $rg.name
    Location = 'westus2'
    Sku = 'Standard'
    AllocationMethod = 'static'
    Zone = 1
}
New-AzPublicIpAddress @publicip
Membuat penyeimbang beban
Bagian ini menjelaskan cara untuk membuat dan mengonfigurasi komponen penyeimbang beban berikut:
Buat IP frontend dengan New-AzLoadBalancerFrontendIpConfig untuk kumpulan IP frontend. IP ini menerima lalu lintas yang masuk ke load balancer
Buat kumpulan alamat backend dengan New-AzLoadBalancerBackendAddressPoolConfig untuk lalu lintas yang dikirim dari frontend load balancer. Kumpulan ini adalah tempat mesin virtual backend Anda digunakan
Membuat pemeriksaan kesehatan menggunakan Add-AzLoadBalancerProbeConfig yang menentukan kesehatan instans mesin virtual backend
Membuat aturan penyeimbang muatan dengan Add-AzLoadBalancerRuleConfig yang menentukan bagaimana lalu lintas didistribusikan ke mesin virtual
Buat penyeimbang muatan publik menggunakan New-AzLoadBalancer
## Place public IP created in previous steps into variable. ##
$pip = @{
    Name = 'myPublicIP'
    ResourceGroupName = $rg.name
}
$publicIp = Get-AzPublicIpAddress @pip

## Create load balancer frontend configuration and place in variable. ##
$fip = @{
    Name = 'myFrontEnd'
    PublicIpAddress = $publicIp
}
$feip = New-AzLoadBalancerFrontendIpConfig @fip

## Create backend address pool configuration and place in variable. ##
$bepool = New-AzLoadBalancerBackendAddressPoolConfig -Name 'myBackEndPool'

## Create the health probe and place in variable. ##
$probe = @{
    Name = 'myHealthProbe'
    Protocol = 'tcp'
    Port = '80'
    IntervalInSeconds = '360'
    ProbeCount = '5'
}
$healthprobe = New-AzLoadBalancerProbeConfig @probe

## Create the load balancer rule and place in variable. ##
$lbrule = @{
    Name = 'myHTTPRule'
    Protocol = 'tcp'
    FrontendPort = '80'
    BackendPort = '80'
    IdleTimeoutInMinutes = '15'
    FrontendIpConfiguration = $feip
    BackendAddressPool = $bePool
}
$rule = New-AzLoadBalancerRuleConfig @lbrule -EnableTcpReset -DisableOutboundSNAT

## Create the load balancer resource. ##
$loadbalancer = @{
    ResourceGroupName = $rg.name
    Name = 'myLoadBalancer'
    Location = 'westus2'
    Sku = 'Standard'
    FrontendIpConfiguration = $feip
    BackendAddressPool = $bePool
    LoadBalancingRule = $rule
    Probe = $healthprobe
}
New-AzLoadBalancer @loadbalancer
Konfigurasikan jaringan virtual
Sebelum Anda menyebarkan VM dan menguji penyeimbang beban Anda, buat sumber daya jaringan virtual yang mendukung.
Buat jaringan virtual untuk komputer virtual ujung belakang.
Buat grup keamanan jaringan untuk menentukan sambungan masuk ke jaringan virtual Anda.
Buat host Azure Bastion untuk mengelola mesin virtual di kumpulan backend dengan aman.
Gunakan gateway NAT untuk menyediakan akses internet keluar ke sumber daya di kumpulan backend penyeimbang muatan Anda.
Membuat jaringan virtual, grup keamanan jaringan, host bastion, dan gateway NAT
Membuat jaringan virtual dengan New-AzVirtualNetwork
Membuat aturan kelompok keamanan jaringan dengan New-AzNetworkSecurityRuleConfig
Buat host Azure Bastion dengan New-AzBastion
Buat kelompok keamanan jaringan dengan New-AzNetworkSecurityGroup
Membuat sumber daya gateway NAT dengan New-AzNatGateway
Menggunakan New-AzVirtualNetworkSubnetConfig untuk mengaitkan gateway NAT ke subnet jaringan virtual
Penting
Harga per jam dimulai sejak Bastion disebarkan, terlepas dari penggunaan data keluar. Untuk informasi selengkapnya, lihat Harga dan SKU. Jika Anda menyebarkan Bastion sebagai bagian dari tutorial atau pengujian, kami sarankan Anda menghapus sumber daya ini setelah Selesai menggunakannya.
## Create public IP address for NAT gateway ##
$ip = @{
    Name = 'myNATgatewayIP'
    ResourceGroupName = $rg.name
    Location = 'westus2'
    Sku = 'Standard'
    AllocationMethod = 'Static'
}
$publicIP = New-AzPublicIpAddress @ip

## Create NAT gateway resource ##
$nat = @{
    ResourceGroupName = $rg.name
    Name = 'myNATgateway'
    IdleTimeoutInMinutes = '10'
    Sku = 'Standard'
    Location = 'westus2'
    PublicIpAddress = $publicIP
}
$natGateway = New-AzNatGateway @nat

## Create backend subnet config ##
$subnet = @{
    Name = 'myBackendSubnet'
    AddressPrefix = '10.1.0.0/24'
    NatGateway = $natGateway
}
$subnetConfig = New-AzVirtualNetworkSubnetConfig @subnet

## Create Azure Bastion subnet. ##
$bastsubnet = @{
    Name = 'AzureBastionSubnet'
    AddressPrefix = '10.1.1.0/24'
}
$bastsubnetConfig = New-AzVirtualNetworkSubnetConfig @bastsubnet

## Create the virtual network ##
$net = @{
    Name = 'myVNet'
    ResourceGroupName = $rg.name
    Location = 'westus2'
    AddressPrefix = '10.1.0.0/16'
    Subnet = $subnetConfig,$bastsubnetConfig
}
$vnet = New-AzVirtualNetwork @net

## Create public IP address for bastion host. ##
$ip = @{
    Name = 'myBastionIP'
    ResourceGroupName = $rg.name
    Location = 'westus2'
    Sku = 'Standard'
    AllocationMethod = 'Static'
}
$publicip = New-AzPublicIpAddress @ip

## Create bastion host ##
$bastion = @{
    ResourceGroupName = $rg.name
    Name = 'myBastion'
    PublicIpAddress = $publicip
    VirtualNetwork = $vnet
}
New-AzBastion @bastion -AsJob

## Create rule for network security group and place in variable. ##
$nsgrule = @{
    Name = 'myNSGRuleHTTP'
    Description = 'Allow HTTP'
    Protocol = '*'
    SourcePortRange = '*'
    DestinationPortRange = '80'
    SourceAddressPrefix = 'Internet'
    DestinationAddressPrefix = '*'
    Access = 'Allow'
    Priority = '2000'
    Direction = 'Inbound'
}
$rule1 = New-AzNetworkSecurityRuleConfig @nsgrule

## Create network security group ##
$nsg = @{
    Name = 'myNSG'
    ResourceGroupName = $rg.name
    Location = 'westus2'
    SecurityRules = $rule1
}
New-AzNetworkSecurityGroup @nsg
Membuat komputer virtual
Di bagian ini, Anda membuat dua komputer virtual untuk kumpulan backend load balancer.
Buat dua antarmuka jaringan dengan New-AzNetworkInterface
Atur nama pengguna dan kata sandi administrator untuk mesin virtual menggunakan Get-Credential
Buat komputer virtual dengan:
# Set the administrator and password for the VMs. ##
$cred = Get-Credential

## Place the virtual network into a variable. ##
$net = @{
    Name = 'myVNet'
    ResourceGroupName = $rg.name
}
$vnet = Get-AzVirtualNetwork @net

## Place the load balancer into a variable. ##
$lb = @{
    Name = 'myLoadBalancer'
    ResourceGroupName = $rg.name
}
$bepool = Get-AzLoadBalancer @lb  | Get-AzLoadBalancerBackendAddressPoolConfig

## Place the network security group into a variable. ##
$ns = @{
    Name = 'myNSG'
    ResourceGroupName = $rg.name
}
$nsg = Get-AzNetworkSecurityGroup @ns

## For loop with variable to create virtual machines for load balancer backend pool. ##
for ($i=1; $i -le 2; $i++){

    ## Command to create network interface for VMs ##
    $nic = @{
        Name = "myNicVM$i"
        ResourceGroupName = $rg.name
        Location = 'westus2'
        Subnet = $vnet.Subnets[0]
        NetworkSecurityGroup = $nsg
        LoadBalancerBackendAddressPool = $bepool
    }
    $nicVM = New-AzNetworkInterface @nic

    ## Create a virtual machine configuration for VMs ##
    $vmsz = @{
        VMName = "myVM$i"
        VMSize = 'Standard_DS1_v2'
    }
    $vmos = @{
        ComputerName = "myVM$i"
        Credential = $cred
    }
    $vmimage = @{
        PublisherName = 'MicrosoftWindowsServer'
        Offer = 'WindowsServer'
        Skus = '2019-Datacenter'
        Version = 'latest'
    }
    $vmConfig = New-AzVMConfig @vmsz `
        | Set-AzVMOperatingSystem @vmos -Windows `
        | Set-AzVMSourceImage @vmimage `
        | Add-AzVMNetworkInterface -Id $nicVM.Id

    ## Create the virtual machine for VMs ##
    $vm = @{
        ResourceGroupName = $rg.name
        Location = 'westus2'
        VM = $vmConfig
        Zone = "$i"
    }
    New-AzVM @vm -AsJob
}
Penyebaran komputer virtual dan host bastion akan dikirimkan sebagai pekerjaan PowerShell. Untuk melihat status pekerjaan, gunakan Get-Job:
Get-Job

Id     Name            PSJobTypeName   State         HasMoreData     Location             Command
--     ----            -------------   -----         -----------     --------             -------
1      Long Running O… AzureLongRunni… Completed     True            localhost            New-AzBastion
2      Long Running O… AzureLongRunni… Completed     True            localhost            New-AzVM
3      Long Running O… AzureLongRunni… Completed     True            localhost            New-AzVM
Pastikan Status pembuatan Mesin Virtual Selesai sebelum melanjutkan ke langkah berikutnya.
Catatan
Azure menyediakan IP akses keluar default untuk VM yang tidak diberi alamat IP publik atau berada di kumpulan backend load balancer Azure dasar internal. Mekanisme IP akses keluar default menyediakan alamat IP keluar yang tidak dapat dikonfigurasi.
IP akses keluar default dinonaktifkan saat salah satu peristiwa berikut terjadi:
- Alamat IP publik ditetapkan ke VM.
- VM ditempatkan di kumpulan backend load balancer standar, dengan atau tanpa aturan keluar.
- Sumber daya Azure NAT Gateway ditetapkan ke subnet VM.
VM yang Anda buat dengan menggunakan set skala komputer virtual dalam mode orkestrasi fleksibel tidak memiliki akses keluar default.
Untuk informasi selengkapnya tentang koneksi keluar di Azure, lihat Akses keluar default di Azure dan Menggunakan Terjemahan Alamat Jaringan Sumber (SNAT) untuk koneksi keluar.
Instal IIS
Gunakan Set-AzVMExtension untuk menginstal Custom Script Extension.
Ekstensi tersebut menjalankan PowerShell Add-WindowsFeature Web-Server untuk menginstal server web IIS dan memperbarui halaman Default.htm untuk menampilkan nama host komputer virtual:
Penting
Pastikan penyebaran komputer virtual telah menyelesaikan langkah-langkah sebelumnya sebelum melanjutkan. Gunakan Get-Job untuk memeriksa status pekerjaan penyebaran komputer virtual.
## For loop with variable to install custom script extension on virtual machines. ##
for ($i=1; $i -le 2; $i++)
{
$ext = @{
    Publisher = 'Microsoft.Compute'
    ExtensionType = 'CustomScriptExtension'
    ExtensionName = 'IIS'
    ResourceGroupName = $rg.name
    VMName = "myVM$i"
    Location = 'westus2'
    TypeHandlerVersion = '1.8'
    SettingString = '{"commandToExecute":"powershell Add-WindowsFeature Web-Server; powershell Add-Content -Path \"C:\\inetpub\\wwwroot\\Default.htm\" -Value $($env:computername)"}'
}
Set-AzVMExtension @ext -AsJob
}
Ekstensi tersebut disebarkan sebagai pekerjaan PowerShell. Untuk melihat status pekerjaan pemasangan, gunakan Get-Job:
Get-Job

Id     Name            PSJobTypeName   State         HasMoreData     Location             Command
--     ----            -------------   -----         -----------     --------             -------
8      Long Running O… AzureLongRunni… Running       True            localhost            Set-AzVMExtension
9      Long Running O… AzureLongRunni… Running       True            localhost            Set-AzVMExtension
Pastikan Status pekerjaan sudah Selesai sebelum melanjutkan ke langkah berikutnya.
Menguji load balancer
Gunakan Get-AzPublicIPAddress untuk mendapatkan alamat IP penyeimbang muatan:
$ip = @{
    ResourceGroupName = $rg.name
    Name = 'myPublicIP'
}
Get-AzPublicIPAddress @ip | select IpAddress
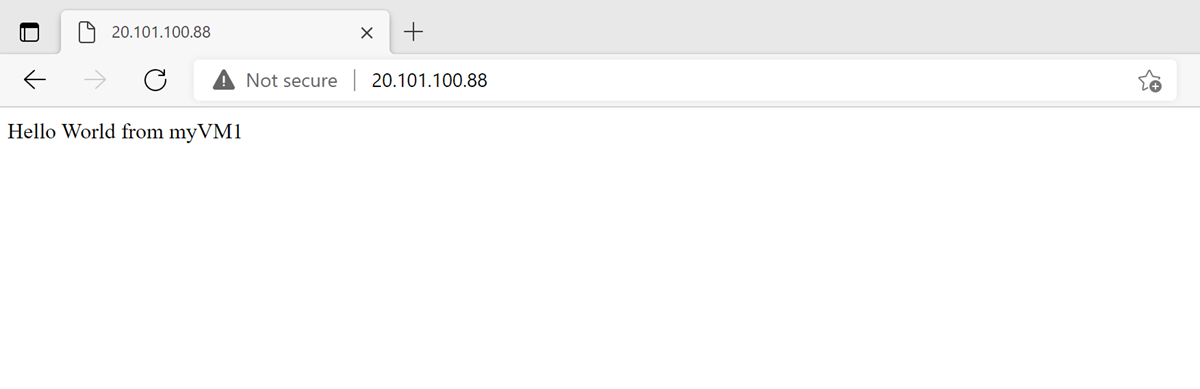
Salin alamat IP publik, lalu tempelkan ke bilah alamat browser Anda. Halaman default server Web IIS ditampilkan di browser.
Membersihkan sumber daya
Jika tidak diperlukan lagi, Anda dapat menggunakan perintah Remove-AzResourceGroup untuk menghapus grup sumber daya, load balancer, dan sumber daya lainnya yang tersisa.
Remove-AzResourceGroup -Name $rg.name
Langkah berikutnya
Dalam mulai cepat ini, Anda akan:
Membuat Azure Load Balancer
Melampirkan 2 mesin virtual ke penyeimbang muatan
Menguji load balancer
Untuk mempelajari informasi selengkapnya tentang Azure Load Balancer, lanjutkan ke: