CloudLens with Moloch example


Solution Overview
This Quick Start deployment guide provides step-by-step instructions for deploying Moloch and CloudLens in the Azure Cloud.
This Quick Start is for users who need to gain more visibility into their Azure VNets.
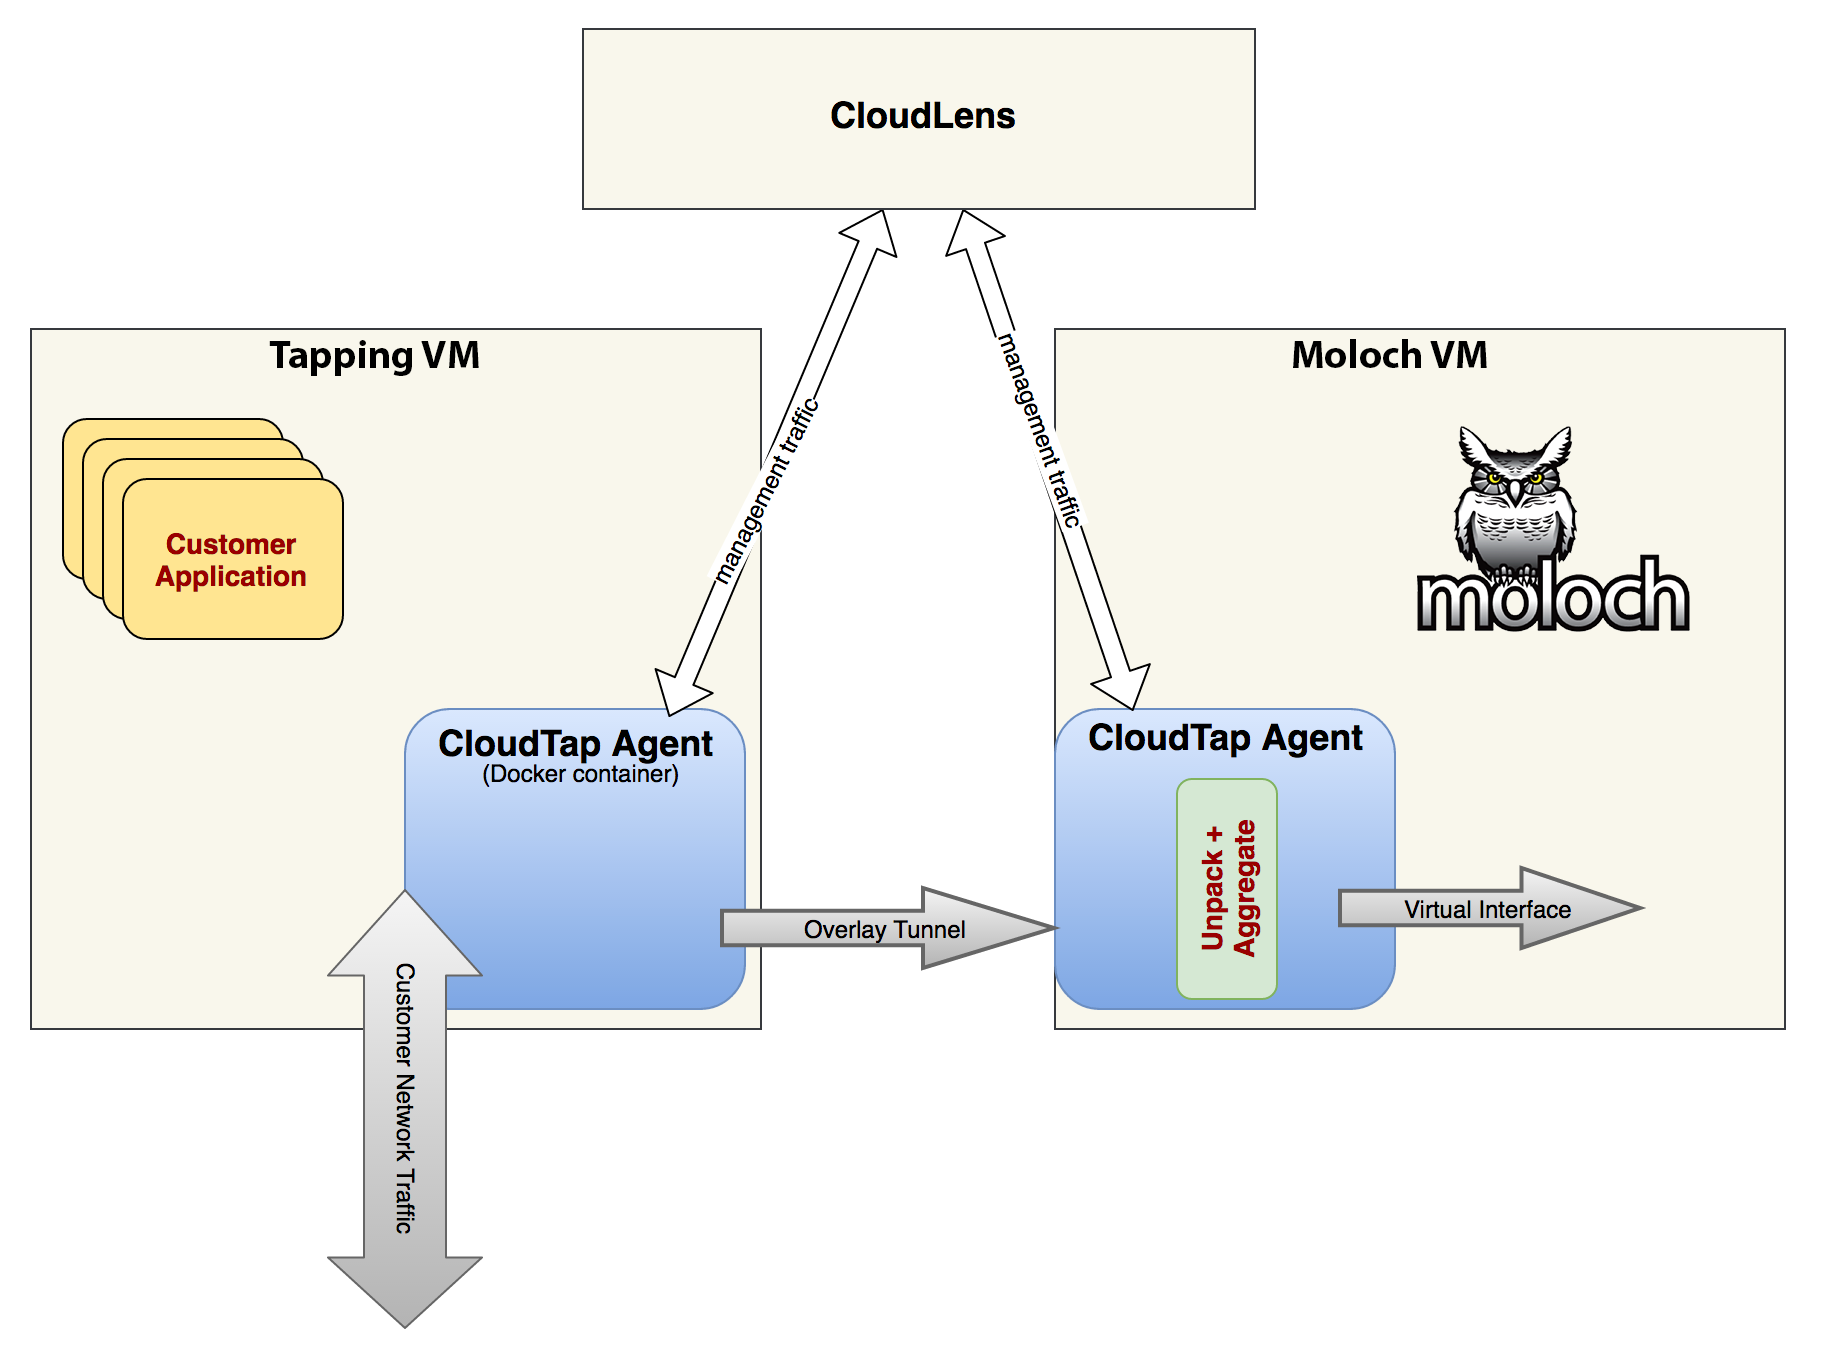
Solution Architecture
This template will deploy:
- Two storage accounts
- One Virtual Network
- 2 Public IP’s, one for the tapping vm and one for the Moloch tool
- Two UbuntuServer 16.04.0-LTS VMs
Licenses and Costs
You are responsible for the cost of the Azure services used while running this Quick Start deployment. There is no additional cost for using the Quick Start.
The Azure template for this Quick Start includes configuration parameters that you can customize. Some of these settings, such as vm size, will affect the cost of deployment. For cost estimates, see the pricing pages for each Azure service you will be using. Prices are subject to change.
CloudLens will be configured to use a free trial account, the user can convert at any time to a paid account.
Prerequisites
Azure Subscription with ability to launch VMs.
Deployment Steps
Step 1. Prepare Your CloudLens Account
- Create a CloudLens free trial account at https://ixia.cloud/free-trial?isQuickstart=true by following the on-screen instructions.
- Activate your free trial account by visiting the link provided in the email.
- Login to CloudLens. A project will be automatically created for you with all the required infrastructure: one group for source instances and one group for tool instances, a connection between the two groups. The groups are automatically configured with filters that match the agents that will be started later by the Quick Start template.
- Select the project by clicking the tile having the name “QUICKSTART_PROJECT”.
- On the project page click on SHOW PROJECT KEY to display the project key and copy it, since you will need it to deploy the template.
Step 2. Launch the Quick Start
Create your CloudLens environment on Azure in a few simple steps:
- Launch the Template by click on 'Deploy to Azure' button.
- Fill in all the required parameter values. Accept the terms and conditions and click on 'Purchase'.
Step 3. Play with the environment
After the deployment is ready (~ 6 minutes):
- Check the CloudLens portal to see if the agents have connected and are part of the 2 groups (should say '1 instance' under each group).
- Login in the Moloch web ui (https://{moloch-vm-ip}:8005) with admin/moloch.
- Generate some network traffic from the tapping vm
- Check the Moloch Web UI (wait for about a minute for the sessions view to update)
Support
For any support related questions, issues or customization requirements, please contact cloudlens@keysight.com.
https://www.ixiacom.com/products/cloudlens-public
Tags: Microsoft.Storage/storageAccounts, Microsoft.Network/publicIPAddresses, Microsoft.Network/networkSecurityGroups, Microsoft.Network/virtualNetworks, Microsoft.Network/networkInterfaces, Microsoft.Compute/virtualMachines, Microsoft.Compute/virtualMachines/extensions, CustomScript