Latihan - Menyebarkan aplikasi web
Di perusahaan mainan Anda, tim pengembangan situs web Anda menerapkan versi terbaru situs web ke repositori Git Anda. Sekarang, Anda siap memperbarui alur untuk membuat situs web, dan menyebarkannya ke Azure App Service.
Dalam proses ini, Anda melakukan tugas-tugas berikut:
- Menambahkan templat alur baru untuk pekerjaan build.
- Memperbarui alur untuk menyertakan pekerjaan build.
- Menambahkan uji asap baru.
- Memperbarui tahap penyebaran untuk menyebarkan aplikasi.
- Jalankan alur.
Menambahkan templat alur untuk pekerjaan build
Tambahkan definisi pekerjaan baru yang berisi langkah-langkah yang diperlukan untuk membangun aplikasi situs web.
Buka Visual Studio Code.
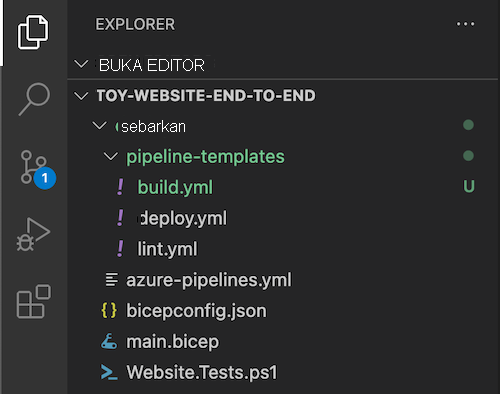
Di folder deploy/pipeline-templates, buat file baru bernama build.yml.
Tambahkan konten berikut ke file templat alur build.yml:
jobs:
- job: Build
  displayName: Build application and database
  pool:
    vmImage: windows-latest

  steps:

  # Build, copy, and publish the website.
  - task: DotNetCoreCLI@2
    displayName: Build publishable website
    inputs:
      command: 'publish'
      publishWebProjects: true

  - task: CopyFiles@2
    displayName: Copy publishable website
    inputs:
      sourceFolder: '$(Build.SourcesDirectory)/src/ToyCompany/ToyCompany.Website/bin'
      contents: '**/publish.zip'
      targetFolder: '$(Build.ArtifactStagingDirectory)/website'
      flattenFolders: true

  - task: PublishBuildArtifacts@1
    displayName: Publish website as pipeline artifact
    inputs:
      pathToPublish: '$(Build.ArtifactStagingDirectory)/website'
      artifactName: 'website'
Pekerjaan tersebut menjalankan langkah build untuk mengubah kode sumber aplikasi situs web menjadi file yang dikompilasi yang siap dijalankan di Azure. Pekerjaan tersebut kemudian menyalin artefak yang dikompilasi ke folder penahapan sementara dan menerbitkannya sebagai artefak alur.
Simpan perubahan Anda ke file tersebut.
Mengganti nama tahap alur pertama, dan menambahkan pekerjaan build
Di Visual Studio Code, buka file azure-alurs.yml di folder deploy.
Ubah tahap Lint. Ganti nama menjadi Build, dan tambahkan pekerjaan build yang menggunakan templat alur build.yml yang Anda buat.
trigger:
  batch: true
  branches:
    include:
    - main

pool:
  vmImage: ubuntu-latest

stages:

- stage: Build
  jobs:
  # Build the Visual Studio solution.
  - template: pipeline-templates/build.yml

  # Lint the Bicep file.
  - template: pipeline-templates/lint.yml

# Deploy to the test environment.
- template: pipeline-templates/deploy.yml
  parameters:
    environmentType: Test

# Deploy to the production environment.
- template: pipeline-templates/deploy.yml
  parameters:
    environmentType: Production
Simpan perubahan Anda ke file tersebut.
Memperbarui file uji asap
Pengembang situs web menambahkan titik akhir kesehatan ke situs web. Titik akhir ini memeriksa bahwa situs web sedang online dan dapat mencapai database. Di sini, Anda menambahkan uji asap baru untuk meminta pemeriksaan kesehatan dari alur penyebaran Anda.
Buka file Website.Tests.ps1 di folder deploy.
Tambahkan kasus uji baru yang meminta pemeriksaan kesehatan. Kasus pengujian gagal jika kode respons bukan 200, yang menunjukkan keberhasilan.
param(
  [Parameter(Mandatory)]
  [ValidateNotNullOrEmpty()]
  [string] $HostName
)

Describe 'Toy Website' {

    It 'Serves pages over HTTPS' {
      $request = [System.Net.WebRequest]::Create("https://$HostName/")
      $request.AllowAutoRedirect = $false
      $request.GetResponse().StatusCode |
        Should -Be 200 -Because "the website requires HTTPS"
    }

    It 'Does not serves pages over HTTP' {
      $request = [System.Net.WebRequest]::Create("http://$HostName/")
      $request.AllowAutoRedirect = $false
      $request.GetResponse().StatusCode |
        Should -BeGreaterOrEqual 300 -Because "HTTP is not secure"
    }

    It 'Returns a success code from the health check endpoint' {
      $response = Invoke-WebRequest -Uri "https://$HostName/health" -SkipHttpErrorCheck
      Write-Host $response.Content
      $response.StatusCode |
        Should -Be 200 -Because "the website and configuration should be healthy"
    }

}
Simpan perubahan Anda ke file tersebut.
Menambahkan output ke file Bicep
Anda ingin menambahkan langkah penyebaran yang menerbitkan situs web Anda ke Azure App Service, tetapi langkah penerbitan memerlukan nama aplikasi App Service. Di sini, Anda mengekspos nama aplikasi sebagai output dari file Bicep.
Buka file main.bicep di folder deploy.
Di akhir konten file, tambahkan nama aplikasi App Service sebagai output.
output appServiceAppName string = appServiceApp.name
output appServiceAppHostName string = appServiceApp.properties.defaultHostName
Simpan perubahan Anda ke file tersebut.
Memperbarui tahap penyebaran
Buka file deploy.yml di folder deploy/pipeline-templates.
Dalam definisi pekerjaan penyebaran tahap Deploy (dekat Line 59) konfigurasikan pekerjaan untuk menggunakan kumpulan agen yang dihosting Windows:
- stage: Deploy_${{parameters.environmentType}}
  displayName: Deploy (${{parameters.environmentType}} Environment)
  jobs:
  - deployment: DeployWebsite
    displayName: Deploy website
    pool:
      vmImage: windows-latest
    variables:
    - group: ToyWebsite${{parameters.environmentType}}
    environment: ${{parameters.environmentType}}
    strategy:
Beberapa langkah alur yang Anda tambahkan nanti untuk bekerja dengan database Anda mengharuskan sistem operasi Windows dijalankan. Anda dapat menggunakan kumpulan agen yang berbeda untuk pekerjaan yang berbeda di alur Anda, sehingga pekerjaan lain terus menggunakan kumpulan agen alur Ubuntu Linux.
Pada langkah SaveDeploymentOutputs tugas Menyebarkan, tambahkan variabel saluran pipa baru dengan nilai nama aplikasi dari keluaran penyebaran Bicep:
- bash: |
    echo "##vso[task.setvariable variable=appServiceAppName]$(echo $DEPLOYMENT_OUTPUTS | jq -r '.appServiceAppName.value')"
    echo "##vso[task.setvariable variable=appServiceAppHostName;isOutput=true]$(echo $DEPLOYMENT_OUTPUTS | jq -r '.appServiceAppHostName.value')"
  name: SaveDeploymentOutputs
  displayName: Save deployment outputs into variables
  env:
    DEPLOYMENT_OUTPUTS: $(deploymentOutputs)
Perhatikan bahwa variabel
appServiceAppHostNamememiliki propertiisOutput=trueyang diterapkan padanya, karena variabel tersebut digunakan dalam tahap uji asap. VariabelappServiceAppNamediatur dan digunakan dalam tahap dan pekerjaan alur yang sama. Jadi, tidak perluisOutput=truepengaturan.Di akhir isi pekerjaan Sebarkan, tambahkan langkah baru untuk menyebarkan aplikasi ke Azure App Service:
steps:
  - checkout: self

  - task: AzureResourceManagerTemplateDeployment@3
    name: DeployBicepFile
    displayName: Deploy Bicep file
    inputs:
      connectedServiceName: ToyWebsite${{parameters.environmentType}}
      deploymentName: $(Build.BuildNumber)
      location: ${{parameters.deploymentDefaultLocation}}
      resourceGroupName: $(ResourceGroupName)
      csmFile: deploy/main.bicep
      overrideParameters: >
        -environmentType $(EnvironmentType)
        -reviewApiUrl $(ReviewApiUrl)
        -reviewApiKey $(ReviewApiKey)
      deploymentOutputs: deploymentOutputs

  - bash: |
      echo "##vso[task.setvariable variable=appServiceAppName]$(echo $DEPLOYMENT_OUTPUTS | jq -r '.appServiceAppName.value')"
      echo "##vso[task.setvariable variable=appServiceAppHostName;isOutput=true]$(echo $DEPLOYMENT_OUTPUTS | jq -r '.appServiceAppHostName.value')"
    name: SaveDeploymentOutputs
    displayName: Save deployment outputs into variables
    env:
      DEPLOYMENT_OUTPUTS: $(deploymentOutputs)

  - task: AzureRmWebAppDeployment@4
    name: DeployWebsiteApp
    displayName: Deploy website
    inputs:
      appType: webApp
      ConnectionType: AzureRM
      azureSubscription: ToyWebsite${{parameters.environmentType}}
      ResourceGroupName: $(ResourceGroupName)
      WebAppName: $(appServiceAppName)
      Package: '$(Pipeline.Workspace)/website/publish.zip'
Catatan
Hati-hati dengan indentasi file YAML, memastikan bahwa langkah penyebaran baru diindentasi pada tingkat yang sama dengan langkah
DeployBicepFile. Jika Anda tidak yakin, salin seluruh isi file deploy.yml dari contoh di langkah berikutnya.Perhatikan bahwa Anda tidak secara eksplisit mengunduh artefak dalam definisi alur. Karena Anda menggunakan pekerjaan penyebaran, Azure Pipelines otomatis mengunduh artefak untuk Anda.
Memverifikasi isi file deploy.yml, dan melakukan perubahan Anda
Verifikasi bahwa file deploy.yml Anda terlihat seperti contoh berikut:
parameters:
- name: environmentType
  type: string
- name: deploymentDefaultLocation
  type: string
  default: westus3

stages:

- ${{ if ne(parameters.environmentType, 'Production') }}:
  - stage: Validate_${{parameters.environmentType}}
    displayName: Validate (${{parameters.environmentType}} Environment)
    jobs:
    - job: ValidateBicepCode
      displayName: Validate Bicep code
      variables:
      - group: ToyWebsite${{parameters.environmentType}}
      steps:
        - task: AzureResourceManagerTemplateDeployment@3
          name: RunPreflightValidation
          displayName: Run preflight validation
          inputs:
            connectedServiceName: ToyWebsite${{parameters.environmentType}}
            location: ${{parameters.deploymentDefaultLocation}}
            deploymentMode: Validation
            resourceGroupName: $(ResourceGroupName)
            csmFile: deploy/main.bicep
            overrideParameters: >
              -environmentType $(EnvironmentType)
              -reviewApiUrl $(ReviewApiUrl)
              -reviewApiKey $(ReviewApiKey)

- ${{ if eq(parameters.environmentType, 'Production') }}:
  - stage: Preview_${{parameters.environmentType}}
    displayName: Preview (${{parameters.environmentType}} Environment)
    jobs:
    - job: PreviewAzureChanges
      displayName: Preview Azure changes
      variables:
      - group: ToyWebsite${{parameters.environmentType}}
      steps:
        - task: AzureCLI@2
          name: RunWhatIf
          displayName: Run what-if
          inputs:
            azureSubscription: ToyWebsite${{parameters.environmentType}}
            scriptType: 'bash'
            scriptLocation: 'inlineScript'
            inlineScript: |
              az deployment group what-if \
                --resource-group $(ResourceGroupName) \
                --template-file deploy/main.bicep \
                --parameters environmentType=$(EnvironmentType) \
                             reviewApiUrl=$(ReviewApiUrl) \
                             reviewApiKey=$(ReviewApiKey)

- stage: Deploy_${{parameters.environmentType}}
  displayName: Deploy (${{parameters.environmentType}} Environment)
  jobs:
  - deployment: DeployWebsite
    displayName: Deploy website
    pool:
      vmImage: windows-latest
    variables:
    - group: ToyWebsite${{parameters.environmentType}}
    environment: ${{parameters.environmentType}}
    strategy:
      runOnce:
        deploy:
          steps:
            - checkout: self

            - task: AzureResourceManagerTemplateDeployment@3
              name: DeployBicepFile
              displayName: Deploy Bicep file
              inputs:
                connectedServiceName: ToyWebsite${{parameters.environmentType}}
                deploymentName: $(Build.BuildNumber)
                location: ${{parameters.deploymentDefaultLocation}}
                resourceGroupName: $(ResourceGroupName)
                csmFile: deploy/main.bicep
                overrideParameters: >
                  -environmentType $(EnvironmentType)
                  -reviewApiUrl $(ReviewApiUrl)
                  -reviewApiKey $(ReviewApiKey)
                deploymentOutputs: deploymentOutputs

            - bash: |
                echo "##vso[task.setvariable variable=appServiceAppName]$(echo $DEPLOYMENT_OUTPUTS | jq -r '.appServiceAppName.value')"
                echo "##vso[task.setvariable variable=appServiceAppHostName;isOutput=true]$(echo $DEPLOYMENT_OUTPUTS | jq -r '.appServiceAppHostName.value')"
              name: SaveDeploymentOutputs
              displayName: Save deployment outputs into variables
              env:
                DEPLOYMENT_OUTPUTS: $(deploymentOutputs)

            - task: AzureRmWebAppDeployment@4
              name: DeployWebsiteApp
              displayName: Deploy website
              inputs:
                appType: webApp
                ConnectionType: AzureRM
                azureSubscription: ToyWebsite${{parameters.environmentType}}
                ResourceGroupName: $(ResourceGroupName)
                WebAppName: $(appServiceAppName)
                Package: '$(Pipeline.Workspace)/website/publish.zip'

- stage: SmokeTest_${{parameters.environmentType}}
  displayName: Smoke Test (${{parameters.environmentType}} Environment)
  jobs:
  - job: SmokeTest
    displayName: Smoke test
    variables:
      appServiceAppHostName: $[ stageDependencies.Deploy_${{parameters.environmentType}}.DeployWebsite.outputs['DeployWebsite.SaveDeploymentOutputs.appServiceAppHostName'] ]
    steps:
      - task: PowerShell@2
        name: RunSmokeTests
        displayName: Run smoke tests
        inputs:
          targetType: inline
          script: |
            $container = New-PesterContainer `
              -Path 'deploy/Website.Tests.ps1' `
              -Data @{ HostName = '$(appServiceAppHostName)' }
            Invoke-Pester `
              -Container $container `
              -CI

      - task: PublishTestResults@2
        name: PublishTestResults
        displayName: Publish test results
        condition: always()
        inputs:
          testResultsFormat: NUnit
          testResultsFiles: 'testResults.xml'
Simpan perubahan Anda ke file tersebut.
Di terminal Visual Studio Code, lakukan dan dorong perubahan Anda ke repositori Git dengan menjalankan perintah berikut:
git add .
git commit -m "Build and deploy website application"
git push
Menjalankan alur
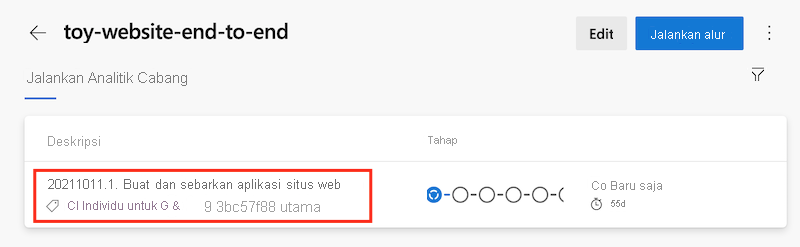
Di browser Anda, buka Alur.
Pilih proses terbaru dari alur Anda.
Tunggu sampai tahap Build berhasil diselesaikan.
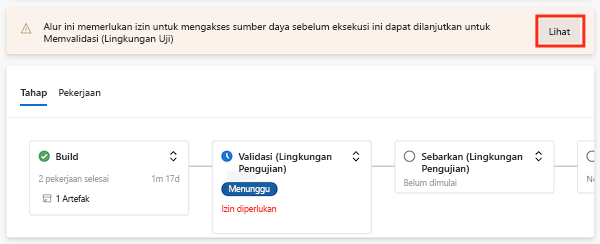
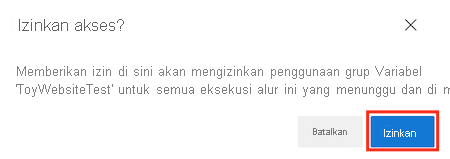
Alur dijeda sebelum menjalankan tahap Validasi (Lingkungan Pengujian) karena alur memerlukan izin untuk menggunakan grup variabel yang dirujuk tahap. Anda perlu menyetujui akses alur ke grup variabel, karena Anda menjalankan alur dalam proyek ini untuk pertama kalinya. Saat menjalankan alur lagi, Anda tidak perlu menyetujui akses ke grup variabel yang sama.
Pilih Tampilkan.
Pilih Izin.
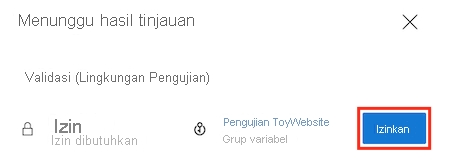
Pilih Izin.
Tahap Validasi (Lingkungan Uji) berhasil diselesaikan.
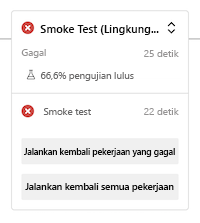
Alur berlanjut dan tahap Sebarkan (Lingkungan Pengujian) berhasil diselesaikan. Alur kemudian menjalankan tahap Smoke Test (Test Environment), tetapi tahap uji asap gagal.
Pilih tahap Uji Asap (Lingkungan Uji) untuk membuka log alur.
Pilih langkah Jalankan uji asap untuk melihat bagian terkait dari log alur.
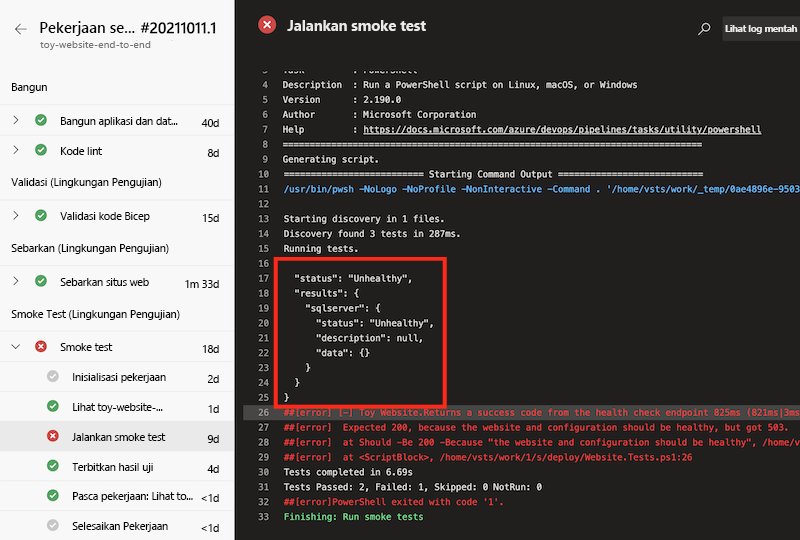
Perhatikan bahwa log alur mencakup respons pemeriksaan kesehatan. Tanggapan menunjukkan bahwa ada masalah terkait komunikasi aplikasi dengan Azure SQL Database. Database belum disebarkan atau dikonfigurasi, itulah sebabnya situs web tidak dapat mengaksesnya. Pada latihan berikutnya, Anda memperbaiki masalah konfigurasi ini.