Advanced insights metric rules
To reveal collaboration trends, Microsoft Viva Insights uses email, calendar, and Teams activities, like chats and calls. While people use these tools to collaborate on work, they might also use them to keep track of personal appointments and other non-collaboration activities. If metrics included these non-collaboration activities, those queries would produce skewed results.
So, how can you exclude non-collaboration activities from your queries and get more accurate results? Add a metric rule. When you use metric rules in your queries, Viva Insights leaves out meetings, emails, chats, and calls you don’t want to analyze.
Let’s use an example. People in your company might book focus time on their calendars, but focus time isn’t something you’d want to analyze like a meeting. To prevent this non-collaborative focus time from sneaking into queries, you might consider using a rule that excludes meetings where Category = Focus time. Similarly, to exclude company-wide meetings, you might set up a rule that excludes meetings where Participants > 100. Not only can you create rules for meetings—you can also create them for chats, emails, and calls.
Here are a few things to keep in mind about metric rules:
- Metric rules apply to your query's metric calculations and also to data shown within the Viva Insights app in Teams and web.
- When you set a rule as default, it applies to all future queries and the Viva Insights app in Teams and web. Refer to About default rules for more information.
About the metric rules page
Before we get into discussing how to use rules in your queries, let’s discuss where you can find, create, and edit them: the Metric rules page. To get to the Metric rules page from the advanced insights app analyst experience, select Metric rules from the left pane.
Views
The Metric rules page contains five views, which you can access through tabs near the top of the page. Let’s talk about each of them, and also explain how to use some related features.

All rules
The All rules view shows all the rules that people in your organization have published and drafted.
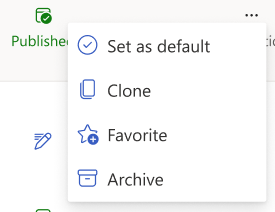
Here’s what you can do in this view:
- Set as default, if you originally created the rule
- Clone
- Archive, if you originally created the rule
- Favorite
Note
Want to make a rule similar to someone else’s? Use the Clone function and create your own based on their settings. Cloning works on drafts and published rules.
Published
The Published view shows all rules that people in your organization have published—that is, it doesn’t show any drafts.
Here’s what you can do in this view:
- Set as default, if you originally created the rule
- Clone
- Archive, if you originally created the rule
- Favorite
Important
After you publish a rule, you won't be able to edit it.
Drafts
In the Drafts view, you’ll find rules that people in your organization are working on and haven’t published yet. You can only publish your own drafts, but you can use the Clone option on anybody’s draft.
Note
We describe how to save a rule as a draft in How to create new rules.
Here’s what you can do in this view:
- Clone
- Publish, if you originally created the rule
Favorites
Use the Favorites view as a place to find frequently accessed rules you’ve marked as favorites in the All rules or Published views.
Here’s what you can do in this view:
- Clone
- Archive, if you originally created the rule
- Remove as favorite
How to mark a rule as Favorite
To mark a rule as a favorite while you’re in All rules or Published, select the ellipses (...) under the Actions column, and then select the Favorite option.
Note
You can only have 10 favorite rules at a time.
What happens when you mark a rule as Favorite
Marking a rule as Favorite helps you find it faster when you're in the Metric rules page or when you're adding a rule to a query. When you view the list of available rules, here's the order you'll see them in:
- Default rule
- Rules you've marked as Favorite
- Published rules
- Draft rules (Metric rules page only)
Only you can view your favorite rules. Other analysts in your organization won't be able to tell what you've favorited.
Archived
When you select a rule's Archive option, Viva Insights archives that rule and sends it to the Archived view, as we describe in the next section. After you archive a rule, you can delete it if you want. You can't use archived rules in a query.
Generally, if you think you might want to restore a rule later, or want to have a record of it, leaving a rule in the Archived view is a better option than deleting it. Only the person who originally created a rule can archive or restore it.
How to archive and restore a rule
To archive a rule, select the ellipses (...) under Actions, and then select Archive. The rule moves to your Archived view.
To restore—that is, republish—a rule, select the ellipses under the Actions column, and then select Undo archive.
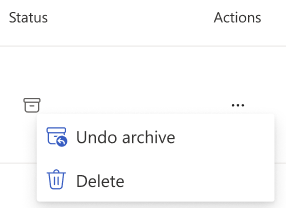
How to delete a rule
To delete a rule, select the ellipses (...) under Actions, and then select Delete. Unlike archived rules, you can't restore a deleted rule.
How to create new rules
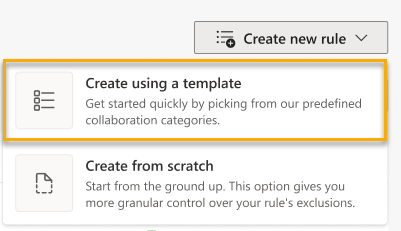
You can create a new rule in one of two ways: by using our template, or by building one from scratch.
Important
After you publish a rule, you won't be able to edit it. If need to work on a rule later, you can save it as a draft, but you can't use draft rules in queries. We explain how to save a rule as a draft in step 6 below.
From a template
About template categories
Before we jump in to how to use the rule template, let’s discuss how we’ve set the template up.
When you create a rule through a template, you'll notice several categories. Within these categories, we've set up filters. When you select these categories and apply them to your new rule, you'll exclude common scenarios from collaboration data—for example, Appointments, which prevents non-collaborative calendar blocks on people's calendars from showing up in queries.
Note
Templates aren't editable. If you want more granular control over attributes and values, consider creating a rule from scratch.
These categories are available for each collaboration type—meetings, emails, chats, and calls. Let's say you wanted to create a rule that excluded appointments and emails people send to themselves. In the template, you'd select the Appointments category under meetings and the Emails sent to self category under Email.
Expand each category container to view that category's filters. We've listed out all category criteria in Category reference.

Category reference
Here's how we define each meeting category. For a meeting to be included in one of these categories, it has to meet all of the conditions in Meeting criteria.
| Category | Meeting criteria |
|---|---|
| Attended meeting |
|
| Likely attended meeting |
|
| Invited meeting |
|
| Out of Office |
|
| No-meeting day |
|
| Focus time |
|
| Appointment |
|
Note
Intended participants are all of the meeting's invitees, plus the organizer.
To add a rule from a template
After you select Create new rule, pick the first option from the dropdown menu: Create using a template.
Select the categories you want your rule to apply to. Repeat this step for each category you want to include.
Skip to step 6 below.
From scratch
On the Metric rules page, either:
- Select Create new rule.

- Find an existing rule you want to customize. Select the ellipses under Actions to access the More options menu, and then select Clone.
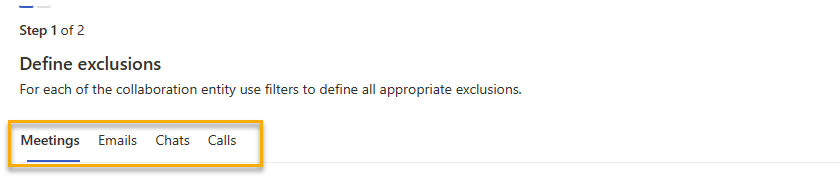
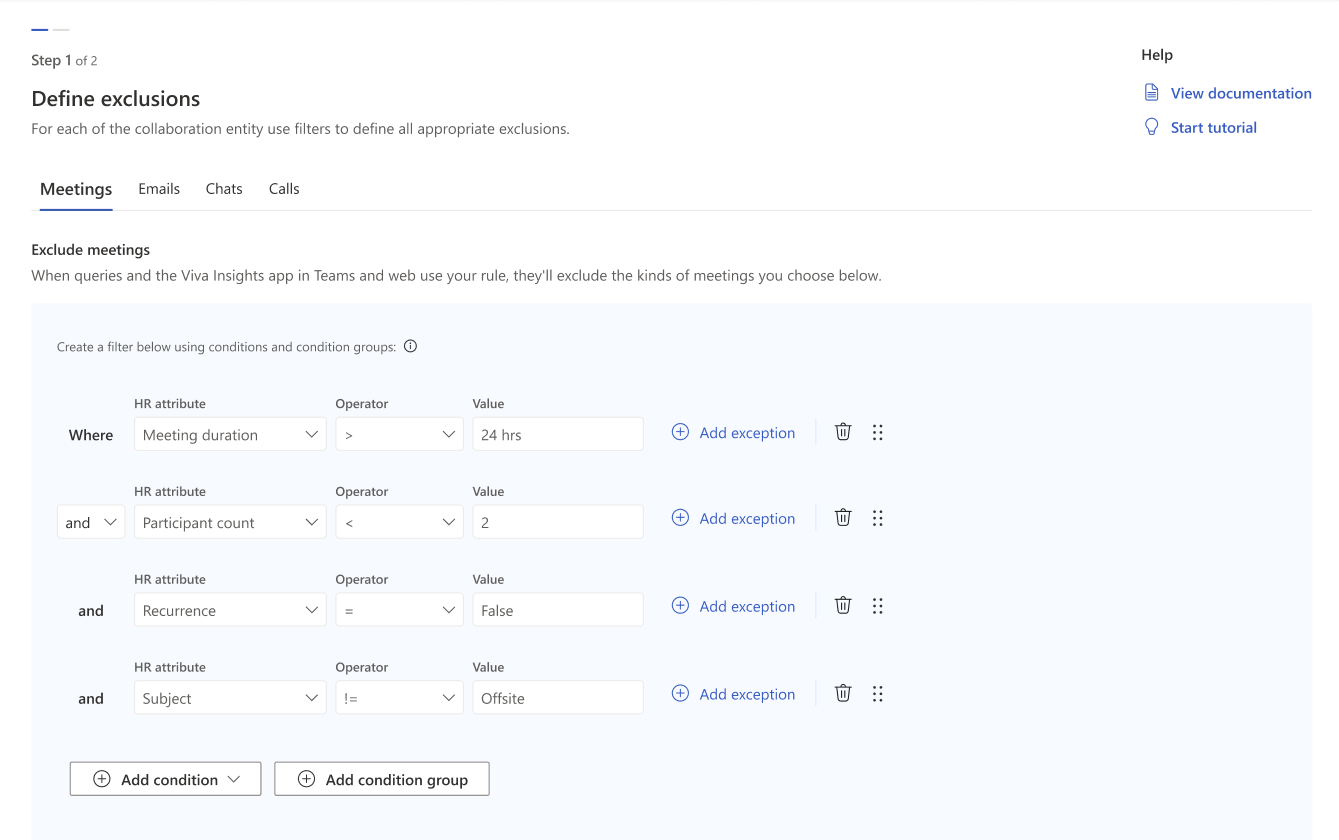
From the tabs at the top of the Define exclusions page, select the first collaboration type you want your rule to apply to (for example, Meetings).
Note
Collaboration types are meetings, emails, chats, or calls. You can set rules for any of these types. Refer to step 4.
Define how you want to exclude certain collaboration activities from your collaboration type by adding filters. Filters are based on organizational data attributes.
To learn more about filters, refer to our Filters article.
If you have other collaboration types you want your rule to apply to, select them from the tabs at the top of the Define exclusions page. Add filters for each collaboration type.
Note
If your rule applies to chats and emails, you can set filters for items read and items sent.
For meeting and email filters, add exceptions to your rule, if there are any.
Exceptions are set as keywords, and they only apply to email or meeting rules. When you give your rule an exception, you’re telling Viva Insights to use the rule like normal, except when it finds one of your set keywords in the email’s subject line or the meeting’s title. In that case, instead of skipping over that email or meeting like your rule dictates, Viva Insights will include that meeting or email in queries.
Here’s how to add exceptions to your rule:
Select Add exception to the right of your condition or condition group.

A pane opens to the right. Type a keyword in the text-input field and press Enter on your keyboard.
Note
Enter each term separately, and make sure you press Enter for each term. If you just select Save without entering, your keyword won't apply to your rule.
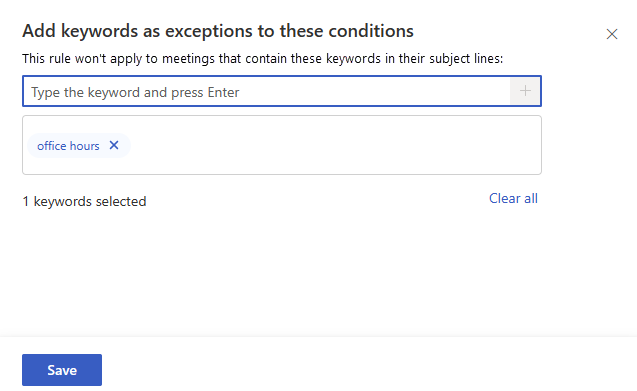
After you’ve entered all your keywords, select the Save button at the bottom left of the pane.
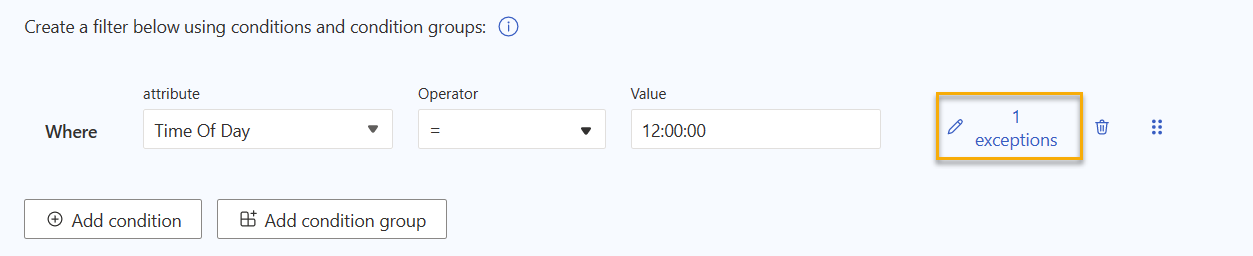
You’ll see your exceptions noted in the condition group. If you need to remove a keyword or add more, select the exceptions link again.
If you want to go on to naming and publishing your rule, select the Next button in the top right of your screen.

If you’re done for now and want to save your rule as a draft, select the close icon to the right of Next, instead. Select Save. If you don’t want to save your draft, select Cancel.
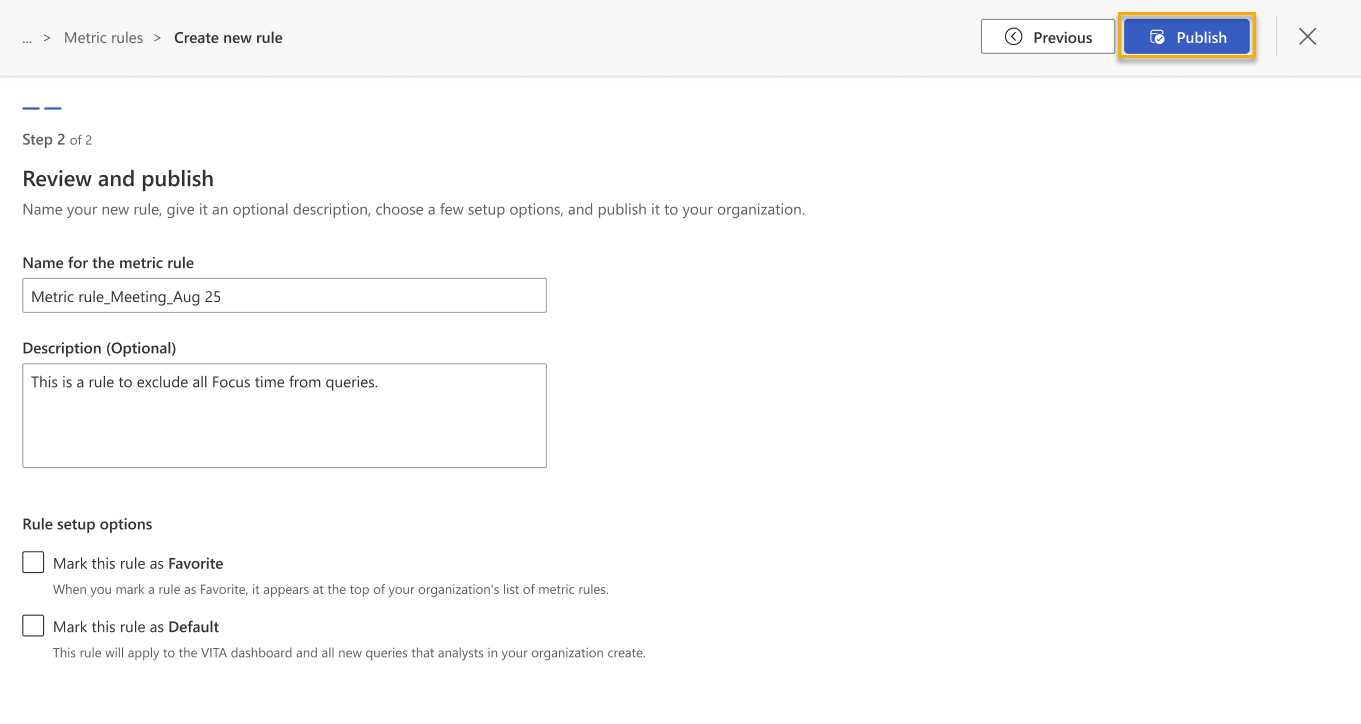
If you want, fill out your rule’s optional publication details. Otherwise, skip to step 8.
- Change your rule's name. If you don't add a new name, the rule will appear with Viva Insights' default naming scheme, which looks like this:
MetricRule_emilybraun_Feb23_2023_1505Hours. - Give your rule a description so other analysts know what it does.
- Select whether you want to put this rule in your Favorites view.
- Select whether you want to make this rule a default rule.
Caution
When you set a rule as default, that rule applies to all queries that any analyst in your organization runs. Default rules also affect calculations for the Viva Insights app in Teams and web. Use the default option carefully.
- Change your rule's name. If you don't add a new name, the rule will appear with Viva Insights' default naming scheme, which looks like this:
If you’re done editing your rule and you’re ready to publish it, select the Publish button. Select Previous to go back.
Your new rule appears in the Published and All rules views on the Metric rules page, and in your Favorites view if you marked it as a favorite in step 7c above. When you go to add a new metric rule to a query, you’ll also find it among the rule options. If you marked a rule as a default in step 7d, that rule will apply to any query that any analyst in your organization runs from this point on.

If you’re ready to add your rule to a query, go to How to add a rule to your query.
How to add a rule to your query
While you’re building your query, select More Settings in the Query setup section.
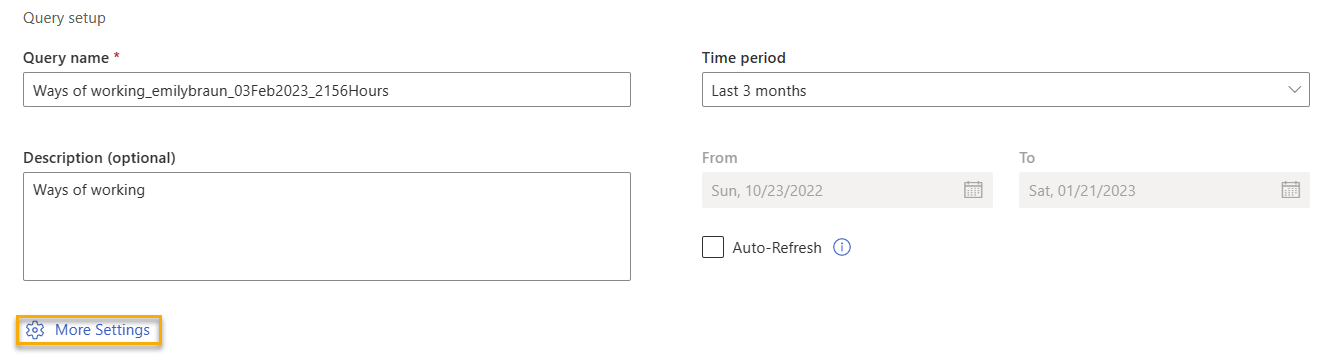
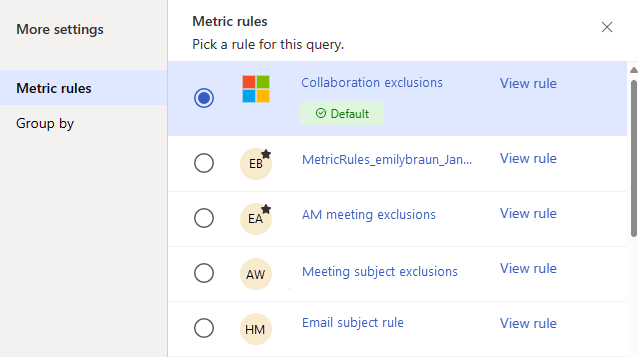
A Metric rules pane appears. Select the rule you want to apply.
Note
You can only apply one rule at a time. If there’s a default rule active in your organization, you’ll notice that the rules pane shows it as selected. When you set a different rule, you’re choosing to use the one you picked instead of the default rule.
If your organization is just starting to use the advanced insights app, the default rule here might be Collaboration exclusions. We talk about this rule in The collaboration exclusions rule.
Select the Save settings button.

Important
If your query uses a metric rule that's been archived or deleted, you'll get an error.
View rule
To get more information about a rule, select the View rule link to the right of the rule title. When you select View rule, you go to a view-only version of the Create a new rule page. Here, you can find out what kinds of collaboration the rule excludes from queries, and which attributes it uses to make those exclusions.
About default rules
Default rules help analysts run queries consistently, and they also determine how the Viva Insights app in Teams and web calculates data.
While default rules create consistency, marking a rule as default has some wide-reaching effects. When you mark a rule as default, you’ll:
- Apply that rule to any query that any analyst in your organization runs from this point on.
- Change how Viva Insights calculates the metric(s) involved in the rule, which affects how the Viva Insights app in Teams and web shows data. If your organization has a default rule, but you don’t want to use it, you’ll need to go into More Settings and de-select it. You can add another rule if you want.
To quickly identify default rules, look for the green Default tag. Default rules always appear first in More settings > Metric rules.
The collaboration exclusions rule
When your organization first uses the analyst experience, you’ll notice we’ve already set a default rule: collaboration exclusions.
This rule applies to meetings, emails, and calls. Here's how the rule determines whether to exclude a meeting, email, or call:
| Collaboration type | Criteria |
|---|---|
| Meeting | Isn't joined on Teams and meets at least one of the following conditions:
|
Meets at least one of the following conditions:
|
|
| Call | Isn't scheduled and meets at least one of the following conditions:
|
Note
A non-collaboration email doesn't warrant a reply, for example, an out-of-office auto-reply or an announcement message sent to a large audience.
Replace collaboration exclusions as default
You or another analyst can replace collaboration exclusions as the default rule at any point. However, keep this important information in mind:
Caution
When you set a rule as default, that rule applies to all queries that any analyst in your organization runs. Default rules also affect calculations for the Viva Insights app in Teams and web. Use the default option carefully.
Saran dan Komentar
Segera hadir: Sepanjang tahun 2024 kami akan menghentikan penggunaan GitHub Issues sebagai mekanisme umpan balik untuk konten dan menggantinya dengan sistem umpan balik baru. Untuk mengetahui informasi selengkapnya, lihat: https://aka.ms/ContentUserFeedback.
Kirim dan lihat umpan balik untuk