Manage Azure resource groups by using the Azure portal
Learn how to use the Azure portal with Azure Resource Manager to manage your Azure resource groups. For managing Azure resources, see Manage Azure resources by using the Azure portal.
Note
This article provides steps about how to delete personal data from the device or service and can be used to support your obligations under the GDPR. For general information about GDPR, see the GDPR section of the Microsoft Trust Center and the GDPR section of the Service Trust portal.
What is a resource group
A resource group is a container that holds related resources for an Azure solution. The resource group can include all the resources for the solution, or only those resources that you want to manage as a group. You decide how you want to allocate resources to resource groups based on what makes the most sense for your organization. Generally, add resources that share the same lifecycle to the same resource group so you can easily deploy, update, and delete them as a group.
The resource group scope is also used throughout the Azure portal to create views that span across multiple resources. For example:
- Metrics blade provides metrics information (CPU, resources) to users.
- Deployments blade shows the history of ARM Template or Bicep deployments targeted to that Resource Group (which includes Portal deployments).
- Policy blade provides information related to the policies enforced on the resource group.
- Diagnostics settings blade provides the ability to diagnose errors or review warnings.
The resource group stores metadata about the resources. Therefore, when you specify a location for the resource group, you're specifying where that metadata is stored. For compliance reasons, you might need to ensure that your data is stored in a particular region. Note that resources inside a resource group can be of different regions.
Create resource groups
Sign in to the Azure portal.
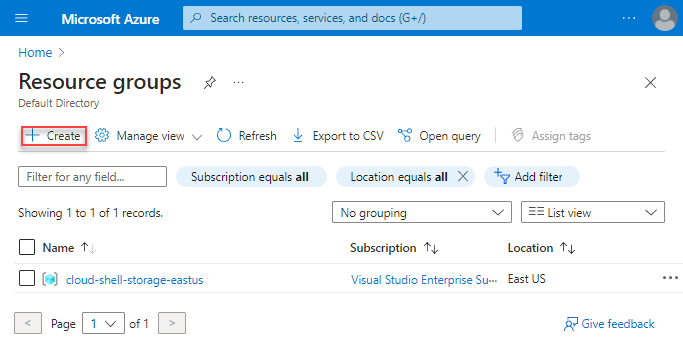
Select Resource groups.
Select Create.
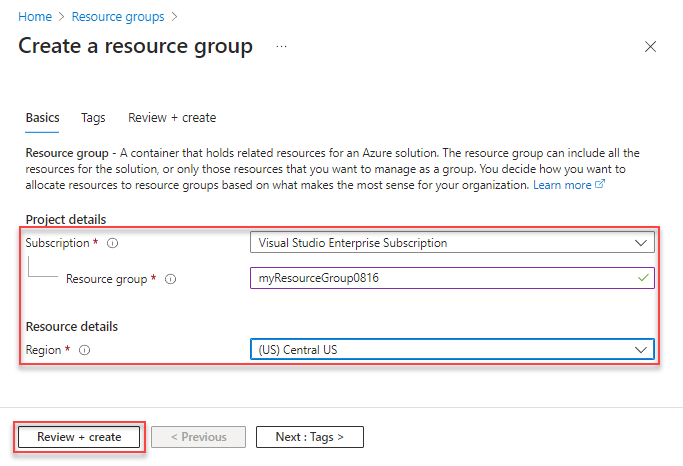
Enter the following values:
Select Review + Create
Select Create. It takes a few seconds to create a resource group.
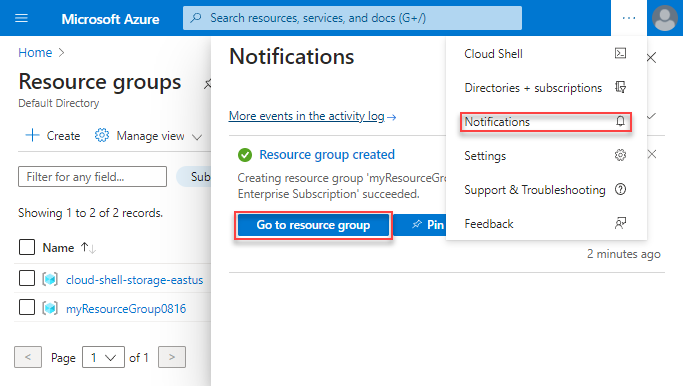
Select Refresh from the top menu to refresh the resource group list, and then select the newly created resource group to open it. Or select Notification(the bell icon) from the top, and then select Go to resource group to open the newly created resource group
List resource groups
Sign in to the Azure portal.
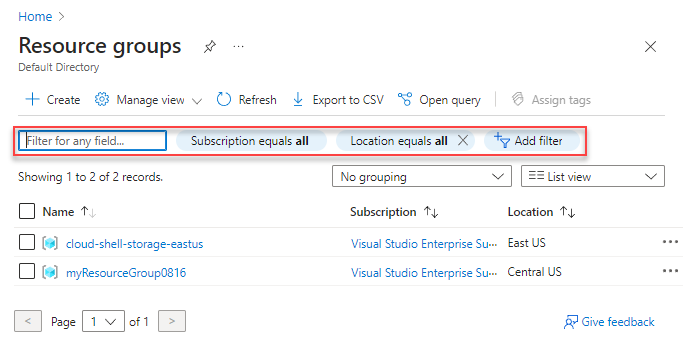
To list the resource groups, select Resource groups
To customize the information displayed for the resource groups, configure the filters. The following screenshot shows the additional columns you could add to the display:
Open resource groups
- Sign in to the Azure portal.
- Select Resource groups.
- Select the resource group you want to open.
Delete resource groups
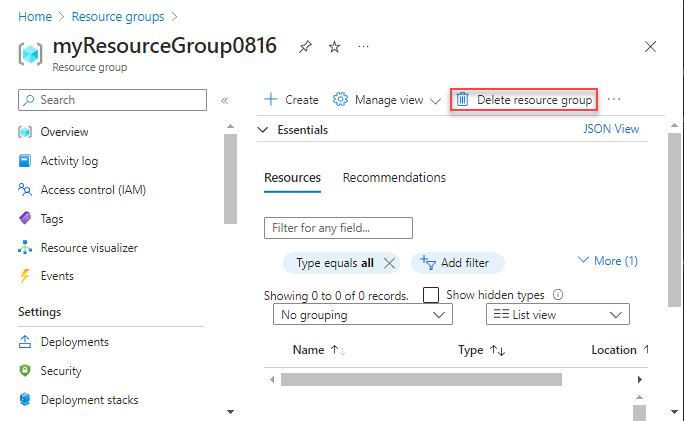
Open the resource group you want to delete. See Open resource groups.
Select Delete resource group.
For more information about how Azure Resource Manager orders the deletion of resources, see Azure Resource Manager resource group deletion.
Deploy resources to a resource group
After you have created a Resource Manager template, you can use the Azure portal to deploy your Azure resources. For creating a template, see Quickstart: Create and deploy Azure Resource Manager templates by using the Azure portal. For deploying a template using the portal, see Deploy resources with Resource Manager templates and Azure portal.
Move to another resource group or subscription
You can move the resources in the group to another resource group. For more information, see Move resources to new resource group or subscription.
Lock resource groups
Locking prevents other users in your organization from accidentally deleting or modifying critical resources, such as Azure subscription, resource group, or resource.
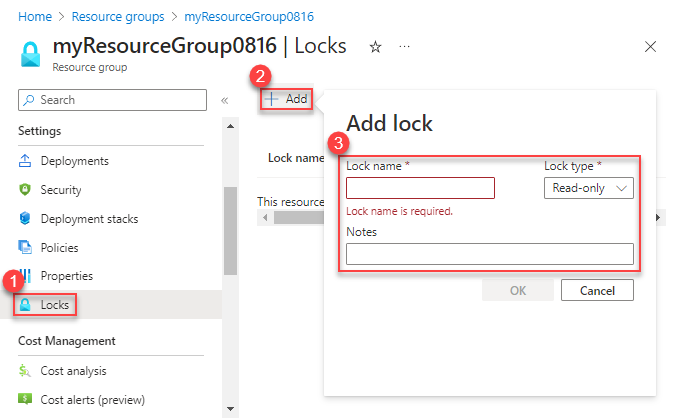
Open the resource group you want to lock. See Open resource groups.
In the left pane, select Locks.
To add a lock to the resource group, select Add.
Enter Lock name, Lock type, and Notes. The lock types include Read-only, and Delete.
For more information, see Lock resources to prevent unexpected changes.
Tag resource groups
You can apply tags to resource groups and resources to logically organize your assets. For information, see Using tags to organize your Azure resources.
Export resource groups to templates
For information about exporting templates, see Single and multi-resource export to template - Portal.
Manage access to resource groups
Azure role-based access control (Azure RBAC) is the way that you manage access to resources in Azure. For more information, see Assign Azure roles using the Azure portal.
Next steps
- To learn Azure Resource Manager, see Azure Resource Manager overview.
- To learn the Resource Manager template syntax, see Understand the structure and syntax of Azure Resource Manager templates.
- To learn how to develop templates, see the step-by-step tutorials.
- To view the Azure Resource Manager template schemas, see template reference.
