Build and deploy a Node.js application to an Azure Cloud Service (classic)
Important
Cloud Services (classic) is now deprecated for all customers as of September 1st, 2024. Any existing running deployments will be stopped and shut down by Microsoft and the data will be permanently lost starting October 2024. New deployments should use the new Azure Resource Manager based deployment model Azure Cloud Services (extended support).
This tutorial shows how to create a Node.js application running in an Azure Cloud Service. Cloud Services are the building blocks of scalable cloud applications in Azure. They allow the separation and independent management and scale-out of front-end and back-end components of your application. Cloud Services provide a robust dedicated virtual machine for hosting each role reliably.
Tip
Looking to build a website? If your scenario involves just a simple website front-end, consider using a lightweight web app. You can easily upgrade to a Cloud Service as your web app grows and your requirements change.
By following this tutorial, you build a web application hosted inside a web role. You use the compute emulator to test your application locally, then deploy it using PowerShell command-line tools.
The application is a "hello world" application:

Prerequisites
Note
This tutorial uses Azure PowerShell, which requires Windows.
- Install and configure Azure PowerShell.
- Download and install the [Azure SDK for .NET 2.7]. In the install setup, select:
- MicrosoftAzureAuthoringTools
- MicrosoftAzureComputeEmulator
Create an Azure Cloud Service project
Perform the following tasks to create a new Azure Cloud Service project, along with basic Node.js scaffolding:
Run Windows PowerShell as Administrator; from the Start Menu or Start Screen, search for Windows PowerShell.
Connect PowerShell to your subscription.
Enter the following PowerShell cmdlet to create the project:
New-AzureServiceProject helloworld
The New-AzureServiceProject cmdlet generates a basic structure for publishing a Node.js application to a Cloud Service. It contains configuration files necessary for publishing to Azure. The cmdlet also changes your working directory to the directory for the service.
The cmdlet creates the following files:
- ServiceConfiguration.Cloud.cscfg, ServiceConfiguration.Local.cscfg and ServiceDefinition.csdef: Azure-specific files necessary for publishing your application. For more information, see Overview of Creating a Hosted Service for Azure.
- deploymentSettings.json: Stores local settings that are used by the Azure PowerShell deployment cmdlets.
Enter the following command to add a new web role:
Add-AzureNodeWebRole
The Add-AzureNodeWebRole cmdlet creates a basic Node.js application. It also modifies the .csfg and .csdef files to add configuration entries for the new role.
Note
If you do not specify a role name, a default name is used. You can provide a name as the first cmdlet parameter:
Add-AzureNodeWebRole MyRole
The Node.js app is defined in the file server.js, located in the directory for the web role (WebRole1 by default). Here's the code:
var http = require('http');
var port = process.env.port || 1337;
http.createServer(function (req, res) {
    res.writeHead(200, { 'Content-Type': 'text/plain' });
    res.end('Hello World\n');
}).listen(port);
This code is essentially the same as the "Hello World" sample on the nodejs.org website, except it uses the port number assigned by the cloud environment.
Deploy the application to Azure
Note
To complete this tutorial, you need an Azure account. You can activate your MSDN subscriber benefits or sign up for a free account.
Download the Azure publishing settings
To deploy your application to Azure, you must first download the publishing settings for your Azure subscription.
Run the following Azure PowerShell cmdlet:
Get-AzurePublishSettingsFileThis command uses your browser to navigate to the publish settings download page. You may be prompted to sign in with a Microsoft Account. If so, use the account associated with your Azure subscription.
Save the downloaded profile to a file location you can easily access.
Run following cmdlet to import the publishing profile you downloaded:
Import-AzurePublishSettingsFile [path to file]Note
After importing the publish settings, consider deleting the downloaded .publishSettings file, because it contains information that could allow someone to access your account.
Publish the application
To publish, run the following commands:
$ServiceName = "NodeHelloWorld" + $(Get-Date -Format ('ddhhmm'))
Publish-AzureServiceProject -ServiceName $ServiceName  -Location "East US" -Launch
- -ServiceName specifies the name for the deployment. This value must be a unique name; otherwise, the publish process fails. The Get-Date command tacks on a date/time string that should make the name unique.
- -Location specifies the datacenter that hosts the application. To see a list of available datacenters, use the Get-AzureLocation cmdlet.
- -Launch opens a browser window and navigates to the hosted service after the deployment completes.
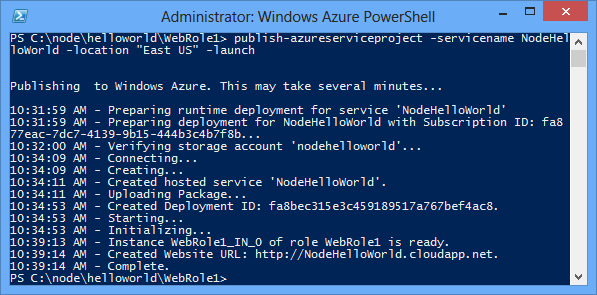
After publishing succeeds, you see a response similar to the screenshot:

Note
It can take several minutes for the application to deploy and become available when first published.
Once the deployment completes, a browser window opens and navigates to the cloud service.

Your application is now running on Azure.
The Publish-AzureServiceProject cmdlet performs the following steps:
- Creates a package to deploy. The package contains all the files in your application folder.
- Creates a new storage account if one doesn't exist. The Azure storage account is used to store the application package during deployment. You can safely delete the storage account after deployment is done.
- Creates a new cloud service if one doesn't already exist. A cloud service is the container in which your application is hosted when it deploys to Azure. For more information, see Overview of Creating a Hosted Service for Azure.
- Publishes the deployment package to Azure.
Stopping and deleting your application
After deploying your application, you may want to disable it so you can avoid extra costs. Azure bills web role instances per hour of server time consumed. Server time is consumed once your application is deployed, even if the instances aren't running and are in the stopped state.
In the Windows PowerShell window, stop the service deployment created in the previous section with the following cmdlet:
Stop-AzureServiceStopping the service may take several minutes. When the service is stopped, you receive a message indicating that it stopped.

To delete the service, call the following cmdlet:
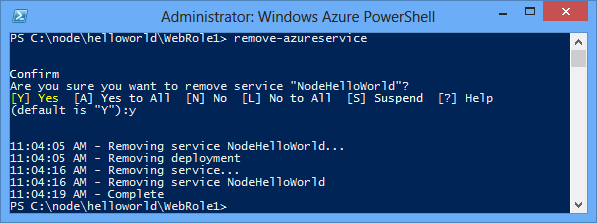
Remove-AzureServiceWhen prompted, enter Y to delete the service.
Deleting the service may take several minutes. After you delete the service, you receive a message indicating that the service was deleted.

Note
Deleting the service does not delete the storage account that was created when the service was initially published, and you will continue to be billed for storage used. If nothing else is using the storage, you may want to delete it.
Next steps
For more information, see the Node.js Developer Center.