Access and manage IBM DB2 resources by using Azure Logic Apps
Applies to: Azure Logic Apps (Consumption)
With Azure Logic Apps and the IBM DB2 connector, you can create automated tasks and workflows based on the resources stored in your DB2 database. Your workflows can connect to the resources in your database, read and list your database tables, add rows, change rows, delete rows, and more. You can include actions in your logic apps that get responses from your database and make the output available for other actions.
This article shows how you can create a logic app that performs various database operations. If you're new to logic apps, review What is Azure Logic Apps?
Supported platforms and versions
The DB2 connector includes a Microsoft client that communicates with remote DB2 servers across a TCP/IP network. You can use this connector for accessing cloud databases such as IBM DB2 for Windows running in Azure virtualization. You can also access on-premises DB2 databases after you install and set up the on-premises data gateway.
The IBM DB2 connector supports these IBM DB2 platforms and versions along with IBM DB2 compatible products that support Distributed Relational Database Architecture (DRDA) SQL Access Manager (SQLAM) versions 10 and 11:
| Platform | Version |
|---|---|
| IBM DB2 for z/OS | 12, 11.1, 10.1 |
| IBM DB2 for i | 7.3, 7.2, 7.1 |
| IBM DB2 for LUW | 11, 10.5 |
Supported database operations
The IBM DB2 connector supports these database operations, which map to the corresponding actions in the connector:
| Database operation | Connector action |
|---|---|
| List database tables | Get tables |
| Read one row using SELECT | Get row |
| Read all rows using SELECT | Get rows |
| Add one row using INSERT | Insert row |
| Edit one row using UPDATE | Update row |
| Remove one row using DELETE | Delete row |
Prerequisites
An Azure account and subscription. If you don't have an Azure subscription, sign up for a free Azure account.
An IBM DB2 database, either cloud-based or on-premises
Basic knowledge about how to create logic apps. For more information, see Create an example Consumption logic app workflow
The logic app where you want to access your DB2 database. This connector provides only actions, so to start your logic app, select a separate trigger, for example, the Recurrence trigger. The examples in this article use the Recurrence trigger.
Add DB2 action - Get tables
In the Azure portal, open your logic app in the Logic App Designer, if not already open.
Under the trigger, choose New step.
In the search box, enter "db2" as your filter. For this example, under the actions list, select this action: Get tables (Preview)
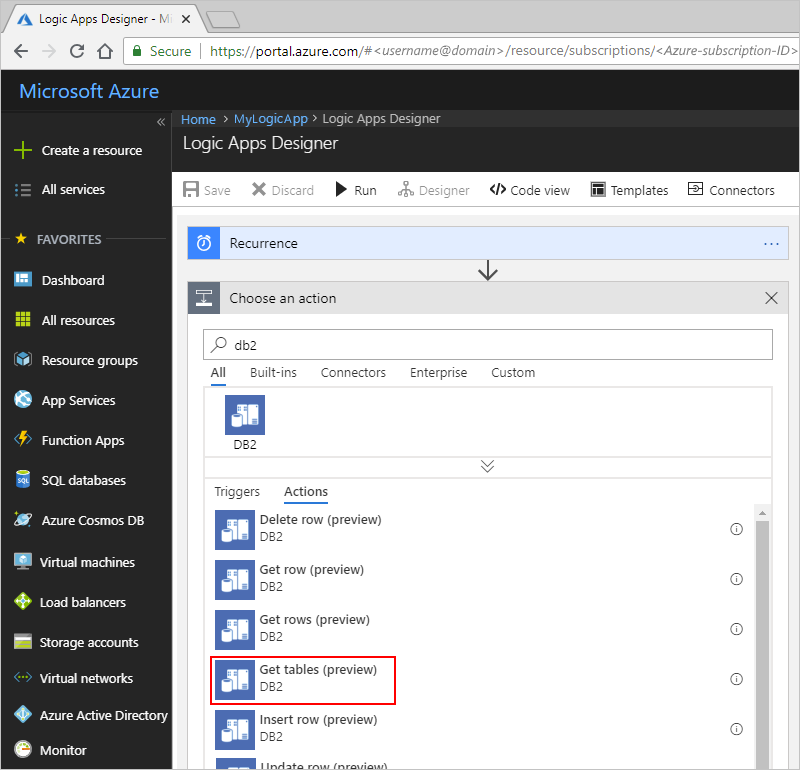
You're now prompted to provide connection details for your DB2 database.
Follow the steps for creating connections for cloud databases or on-premises databases.
Connect to cloud DB2
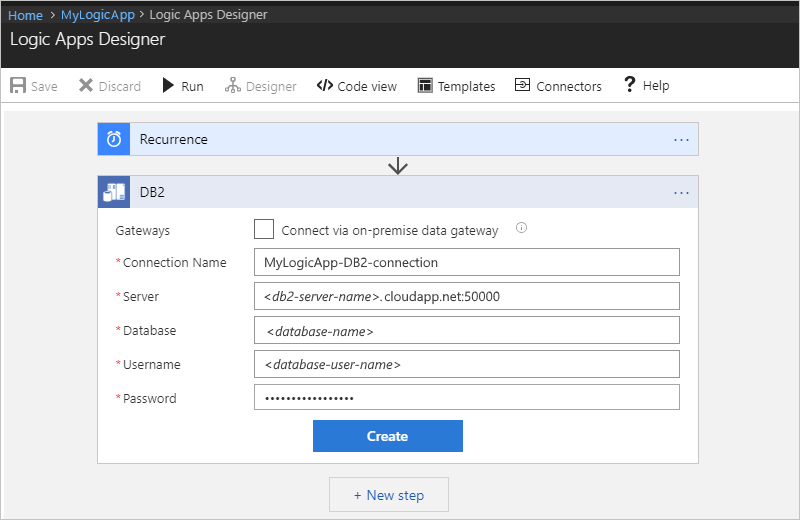
To set up your connection, provide these connection details when prompted, choose Create, and then save your logic app:
| Property | Required | Description |
|---|---|---|
| Connect via on-premises gateway | No | Applies only for on-premises connections. |
| Connection Name | Yes | The name for your connection, for example, "MyLogicApp-DB2-connection" |
| Server | Yes | The address or alias colon port number for your DB2 server, for example, "myDB2server.cloudapp.net:50000" Note: This value is a string that represents a TCP/IP address or alias, either in IPv4 or IPv6 format, followed by a colon and a TCP/IP port number. |
| Database | Yes | The name for your database Note: This value is a string that represents a DRDA Relational Database Name (RDBNAM): - DB2 for z/OS accepts a 16-byte string where the database is known as an "IBM DB2 for z/OS" location. |
| Username | Yes | Your user name for the database Note: This value is a string whose length is based on the specific database: - DB2 for z/OS accepts an 8-byte string. |
| Password | Yes | Your password for the database |
For example:
Connect to on-premises DB2
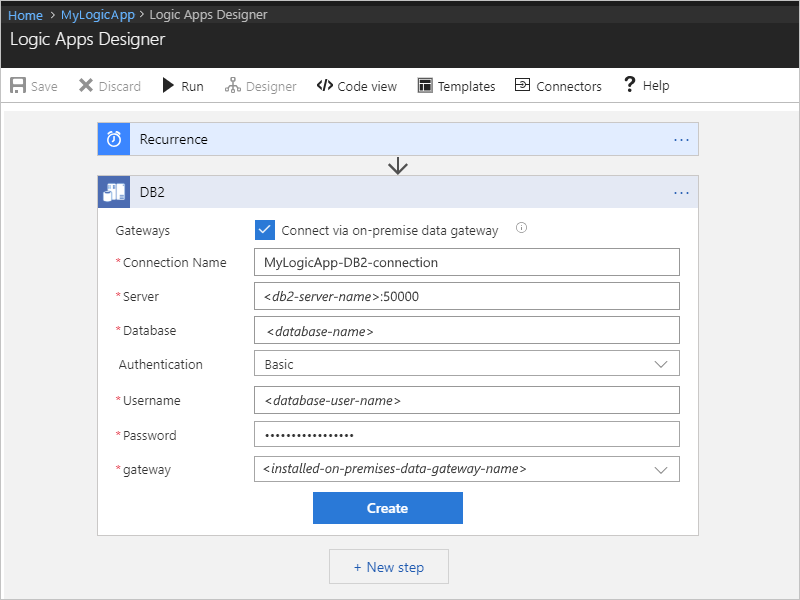
Before creating your connection, you must already have your on-premises data gateway installed. Otherwise, you can't finish setting up your connection. If you have your gateway installation, continue with providing these connection details, and then choose Create.
| Property | Required | Description |
|---|---|---|
| Connect via on-premises gateway | Yes | Applies when you want an on-premises connection and shows the on-premises connection properties. |
| Connection Name | Yes | The name for your connection, for example, "MyLogicApp-DB2-connection" |
| Server | Yes | The address or alias colon port number for your DB2 server, for example, "myDB2server:50000" Note: This value is a string that represents a TCP/IP address or alias, either in IPv4 or IPv6 format, followed by a colon and a TCP/IP port number. |
| Database | Yes | The name for your database Note: This value is a string that represents a DRDA Relational Database Name (RDBNAM): - DB2 for z/OS accepts a 16-byte string where the database is known as an "IBM DB2 for z/OS" location. |
| Authentication | Yes | The authentication type for your connection, for example, "Basic" Note: Select this value from the list, which includes Basic or Windows (Kerberos). |
| Username | Yes | Your user name for the database Note: This value is a string whose length is based on the specific database: - DB2 for z/OS accepts an 8-byte string. |
| Password | Yes | Your password for the database |
| Gateway | Yes | The name for your installed on-premises data gateway Note: Select this value from the list, which includes all the installed data gateways within your Azure subscription and resource group. |
For example:
View output tables
To run your logic app manually, on the designer toolbar, choose Run. After your logic app finishes running, you can view the output from the run.
On your logic app menu, select Overview.
Under Summary, in the Runs history section, select the most recent run, which is the first item in the list.
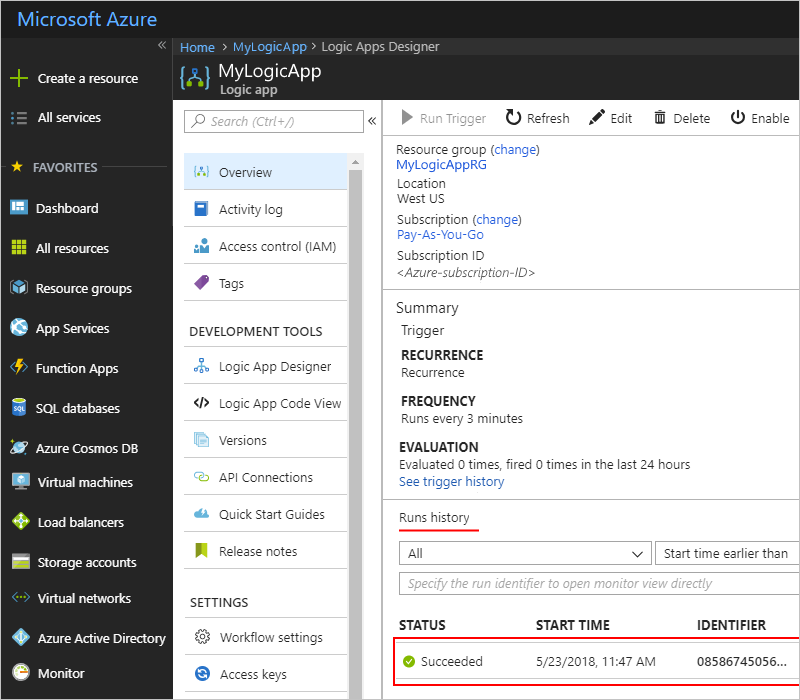
Under Logic app run, you can now review the status, inputs, and outputs for each step in your logic app. Expand the Get tables action.
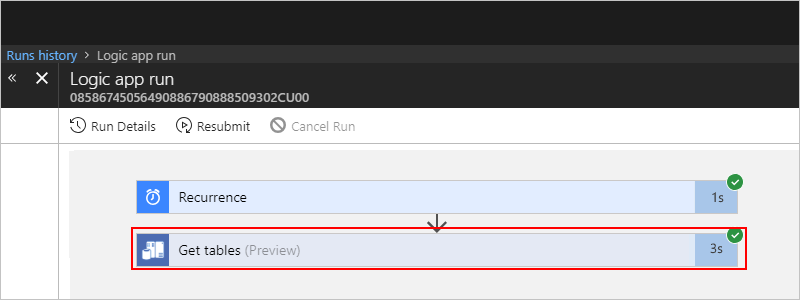
To view the inputs, choose Show raw inputs.
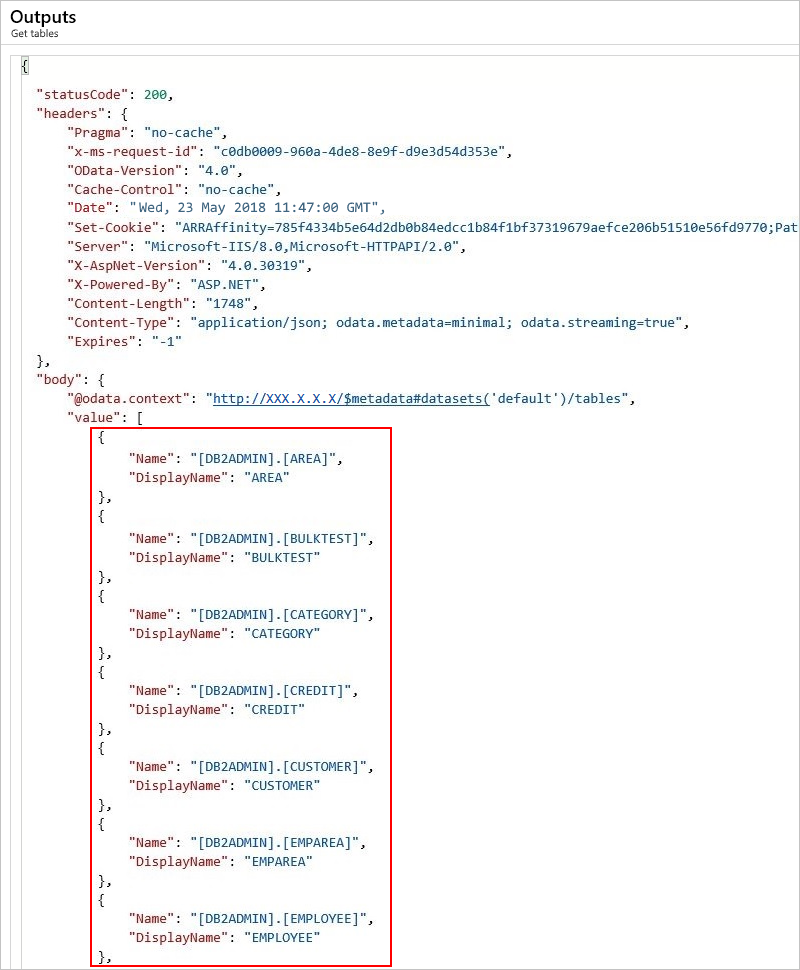
To view the outputs, choose Show raw outputs.
The outputs include a list of tables.
Get row
To fetch one record in a DB2 database table, use the Get row action in your logic app.
This action runs a DB2 SELECT WHERE statement, for example,
SELECT FROM AREA WHERE AREAID = '99999'.
If you've never used DB2 actions before in your logic app, review the steps in the Add DB2 action - Get tables section, but add the Get row action instead, and then return here to continue.
After you add the Get row action, here is how your example logic app appears:
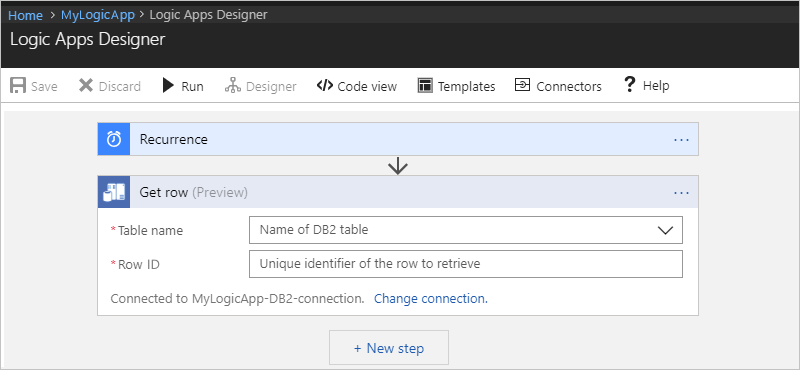
Specify values for all the required properties (*). After you select a table, the action shows the relevant properties that are specific to records in that table.
Property Required Description Table name Yes The table that has the record you want, such as "AREA" in this example Area ID Yes The ID for the record you want, such as "99999" in this example 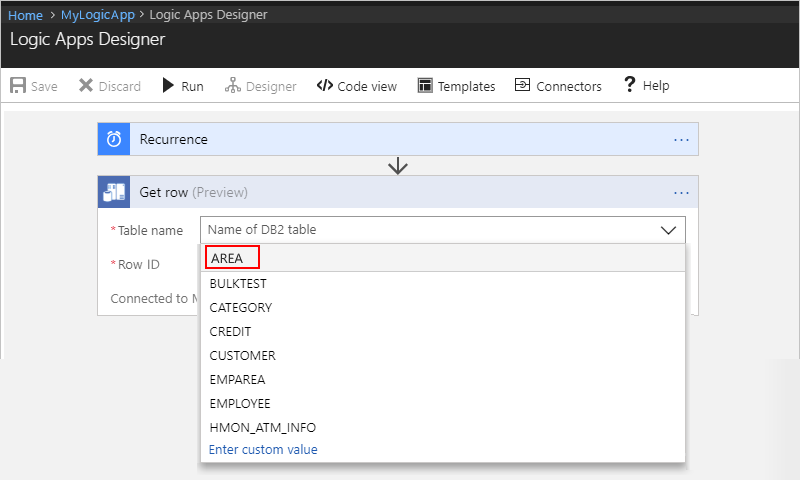
When you're done, on the designer toolbar, choose Save.
View output row
To run your logic app manually, on the designer toolbar, choose Run. After your logic app finishes running, you can view the output from the run.
On your logic app menu, select Overview.
Under Summary, in the Runs history section, select the most recent run, which is the first item in the list.
Under Logic app run, you can now review the status, inputs, and outputs for each step in your logic app. Expand the Get row action.
To view the inputs, choose Show raw inputs.
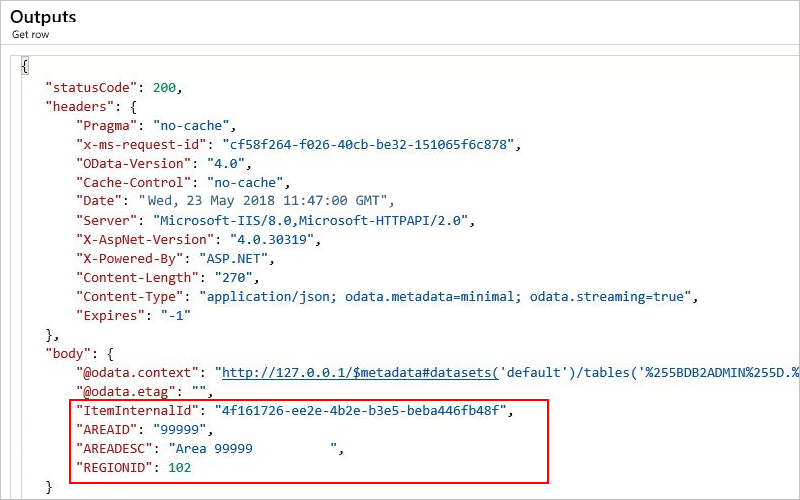
To view the outputs, choose Show raw outputs.
The outputs include your specified row.
Get rows
To fetch all records in a DB2 database table, use the Get rows action in your logic app.
This action runs a DB2 SELECT statement, for example, SELECT * FROM AREA.
If you've never used DB2 actions before in your logic app, review the steps in the Add DB2 action - Get tables section, but add the Get rows action instead, and then return here to continue.
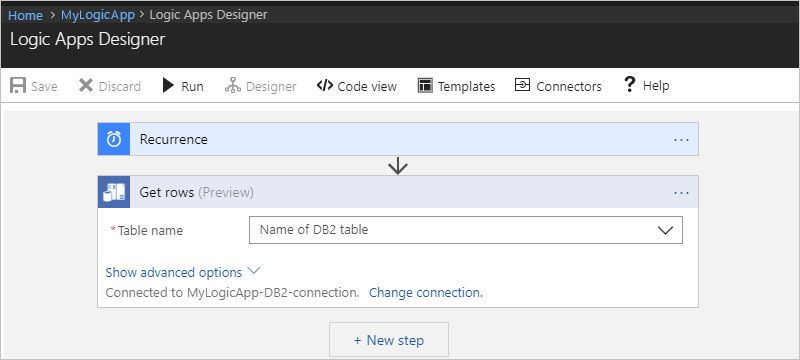
After you add the Get rows action, here is how your example logic app appears:
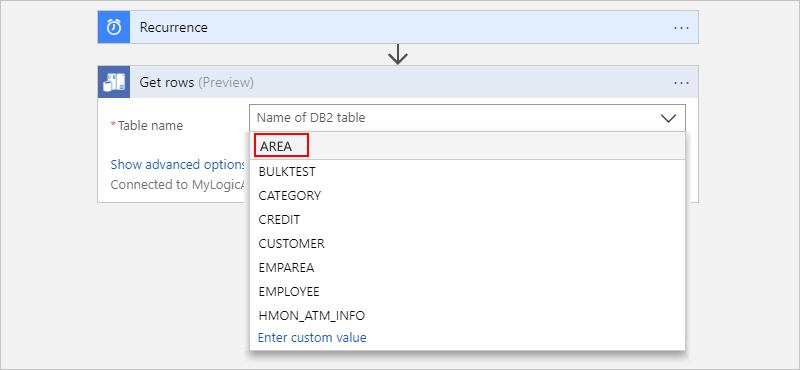
Open the Table name list, and then select the table you want, which is "AREA" in this example:
To specify a filter or query for results, choose Show advanced options.
When you're done, on the designer toolbar, choose Save.
View output rows
To run your logic app manually, on the designer toolbar, choose Run. After your logic app finishes running, you can view the output from the run.
On your logic app menu, select Overview.
Under Summary, in the Runs history section, select the most recent run, which is the first item in the list.
Under Logic app run, you can now review the status, inputs, and outputs for each step in your logic app. Expand the Get rows action.
To view the inputs, choose Show raw inputs.
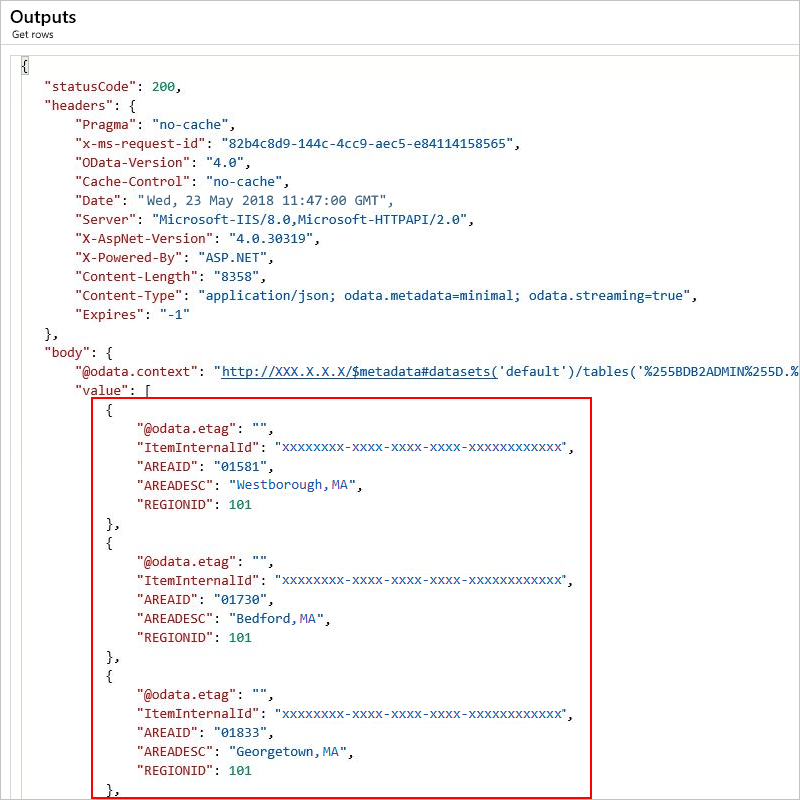
To view the outputs, choose Show raw outputs.
The outputs include all the records in your specified table.
Insert row
To add a single record to a DB2 database table,
use the Insert row action in your logic app.
This action runs a DB2 INSERT statement, for example,
INSERT INTO AREA (AREAID, AREADESC, REGIONID) VALUES ('99999', 'Area 99999', 102).
If you've never used DB2 actions before in your logic app, review the steps in the Add DB2 action - Get tables section, but add the Insert row action instead, and then return here to continue.
After you add the Insert row action, here is how your example logic app appears:
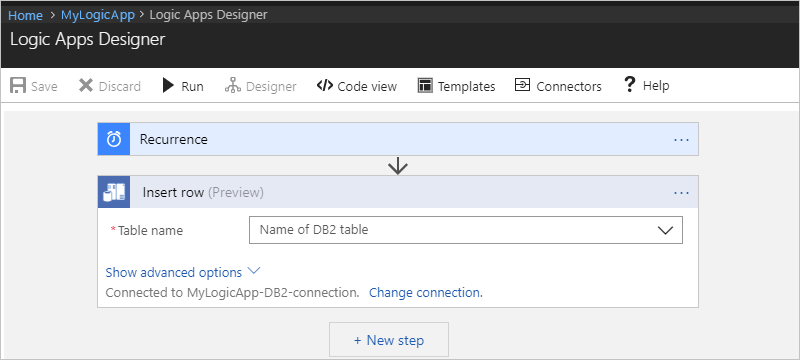
Specify values for all the required properties (*). After you select a table, the action shows the relevant properties that are specific to records in that table.
For this example, here are the properties:
Property Required Description Table name Yes The table where to add the record, such as "AREA" Area ID Yes The ID for the area to add, such as "99999" Area description Yes The description for the area to add, such as "Area 99999" Region ID Yes The ID for the region to add, such as "102" For example:
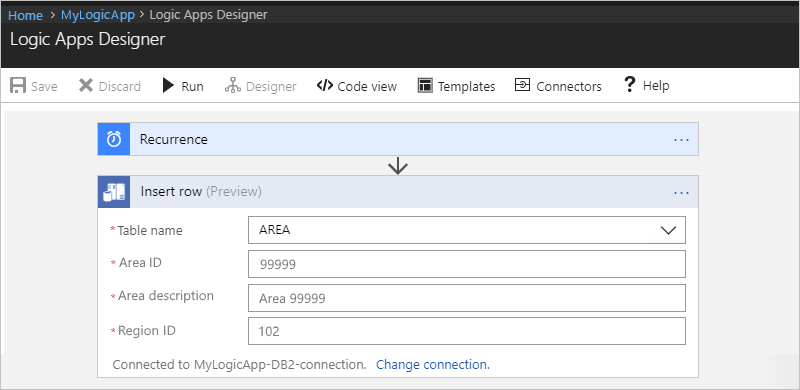
When you're done, on the designer toolbar, choose Save.
View insert row outputs
To run your logic app manually, on the designer toolbar, choose Run. After your logic app finishes running, you can view the output from the run.
On your logic app menu, select Overview.
Under Summary, in the Runs history section, select the most recent run, which is the first item in the list.
Under Logic app run, you can now review the status, inputs, and outputs for each step in your logic app. Expand the Insert row action.
To view the inputs, choose Show raw inputs.
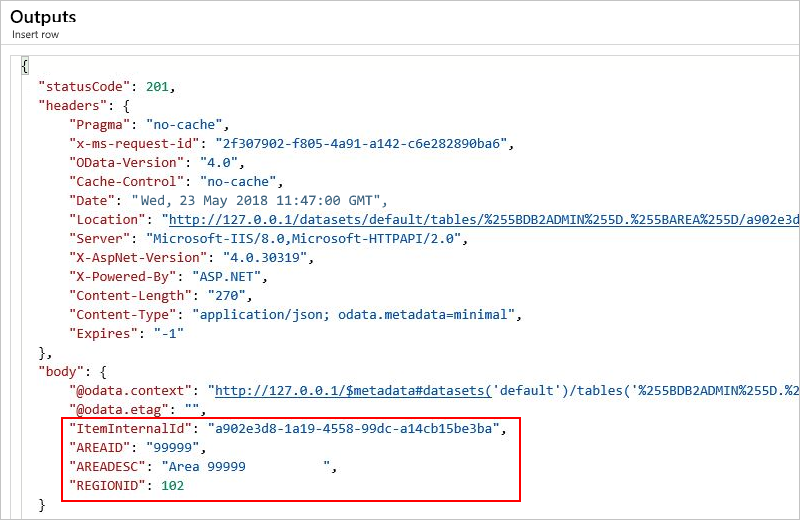
To view the outputs, choose Show raw outputs.
The outputs include the record you added to your specified table.
Update row
To update a single record in a DB2 database table,
use the Update row action in your logic app.
This action runs a DB2 UPDATE statement, for example,
UPDATE AREA SET AREAID = '99999', AREADESC = 'Updated 99999', REGIONID = 102).
If you've never used DB2 actions before in your logic app, review the steps in the Add DB2 action - Get tables section, but add the Update row action instead, and then return here to continue.
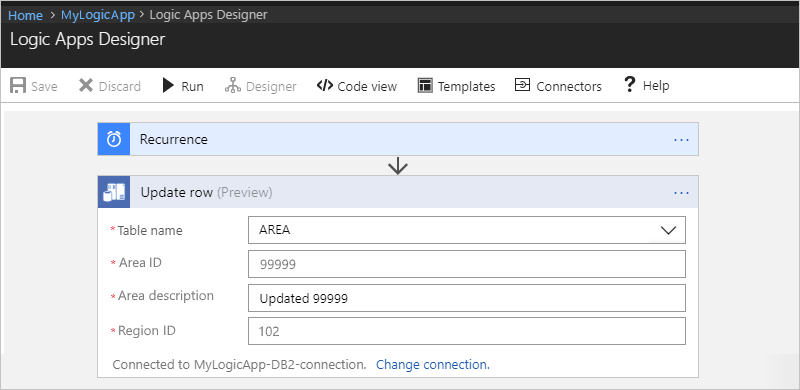
After you add the Update row action, here is how your example logic app appears:
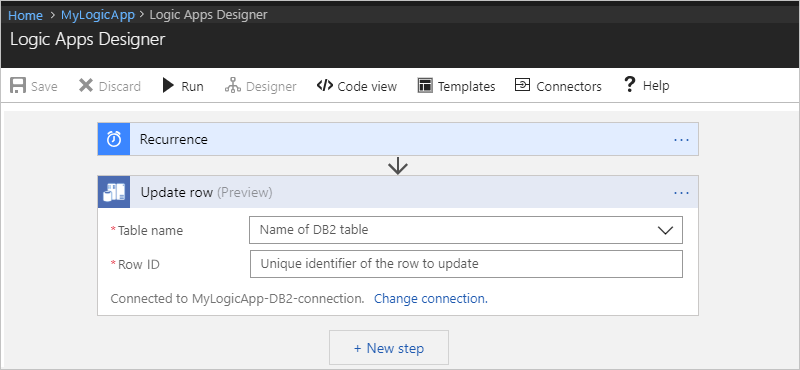
Specify values for all the required properties (*). After you select a table, the action shows the relevant properties that are specific to records in that table.
For this example, here are the properties:
Property Required Description Table name Yes The table where to update the record, such as "AREA" Row ID Yes The ID for the record to update, such as "99999" Area ID Yes The new area ID, such as "99999" Area description Yes The new area description, such as "Updated 99999" Region ID Yes The new region ID, such as "102" For example:
When you're done, on the designer toolbar, choose Save.
View update row outputs
To run your logic app manually, on the designer toolbar, choose Run. After your logic app finishes running, you can view the output from the run.
On your logic app menu, select Overview.
Under Summary, in the Runs history section, select the most recent run, which is the first item in the list.
Under Logic app run, you can now review the status, inputs, and outputs for each step in your logic app. Expand the Update row action.
To view the inputs, choose Show raw inputs.
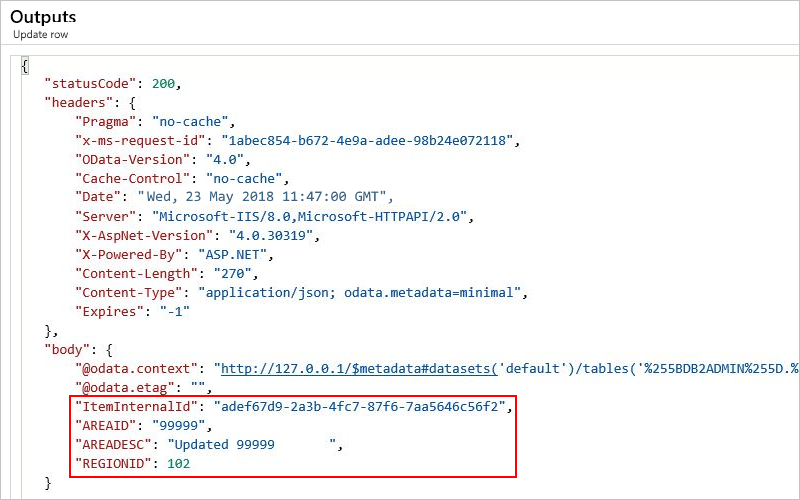
To view the outputs, choose Show raw outputs.
The outputs include the record you updated in your specified table.
Delete row
To delete a single record from a DB2 database table,
use the Delete row action in your logic app.
This action runs a DB2 DELETE statement, for example,
DELETE FROM AREA WHERE AREAID = '99999'.
If you've never used DB2 actions before in your logic app, review the steps in the Add DB2 action - Get tables section, but add the Delete row action instead, and then return here to continue.
After you add the Delete row action, here is how your example logic app appears:
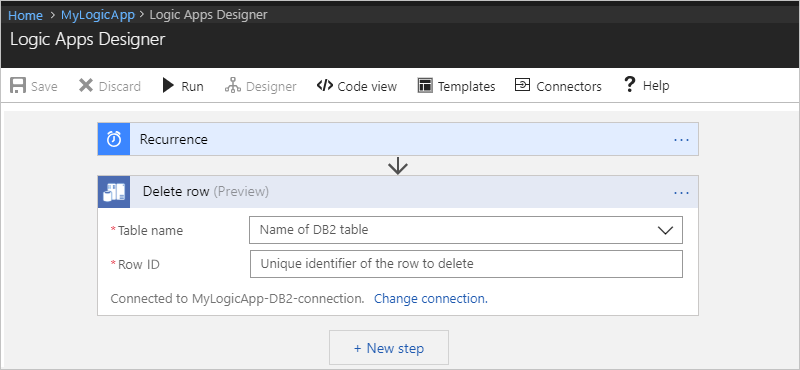
Specify values for all the required properties (*). After you select a table, the action shows the relevant properties that are specific to records in that table.
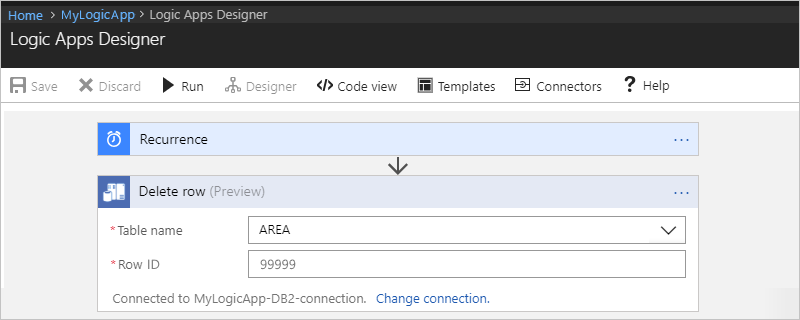
For this example, here are the properties:
Property Required Description Table name Yes The table where to delete the record, such as "AREA" Row ID Yes The ID for the record to delete, such as "99999" For example:
When you're done, on the designer toolbar, choose Save.
View delete row outputs
To run your logic app manually, on the designer toolbar, choose Run. After your logic app finishes running, you can view the output from the run.
On your logic app menu, select Overview.
Under Summary, in the Runs history section, select the most recent run, which is the first item in the list.
Under Logic app run, you can now review the status, inputs, and outputs for each step in your logic app. Expand the Delete row action.
To view the inputs, choose Show raw inputs.
To view the outputs, choose Show raw outputs.
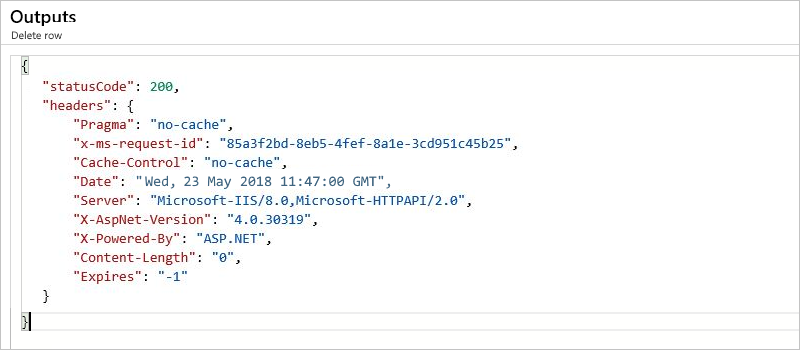
The outputs no longer include the record you deleted from your specified table.
Connector reference
For more technical details about this connector, such as triggers, actions, and limits as described by the connector's Swagger file, see the connector's reference page.