Nóta
Aðgangur að þessari síðu krefst heimildar. Þú getur prófað aðskrá þig inn eða breyta skráasöfnum.
Aðgangur að þessari síðu krefst heimildar. Þú getur prófað að breyta skráasöfnum.
In this article, you learn how to add a virtual network to a lab, and configure it for creating lab virtual machines (VMs).
Azure DevTest Labs creates a new virtual network for each lab. If you have an existing virtual network, such as one configured with Azure ExpressRoute or site-to-site virtual private network (VPN), you can add this network to your lab. You can then create lab VMs in that virtual network.
Add a virtual network to a lab
To add a configured virtual network and subnet to a lab, follow these steps:
In the Azure portal, go to your lab resource.
On the Overview page, expand the Settings section on the left menu, and select Configuration and policies:
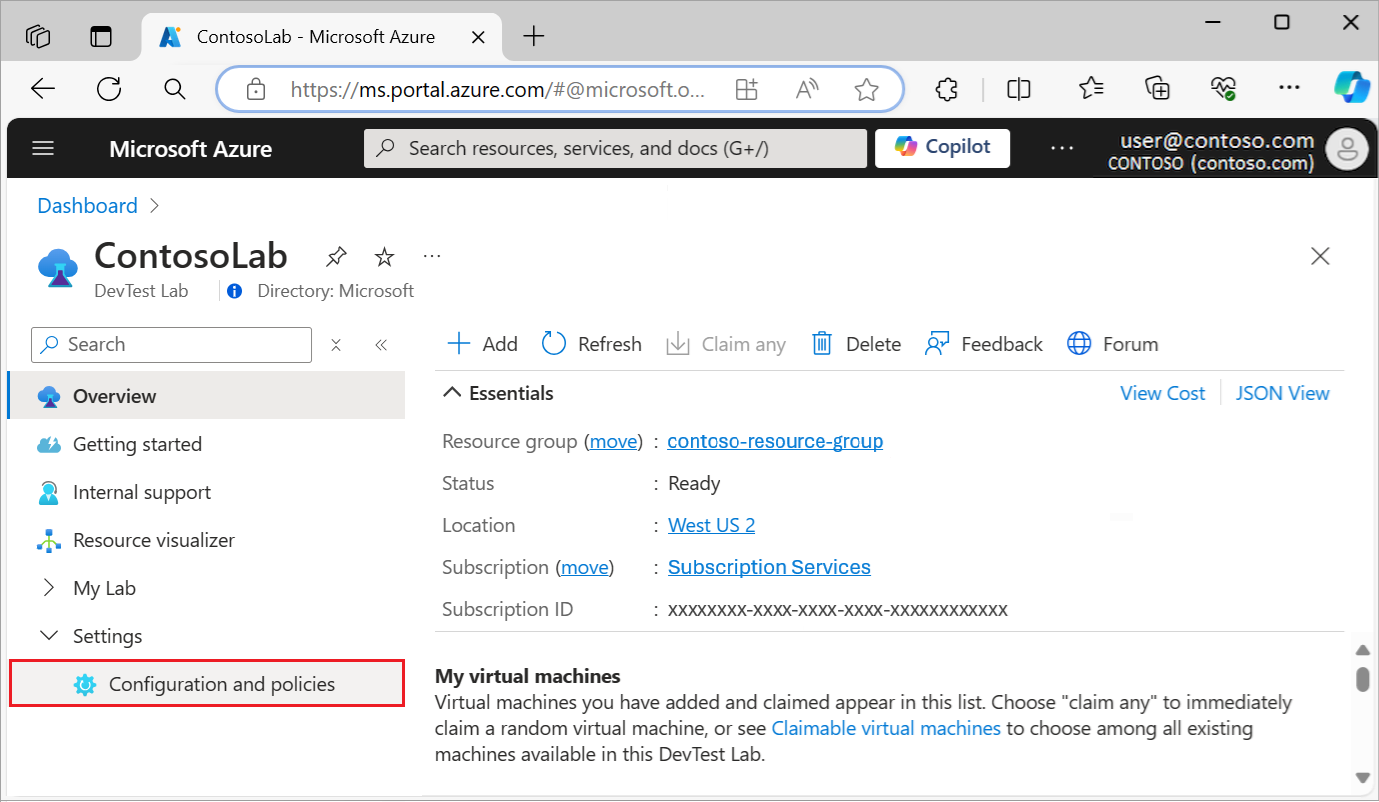
The Activity log view opens for the lab where you can review configuration and policies settings.
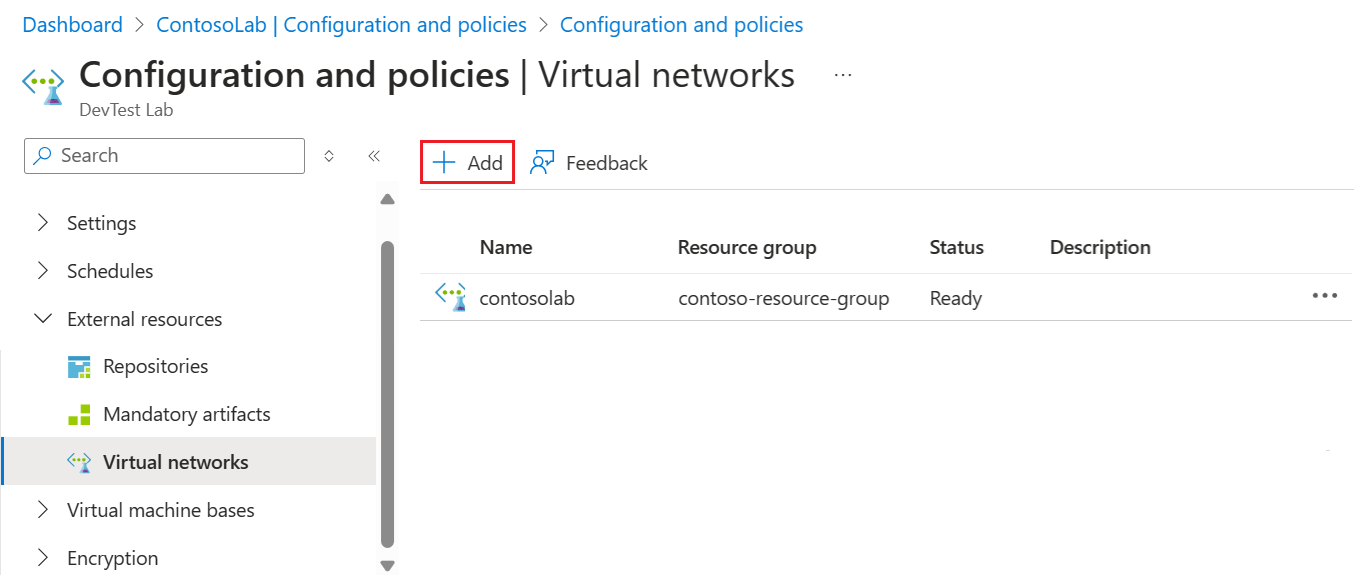
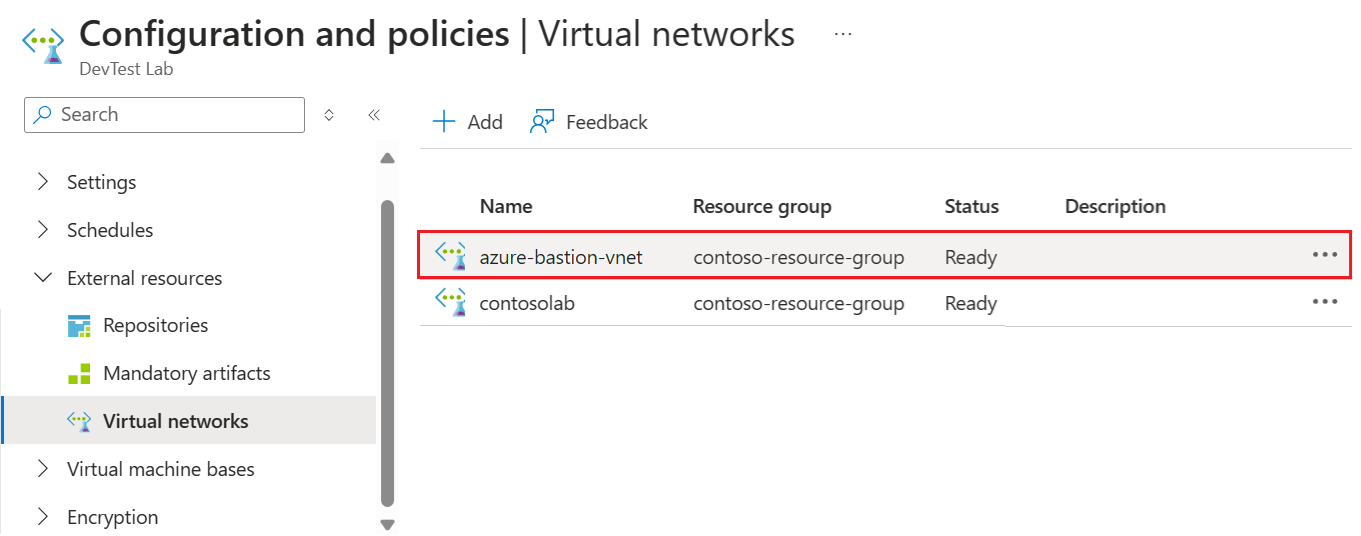
On the left menu, expand the External resources section, and select Virtual networks to view the lab's current virtual networks.
On the Virtual networks page, select Add:
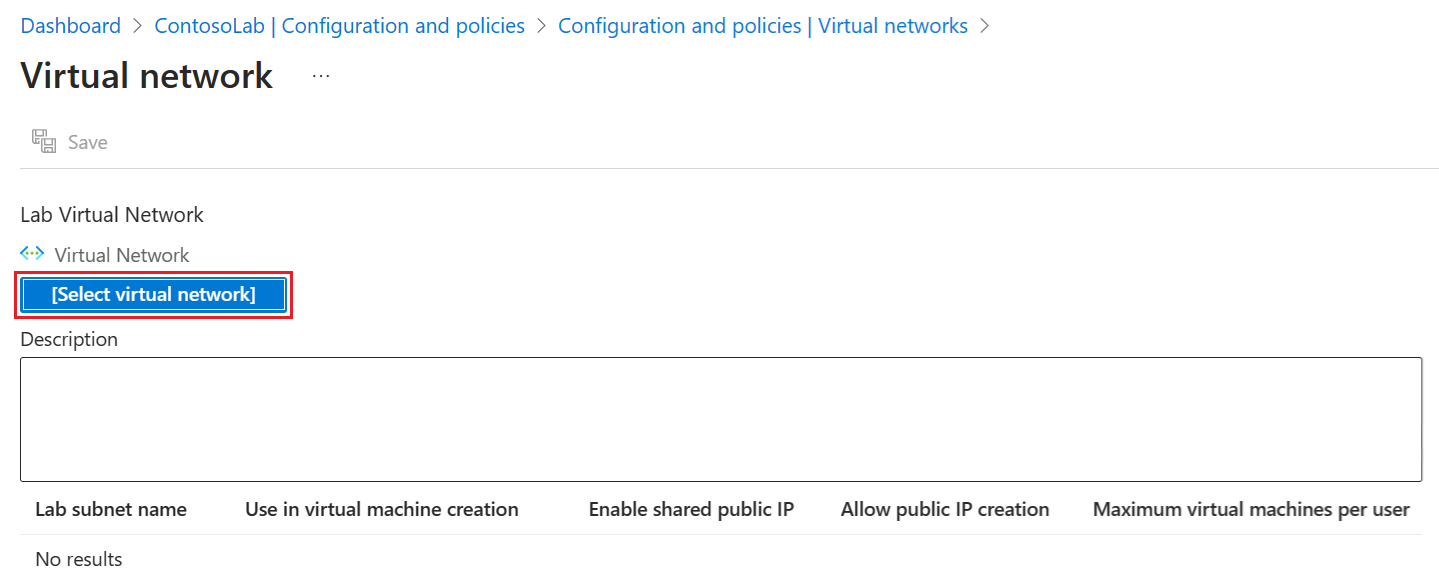
On the Virtual network page, choose the Select virtual network option:
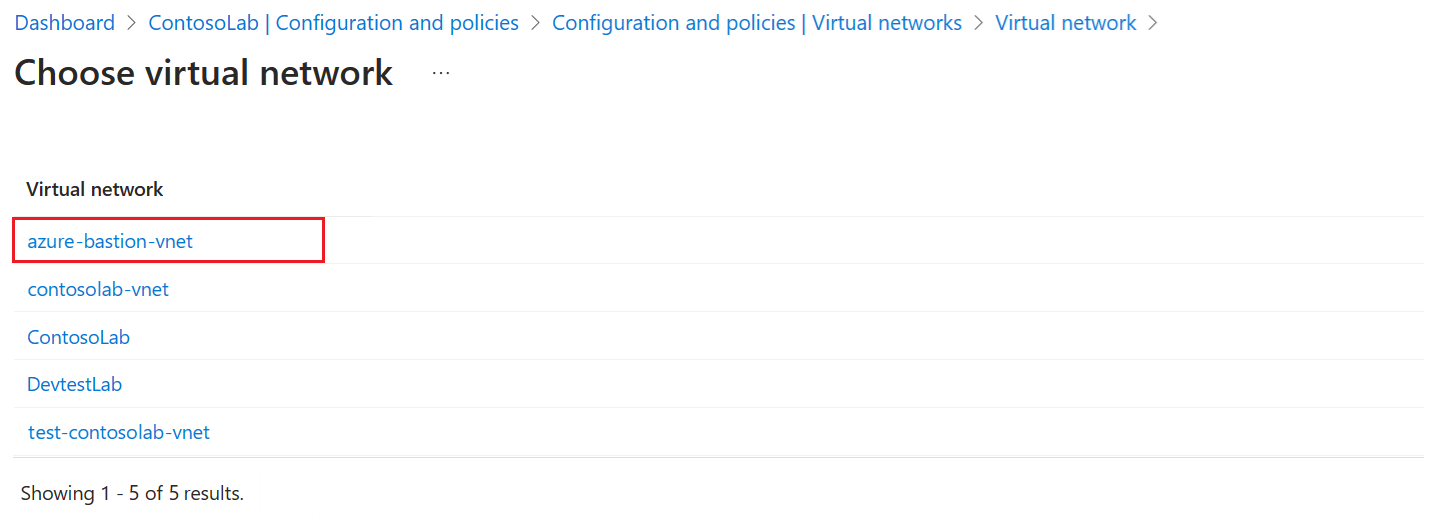
The Choose virtual network page shows all virtual networks in the subscription that are in the same region as the lab. Select the virtual network that you want to add to your lab:
The virtual network that you select appears on the Virtual network page. Select Save to add the virtual network to your lab:

The added virtual network appears in the list for the lab on the Virtual networks page. When the Status for the new virtual network shows as Ready, select the network:
The Virtual network page shows the subnets for the new virtual network. Select a subnet to configure:

On the Lab Subnet pane, configure the following options:
- Use in virtual machine creation: Allow or disallow virtual machine (VM) creation in the subnet.
- Enable shared public IP: Enable or disable a shared public IP address.
- Allow public IP creation: Allow or disallow creating public IP addresses in the subnet.
- Maximum virtual machines per user: Specify the maximum number of VMs each user can create in the subnet. If you don't want to restrict the number of VMs, leave this field blank.
On the Lab Subnet pane, select Save. The Virtual network page refreshes to show the configured subnet for the virtual network.
On the Virtual network page, select Save to apply the virtual network subnet changes to your lab.


Create VMs in a virtual network
When you allow VM creation in a subnet, you can create lab VMs in the added virtual network with these steps:
Add a lab VM and select a VM base by following the instructions in Create and add virtual machines.
On the Create lab resource screen, select the Advanced settings tab.
Expand the Virtual network dropdown list and select the virtual network you added.
As necessary, expand the Subnet Selector dropdown list and select the desired subnet.
Continue with creating the VM.