Create an Azure Logic Apps (SOAP) custom connector (preview)
[This topic is prerelease documentation and is subject to change.]
To integrate SOAP services in your Azure Logic Apps workflows, you can create and register a custom Simple Object Access Protocol (SOAP) connector by using Web Services Description Language (WSDL) that describes your SOAP service. The SOAP connectors work like prebuilt connectors, so you can use them in the same way as other connectors in your logic apps. Currently, SOAP custom connectors don't support one-way operations.
Important
- This is a preview feature.
- Preview features aren’t meant for production use and may have restricted functionality. These features are available before an official release so that customers can get early access and provide feedback.
Prerequisites
To register your SOAP connector, you need:
An Azure subscription. If you don't have a subscription, you can start with a free Azure account. As an alternative, you can sign up for a pay-as-you-go subscription.
Either of the following:
- A URL to a WSDL file that defines your SOAP service and the APIs.
- A WSDL file that defines your SOAP service and the APIs.
For this procedure, you can use our example, Orders SOAP Services (
http://fazioapisoap.azurewebsites.net/FazioService.svc?singleWsdl).(Optional) An image to use as an icon for your custom connector.
1. Create your connector
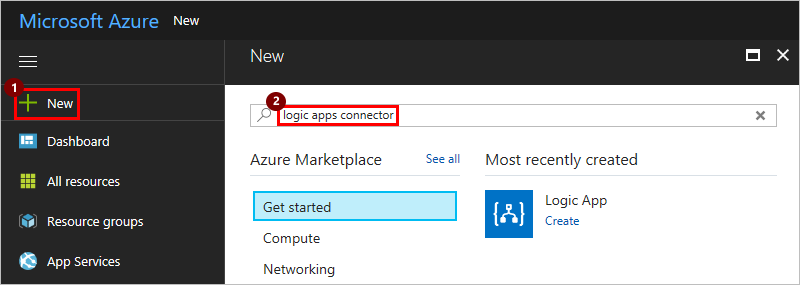
In the Azure portal on the main Azure menu, select New.
In the search box, enter logic apps connector, and then select Enter.
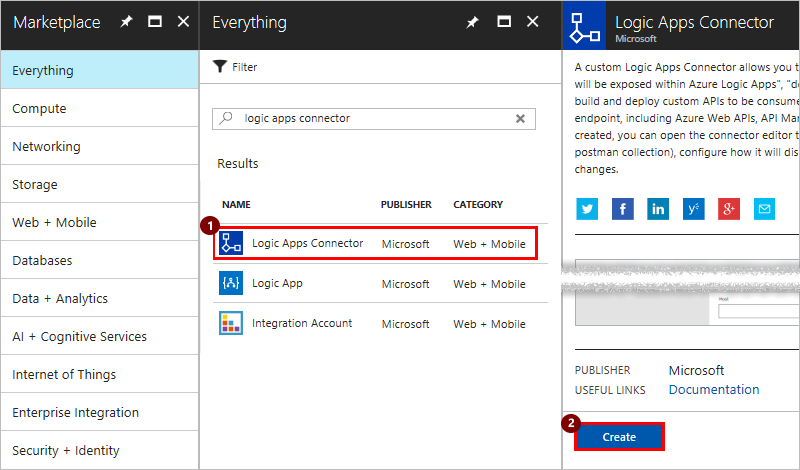
From the Results list, select Logic Apps Connector > Create.
Enter details for registering your connector as described in the table. When you're done, select the Pin to dashboard checkbox, and then select Create.
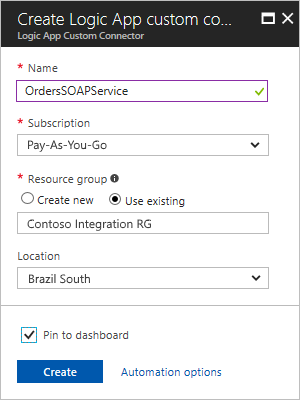
Property Suggested value Description Name soap-connector-name Enter a name for your connector. Subscription Azure-subscription-name Select your Azure subscription. Resource group Azure-resource-group-name Create or select an Azure group for organizing your Azure resources. Location deployment-region Select the same Azure region as your logic app.
After Azure deploys your connector, the Logic Apps connector menu should open. If it doesn't, select your SOAP connector from the Azure dashboard.
2. Define your connector
Specify the WSDL file or URL for creating your connector, the authentication that your connector uses, and the actions and triggers that your SOAP connector provides.
2a. Specify the WSDL file or URL for your connector
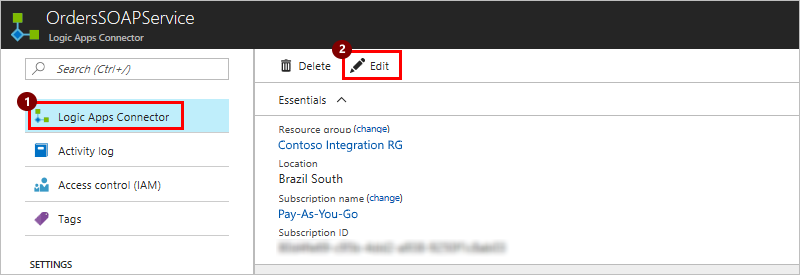
On your connector's menu, select Logic Apps Connector if it isn't already selected.
On the toolbar, select Edit.
Select General to provide the details in these tables for creating, securing, and defining the actions and triggers for your SOAP connector.
For Custom connectors, select SOAP for your API Endpoint to provide the WSDL file that describes your API.

Option Format Description Upload WSDL from file WSDL-file Browse to the location for your WSDL file, and select that file. Upload WSDL from URL http://path-to-wsdl-file Enter the URL for your service's WSDL file. SOAP to REST Not applicable Transform APIs in the SOAP service into REST APIs. For General information, upload an icon for your connector.
Typically, the Description, Host, and Base URL fields are automatically populated from your WSDL file. If they aren't, add this information as described in the table, and then select Continue.
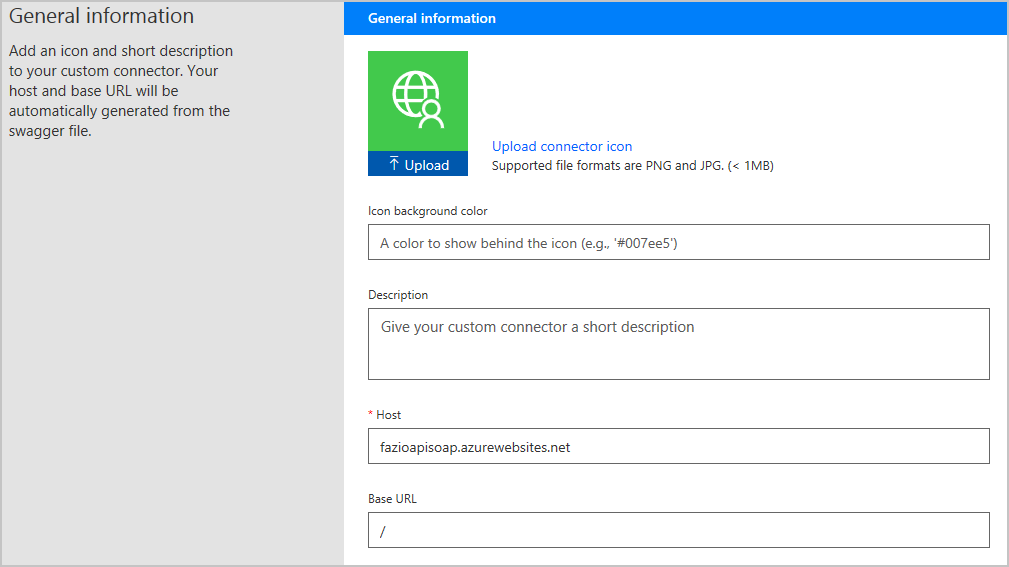
Option or setting Format Description Upload Icon png-or-jpg-file-under-1-MB An icon that represents your connector Color: Preferably a white logo against a color background.
Dimensions: A logo approximately 160 × 160 pixels inside a square 230 × 230 pixels
Icon background color icon-brand-color-hexadecimal-code The color behind your icon that matches the background color in your icon file. Format: Hexadecimal. For example, #007ee5 represents the color blue.
Description connector-description Enter a short description for your connector. Host connector-host Enter the host domain for your SOAP service. Base URL connector-base-URL Enter the base URL for your SOAP service.
2b. Describe the authentication that your connector uses
Select Security, and then review or describe the authentication that your connector uses. Authentication makes sure that your users' identities flow appropriately between your service and any clients.
By default, your connector's Authentication type is set to No authentication.
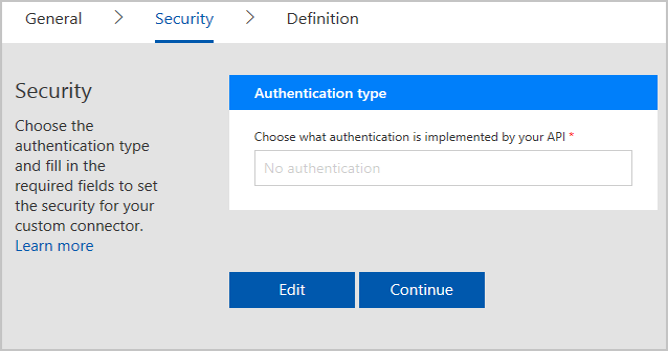
To change the authentication type, select Edit. You can select Basic authentication. To use parameter labels other than default values, update them under Parameter label.

To save your connector after entering the security information, at the top of the page, select Update connector, and then select Continue.
2c. Review, update, or define actions and triggers for your connector
Select Definition, and then review, edit, or define new actions and triggers that users can add to their workflows.
Actions and triggers are based on the operations defined in your WSDL file, which automatically populate the Definition page, and include the request and response values. If the required operations already appear here, you can go to the next step in the registration process without making changes on this page.
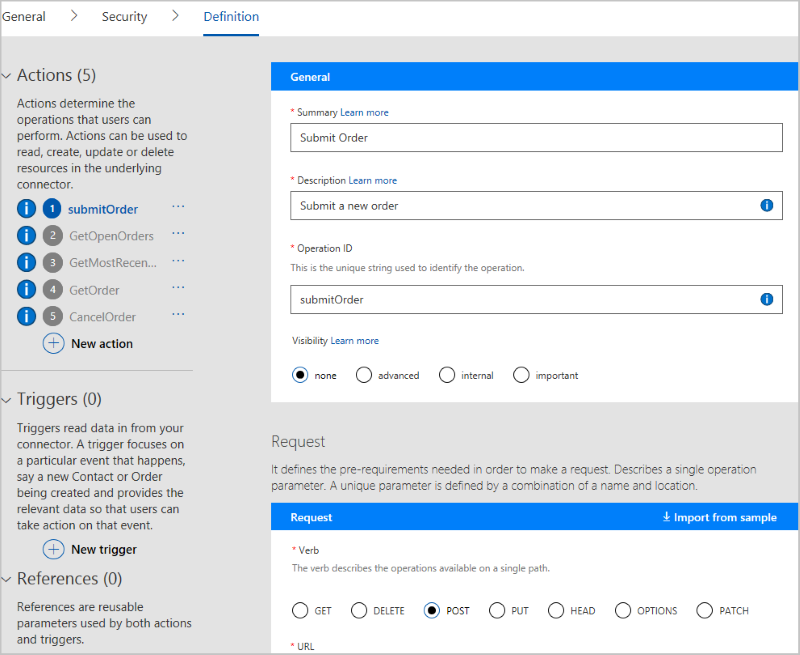
(Optional) If you want to edit existing actions and triggers, or add new ones, go to an example of editing an API definition.
3. Finish creating your connector
When you're ready, select Update Connector to deploy your connector.
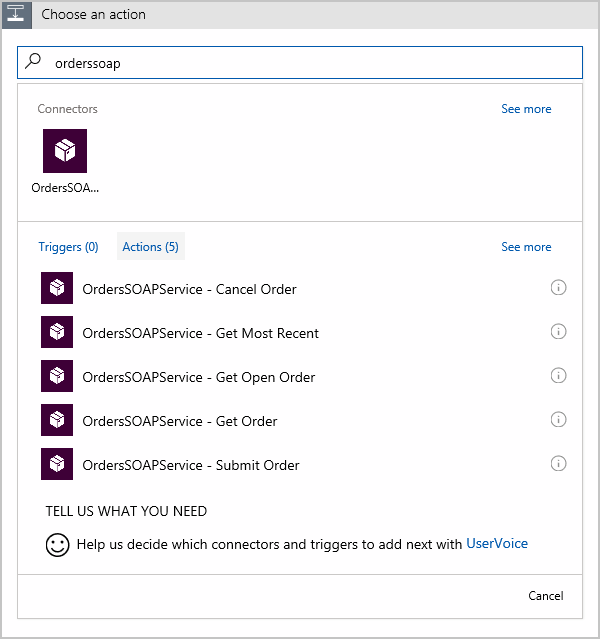
Congratulations! Now when you create a logic app, you can find your connector in Logic Apps Designer and add that connector to your logic app.
Share your connector with other Logic Apps users
Registered but uncertified custom connectors work like prebuilt connectors, with one exception. They're available only to the connector's author and users who have the same Microsoft Entra ID tenant and Azure subscription for Logic Apps in the region where those apps are deployed. Although sharing is optional, you might have scenarios where you want to share your connectors with other users.
Important
If you share a connector, others might start to depend on that connector. Deleting your connector deletes all connections to that connector.
To share your connector with external users outside these boundaries—for example, with all Logic Apps users—certify your connector. To learn more, go to Certify your connector.
FAQ
Q: Is the SOAP connector generally available?
A: The SOAP connector is in preview, and isn't a generally available service yet.
Q: Are there any restrictions or known issues for a SOAP connector?
A: Yes. To learn more, go to SOAP connector restrictions and known issues.
Q: Are there any limits for custom connectors?
A: Yes. To learn more, go to custom connector limits.
Get support
For support with development and onboarding, or to request features that aren't available in the registration wizard, contact condevhelp@microsoft.com. Microsoft monitors this account for developer questions and problems, and routes them to the appropriate team.
To ask or answer questions, or see what other Logic Apps users are doing, go to Azure Logic Apps forum.
To help improve Logic Apps, vote on or submit ideas on the Logic Apps user feedback site.
Related information
Certify your connector
Custom connector FAQ for Azure Logic Apps, Power Automate, and Power Apps
Provide feedback
We greatly appreciate feedback on issues with our connector platform, or new feature ideas. To provide feedback, go to Submit issues or get help with connectors and select your feedback type.