Create a branching rule
Branching rules allow you to customize the flow of your survey. You can show or hide questions, choose to navigate to another question or survey, or even open a website based on the response to a question. Branching rules make your surveys interactive and ensure that only relevant questions are displayed to respondents.
If you have hidden a question from being displayed in a survey by using the Visible option, you can use the branching rule to display it based on the required response. For more information about setting the visibility for a question, see Create a survey.
For example, for the question How likely is it that you would recommend us to a friend?, you can create a branching rule to ask the reason if someone responds Not likely.
To create a branching rule
Open the survey.
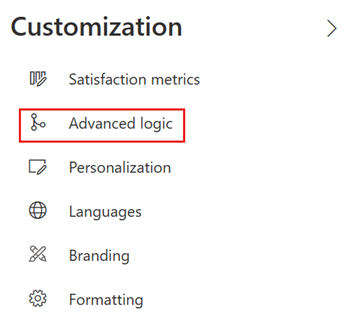
On the Design tab, select Customization at the right side of the page, and then select Advanced logic.

If you haven't created any rules yet, the following message is displayed. Select Use advanced logic.

If you've created at least one rule, a list of rules is displayed in a grid. Select New rule.

In the Rule name field, enter a name for the branching rule.
In the Primary rule condition(s) area, select Add condition to add a response condition.
Note
You can create a maximum of 10 conditions.
In the first list, choose whether you want to create a rule on a question or a survey variable.

If you want to create the rule on a survey variable, select a variable from the Select survey variable list.

If you want to create the rule on a question, select a question from the Select question list.

Select values from the Select operator and Select response lists, respectively.
You can add more conditions by using AND/OR operator by selecting Add condition.

Select Add "If true" to add the action that will be triggered when the defined condition meets the criteria.
Select Add action to add the response action.
Note
You can create a maximum of 10 actions to be triggered when the defined condition is true.
In the Select action list, choose one of the following actions:
- Show: Select a question to be displayed based on the response to a question.
- Hide: Select a question to be hidden based on the response to a question.
- Navigate to: Select the target to which a respondent should be navigated.

In the Select target list, choose a target for the selected action:
If you select Show or Hide as the action, you can select Question or Section as the target.
If you select Navigate to as the action, you can choose one of the following targets:
- Question: Skip to a question based on the response to a question. The questions between the source and target questions are hidden from the respondent.
- Section: Skip to a section based on the response to a question. The questions between the source and target sections are hidden from the respondent.
- End of survey: End the survey based on the response to a question.
- Chained survey: Open a different survey, created by you, based on the response to a question.
- URL: Open a website based on the response to a question. You must add
http://to the URL for it to work properly.
In the Select value list, enter or choose a value in accordance with the target.

Select Add "If false" to add the action that's triggered when the defined condition doesn't meet the criteria. Then follow steps 8 through 11.
Note
You can create a maximum of 10 actions to be triggered when the defined condition is false.

Select Save.
After creating a branching rule, you can preview the survey and see whether the rule is working as expected.
Manage branching rules
After you've created a branching rule or a set of branching rules, you can edit, delete, or change the order of their execution. The branching rules are executed in the order they were created in.
Open the survey.
Select Customization at the right side of the page, and then select Advanced logic.

A list of rules is displayed in a grid.

To edit a branching rule, select Edit
 from the corresponding rule row.
To delete a branching rule, select Delete
 from the corresponding rule row.
To change the order of execution of a branching rule, move a rule up or down in the grid. To move a rule up or down, select Move up
 or Move down
  from the corresponding rule row.
See also
Add and configure satisfaction metrics
Personalize your survey by adding variables
Create multilingual survey
Add branding to your survey
Add formatting to your survey
Add formatting to survey elements