Skip deletion of user accounts that go out of scope in Microsoft Entra ID
By default, the Microsoft Entra provisioning engine soft deletes or disables users that go out of scope. However, for certain scenarios like Workday to AD User Inbound Provisioning, this behavior may not be the expected and you may want to override this default behavior.
This article describes how to use the Microsoft Graph API and the Microsoft Graph API explorer to set the flag SkipOutOfScopeDeletions that controls the processing of accounts that go out of scope.
- If SkipOutOfScopeDeletions is set to 0 (false), accounts that go out of scope are disabled in the target.
- If SkipOutOfScopeDeletions is set to 1 (true), accounts that go out of scope aren't disabled in the target. This flag is set at the Provisioning App level and can be configured using the Graph API.
Because this configuration is widely used with the Workday to Active Directory user provisioning app, the following steps include screenshots of the Workday application. However, the configuration can also be used with all other apps, such as ServiceNow, Salesforce, and Dropbox. To successfully complete this procedure, you must have first set up app provisioning for the app. Each app has its own configuration article. For example, to configure the Workday application, see Tutorial: Configure Workday to Microsoft Entra user provisioning. SkipOutOfScopeDeletions doesn't work for cross-tenant synchronization.
Step 1: Retrieve your Provisioning App Service Principal ID (Object ID)
- Sign in to the Microsoft Entra admin center as at least an Application Administrator.
- Browse to Identity > Applications > Enterprise applications.
- Select your application and go to Properties section of your provisioning app. In this example, we're using Workday.
- Copy the GUID value in the Object ID field. This value is also called the ServicePrincipalId of your app and it's used in Graph Explorer operations.
Step 2: Sign into Microsoft Graph Explorer
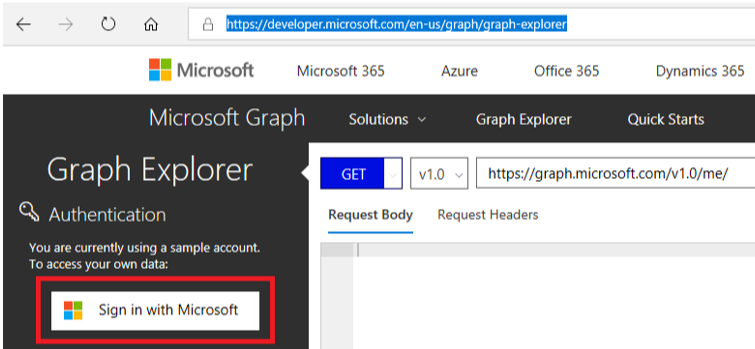
Launch Microsoft Graph Explorer
Select the "Sign-In with Microsoft" button and sign-in as a user with at least the Application Administrator role.

Upon successful sign-in, the user account details appear in the left-hand pane.
Step 3: Get existing app credentials and connectivity details
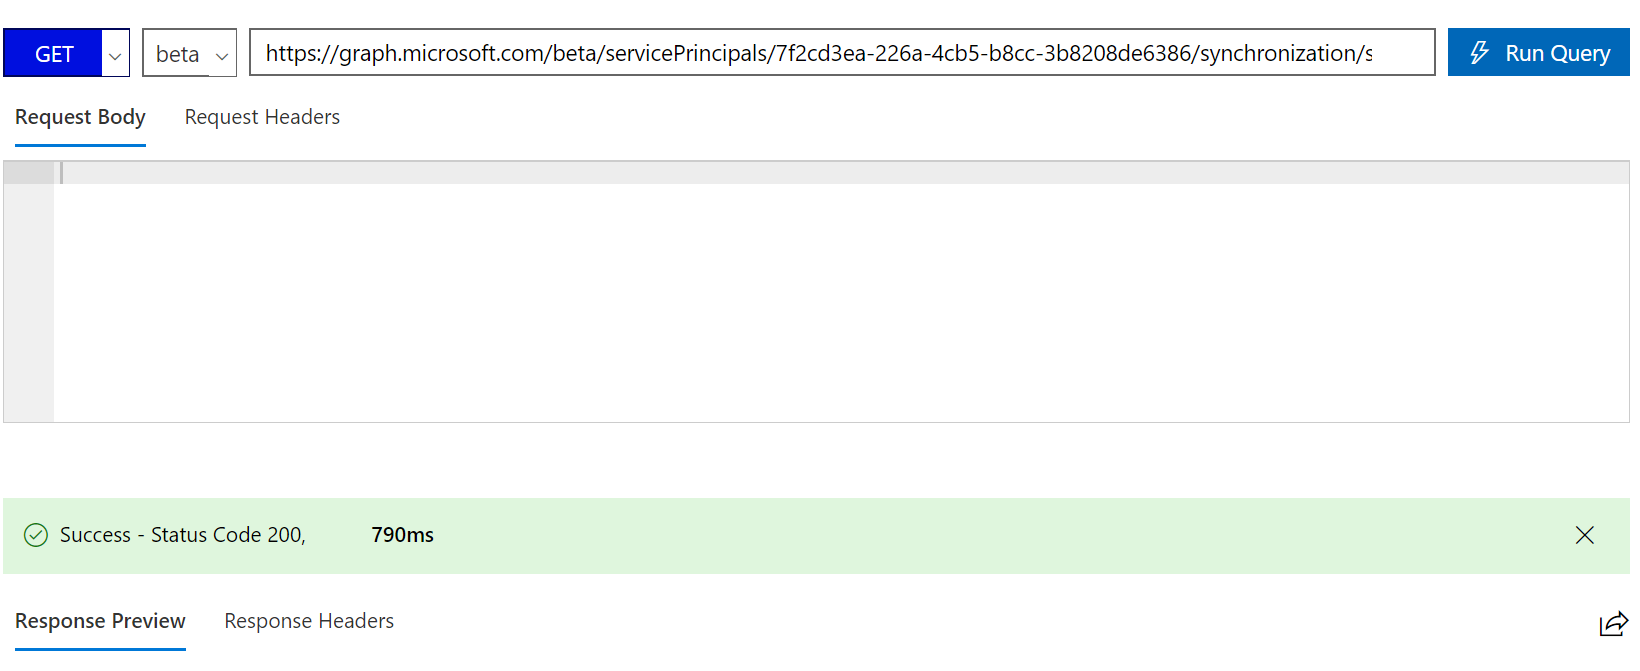
In the Microsoft Graph Explorer, run the following GET query replacing [servicePrincipalId] with the ServicePrincipalId extracted from the Step 1.
GET https://graph.microsoft.com/beta/servicePrincipals/[servicePrincipalId]/synchronization/secrets

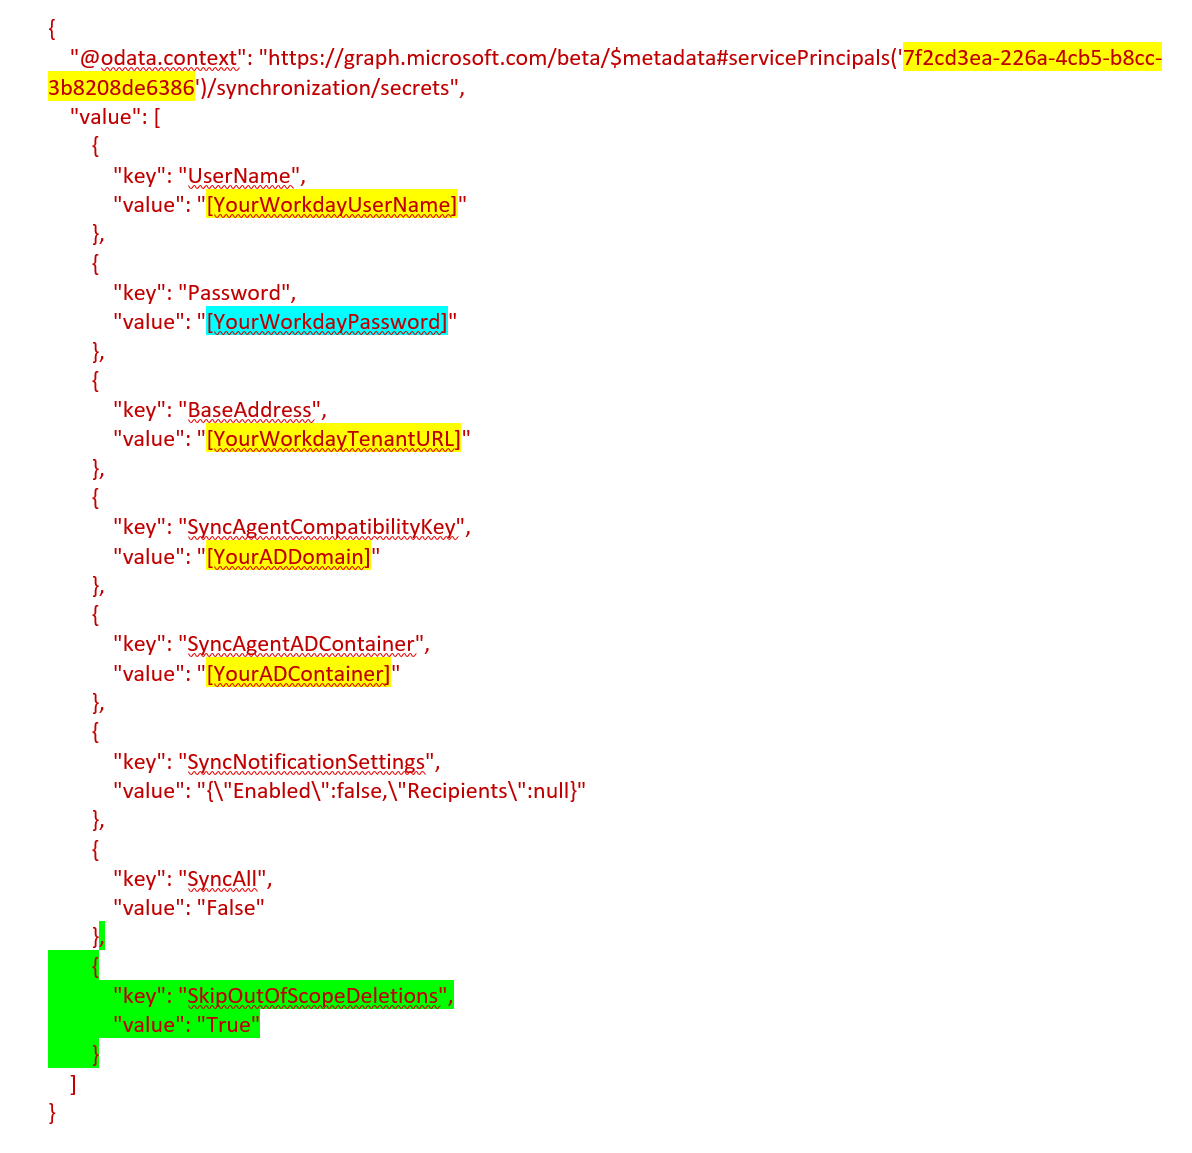
Copy the Response into a text file. It looks like the JSON text shown, with values highlighted in yellow specific to your deployment. Add the lines highlighted in green to the end and update the Workday connection password highlighted in blue.

Here's the JSON block to add to the mapping.
{
  "key": "SkipOutOfScopeDeletions",
  "value": "True"
}
Step 4: Update the secrets endpoint with the SkipOutOfScopeDeletions flag
In the Graph Explorer, run the command to update the secrets endpoint with the SkipOutOfScopeDeletions flag.
In the URL, replace [servicePrincipalId] with the ServicePrincipalId extracted from the Step 1.
PUT https://graph.microsoft.com/beta/servicePrincipals/[servicePrincipalId]/synchronization/secrets
Copy the updated text from Step 3 into the "Request Body".

Select “Run Query”.
You should get the output as "Success – Status Code 204". If you receive an error, you may need to check that your account has Read/Write permissions for ServicePrincipalEndpoint. You can find this permission by clicking on the Modify permissions tab in Graph Explorer.

Step 5: Verify that out of scope users don’t get disabled
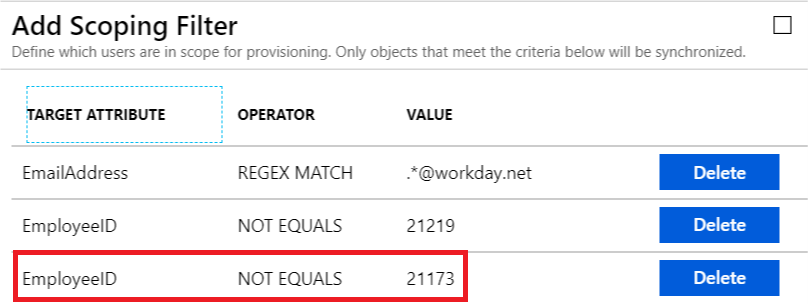
You can test this flag results in expected behavior by updating your scoping rules to skip a specific user. In the example, we're excluding the employee with ID 21173 (who was earlier in scope) by adding a new scoping rule:

In the next provisioning cycle, the Microsoft Entra provisioning service identifies that the user 21173 is out of scope. If the SkipOutOfScopeDeletions property is enabled, then the synchronization rule for that user displays a message.