Distribuire un progetto da .NET Aspire a Azure Container Apps usando Visual Studio
.NET .NET Aspire progetti sono progettati per l'esecuzione in ambienti containerizzati. Azure Container Apps è un ambiente completamente gestito che consente di eseguire microservizi e applicazioni in contenitori in una piattaforma serverless. Questo articolo illustra come creare una nuova soluzione di .NET Aspire e distribuirla in Microsoft Azure Container Apps usando il Visual Studio. Si apprenderà come completare le attività seguenti:
- Fornire un gruppo di risorse Azure e un Registro dei Contenitori
- Pubblicare i progetti .NET Aspire come immagini container nel Container Registry Azure
- Configura un contenitore Redis in Azure
- Distribuire le applicazioni in un ambiente Azure Container Apps
- Visualizzare i log della console dell'applicazione per risolvere i problemi dell'applicazione
Prerequisiti
Per usare .NET.NET Aspire, è necessario che il codice seguente sia installato in locale:
- .NET 8.0 o .NET 9.0
- Runtime conforme a OCI per i container, ad esempio:
- Docker Desktop o Podman. Per altre informazioni, vedere Runtime del container.
- Un ambiente di sviluppo integrato (IDE) o un editor di codice, ad esempio:
- Visual Studio 2022 versione 17.9 o successiva (facoltativo)
-
Visual Studio Code (facoltativo)
- C# Dev Kit: Estensione (facoltativo)
- JetBrains Rider con .NET.NET Aspire plugin (facoltativo)
Per altre informazioni, vedere .NET.NET Aspire configurazione e strumentie .NET.NET Aspire SDK.
Crea un progetto .NET.NET Aspire
Come punto di partenza, questo articolo presuppone che abbiate creato un progetto .NET.NET Aspire dal modello Starter Application .NET.NET Aspire. Per ulteriori informazioni, vedere Avvio rapido: Crea il tuo primo progetto .NET.NET Aspire.
Denominazione delle risorse
Quando si creano nuove risorse Azure, è importante rispettare i requisiti di denominazione. Per Azure Container Apps, il nome deve avere una lunghezza di 2-32 caratteri e deve essere costituito da lettere minuscole, numeri e trattini. Il nome deve iniziare con una lettera e terminare con un carattere alfanumerico.
Per altre informazioni, vedere regole di denominazione e restrizioni per le risorse Azure.
Distribuire l'app
Nell'Esplora Soluzioni, fare clic con il pulsante destro del mouse sul progetto AppHost e selezionare Pubblica per aprire la finestra di dialogo Pubblica.
Selezionare Azure Container Apps per .NET Aspire come destinazione di pubblicazione.

Nel passaggio
AzDev Environment (Ambiente AzDev) selezionare i valori sottoscrizione sottoscrizione desiderati e Location e quindi immettere un nome dell'ambiente, ad esempio -vs . Selezionare Fine per chiudere il flusso di lavoro della finestra di dialogo e visualizzare il riepilogo dell'ambiente di distribuzione.
Selezionare Pubblica per effettuare il provisioning e distribuire le risorse in Azure. Il completamento di questo processo può richiedere alcuni minuti. Visual Studio fornisce aggiornamenti sullo stato di avanzamento della distribuzione.
Al termine della pubblicazione, Visual Studio visualizza gli URL delle risorse nella parte inferiore della schermata dell'ambiente. Usare questi collegamenti per visualizzare le varie risorse distribuite. Selezionare l'URL webfrontend per aprire un browser sull'app distribuita.

Testare l'app distribuita
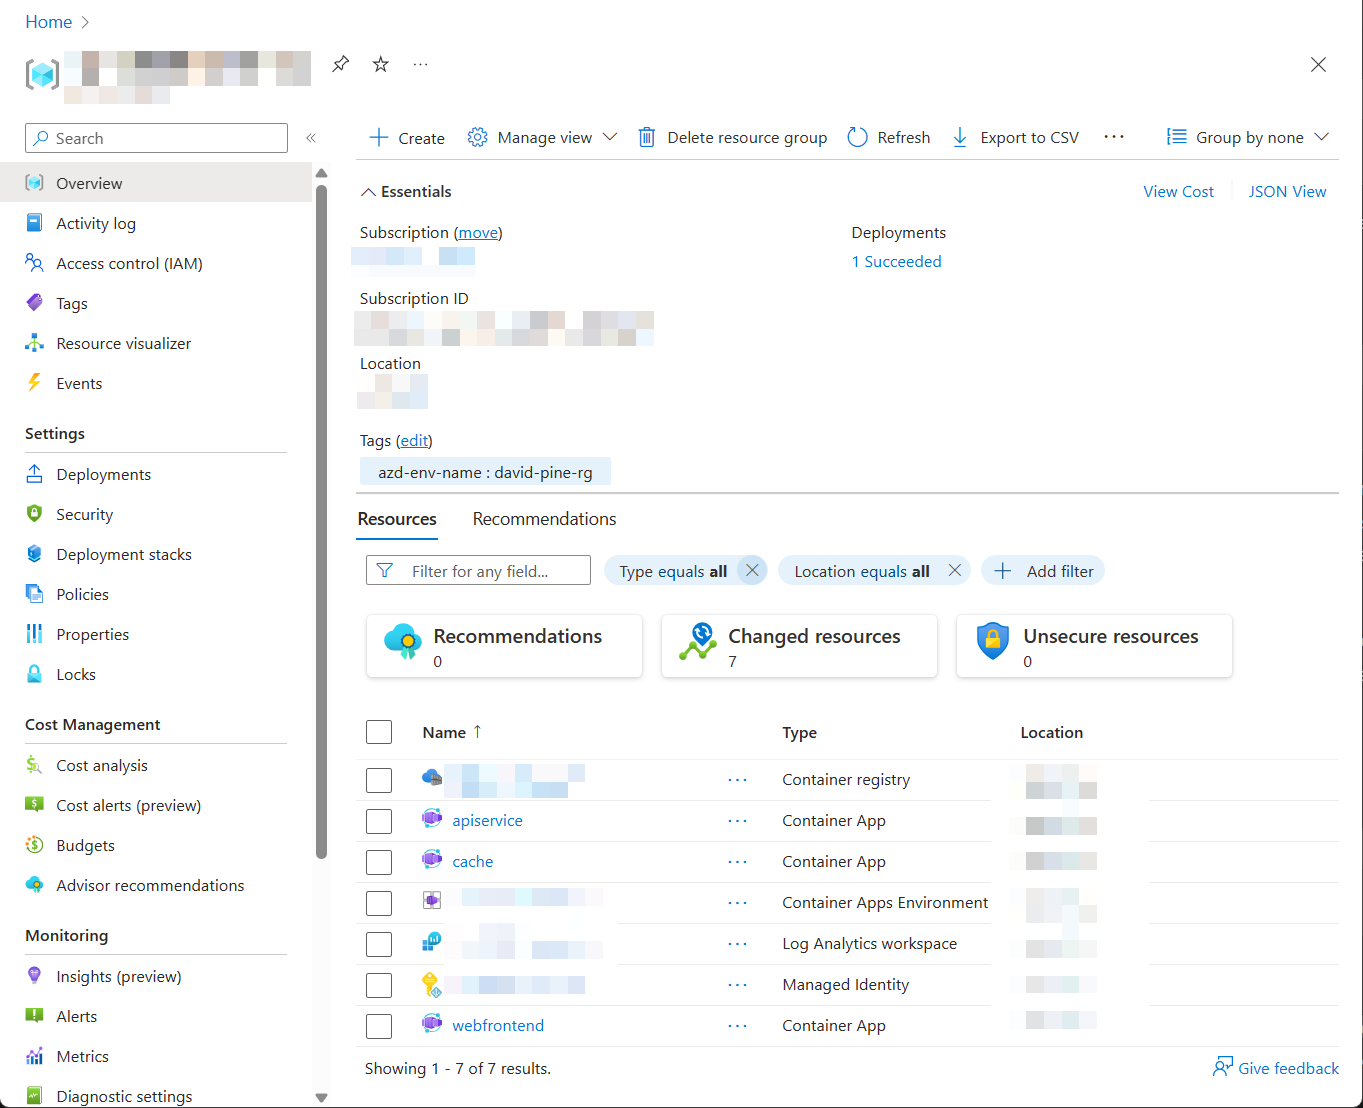
Ora che l'app è stata eseguita e distribuita, puoi accedere al portale Azure. Nel gruppo di risorse in cui è stata distribuita l'app verranno visualizzate le tre app contenitore e altre risorse.
Clicca sull'app Contenitore web per aprirla nel portale.
Clicca sul link URL applicazione per aprire il front-end nel browser.
Quando si fa clic sul nodo "Meteo" nella barra di navigazione, l'app contenitore front-end web effettua una chiamata all'app contenitore apiservice per ottenere i dati. L'output del front-end sarà memorizzato nella cache utilizzando l'app contenitore redis e l'integrazione .NET AspireRedis della memorizzazione nella cache dell'output. Quando si aggiorna il front-end alcune volte, si noterà che i dati meteo vengono memorizzati nella cache. Verrà aggiornato dopo alcuni secondi.
Distribuire il dashboard .NET.NET Aspire
È possibile distribuire il dashboard .NET.NET Aspire come parte dell'app ospitata. Questa funzionalità è ora completamente supportata. Durante la distribuzione, i log di output di azd stampano un URL aggiuntivo per il dashboard distribuito.
È possibile eseguire azd monitor per avviare automaticamente il dashboard.
azd monitor
Pulire le risorse
Per eliminare l'ambiente azd, utilizzare l'elenco a discesa Altre azioni e quindi scegliere Elimina ambiente.


